最近StateListAnimatorをよく使っているので、備忘録がてらそのプラクティスを纏めてみようと思います。
StateListAnimatorとは
ViewのStateに合わせてプロパティアニメーションを定義できるものです。
ドキュメントは以下の通りです。
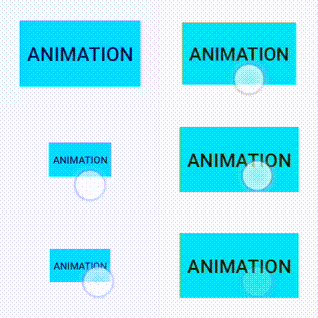
例)指の押し/離しでアニメーションを変えてみる
簡単な例を実装してみます。
ボタンを押した時にViewが沈み込み、離した時に戻るようなアニメーションです。
<?xml version="1.0" encoding="utf-8"?>
<selector xmlns:android="http://schemas.android.com/apk/res/android">
    <item android:state_pressed="true"> <!-- 押した時に縮小 -->
        <set>
            <objectAnimator
                android:duration="150"
                android:propertyName="scaleX"
                android:valueTo="0.5f" />
            <objectAnimator
                android:duration="150"
                android:propertyName="scaleY"
                android:valueTo="0.5f" />
        </set>
    </item>
    <item android:state_pressed="false"> <!-- 離した時に戻る -->
        <set>
            <objectAnimator
                android:duration="150"
                android:propertyName="scaleX"
                android:valueTo="1.0f" />
            <objectAnimator
                android:duration="150"
                android:propertyName="scaleY"
                android:valueTo="1.0f" />
        </set>
    </item>
</selector>
...
        <!- android:stateListAnimator に指定 -->
        <Button
            android:id="@+id/animation_button"
            android:layout_width="wrap_content"
            android:layout_height="wrap_content"
            android:background="@android:color/holo_blue_bright"
            android:stateListAnimator="@animator/click_animator"
            android:text="animation"/>
...
stateに合わせてObjectAnimatorを指定するだけで、簡単なアニメーションができました。
複数のStateの組み合わせ
Stateは組み合わせることもできます。
分かりやすい所で、CheckBoxに適応することで、ON->OFFとOFF->ONのアニメーションを変えてみます。
<?xml version="1.0" encoding="utf-8"?>
<selector xmlns:android="http://schemas.android.com/apk/res/android">
    <!-- 押した時は共通 -->
    <item android:state_pressed="true">
        <set>
            <objectAnimator
                android:duration="150"
                android:propertyName="scaleX"
                android:valueTo="0.5f" />
            <objectAnimator
                android:duration="150"
                android:propertyName="scaleY"
                android:valueTo="0.5f" />
        </set>
    </item>

    <!-- OFF->ON -->
    <item
        android:state_checked="false"
        android:state_pressed="false">
        <set>
            <objectAnimator
                android:duration="150"
                android:propertyName="scaleX"
                android:valueTo="1.0f" />
            <objectAnimator
                android:duration="150"
                android:propertyName="scaleY"
                android:valueTo="1.0f" />
        </set>
    </item>

    <!-- ON->OFF -->
    <item
        android:state_checked="true"
        android:state_pressed="false">
        <set android:ordering="together">
            <objectAnimator android:duration="300">
                <propertyValuesHolder android:propertyName="scaleX">
                    <keyframe
                        android:fraction="0"
                        android:value="0.5f" />
                    <keyframe
                        android:fraction="0.65"
                        android:interpolator="@android:interpolator/decelerate_cubic"
                        android:value="1.5f" />
                    <keyframe
                        android:fraction="1"
                        android:interpolator="@android:interpolator/accelerate_cubic"
                        android:value="1.0f" />
                </propertyValuesHolder>
            </objectAnimator>
            <objectAnimator android:duration="300">
                <propertyValuesHolder android:propertyName="scaleY">
                    <keyframe
                        android:fraction="0"
                        android:value="0.5f" />
                    <keyframe
                        android:fraction="0.65"
                        android:interpolator="@android:interpolator/decelerate_cubic"
                        android:value="1.5f" />
                    <keyframe
                        android:fraction="1"
                        android:interpolator="@android:interpolator/accelerate_cubic"
                        android:value="1.0f" />
                </propertyValuesHolder>
            </objectAnimator>
        </set>
    </item>
</selector>
少々stateがどちらかを把握し難いですが、OFF->ONの方がバウンドするようなアニメーションに変更できました。
使用可能なStateは決まっています。
こちらに一覧がありますので、参考にどうぞ。
ViewにStateを増やしてみる
前述の例で使っているandroid:state_checkedは、Checkableインターフェイスを実装したViewで参照可能なStateです。
CheckBoxはこれを実装しており、ソース上でも isChecked等のメソッドが使えるので、そちらで把握してる人の方が多いと思います。
つまるところ、Checkableインターフェイスを実装してしまえば、あらゆるViewで前述のような組み合わせのStateが使えます。
Checkableインターフェイスの実装についてはこちらの記事などが分かりやすいので、ここでは割愛します。
- http://y-anz-m.blogspot.com/2012/02/drawablestate-viewgroup.html
- https://qiita.com/muran001/items/047b0e5ba9e10f4846ae
例として、FloatingActionButtonを以下のように拡張して、同様のAnimatorを適応してみました。
class ExFab @JvmOverloads constructor(
    context: Context,
    attrs: AttributeSet? = null,
    defStyleAttr: Int = 0
) : FloatingActionButton(context, attrs, defStyleAttr), Checkable {
    private var isChecked: Boolean = false

    init {
        setImageResource(R.drawable.ic_favorite_off)
        stateListAnimator = AnimatorInflater.loadStateListAnimator(context, R.animator.check_box_animator)
    }

    override fun isChecked(): Boolean {
        return isChecked
    }

    override fun toggle() {
        setChecked(isChecked.not())
    }

    override fun setChecked(checked: Boolean) {
        if (isChecked != checked) {
            isChecked = checked
            refreshDrawableState()
            setImageResource(if (checked) R.drawable.ic_favorite else R.drawable.ic_favorite_off)
        }
    }

    // Checkable実装に必要な処理
    override fun onCreateDrawableState(extraSpace: Int): IntArray? {
        val drawableState = super.onCreateDrawableState(extraSpace + 1)
        if (isChecked()) {
            View.mergeDrawableStates(drawableState, CHECKED_STATE_SET)
        }
        return drawableState
    }

    companion object {
        private val CHECKED_STATE_SET = intArrayOf(android.R.attr.state_checked)
    }
}
CheckBoxの様に動き、各Stateでアニメーションが変わるFabを実装できました。
アニメーションのカスタマイズ
アニメーション内容はobjectAnimatorの範囲でカスタマイズ可能です。
前述の例で既に使っていますが、keyframeなどを使う事により細かいアニメーションも作れます。


(これらは一例であり、この様なアニメーションが良いかと言われると微妙ではありますが…。)
ドキュメントはこちらにありますので、これを参考にカスタマイズしてみると良いでしょう。
終わりに
設計思想によるかもしれませんが、View単体で単純なアニメーションが完結できると、使い回す上でかなり便利かと思います。


