Svelte をセットアップ
まずはSvelteをセットアップしましょう。
Svelteにはセットアップ用のcliが無いので、
下記コマンドでGitHubからプロジェクトテンプレートをコピーしてください。
npx degit sveltejs/template my-svelte-project
degitをインストールしていない場合、インストールするか尋ねられるのでインストールしましょう。
degitは簡単に言うと、GitHubリポジトリから.gitフォルダ以外をダウンロードしてくれるやつです。
Typescript をセットアップ
次にTypescriptを導入していきますが、難しい操作は無いので安心してください。
まずはコピーしてきたプロジェクトへ移動しましょう。
cd my-svelte-project
次は下記コマンドを実行してください。
node scripts/setupTypeScript.js
Converted to TypeScript.と表示されたら成功です。
パッケージをインストール
ここまでで【Svelte + Typescript】の設定は完了しています。
ただ、まだパッケージはインストールされていないので下記コマンドでインストールしてあげましょう。
npm install
これでSvelteプロジェクトは実行可能な状態になりました。
下記コマンドで実行してみましょう。
npm run dev
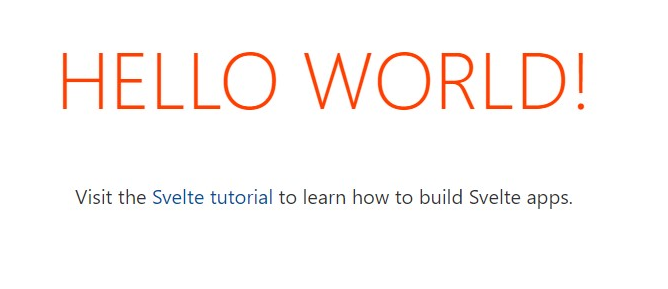
実行後、http://localhost:5000/にアクセスして下の画像のような画面が表示されれば問題なく動作しています。
Tailwindcss セットアップ
最後に、Tailwindcssをセットアップしていきます。
SvelteはPostCSS 8に対応していないので、PostCSS 7でTailwindcssをインストールします。
npm install -D tailwindcss@npm:@tailwindcss/postcss7-compat postcss@^7 autoprefixer@^9
インストール後、 tailwind.config.js を生成しましょう。
下記コマンドを実行してください。
npx tailwindcss init
生成されたtailwind.config.jsの設定を少し変更します。
*.svelteファイルをパージ対象にしたいのでpurgeフィールドに追加しましょう。
module.exports = {
-  purge: [],
+  purge: ["./src/**/*.svelte"],
  darkMode: false, // or 'media' or 'class'
  theme: {
    extend: {},
  },
  variants: {
    extend: {},
  },
  plugins: [],
}
開発中はパージしたくない場合は下記のように変更してください。
+ const production = !process.env.ROLLUP_WATCH;
module.exports = {
-  purge: [],
+  purge: {
+    content: ["./src/**/*.svelte"],
+    enabled: production,
+  },
  darkMode: false, // or 'media' or 'class'
  theme: {
    extend: {},
  },
  variants: {
    extend: {},
  },
  plugins: [],
};
次は rollup.config.js を変更していきます。
*.svelteファイルに書いたtailwindcssを処理できるように設定する必要があるからです。
import svelte from "rollup-plugin-svelte";
import commonjs from "@rollup/plugin-commonjs";
import resolve from "@rollup/plugin-node-resolve";
import livereload from "rollup-plugin-livereload";
import { terser } from "rollup-plugin-terser";
import sveltePreprocess from "svelte-preprocess";
import typescript from "@rollup/plugin-typescript";
import css from "rollup-plugin-css-only";

const production = !process.env.ROLLUP_WATCH;

function serve() {
  let server;

  function toExit() {
    if (server) server.kill(0);
  }

  return {
    writeBundle() {
      if (server) return;
      server = require("child_process").spawn(
        "npm",
        ["run", "start", "--", "--dev"],
        {
          stdio: ["ignore", "inherit", "inherit"],
          shell: true,
        }
      );

      process.on("SIGTERM", toExit);
      process.on("exit", toExit);
    },
  };
}

export default {
  input: "src/main.ts",
  output: {
    sourcemap: true,
    format: "iife",
    name: "app",
    file: "public/build/bundle.js",
  },
  plugins: [
    svelte({
-      preprocess: sveltePreprocess({ sourceMap: !production })
+      preprocess: sveltePreprocess({
+        sourceMap: !production,
+        postcss: {
+          plugins: [
+            require("tailwindcss"),
+            require("autoprefixer")
+          ],
+        },
+      }),
      compilerOptions: {
        // enable run-time checks when not in production
        dev: !production,
      },
    }),
    // we'll extract any component CSS out into
    // a separate file - better for performance
    css({ output: "bundle.css" }),

    // If you have external dependencies installed from
    // npm, you'll most likely need these plugins. In
    // some cases you'll need additional configuration -
    // consult the documentation for details:
    // https://github.com/rollup/plugins/tree/master/packages/commonjs
    resolve({
      browser: true,
      dedupe: ["svelte"],
    }),
    commonjs(),
    typescript({
      sourceMap: !production,
      inlineSources: !production,
    }),

    // In dev mode, call `npm run start` once
    // the bundle has been generated
    !production && serve(),

    // Watch the `public` directory and refresh the
    // browser on changes when not in production
    !production && livereload("public"),

    // If we're building for production (npm run build
    // instead of npm run dev), minify
    production && terser(),
  ],
  watch: {
    clearScreen: false,
  },
};
これでTailwindcssが使えるようになりました。
早速、App.svelteを書き換えてTailwindcssを使ってみましょう。
<div class="bg-indigo-600">
  <div class="max-w-7xl mx-auto py-3 px-3 sm:px-6 lg:px-8">
    <div class="flex items-center justify-between flex-wrap">
      <div class="w-0 flex-1 flex items-center">
        <span class="flex p-2 rounded-lg bg-indigo-800">
          <svg
            class="h-6 w-6 text-white"
            xmlns="http://www.w3.org/2000/svg"
            fill="none"
            viewBox="0 0 24 24"
            stroke="currentColor"
            aria-hidden="true"
          >
            <path
              stroke-linecap="round"
              stroke-linejoin="round"
              stroke-width="2"
              d="M11 5.882V19.24a1.76 1.76 0 01-3.417.592l-2.147-6.15M18 13a3 3 0 100-6M5.436 13.683A4.001 4.001 0 017 6h1.832c4.1 0 7.625-1.234 9.168-3v14c-1.543-1.766-5.067-3-9.168-3H7a3.988 3.988 0 01-1.564-.317z"
            />
          </svg>
        </span>
        <p class="ml-3 font-medium text-white truncate">
          <span class="md:hidden"> We announced a new product! </span>
          <span class="hidden md:inline">
            Big news! We're excited to announce a brand new product.
          </span>
        </p>
      </div>
      <div
        class="order-3 mt-2 flex-shrink-0 w-full sm:order-2 sm:mt-0 sm:w-auto"
      >
        <a
          href="#"
          class="flex items-center justify-center px-4 py-2 border border-transparent rounded-md shadow-sm text-sm font-medium text-indigo-600 bg-white hover:bg-indigo-50"
        >
          Learn more
        </a>
      </div>
      <div class="order-2 flex-shrink-0 sm:order-3 sm:ml-3">
        <button
          type="button"
          class="-mr-1 flex p-2 rounded-md hover:bg-indigo-500 focus:outline-none focus:ring-2 focus:ring-white sm:-mr-2"
        >
          <span class="sr-only">Dismiss</span>
          <svg
            class="h-6 w-6 text-white"
            xmlns="http://www.w3.org/2000/svg"
            fill="none"
            viewBox="0 0 24 24"
            stroke="currentColor"
            aria-hidden="true"
          >
            <path
              stroke-linecap="round"
              stroke-linejoin="round"
              stroke-width="2"
              d="M6 18L18 6M6 6l12 12"
            />
          </svg>
        </button>
      </div>
    </div>
  </div>
</div>

<style global lang="postcss">
  @tailwind base;
  @tailwind components;
  @tailwind utilities;
</style>
src/App.svelte を書き換えたら、早速実行します。
実行は下記コマンドです。
npm run dev
下の画像のようなバナーが表示されましたか?
表示されれば成功です!

終わりに
Tailwindcssの導入が思ったよりも簡単にできて感動しました。
次は、Svelteでルーティングする方法を書こうかなと思います。