業務+自宅作業でえらいハマったので。
以前はJaCoCoというライブラリを使っていたらしく、
設定の仕方も変わっているようなので簡単にメモ。
※テストコードの書き方については記載しない。
build.gradleの設定
以下の箇所に設定を追加する。
android_buildTypes
buildTypesの必要な箇所に
「testCoverageEnabled true」と記載する。
初期でプロジェクトを作成した時にはreleaseしか存在しないが、
以下の例ではdebugを作成し、その中に記載している。
android{

  ~中略~

    buildTypes{
        debug {

            ~中略~

            testCoverageEnabled true

            ~中略~

        }
    }

  ~中略~

}
dependencies
dependenciesにテストに必要なライブラリを記述する。
$versionはあくまで例のため、
プロジェクトに必要なバージョンを正しく記載すること。
Espressoは不要だと思っていたのだが、
実際にはないと起動できなかったので必要。
dependencies {

  ~中略~

    testCompile "junit:junit:$dependencies"

    androidTestCompile "com.android.support.test:runner:$version"
    androidTestCompile "com.android.support.test:rules:$version"
    androidTestCompile "com.android.support:support-annotations:$version"
    androidTestCompile "com.android.support.test.espresso:espresso-core:$version"

  ~中略~

}
実行
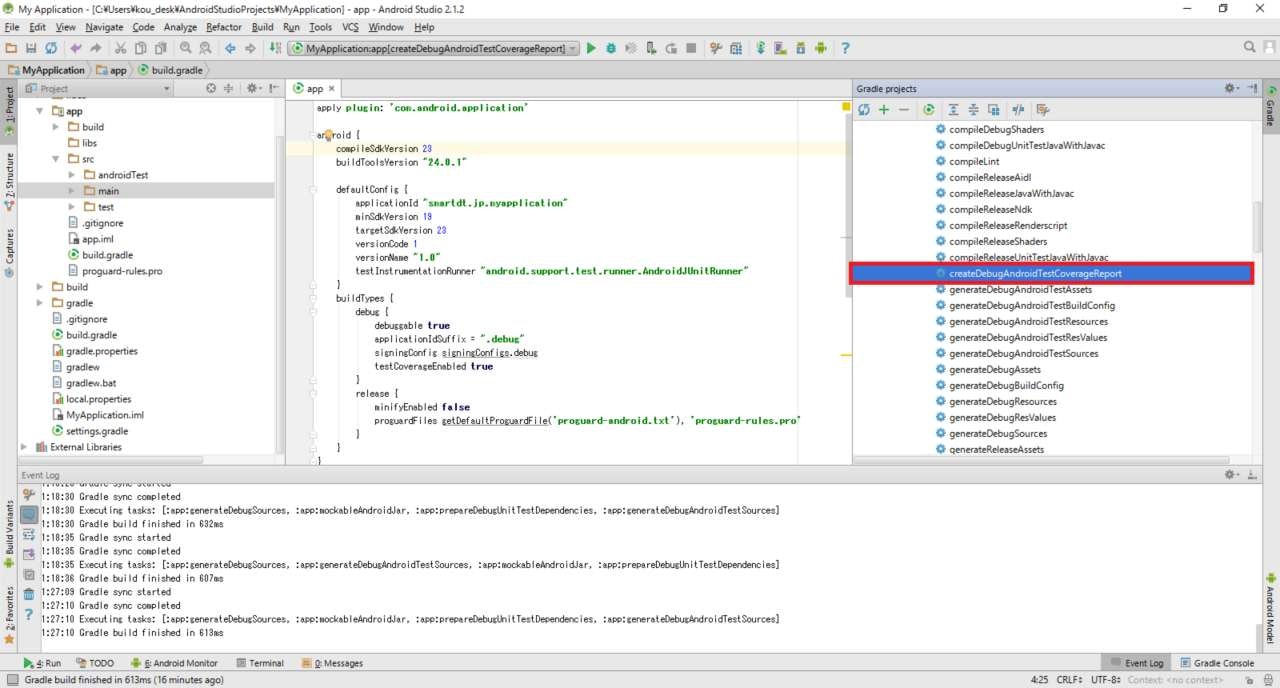
AndroidStudioの右側に「Gradle」というタブがあるため開く。
上記の設定が追加できていれば、
:app→Task→otherの中に「createDebugAndroidTestCoverageReport」と表示されているはず。
該当の項目上で右クリックし、Run を押下する。
実行結果格納箇所
プロジェクト配下の「app\build\reports」に格納されている。
「reports\coverage\debug\index.html」でグラフィカルにカバレッジ率などを確認できる。