今回は、LambdaとAPI Gatewayを組み合わせて、DynamoDBにデータを登録する仕組みを作ろうと実践してみました。
ところが、実際にLambda関数を実行してみたところ、まさかの「aws-sdkが見つからない」というエラーが発生。
Node.jsのランタイムバージョンを22や18に変更して再試行したり、Lambdaの権限を確認するなど、さまざまな解決方法を試してみましたが、状況は改善せず…。
そんな中、「ローカル環境にaws-sdkをインストールする」という解決策を見つけ、これを試したところ無事に問題を解決しました。
同じような状況でお困りの方の参考になればと思い、今回の手順をまとめました。
以下は実際にテストした際のソースコードです。
const AWS = require('aws-sdk');

// DynamoDB クライアントを作成
const dynamoDb = new AWS.DynamoDB.DocumentClient();

exports.handler = async (event) => {
    try {
        const version = AWS.VERSION; // AWS SDK のバージョンを取得
        return {
            statusCode: 200,
            body: JSON.stringify({
                message: "aws-sdk is available!",
                version: version,
            }),
        };
    } catch (error) {
        return {
            statusCode: 500,
            body: JSON.stringify({
                message: "aws-sdk is not available",
                error: error.message,
            }),
        };
    }
};
実行結果(エラーレスポンス)
Status: Failed
Test Event Name: test

Response:
{
  "errorType": "Runtime.ImportModuleError",
  "errorMessage": "Error: Cannot find module 'aws-sdk'\nRequire stack:\n- /var/task/index.js\n- /var/runtime/index.mjs",
  "trace": [
    "Runtime.ImportModuleError: Error: Cannot find module 'aws-sdk'",
    "Require stack:",
    "- /var/task/index.js",
    "- /var/runtime/index.mjs",
    "    at _loadUserApp (file:///var/runtime/index.mjs:1087:17)",
    "    at async UserFunction.js.module.exports.load (file:///var/runtime/index.mjs:1119:21)",
    "    at async start (file:///var/runtime/index.mjs:1282:23)",
    "    at async file:///var/runtime/index.mjs:1288:1"
  ]
}

Function Logs:
2024-12-05T04:51:04.621Z	undefined	ERROR	Uncaught Exception 	{"errorType":"Runtime.ImportModuleError","errorMessage":"Error: Cannot find module 'aws-sdk'\nRequire stack:\n- /var/task/index.js\n- /var/runtime/index.mjs","stack":["Runtime.ImportModuleError: Error: Cannot find module 'aws-sdk'","Require stack:","- /var/task/index.js","- /var/runtime/index.mjs","    at _loadUserApp (file:///var/runtime/index.mjs:1087:17)","    at async UserFunction.js.module.exports.load (file:///var/runtime/index.mjs:1119:21)","    at async start (file:///var/runtime/index.mjs:1282:23)","    at async file:///var/runtime/index.mjs:1288:1"]}
INIT_REPORT Init Duration: 1369.04 ms	Phase: invoke	Status: error	Error Type: Runtime.ImportModuleError
START RequestId: 61c5f896-c8b0-4e42-ae88-7e35bc7caf21 Version: $LATEST
END RequestId: 61c5f896-c8b0-4e42-ae88-7e35bc7caf21
REPORT RequestId: 61c5f896-c8b0-4e42-ae88-7e35bc7caf21	Duration: 1379.37 ms	Billed Duration: 1380 ms	Memory Size: 128 MB	Max Memory Used: 65 MB	Status: error	Error Type: Runtime.ImportModuleError

Request ID: 61c5f896-c8b0-4e42-ae88-7e35bc7caf21
はじめに
今回私の環境はMacOSなので、Windowsをお使いの方には少し手順が異なるかもしれません。その点はご了承いただければと思います。
まずは、aws-sdkをインストールする前に、必要な準備についてご紹介します。
今回、aws-sdk のインストールには npm コマンドを使用します。そのため、まずは npm をインストールする必要があります。
npm のインストール方法には、主に以下の2つの方法があります。
・Homebrewを使ってインストールする方法
・公式サイトから直接インストールする方法
Homebrewを使ってインストールする方法
自分は今回こちらの方法でインストールを実施しました
Homebrewがインストールされていない場合は下記コマンドを実行します。
/bin/bash -c "$(curl -fsSL https://raw.githubusercontent.com/Homebrew/install/HEAD/install.sh)"
その後、Node.jsをインストールします。
brew install node
その後、インストールしたNode.jsとnpmのバージョンが表示されればインストール成功です。
node -v
npm -v
公式サイトから直接インストールする方法
公式サイトにアクセスし、「LTS(推奨版)」を選択して画面の指示に従ってダウンロードします。
その後、同じようにターミナルで以下コマンドを実行してバージョンが表示されればインストール成功です。
node -v
npm -v
これでnpmコマンドが使用できるようになりました!
AWS SDKインストール
次にAWS SDKをインストールしましょう。
まず作業フォルダを作成します。
mkdir aws-sdk-layer
cd aws-sdk-layer
mkdir nodejs
cd nodejs
npmコマンドでSDKインストールします
npm install aws-sdk
これで、nodejs フォルダ内に node_modules フォルダが作成され、AWS SDK がインストールされます。
次に一つ前の階層に戻ってZIPファイルを作成します。
cd ..

zip -r aws-sdk-layer.zip nodejs
作業フォルダに aws-sdk-layer.zip というファイルが作成されます。
レイヤー作成
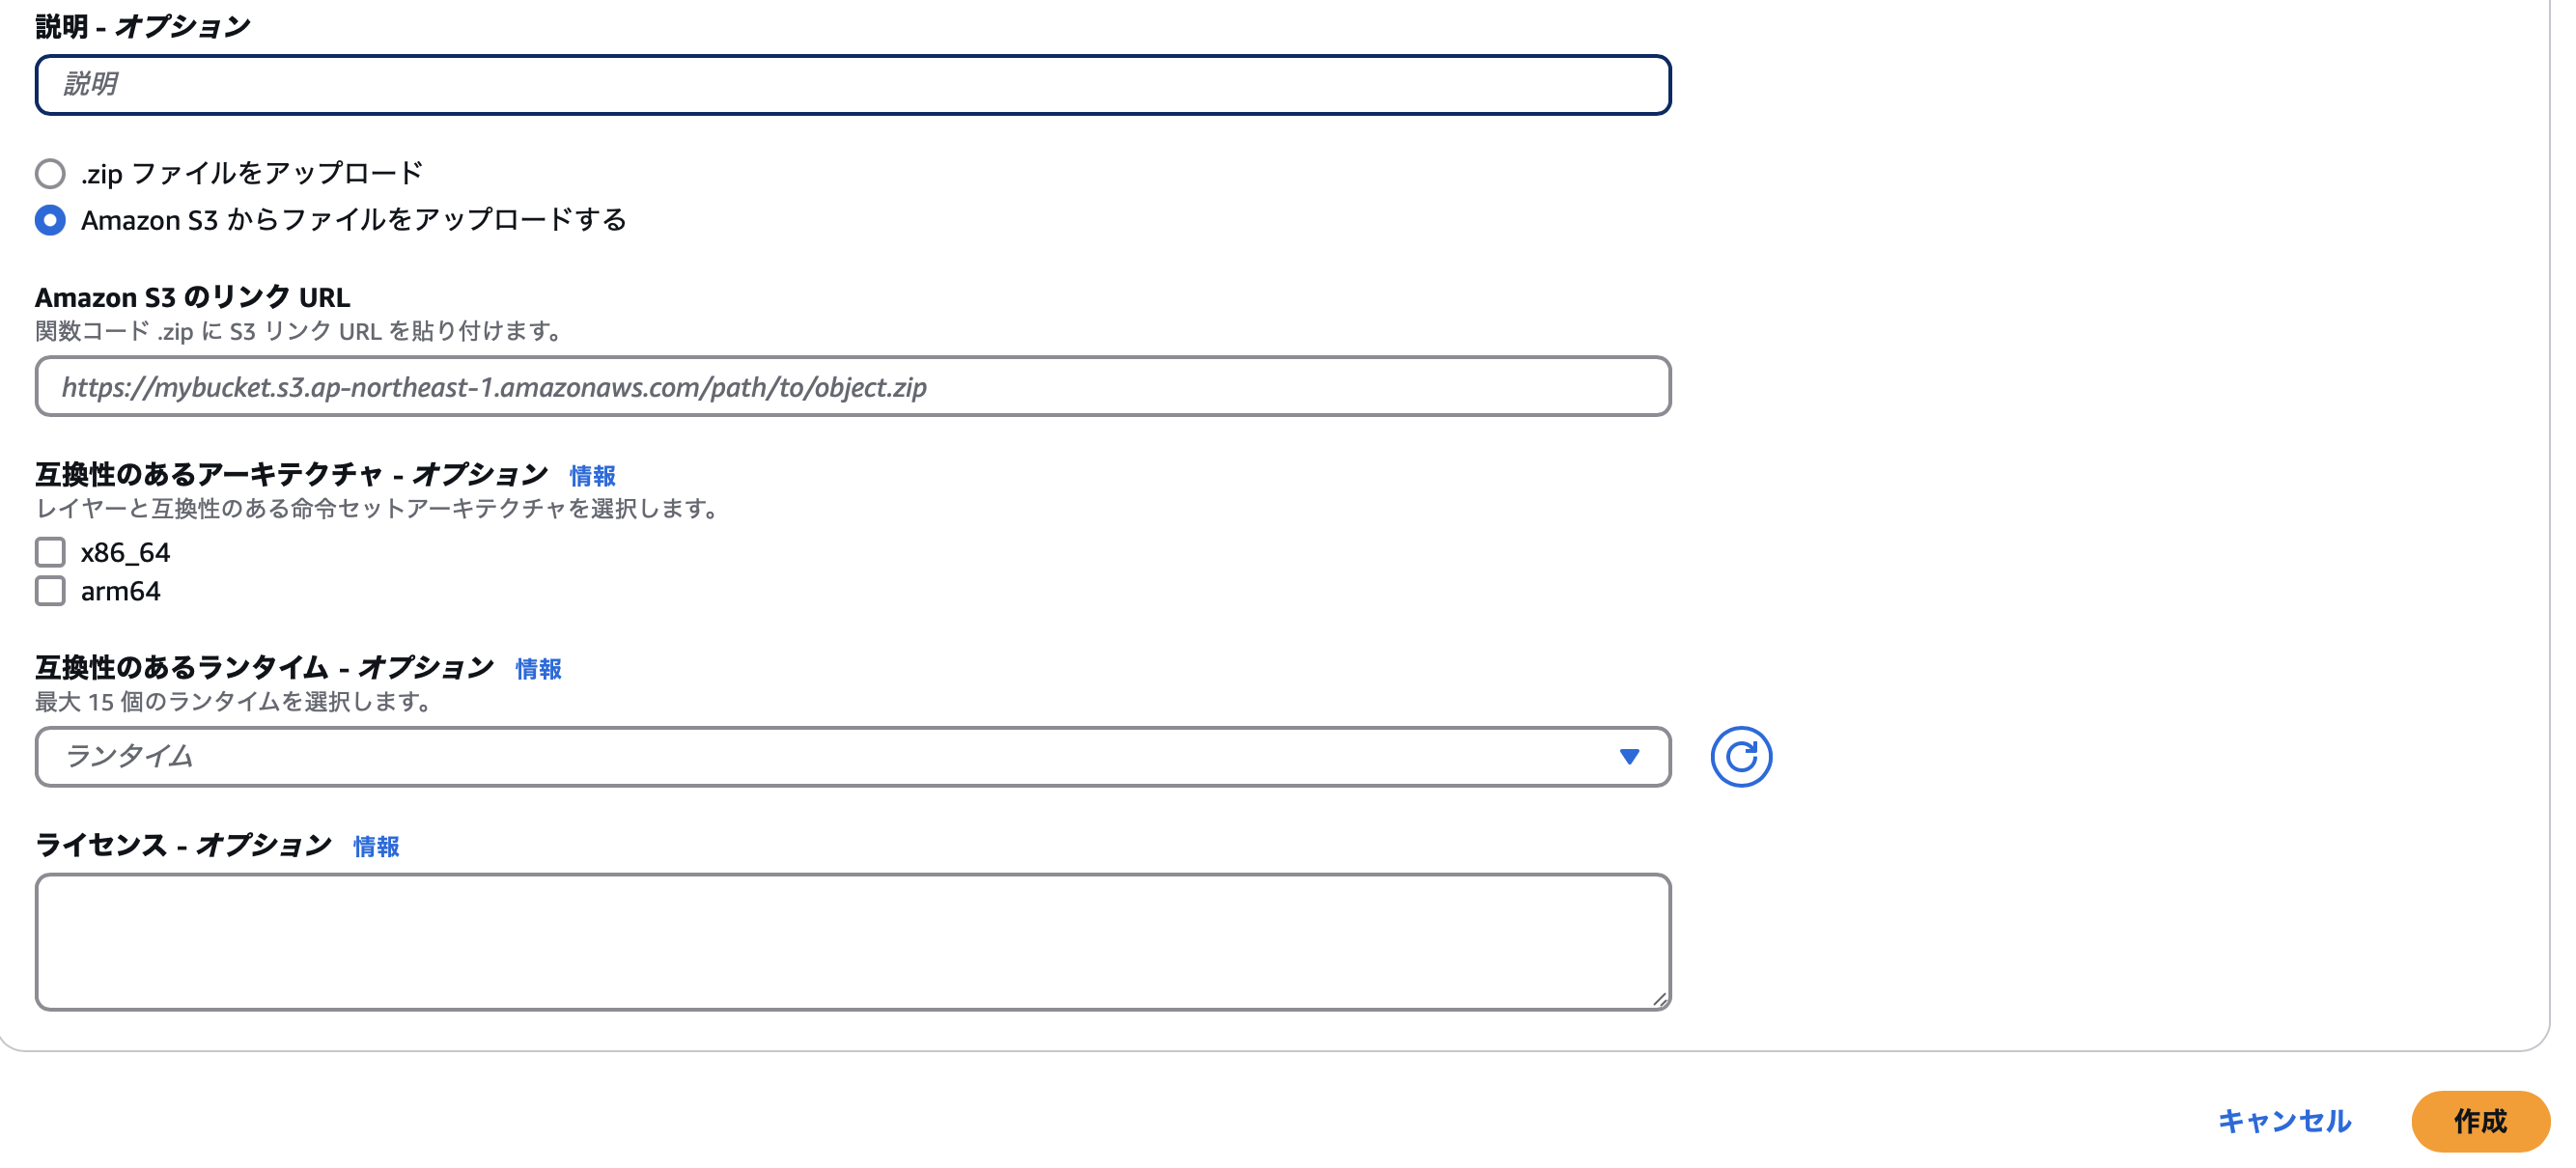
続いて、Lambda コンソールを開き、左側のメニューから「レイヤー」を選択し、右上にある「レイヤーの作成」をクリックします。
名前を入力し、ファイルをアップロードします。
今回アップロードしたいファイルは10MBを超えるため、S3 に「aws-sdk-layer.zip」 をアップロードし、そこから指定するのがおすすめです。
S3にアップロード後、ZIPファイルのオブジェクトURLをコピーし、アップロードに使用します。
ランタイムの設定
「互換性のあるランタイム」には、Lambdaで使用しているランタイムと同じバージョンを選択します。
今回は Node.js 18.x を使用しました。
レイヤーを作成したら、バージョンARNをコピーしておきましょう。
Lambda関数にレイヤーを追加
最後に、作成したLambda関数にレイヤーを追加します。
対象のLambda関数を選択し、画面をスクロールして「レイヤー」の項目まで進みます。そこで、右側にある「レイヤーの追加」をクリックしてください。
ここで「ARNを指定」を選択します。
「AWS レイヤー」の項目に、先ほどコピーしたバージョンARNを貼り付け、右下の「追加」ボタンをクリックしてください。
これで設定は完了です。最後に、Lambda関数を再デプロイしてテストを実行してみましょう。
Status: Succeeded
Test Event Name: test

Response:
{
  "statusCode": 200,
  "body": "{\"message\":\"aws-sdk is available!\",\"version\":\"2.1692.0\"}"
}

Function Logs:
START RequestId: b9df522e-ba5c-4703-9d64-2ba3f7d03957 Version: $LATEST
END RequestId: b9df522e-ba5c-4703-9d64-2ba3f7d03957
REPORT RequestId: b9df522e-ba5c-4703-9d64-2ba3f7d03957	Duration: 117.78 ms	Billed Duration: 118 ms	Memory Size: 128 MB	Max Memory Used: 92 MB	Init Duration: 755.95 ms

Request ID: b9df522e-ba5c-4703-9d64-2ba3f7d03957
このようにレスポンスが正常に返ってくれば、設定は成功です。
ぜひ参考にしていただければと思います。


