今回やる事
DRF、Vue.js、dockerでの環境構築をする上で、各ファイルの意味だったりコマンドだったりをよく忘れるので、とりあえずDRFとVueが連携出来るまでを、ほぼ自分用に残しておきます。
例として、ユーザー一覧を取得するだけの処理を実装します。
環境
docker
$ docker version

Version: 20.10.6
docker_compose
$ docker-compose -v

docker-compose version 1.29.1, build c34c88b2
python
$ python --version

Python 3.8.10
構築編
DBは開発段階ではsqliteを使い、DRF用にコンテナ1つ、Vue用にコンテナ1つを用意します。
サーバーはそれぞれの開発サーバーを使用するとします。
まずは、以下の様なディレクトリ構成でファイルを作成します。
アプリ名は「k2」です。
k2/
 ├ api
 │  ├ Dockerfile
 │  └ requirements.txt
 ├ web
 │  └ Dockerfile
 └docker-compose.yml

※一部省略。
docker-composeを定義
まずは、docker-composeでDRF用のコンテナとVue用のコンテナを定義します。
version: '3'
services:
    api:
        # Dockerfileの場所
        build: ./api

        # どのimageを使うか。Dockerfileでimageは作成する。
        image: k2-drf-image

        # コンテナ名を指定出来る。
        container_name: k2-api

        # 公開用のポート。ホスト側:コンテナ側を指定
        # コンテナ側のみ指定も可能だが、その時ホスト側はランダムになる。
        ports:
          -  '8000:8000'

        # マウントするパス
        volumes:
          -  ./api/:/usr/src/k2/api/

        # dockerコンテナを落とさず起動し続けるようにする
        tty: true
    web:
        build: ./web
        image: k2-vue-image
        container_name: k2-web
        ports:
          -  '8080:8080'
        volumes:
          -  ./web/:/usr/src/k2/web/
        tty: true
次に、apiとwebのDockerfileを定義します。
apiのDockerfile
# イメージを選択
FROM python:3.9.5-alpine

# バイナリレイヤ下での標準出力とエラー出力を抑制
ENV PYTHONUNBUFFERED 1

# 開始ディレクトリ位置
WORKDIR /usr/src/k2/api

# 必要なものをインストール
# 今回はalpineなのでapkを使用する。
RUN apk update
RUN apk add --no-cache --vertual=wow-ini-module  \
  net-tools \
  sudo \
  bzip2 \
  curl \
  gcc \
  git \
  python3-dev \
  vim \
  bash

# ADDかCOPYを使うなら.dockerignoreを書いておく。
ADD . .

RUN pip install --upgrade pip
RUN pip install -r requirements.txt
とりあえず最小限をrequirements.txtに記述する。
Django==3.2.4
django-cors-headers==3.4.0
django-environ==0.4.5
django-filter==2.3.0
djangorestframework==3.12.4
djangorestframework-jwt==1.11.0
gunicorn==20.0.4
requests==2.24.0
webのDockerfile
FROM node:10.17.0

WORKDIR /usr/src/k2/web/

RUN apt-get update
RUN apt-get install -y --no-install-recommends \
	net-tools \
	sudo \
	bzip2 \
	curl \
	gcc \
	git \
	vim
RUN apt-get clean

RUN npm install -g yarn \
	&& yarn global add @vue/cli \
イメージ構築、コンテナ作成~立ち上げ
$ docker-compose up -d --build
コンテナに接続し、環境を整える
ターミナルを2つ立ち上げてそれぞれで接続し、それぞれの最低限の環境を整える。
DRF側
$ docker-compose exec api bash
$ django-admin startproject api
$ django-admin startapp k2
$ python manage.py makemigrations
$ python manage.py migrate
$ python manage.py createsuperuser
上記で作ったファイル群を以下のフォルダ構成に直します。
k2/
 └ api
    ├ api/
    ├ k2/
    ├ db.sqlite3
    ├ Dockerfile
    ├ manage.py
    └ requirements.txt
とりあえずこの段階で、python manage.py runserver 0.0.0.0:8000で開発サーバーは立ち上がる。
Vue側
$ docker-compose exec web bash
vueプロジェクトの作成
①現在のディレクトリにフォルダ群を展開する。
$ vue create .
? Generate project in current directory? (Y/n) y
②マニュアルで導入するものを選択する。
? Please pick a preset:
  Default ([Vue 2] babel, eslint)
  Default (Vue 3) ([Vue 3] babel, eslint)
❯ Manually select features
③導入するものにスペースで☑を入れる。
? Check the features needed for your project:
 ◉ Choose Vue version
 ◉ Babel
 ◯ TypeScript
 ◯ Progressive Web App (PWA) Support
 ◉ Router
 ◉ Vuex
 ◉ CSS Pre-processors
 ◉ Linter / Formatter
 ◉ Unit Testing
❯◉ E2E Testing
・Babel
JSのコードを新しい書き方から古い書き方へと変換するツール。
ブラウザによって古いバージョンしか対応していないため、このようなツールが必要になる。
・PWA
ネイティブアプリのような使い勝手を実現したWEBアプリの事。
インストール不要で、ホーム画面やアイコン追加やプッシュ通知などが可能。
そのほかに読み込み速度や表示の高速化、オフラインで閲覧化などのメリットもある。
・CSS Pre-processor
Sass, Less, Stylusなどのプリプロセッサ独自の構文でCSSを作成するプログラム。
純粋なCSSにはない、ミックスイン、セレクターの入れ子、セレクター継承などが可能。
・Linter
ESLint等のコードフォーマッターなどを使用するか選択する。
・Unit Testing(単体テスト)
Mocha+Chainや、Jestなどを使用するか選択する。
・E2E Testing(End to Endテスト)
システム全体を通してテストを行う事。
それらのライブラリなどを使うか選択する。
④vueのバージョンを選択する。
3.x系だとvuetify Alphaしか対応してないみたいなので、今回は普通の2.xを使います。
? Choose a version of Vue.js that you want to start the project with
❯ 2.x
  3.x
⑤routerのhistoryモードを使うか選択。
? Use history mode for router? (Requires proper server setup for index fallback in producti
on) (Y/n) y
・historyモード
ページのリロード無しにURL遷移を実現するhistory.pushState APIを利用したルーターのモード。シングルページのクライアントアプリなので、適切なサーバーの設定をしないと、404エラーが起きる。そのため、どのアセットにもURLがマッチしなかった場合に、index.htmlを返す設定が必要。
・hashモード(vue-routerのデフォルト)
完全なURLをhashを使ってシミュレートし、URLが変更された時にページのリロードが起きない。
⑥ どのCSS pre-processorを使うか選択。
? Pick a CSS pre-processor (PostCSS, Autoprefixer and CSS Modules are supported by default)
: (Use arrow keys)
❯ Sass/SCSS (with dart-sass)
  Sass/SCSS (with node-sass)
  Less
  Stylus
⑦ linterを選択する。
? Pick a linter / formatter config: (Use arrow keys)
❯ ESLint with error prevention only
  ESLint + Airbnb config
  ESLint + Standard config
  ESLint + Prettier
⑧ lintの追加の機能を設定
? Pick additional lint features: (Press <space> to select, <a> to toggle all, <i> to invert
 selection)
❯◉ Lint on save
 ◯ Lint and fix on commit
⑨ unitテストに何を使用するか。
? Pick a unit testing solution: (Use arrow keys)
❯ Mocha + Chai
  Jest
・Mochaは、BDD/TDDをするための枠組みを提供、chaiはテストを実施するための便利なメソッドを提供してくれる。TDD(テスト駆動開発)/BDD(振る舞い駆動開発)
・JestはFacebookが開発したテストランナ。
⑩ E2Eテストに何を使用するか。
? Pick an E2E testing solution:
❯ Cypress (Chrome only)
  Nightwatch (WebDriver-based)
  WebdriverIO (WebDriver/DevTools based)
・Cypress
E2Eテストフレームワーク
・Nightwatch
Seleniumを基盤として作られており、Node.jsでブラウザを操作してE2Eテストを行うツール
・WebdriverIO
ウェブブラウザによるテストを自動的に実行するライブラリ
⑪ Babel, ESLintなどをどのファイルで管理するか。
? Where do you prefer placing config for Babel, ESLint, etc.? (Use arrow keys)
❯ In dedicated config files
  In package.json
⑫ プリセットをセーブするか
? Save this as a preset for future projects? (y/N) n
⑬ どちらのパッケージマネージャーを使うか。
? Pick the package manager to use when installing dependencies: (Use arrow keys)
❯ Use Yarn
  Use NPM
これでvueのプロジェクトが出来上がり、yarn serveで開発サーバーが立ち上がる。
あと、必要に応じて下記のライブラリ等も導入しておく。
下の連携テストでは、
・vuetify
・sass
・axios
・boxicons
・vue-loading-template
を使っている。
# update
yarn install

# vuetify
yarn add vuetify (vue add vuetify)

# sass
yarn add --dev sass

# vuesax
npm install vuesax

# material-icons(アイコン)
npm install material-icons --save

# axios
npm install --save axios vue-axios

# boxicons(アイコン)
npm i boxicons

# lodash
npm i --save lodash

# vue-persistedstate
npm i vuex-persistedstate

# vue-session
npm i vue-session

# vue-loading-template
npm install vue-loading-template --save
連携テスト
とりあえず、ユーザー一覧をDRFから受け取ってそれを表示させるところまでをやります。
DRF側
やる事
- 初期設定
- ルーティング
- View記述
DRF: 初期設定
# 追加
import logging
logging.basicConfig(
    level=logging.DEBUG,
    format='''%(levelname)s %(asctime)s %(pathname)s:%(funcName)s 行数:%(lineno)s:%(lineno)s
    %(message)s'''

# 編集
ALLOWED_HOSTS = ['*']


# 追加
INSTALLED_APPS = [
    ...
    'rest_framework',

    # Json Web Token関連のライブラリ
    'rest_framework_jwt',
    'django_filters',
    'k2.apps.K2Config',
]

# 追加
REST_FRAMEWORK = {
    # デフォルトのパーミッションクラス
    'DEFAULT_PERMISSION_CLASSES': [
        'rest_framework.permissions.DjangoModelPermissionsOrAnonReadOnly',
    ],
    # デフォルトの認証クラス
    'DEFAULT_AUTHENTICATION_CLASSES': [
        'rest_framework_jwt.authentication.JSONWebTokenAuthentication',
        'rest_framework.authentication.SessionAuthentication',
        'rest_framework.authentication.BasicAuthentication',
    ],
    # デフォルトのフィルターバックエンド
    'DEFAULT_FILTER_BACKENDS': [
        'django_filters.rest_framework.DjangoFilterBackend',
    ],
    # デフォルトのスロットルクラス
    'DEFAULT_THROTTLE_CLASSES': [
        'rest_framework.throttling.AnonRateThrottle',
        'rest_framework.throttling.UserRateThrottle',
    ],
    # デフォルトのスロットルの制限
    'DEFAULT_THROTTLE_RATES': {
        'anon': '100/day',
        'user': '5/sec',
    }
}

# 追加
if DEBUG:
    # CORS関連の設定追加。
    INSTALLED_APPS += ['corsheaders']
    MIDDLEWARE = ['corsheaders.middleware.CorsMiddleware'] + MIDDLEWARE
    CORS_ORIGIN_ALLOW_ALL = True
DRF: ルーティング
from django.urls import path, include
from . import views, viewsets
from rest_framework.routers import DefaultRouter

router = DefaultRouter()
router.register('users', viewsets.UserViewSet)

app_name = 'k2'
urlpatterns = [
    path('', include(router.urls)),
]
from django.contrib import admin
from django.urls import path, include

urlpatterns = [
    path('admin/', admin.site.urls),
    path('api/', include('k2.urls')),
]
DRF: View記述
今回はDjangoデフォルトのUserモデルを使用します。
from django.contrib.auth.models import User
from serializers import UserSerializer
from rest_framework import (
    viewsets
)
import logging

logger = logging.getLogger(__name__)


class BaseModelViewSet(viewsets.ModelViewSet):

    pass

class UserViewSet(BaseModelViewSet):

    queryset = User.objects.all()
    serializer_class = UserSerializer

    def list(self, request, *args, **kwargs):
        return super().list(request, *args, **kwargs)
from rest_framework import serializers
from django.contrib.auth.models import User
import logging
import logging

logger = logging.getLogger(__name__)


class UserSerializer(serializers.ModelSerializer):

    class Meta:
        model = User
        fields = '__all__'
これで、localhost:8000/api/users/にアクセスすると、python manage.py createsuperuserコマンドなどで作成したユーザー一覧が返る。
Vue側
やる事
- 初期設定
- ルーティング
- 画面実装
- ajax投げて表示
Vue: 初期設定
main.jsでライブラリ等を読み込む。
import Vue from 'vue'
import App from './App.vue'
import router from './router'
import store from './store'
import http from '@/plugins/http'
import vuetify from './plugins/vuetify'
import eventHub from '@/plugins/eventHub'

import 'boxicons/css/boxicons.min.css'

Vue.config.productionTip = false

Vue.use(http)
Vue.use(eventHub)

new Vue({
  router,
  store,
  vuetify,
  render: h => h(App)
}).$mount('#app')
<template>
    <v-app>
        <router-view/>
    </v-app>
</template>

<script>
    export default {
        name: 'App',
    }
</script>
axiosのデフォルト設定をしておく。
import Vue from 'vue'
import axios from 'axios'
import router from '@/router'


export default {
    install: function (Vue, options) {
        const http = axios.create({
            baseURL: 'http://localhost:8000/',
            xsrfCookieName: 'csrftoken',
            xsrfHeaderName: 'X-CSRFTOKEN',
            timeout: 10000,
        })
        Vue.prototype.$axios = http
    }
}
import Vue from 'vue'
import Vuetify from 'vuetify/lib'

Vue.use(Vuetify)

export default new Vuetify({
})
孫コンポーネントとか遠い関係のコンポーネントのイベントを検知するためのもの。
import Vue from 'vue'

const eventHub = {
    install: function (Vue, options) {
        Vue.prototype.$eventHub = new Vue()
    }
}

export default eventHub
eslintがうるさいので最低限だまらせておく。
  ...
  rules: {
    'no-console': process.env.NODE_ENV === 'production' ? 'warn' : 'off',
    'no-debugger': process.env.NODE_ENV === 'production' ? 'warn' : 'off',
    'no-tabs': 'off',
    'indent': 'off',
    'comma-dangle': 'off',
    'eol-last': 'off',
    'no-unused-vars': 'off',
    'no-mixed-spaces-and-tabs': 'off',
    'no-unneeded-ternary': 'off',
    'vue/no-unused-components': 'off',
    'no-multi-spaces': 'off'
  },
  ...
Vue: ルーティング
全体のルート
import Vue from 'vue'
import VueRouter from 'vue-router'
import pages from './pages'

Vue.use(VueRouter)

const routes = [...pages]

const router = new VueRouter({
    mode: 'history',
    routes
})

export default router
ページ関連のルート
import { Home } from '@/views/index'

const routes = [
    {
        path: '/',
        name: 'Home',
        component: Home
    },
]

export default routes
Vue: 画面実装
index.jsにコンポーネントを纏める。
export { default as Home } from './Home'
Home画面のコンポーネント。今回はコンポーネント分けないで直書きしちゃいます。
<template>
    <div id="home_wrap">
        <v-card
            flat
            tile
        >
            <div v-if="loading">
                <Loading/>
            </div>
            <div v-else>
                <v-card-title>
                    users
                </v-card-title>
                <v-list three-line>
                    <template v-for="(user, i) in users">
                        <v-list-item
                            :key="i"
                        >
                            <v-list-item-avatar>
                                <i class='bx bxs-user'></i>
                            </v-list-item-avatar>

                            <v-list-item-content>
                                <v-list-item-title>
                                    {{ user.username }}
                                </v-list-item-title>
                                <v-list-item-subtitle>
                                    id: {{ user.id }}
                                </v-list-item-subtitle>
                            </v-list-item-content>

                        </v-list-item>
                    </template>
                </v-list>
            </div>
        </v-card>
    </div>
</template>

<script>
  import Loading from '../components/Loading'

  export default {
    name: 'Home',
    components: {
        Loading,
    },
    data: () => ({
        loading: true,
        users: [],
    }),
    mounted () {
        this.getUsers()
    },
    methods: {
        getUsers () {
            this.loading = true
            this.$axios({
                url: '/api/users/',
                method: 'GET',
            })
            .then(res => {
                console.log(res)
                this.users = res.data
                this.loading = false
            })
            .catch(e => {
                console.log(e)
                this.loading = false
            })
        }
    }
  }
</script>

<style lang="scss" scoped>
    #home_wrap {
        width: 1200px;
        margin: 0 auto;
    }
</style>
ロード画面のコンポーネント
<template>
    <div class="loading_wrap">
        <vue-loading
            type="cylon"
            color="#aaa"
            :size="{ width: '50px', height: '50px' }"
        ></vue-loading>
    </div>
</template>
<script>
    import { VueLoading } from 'vue-loading-template'

    export default {
        name: 'Loading',
        components: {
            VueLoading,
        },
    }
</script>
<style lang="scss" scoped>
    .loading_wrap {
        width: 50px;
        height: 50px;
        margin: 50px auto;
    }
</style>
まとめ
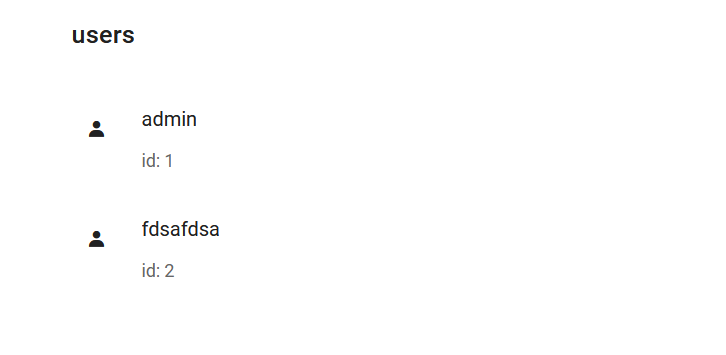
こんな感じの画面になりました。