理屈
code
  notionに ログインさせる

 リンクのクラス名から、情報一括取得【findAll】

 パンダでデータframe新規作成

 Excelに保存
code
from selenium import webdriver
from selenium.webdriver.firefox.options import Options
from selenium.webdriver.common.by import By
from selenium.webdriver.common.keys import Keys
from selenium.webdriver.support.ui import WebDriverWait
from selenium.webdriver.support import expected_conditions as EC
from selenium.webdriver.firefox.service import Service as FirefoxService
from selenium.webdriver.firefox.options import Options
from bs4 import BeautifulSoup
import pandas as pd


options = Options()
options.headless = False  # ヘッドレスモードを無効化(ブラウザを表示)

driver_path = '/path/to/geckodriver'
driver = webdriver.Firefox(executable_path=driver_path, options=options)

notion_url = "https://www.notion.so/login"
driver.get(notion_url)

# ログイン情報
email = "your_email@example.com"  # あなたのメールアドレス
password = "your_password"  # あなたのパスワード

# メールアドレスの入力フィールドを見つけて入力
email_field = driver.find_element(By.XPATH, '//input[@name="email"]')
email_field.send_keys(email)

# パスワードの入力フィールドを見つけて入力
password_field = driver.find_element(By.XPATH, '//input[@name="password"]')
password_field.send_keys(password)

# ログインボタンを見つけてクリック
login_button = driver.find_element(By.XPATH, '//button[@type="submit"]')
login_button.click()

from selenium.webdriver.support.ui import WebDriverWait
from selenium.webdriver.support import expected_conditions as EC


# ログイン後、ページ読み込み待つ
wait = WebDriverWait(driver, 10)
wait.until(EC.presence_of_element_located((By.XPATH, '//div[@class="notion-page-content"]')))

html = driver.page_source

soup = BeautifulSoup(html, "html.parser")

# aタグからリンクを取得
links = []
for a in soup.find_all("a", href=True):
    link = a["href"]
    if link.startswith("http"):  # 有効なURLのみ
        links.append(link)

driver.quit()

# CSVに保存
df = pd.DataFrame(links, columns=["Link"])
df.to_csv("notion_links.csv", index=False)

texts = []

# URLを順番に処理
for url in link_urls:
    driver.get(url)
    time.sleep(2)  # ページが読み込まれるまで待つ
    soup = BeautifulSoup(driver.page_source, 'html.parser')

    # 本文が入っている部分を特定(クラス名やタグは要調整)
    blocks = soup.find_all("div", class_="notion-text")  # ここでクラス名やタグを調整
    full_text = "\n".join([block.get_text(strip=True) for block in blocks])  # 複数行のテキストを一つにまとめる

    texts.append(full_text)

# 終了後、ブラウザを閉じる
driver.quit()

# DataFrameにしてエクセルに保存
df = pd.DataFrame(texts, columns=["本文"])

# 保存先ファイル名
file_name = "notion_本文_まとめ.xlsx"

# DataFrameをExcelに書き出し
df.to_excel(file_name, index=False)

# Excelを開いて、幅を広げる
wb = load_workbook(file_name)
ws = wb.active

# A列の幅を広げる(本文が長いから広めの設定)
ws.column_dimensions['A'].width = 100  # 幅を調整

# 保存
wb.save(file_name)
解説
notionログイン
from selenium import webdriver
from selenium.webdriver.firefox.options import Options
from selenium.webdriver.common.by import By
from selenium.webdriver.common.keys import Keys
from selenium.webdriver.support.ui import WebDriverWait
from selenium.webdriver.support import expected_conditions as EC


options = Options()
options.headless = False  # ヘッドレスモードを無効化(ブラウザを表示)

driver_path = '/path/to/geckodriver'
driver = webdriver.Firefox(executable_path=driver_path, options=options)

notion_url = "https://www.notion.so/login"
driver.get(notion_url)

# ログイン情報
email = "your_email@example.com"  # あなたのメールアドレス
password = "your_password"  # あなたのパスワード

# メールアドレスの入力フィールドを見つけて入力
email_field = driver.find_element(By.XPATH, '//input[@name="email"]')
email_field.send_keys(email)

# パスワードの入力フィールドを見つけて入力
password_field = driver.find_element(By.XPATH, '//input[@name="password"]')
password_field.send_keys(password)

# ログインボタンを見つけてクリック
login_button = driver.find_element(By.XPATH, '//button[@type="submit"]')
login_button.click()

from selenium.webdriver.support.ui import WebDriverWait
from selenium.webdriver.support import expected_conditions as EC


# ログイン後、ページ読み込み待つ
wait = WebDriverWait(driver, 10)
wait.until(EC.presence_of_element_located((By.XPATH, '//div[@class="notion-page-content"]')))  # Notionページの要素が読み込まれるのを待機
notionからクラス名で、情報一括取得
links = driver.find_elements(By.CLASS_NAME, "your-class-name")
link_urls = [link.get_attribute('href') for link in links]

driver.get(notion_page_url)
pandaでexcel保存
import pandas as pd

df.to_excel("notion_data.xlsx", index=False)
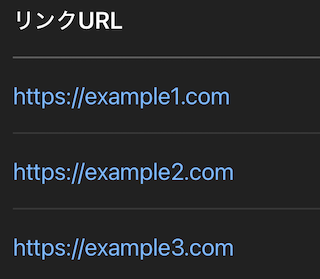
pandas リンク3つを"リンクURL"のタイトル付け、表に
その時のpanda code
df = pd.DataFrame(link_urls, columns=["リンクURL"])
df.to_excel("リンク一覧.xlsx", index=False)
出力結果
表に新しくつけたい列名 指定
pd.DataFrame(link_urls, columns=["リンクURL"]
dataが500文字以上の時、最初の500文字だけ表示 data 500文字以下の時、全文表示
これは、三項演算子
text[:500] + "..." if len(text) > 500 else text
三項演算子 仕組み
if len(text) > 500:
    result = text[:500] + "..."
else:
    result = text
ページ読み込み待機 ベスト書き方
from selenium.webdriver.support.ui import WebDriverWait
from selenium.webdriver.support import expected_conditions as EC

time.sleep(5)

wait = WebDriverWait(driver, 10)
クラス名から、リンク取得(beautifulsoup)
links = driver.find_elements(By.CLASS_NAME, "your-class-name")
link_urls = [link.get_attribute('href') for link in links]
divから たくさんある本文取得、改行
blocks = soup.find_all("div", class_="notion-text")  # ここでクラス名やタグを調整
    full_text = "\n".join([block.get_text(strip=True) for block in blocks])  # 複数行のテキストを一つにまとめる

    texts.append(full_text)
beautifulsoup find_allとfind
使いどき
  find_all : 文 長め * それが何行も

  find : 文 短
find使いどき

注意点 : 画像やリンク、別で取らんといかん
sample0 : このdataをexcelにしたい

→ excelにしたらこう

sample 1
import requests
from bs4 import BeautifulSoup
import pandas as pd

# 例として1個のNotionページ
url = "https://example.com/notion-page"
res = requests.get(url)
soup = BeautifulSoup(res.text, "html.parser")

# 本文だけ取り出す(1個だけ想定)
content = soup.find("div", class_="notion-text").text

# テキスト整形(空白だけ消す例)
def clean_text(text):
    return text.strip()

# データに追加
data = []
data.append({"メモ本文": clean_text(content)})

# Excelに保存
df = pd.DataFrame(data)
df.to_excel("notion_memo.xlsx", index=False)
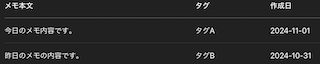
sample 2
data = []

for url in link_urls:
    driver.get(url)
    soup = BeautifulSoup(driver.page_source, 'html.parser')

    # ↓ここはNotionのクラスに合わせて調整
    content = soup.find("div", class_="notion-text").text
    tag = soup.find("div", class_="notion-tag").text
    date = soup.find("div", class_="notion-date").text

    data.append({
        "メモ本文": clean_text(content),
        "タグ": tag,
        "作成日": date
    })

df = pd.DataFrame(data)
df.to_excel("notionメモまとめ.xlsx", index=False)
sample 2 出力結果
find_all sample
texts = []

# URLを順番に処理
for url in link_urls:
    driver.get(url)
    time.sleep(2)  # ページが読み込まれるまで待つ
    soup = BeautifulSoup(driver.page_source, 'html.parser')

    # 本文が入っている部分を特定(クラス名やタグは要調整)
    blocks = soup.find_all("div", class_="notion-text")  # ここでクラス名やタグを調整
    full_text = "\n".join([block.get_text(strip=True) for block in blocks])  # 複数行のテキストを一つにまとめる

    texts.append(full_text)

# 終了後、ブラウザを閉じる
driver.quit()

# 列にタイトル付ける
df = pd.DataFrame(texts, columns=["本文"])

file_name = "notion_本文_まとめ.xlsx"

# DataFrameをExcelに書き出し
df.to_excel(file_name, index=False)

# Excelを開いて、幅を広げる
wb = load_workbook(file_name)
ws = wb.active

# A列の幅 広げる(本文が長いから広めの設定)
ws.column_dimensions['A'].width = 100  # 幅を調整


wb.save(file_name)
リンク全権取得
soup = BeautifulSoup(driver.page_source, "html.parser")

# 4. すべてのリンク(<a>タグのhref)を抽出
links = []
for a in soup.find_all("a", href=True):
    href = a["href"]
    if href not in links:
        links.append(href)

              ↓
        csvファイルに保存
csv 列名つけて保存
df = pd.DataFrame(links, columns=["Link"])
df.to_csv("notion_links.csv", index=False)
csv 列名つけずに保存
with open("notion_links.csv", "w") as f:
    for link in links:
        f.write(link + "\n")
csv 複数列 一度に追加
import pandas as pd

# リストで複数のリンクを持っている場合
links = [
    "https://link1.com",
    "https://link2.com",
    "https://link3.com"
    # 必要に応じてリンクを追加
]

# データフレームを作成
df = pd.DataFrame(links, columns=["タンク", "サンク", "リンク名"])  # 列名を一度に設定

df.to_csv("notion_links.csv", index=False)
csv 複数列 一度に更新 (追加 + 修正)
import pandas as pd

# 2つのデータフレームを作成
df1 = pd.DataFrame({"リンク": ["https://link1.com", "https://link2.com"]})
df2 = pd.DataFrame({"リンク": ["https://link3.com", "https://link4.com"]})

df = pd.concat([df1, df2], ignore_index=True)

df.to_csv("notion_links.csv", index=False)