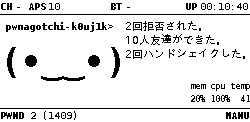
pwnagotchi とは ( https://qiita.com/k0uj1k/items/f91a3b7e3a4b9209774f ) を参照してください。
履歴
21/04/28 誤記修正
20/11/10 godcityさんより main.plugins.bt-tether.devices.android-phone.enabled = true を推奨設定
20/04/26 新規作成
pwnagotchi で スマホのテザリング を使う。
テザリングすると何ができるの?
- pwnagotchi のwebUIがスマホでできるようになります。(Android 192.168.44.44:8080, iphone 172.20.10.6:8080)
- pwnagotchi の時刻がネット同期で正確になります。
- 事前に
JST日本時間に設定しておきましょう。
- 事前に
- PwnMAP に登録されます。PwnGrid の世界へ羽ばたきます。
- ( https://pwnagotchi.ai/map/ )
- pwnagotchi MAILシステムなどの message 交換機能が使えるようです。(未確認)
日本時間への設定の仕方
MANUモードのコマンドラインで
sudo raspi-config
4 Localisation Optionsを選択。
I2 Change Timezoneを選択。
Asiaを選択。
Tokyoを選択。
Finishを選択。
これでできます。
dateコマンドで、JSTになっていれば timezone 設定完了です。
初めてペアリングする場合
材料
スマホ
動作確認済み pwnagotchi (作り方 https://qiita.com/k0uj1k/items/f91a3b7e3a4b9209774f )
設定方法
/etc/pwnagtoch/config.tomlを編集します。
Android スマホの場合
あらかじめスマホ画面の”設定"→”端末情報”→”端末の状態”から、
"bluetooth のアドレス” を確認しておきましょう。
XX:XX:XX:XX:XX:XX (MAC アドレスと同じ形式です。)
main.plugins.bt-tether.devices.android-phone.mac = "XX:XX:XX:XX:XX:XX"
と変更します。
main.plugins.bt-tether.enabled = true

main.plugins.bt-tether.devices.android-phone.enabled = true
main.plugins.bt-tether.devices.android-phone.search_order = 1
main.plugins.bt-tether.devices.android-phone.mac = "XX:XX:XX:XX:XX:XX"
main.plugins.bt-tether.devices.android-phone.ip = "192.168.44.44"
main.plugins.bt-tether.devices.android-phone.netmask = 24
main.plugins.bt-tether.devices.android-phone.interval = 1
main.plugins.bt-tether.devices.android-phone.scantime = 10
main.plugins.bt-tether.devices.android-phone.max_tries = 10
main.plugins.bt-tether.devices.android-phone.share_internet = false
main.plugins.bt-tether.devices.android-phone.priority = 1
ペアリング
スマホのbluetooth を有効にします。
pwnagotchi を MANU モードで起動します。

ssh pi@10.0.0.2 で login します。
# sudo su
super user になります。
bluetoothctl
# bluetoothctl
Agent registered
scan on
[bluetooth]# scan on
Discovery started
[CHG] Controller ZZ:ZZ:ZZ:ZZ:ZZ:ZZ Discovering: yes
...
[NEW] Device XX:XX:XX:XX:XX:XX YOURPHONENAME
[NEW] XX:XX:XX:XX:XX:XX YOURPHONENAME
と出てきたら、pwnagotchi から スマホが見えた状態です。
pair XX:XX:XX:XX:XX:XX
[bluetooth]# pair XX:XX:XX:XX:XX:XX
Attepmting to pair with XX:XX:XX:XX:XX:XX
その後、ペアリングを行い、6桁のBluetoothペア設定コードが
- コマンドライン側
- pwnagotchi 側
両方に表示されます。
- コマンドラインでは "yes" とします。
- スマホ側は "ペア設定する" をタップします。
# ペアリングの時間は短いので、素早くやりましょう。
[bluetooth]# pair XX:XX:XX:XX:XX:XX
Attempting to pair with XX:XX:XX:XX:XX:XX
[CHG] Device XX:XX:XX:XX:XX:XX Connected: yes
Request confirmation
[agent] Confirm passkey 977510 (yes/no): yes
[CHG] Device XX:XX:XX:XX:XX:XX Modalias: bluetooth:v000xxxxxxxx
[CHG] Device XX:XX:XX:XX:XX:XX UUIDs: xxx
...
[CHG] Device XX:XX:XX:XX:XX:XX UUIDs: xxx
[CHG] Device XX:XX:XX:XX:XX:XX ServicesResolved: yes
[CHG] Device XX:XX:XX:XX:XX:XX Paired: yes
Pairing successful
[agent] Confirm passkey ?????? (yes/no) と聞かれます。
コマンドラインの画面に戻って、yes とします。
この時に、スマホの画面側でも
pwnagotchi-yourname のペアリングの確認が出ます。
上記の ?????? の数字が同じならば、"OK" をタップします。

"ペア設定する"でスマホ側に pwnagotchi が登録されます。

paired-device でスマホとペアリングできたことが確認できます。
[bluetooth]# paired-devices
Device XX:XX:XX:XX:XX:XX YOURPHONENAME
コマンドラインでは、
info XX:XX:XX:XX:XX:XX でペアリングやコネクションの状態が確認できます。
[bluetooth]# info XX:XX:XX:XX:XX:XX
Device XX:XX:XX:XX:XX:XX (public)
        Name: YOURPHONEMAE
        Alias: YOURPHONEMAE
        Class: 0x00000000
        Icon: phone
        Paired: yes
        Trusted: no
        Blocked: no
        Connected: yes
        LegacyPairing: no
        UUID: OBEX Object Push
        UUID: OBEX File Transfer
        UUID: Audio Source
        UUID: A/V Remote Control Target
        UUID: A/V Remote Control
        UUID: Headset AG
        UUID: PANU
        UUID: NAP
        UUID: Handsfree Audio Gateway
        UUID: SIM Access
        UUID: Phonebook Access Server
        UUID: Message Access Server
        UUID: PnP Information
        UUID: Generic Access Profile
        UUID: Generic Attribute Profile
        Modalias: bluetooth: 0xxxxxxxxxx
[
[bluetooth] exit
exit で終了です。
この後、pwnagotchi を再起動します。
# 再起動しないとうまくいかないです。
# shutdown -r now
次にスマホ画面に戻って、
"設定"→"テザリングとポータブルアクセス"→"Bluetooth" のテザリングを有効にします。

pwnagotchi の画面の上部中央が BT C となれば、コネクションが成功です。
# 焦らずしばらく待ちましょう。すぐにはコネクションが成立しません。

うまくいかない時は、下に記載の再設定の手順になります。
pwnagotchi の slack を見てると、
皆さんBluetoothのコネクションには苦戦しているようです。
iphone の場合
main.plugins.bt-tether.devices.ios-phone.mac = "XX:XX:XX:XX:XX:XX"
iphone の Bluetoothアドレス XX:XX:XX:XX:XX:XX を設定します。
#こちらは試してません。
main.plugins.bt-tether.enabled = true

main.plugins.bt-tether.devices.ios-phone.enabled = true
main.plugins.bt-tether.devices.ios-phone.search_order = 2
main.plugins.bt-tether.devices.ios-phone.mac = "XX:XX:XX:XX:XX:XX"
main.plugins.bt-tether.devices.ios-phone.ip = "172.20.10.6"
main.plugins.bt-tether.devices.ios-phone.netmask = 24
main.plugins.bt-tether.devices.ios-phone.interval = 5
main.plugins.bt-tether.devices.ios-phone.scantime = 20
main.plugins.bt-tether.devices.ios-phone.max_tries = 0
main.plugins.bt-tether.devices.ios-phone.share_internet = false
main.plugins.bt-tether.devices.ios-phone.priority = 999
ペアリングをやりなおす場合
スマホのbluetooth を有効にします。
設定→Bluetoothから、ペアリングしている pwnagotchi をタップして"削除"します。

スマホのbluetooth を一旦無効にします。
pwnagotchi を MANU モードで起動します。
ssh pi@10.0.0.2 で login します。
sudo su で super user になります。
bluetoothctl
scan on
paired-device' でスマホの端末名や Bluetooth アドレス XX:XX:XX:XX:XX:XX が出てきたら、ペアリング情報が残っています。 remove XX:XX:XX:XX:XX:XX` ペアリング情報を削除します。
# すでにつながっている場合はdisconnectしましょう。
[YOURPHONAME]# disconnect XX:XX:XX:XX:XX:XX
Attempting to disconnect from XX:XX:XX:XX:XX:XX
Successful disconnected
[bluetooth]# remove XX:XX:XX:XX:XX:XX
[DEL] Device XX:XX:XX:XX:XX:XX YOURPHONENAME
Device has been removed
次に、スマホのbluetooth を有効にします。
# ここからは初めてペアリングする場合と同じです。(上をご覧ください。)
[bluetooth]# pair XX:XX:XX:XX:XX:XX
ハックザプラネット!
