Spring Bootを使用してバックエンドのプログラムを作成します。
ワークスペース作成
まずは適当な場所にワークスペース(作業フォルダ)を作成します。
今回はDocumentsにsampleWorkspaceフォルダを作成しました。
Eclipse起動
pleiadesを解凍したフォルダまで移動し、eclipse.exeをダブルクリックします。

ワークスペースを聞かれるので、先ほど作成したフォルダを指定して起動します。

Spring Bootプロジェクト作成
Eclipseが起動したら、ファイル→新規→プロジェクトを選択します。
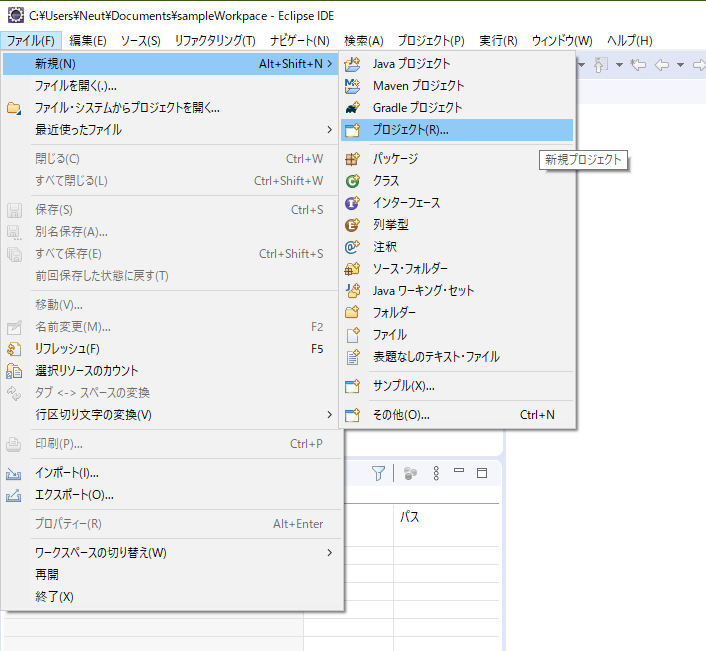
Spring Boot→Springスターター・プロジェクト選択して次へ。

Javaバージョンは8を選択して次へ。
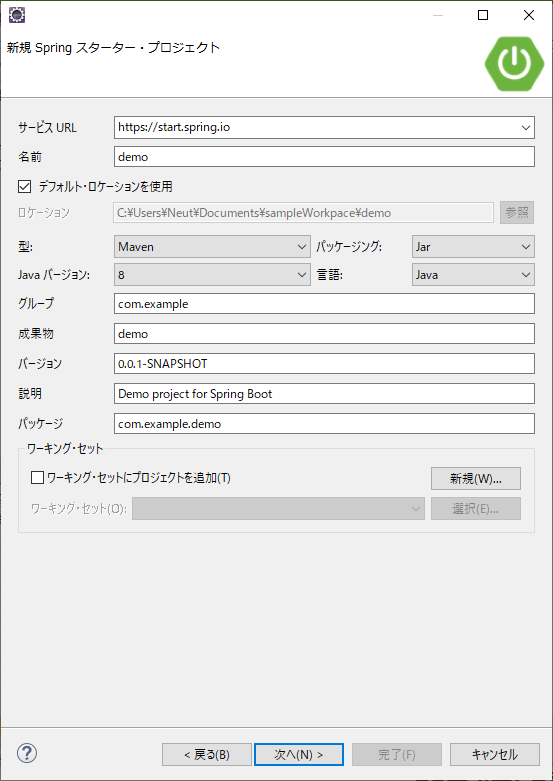
Spring Bootバージョンは2.4.1、WebのSpring Webにチェックして完了。

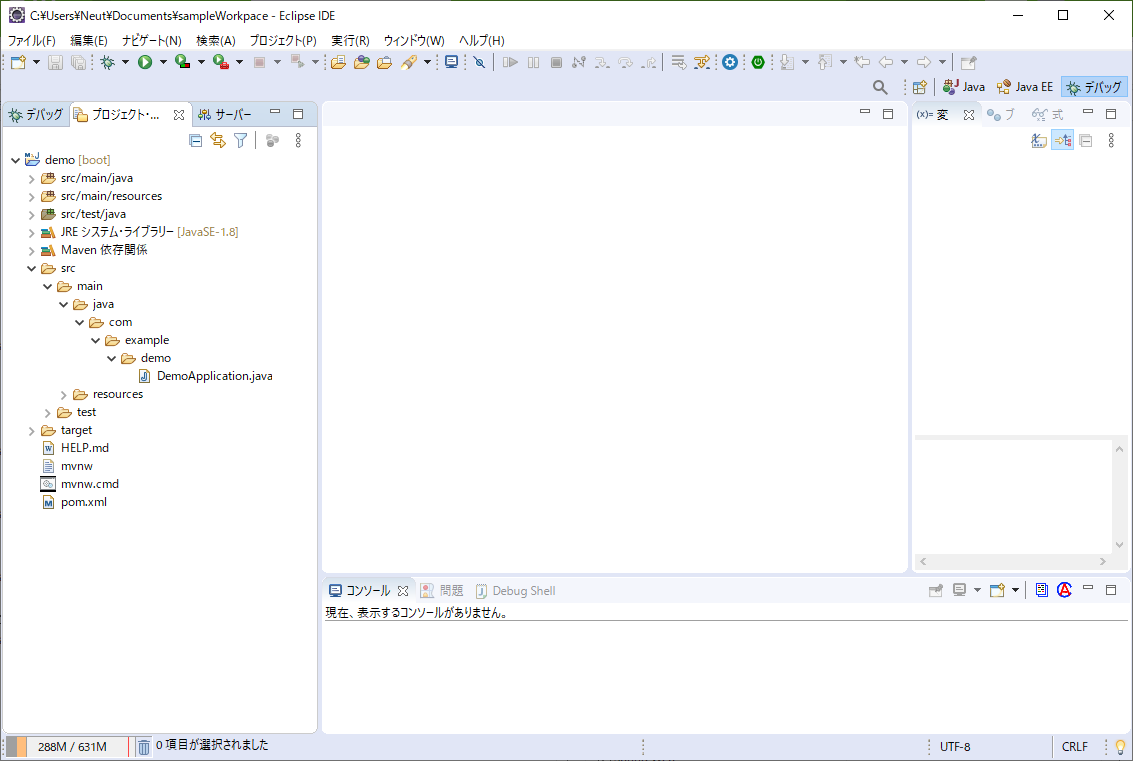
プロジェクトが作成されました。
Doma Toolsインストール
↓Doma公式より引用です
Daoメソッドを右クリックでSQLファイルに飛べるようになるので、インストールします。
Doma Tools は Java ファイルと SQL ファイルの相互遷移を可能にするプラグインです。
Doma の利用に必須ではありませんが、このプラグインを使用すると生産性が高まります。
ヘルプ→新規ソフトウェアのインストールを選択します。

作業対象に http://dl.bintray.com/domaframework/eclipse/と入力し完了をクリックします。

依存ライブラリ追加
pom.xmlのdependencyに依存ライブラリを追記します。
追記後は以下のようになります。
<?xml version="1.0" encoding="UTF-8"?>
<project xmlns="http://maven.apache.org/POM/4.0.0"
	xmlns:xsi="http://www.w3.org/2001/XMLSchema-instance"
	xsi:schemaLocation="http://maven.apache.org/POM/4.0.0 https://maven.apache.org/xsd/maven-4.0.0.xsd">
	<modelVersion>4.0.0</modelVersion>
	<parent>
		<groupId>org.springframework.boot</groupId>
		<artifactId>spring-boot-starter-parent</artifactId>
		<version>2.4.1</version>
		<relativePath /> <!-- lookup parent from repository -->
	</parent>
	<groupId>com.example</groupId>
	<artifactId>demo</artifactId>
	<version>0.0.1-SNAPSHOT</version>
	<name>demo</name>
	<description>Demo project for Spring Boot</description>

	<properties>
		<java.version>1.8</java.version>
	</properties>

	<dependencies>
		<dependency>
			<groupId>org.springframework.boot</groupId>
			<artifactId>spring-boot-starter-web</artifactId>
		</dependency>

		<dependency>
			<groupId>org.springframework.boot</groupId>
			<artifactId>spring-boot-starter-test</artifactId>
			<scope>test</scope>
		</dependency>

    <!-- 追記 ここから -->
		<dependency>
			<groupId>org.seasar.doma.boot</groupId>
			<artifactId>doma-spring-boot-starter</artifactId>
			<version>1.1.1</version>
		</dependency>

		<dependency>
			<groupId>org.seasar.doma</groupId>
			<artifactId>doma</artifactId>
			<version>2.19.2</version>
		</dependency>

		<dependency>
			<groupId>mysql</groupId>
			<artifactId>mysql-connector-java</artifactId>
			<scope>runtime</scope>
		</dependency>
     <!-- ここまで -->

	</dependencies>

	<build>
		<plugins>
			<plugin>
				<groupId>org.springframework.boot</groupId>
				<artifactId>spring-boot-maven-plugin</artifactId>
			</plugin>
		</plugins>
	</build>

</project>
データベース接続設定
application.propertiesに以下を追記します。
spring.datasource.url=jdbc:mysql://localhost:3306/sampledb?characterEncoding=UTF-8&serverTimezone=JST
spring.datasource.username=root
spring.datasource.password=root
doma.dialect=mysql
Doma設定
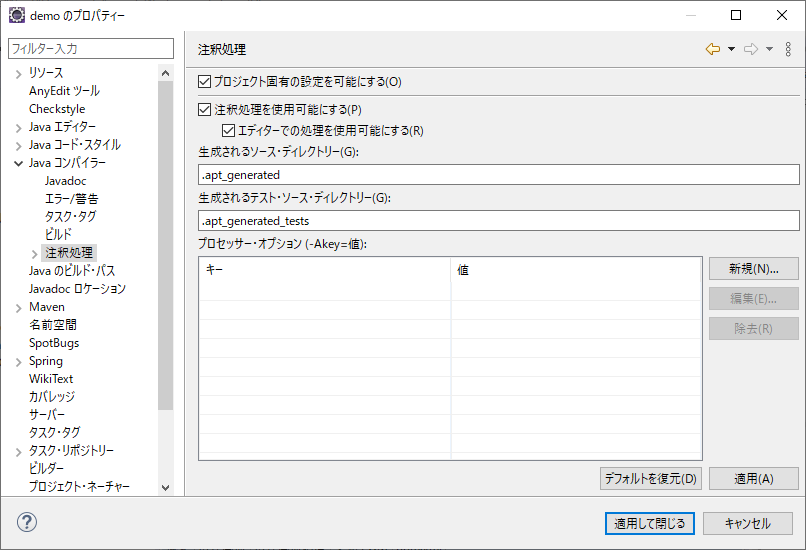
注釈処理
プロジェクト→プロパティ→Javaコンパイラー→注釈処理
以下のようにチェックを入れます。
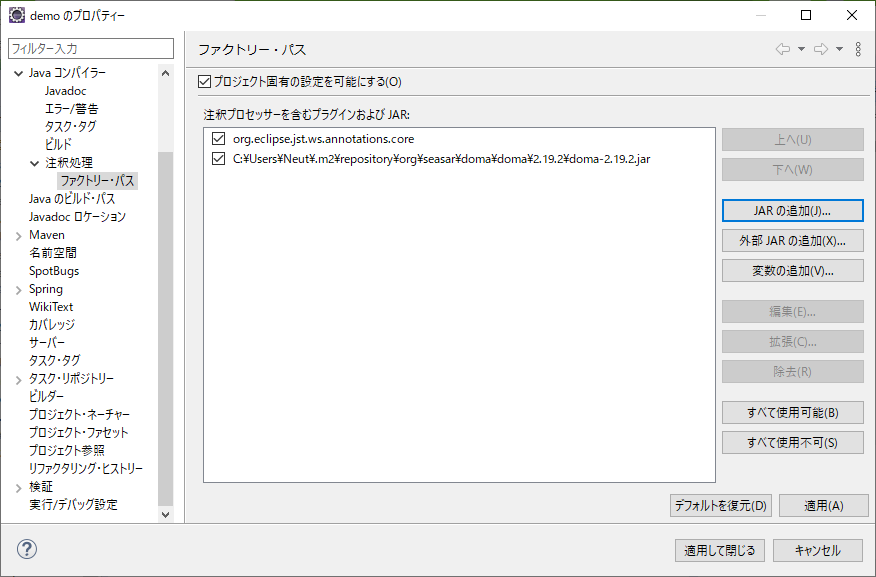
ファクトリーパス
以下のようにチェックを入れます。

外部Jar追加
外部Jarの追加をクリックして、domaのJarを追加します。
今回はdoma-2.19.2.jarを選択します。

適用して閉じます。
ビルドを促されたらビルドします。
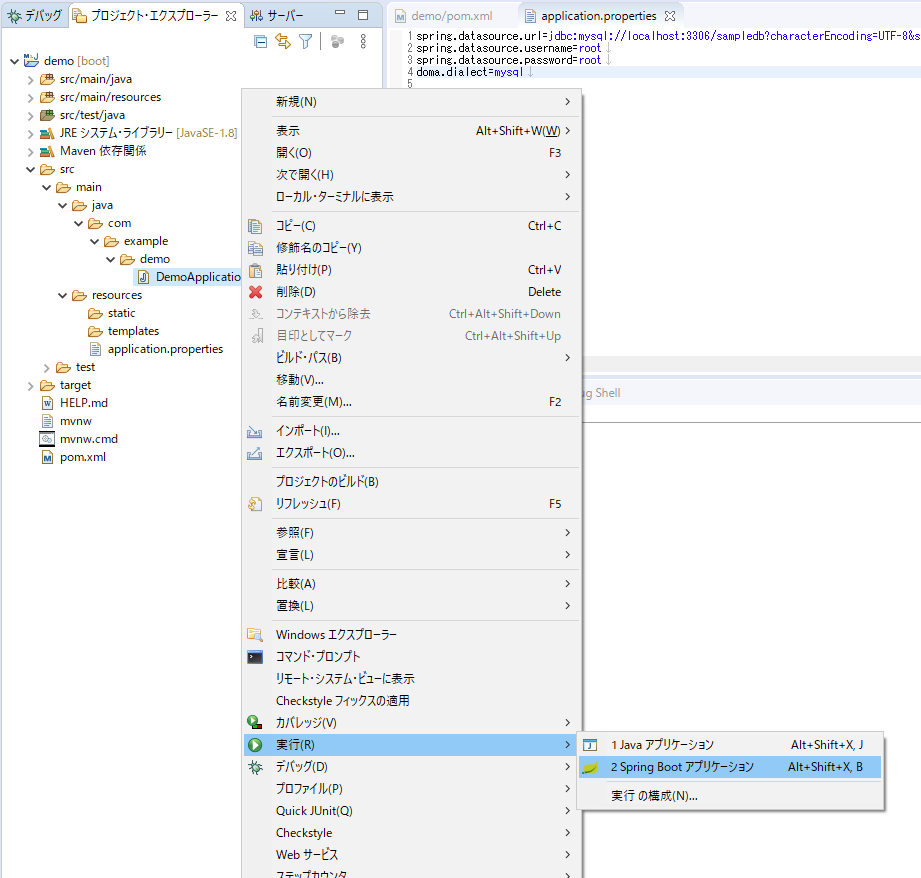
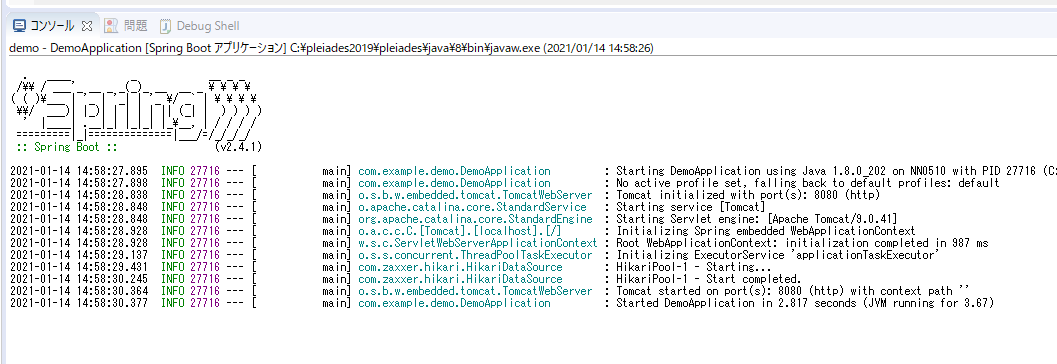
アプリケーション実行
DemoApplication.javaの上で右クリック→実行→Spring Bootアプリケーションを選択します。
コンソールに以下のようなログが出たらOKです。
http://localhost:8080/ にアクセスすると以下のような画面が表示されます。
