ODCでC#のコードを取り込むExternal Logicだが、毎回コマンドでpublishしてzipファイルにまとめるのが面倒なので、ショートカット1つで実行できる方法を調査する。
環境情報
OutSystemsExternalLibraries.SDK.1.4.0
.NET SDK 6.0
Visual Studio Code (Version 1.85.1)
参考
External Logicの一般的な作り方については、ODCでC#を取り込んでみる(External Logic)を参照。
実現すること
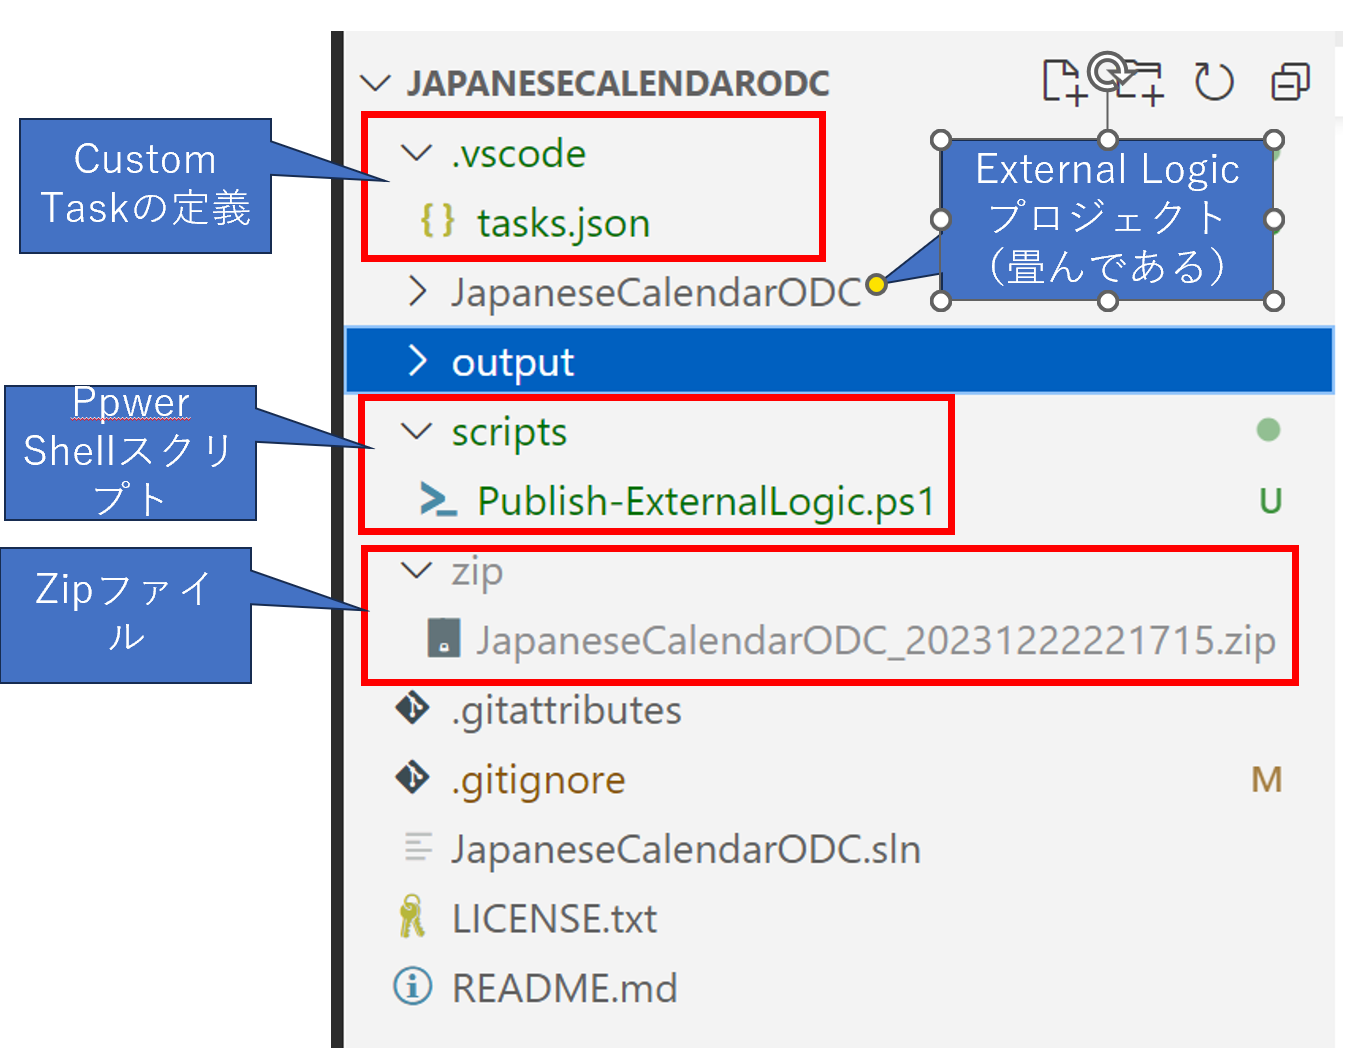
VSCodeのCustom Taskを作成する。
Ctrl + Shift + Bのショートカットを入力すると、dotnet publishを行い、結果をファイル名にタイムスタンプを含むzipファイルにまとめる。
Power Shellスクリプトを用意する
VSCodeで開いたWorkspace直下にscriptsフォルダを作成。
さらにその下に「Publish-ExternalLogic.ps1」ファイルを作成した(「実現すること」のスクリーンショット参照)。
先に結果のファイルを以下に示す。
dotnet publish -c Release -r linux-x64 --self-contained false -o output
New-Item -ItemType Directory -Force -Path .\zip
$destinationPath = ".\zip\" + $args[0] + "_" + (Get-Date).ToString("yyyyMMddHHmmss") + ".zip"
Compress-Archive -Path .\output\* -DestinationPath $destinationPath
1行目:一般的なExternal Logic発行用の「dotnet publish」コマンド。ただし、出力先は「-o」オプションを使って、Workspace直下のoutputフォルダに結果のファイルを出力している。zip圧縮するときにパスを指定しやすくするため
2行目:Workspace直下に「zip」フォルダを作成
3行目:zipファイルの、Workspaceからの相対パスを作成。$args[0]には、タスク側からWorkspace名を渡すことで、複数のExternal Logicで使いまわせるようにする
4行目:1行目で出力しておいたファイルをまとめてzip化する
Custom Taskのテンプレートを作成する
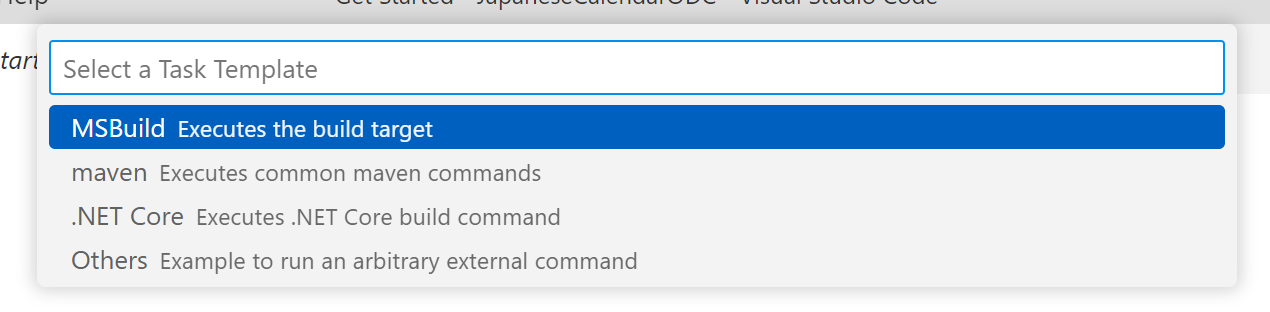
Ctrl + Shift + Bのショートカットで動作するCustom Taskのテンプレートを作成するため、以下の手順で操作した。
Terminal メニュー > Configure Default Build Task...

Create tasks.json file from template

続けて、MSBuild Executes the build targetを選んだ
以下のようなファイルが、Workspace直下の.vscode/tasks.jsonファイルが以下の形で生成される(書き換えてしまうのでほとんど使わないが)。
{
    // See https://go.microsoft.com/fwlink/?LinkId=733558
    // for the documentation about the tasks.json format
    "version": "2.0.0",
    "tasks": [
        {
            "label": "build",
            "type": "shell",
            "command": "msbuild",
            "args": [
                // Ask msbuild to generate full paths for file names.
                "/property:GenerateFullPaths=true",
                "/t:build",
                // Do not generate summary otherwise it leads to duplicate errors in Problems panel
                "/consoleloggerparameters:NoSummary"
            ],
            "group": "build",
            "presentation": {
                // Reveal the output only if unrecognized errors occur.
                "reveal": "silent"
            },
            // Use the standard MS compiler pattern to detect errors, warnings and infos
            "problemMatcher": "$msCompile"
        }
    ]
}
tasks.jsonの書き換えによりCustom Taskを完成させる
${workspaceFolder}はWorkspaceのパス、${workspaceFolderBasename}はWorkspace名で置き換えられる(Variables Referenceを参照)。
{
    // See https://go.microsoft.com/fwlink/?LinkId=733558
    // for the documentation about the tasks.json format
    "version": "2.0.0",
    "tasks": [
        {
            "label": "publish",
            "type": "shell",            // the command is interpreted as a shell command (for example: bash, cmd, or PowerShell).
            "command": "${workspaceFolder}\\scripts\\Publish-ExternalLogic.ps1",
            "args": [
                "${workspaceFolderBasename}"
            ],
            "group": "build",
            "presentation": {
                "reveal": "always"
            }
        }
    ]
}
type: 'shell'を指定すると、commandで指定したものを、cmdやps1コマンドとして実行される。
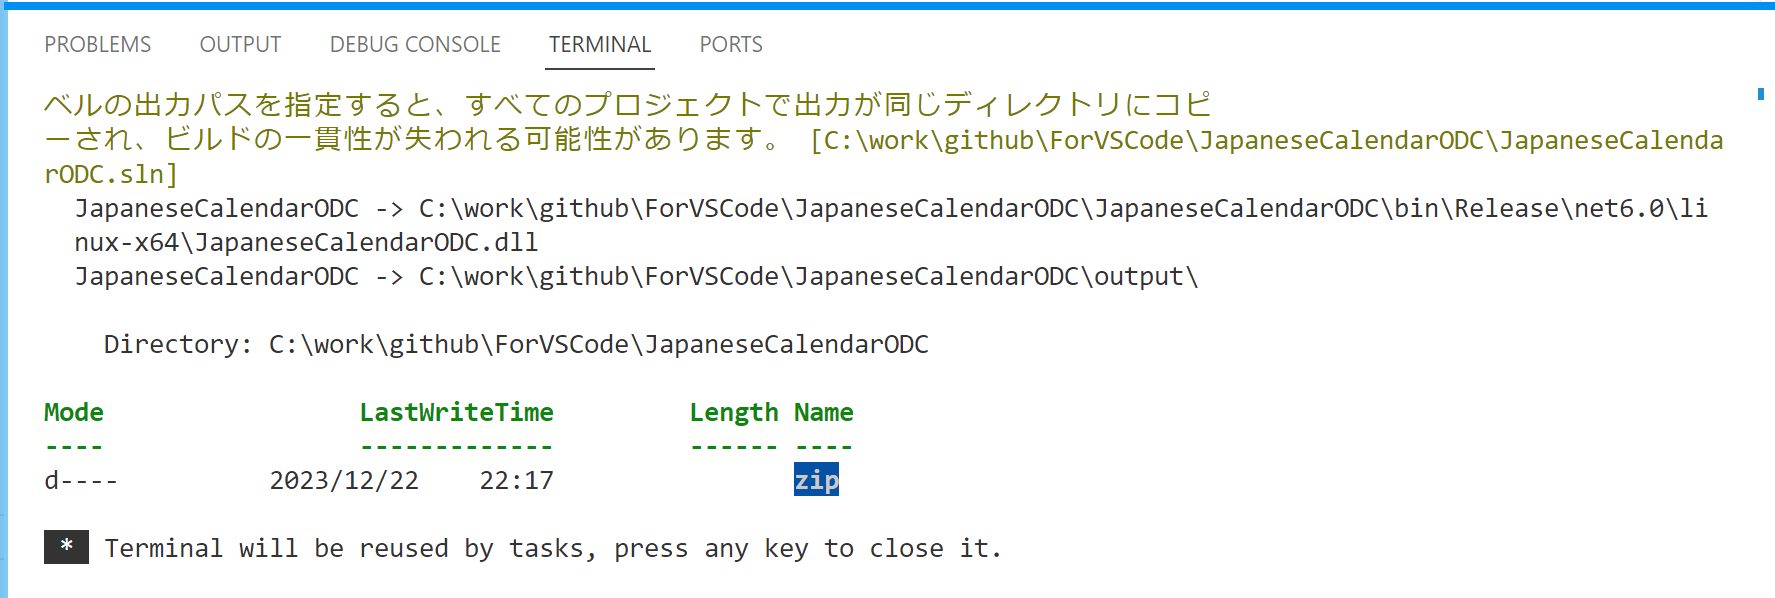
テスト
VSCode上でショートカットキー「Ctrl + Shift + B」を入力するとTerminalに以下のようにスクリプトが実行されて、結果が表示される。