今回は Kintone Portal Designer のサンプルテンプレートのHTMLを編集して独自のポータル画面を作って見ようと思います。
サンプルテンプレートのImport
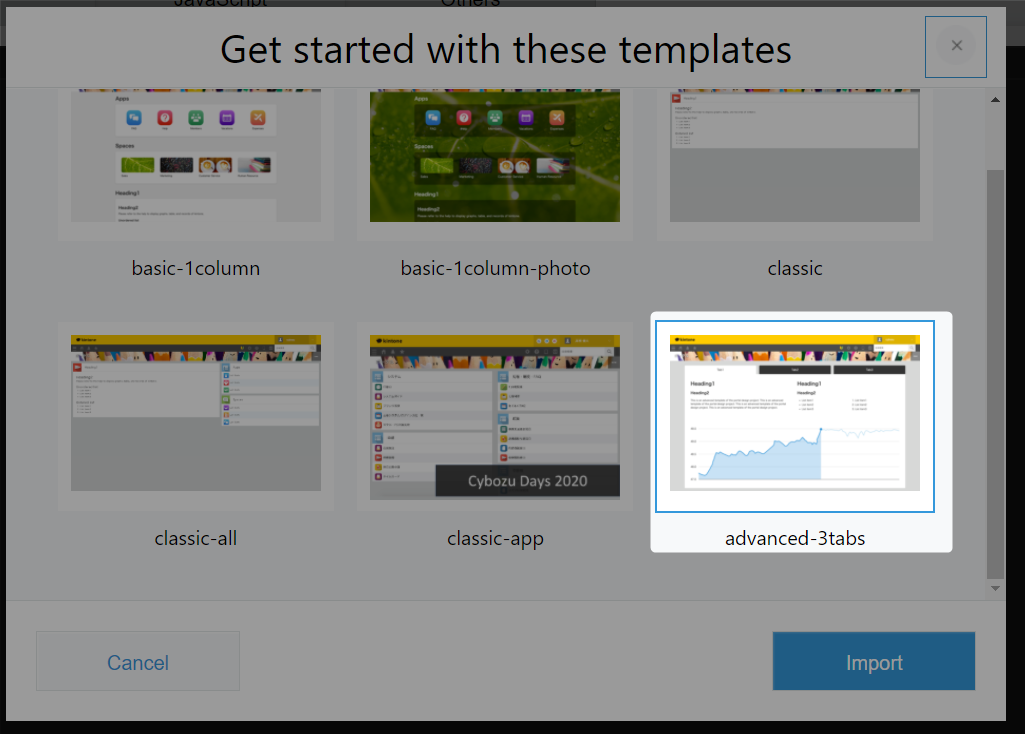
Kintone Portal Designerでは、いくつか予め準備されたサンプルテンプレートからデザインをImportすることができます。まずはImportボタンをクリックします。
今回はタブ切り替えができるデザインにしたいと思います。
advance-3tabを選択してImportをクリックしましょう。
Saveボタンと左上のトグルボタンをクリックするのもお忘れなく。
HTMLの編集
Kintone Portal Designer のサンプルテンプレートを使うと、HTMLを編集するだけでオリジナルのポータル画面が作成できます。
タブのHTML
タブ選択のHTMLは以下のようになっています。
class に advanced-tab--active があるタブが初期表示のときに選択されるタブになります。
初期表示させたいタブの class に advanced-tab--active を設定しておきましょう。
<div id="tabs" class="advanced-tab-container">
  <button role="tab" class="advanced-tab advanced-tab--active" type="button" aria-expanded="true">Tab1</button>
  <button role="tab" class="advanced-tab" type="button" aria-expanded="false">Tab2</button>
  <button role="tab" class="advanced-tab" type="button" aria-expanded="false">Tab3</button>
</div>
タブのタイトルの編集
3~7行目あたりの </button> の直前にある Tab1~Tab3を変更します。
タブの名前1~タブの名前3 に変更してみました。
<div id="tabs" class="advanced-tab-container">
  <button role="tab" class="advanced-tab advanced-tab--active" type="button" aria-expanded="true">タブの名前1</button>
  <button role="tab" class="advanced-tab" type="button" aria-expanded="false">タブの名前2</button>
  <button role="tab" class="advanced-tab" type="button" aria-expanded="false">タブの名前3</button>
</div>
タブの削除
以下のように、消したいタブの行を削除するだけです。
※分かりやすいようにコメントアウトしてみました。
<div id="tabs" class="advanced-tab-container">
  <button role="tab" class="advanced-tab advanced-tab--active" type="button" aria-expanded="true">タブの名前1</button>
  <!-- <button role="tab" class="advanced-tab" type="button" aria-expanded="false">タブの名前2</button> -->
  <button role="tab" class="advanced-tab" type="button" aria-expanded="false">タブの名前3</button>
</div>
タブの追加
タブを増やしたい時は、タブの行をコピーしてペーストし増やします。
<div id="tabs" class="advanced-tab-container">
  <button role="tab" class="advanced-tab advanced-tab--active" type="button" aria-expanded="true">タブの名前1</button>
  <button role="tab" class="advanced-tab" type="button" aria-expanded="false">タブの名前2</button>
  <button role="tab" class="advanced-tab" type="button" aria-expanded="false">タブの名前3</button>
  <button role="tab" class="advanced-tab" type="button" aria-expanded="false">タブの名前4</button>
</div>
※タブを増やした場合、タブの中身も同時に追加する必要があります。
タブの中身
タブの中身は、タブのタイトルよりも下の行(9行目あたり~)で設定されていて、こんな構成になっています。
並び順は、タブのタイトル順と一致しています。
タブ1を初期表示で開いていおきたい場合は、class に advanced-panel-contents--active を追加しておきましょう。
<div class="advanced-panel-container">
  <!-- タブ1の内容 -->
  <div class="advanced-panel-contents advanced-panel-contents--active">
    ...
  </div>

  <!-- タブ2の内容 -->
  <div class="advanced-panel-contents">
    ...
  </div>

  <!-- タブ3の内容 -->
  <div class="advanced-panel-contents">
    ...
  </div>

  <!-- タブを追加した場合はタブ4の中身も追加します -->
  <!-- タブ4の内容 -->
  <div class="advanced-panel-contents">
    ...
  </div>

</div>
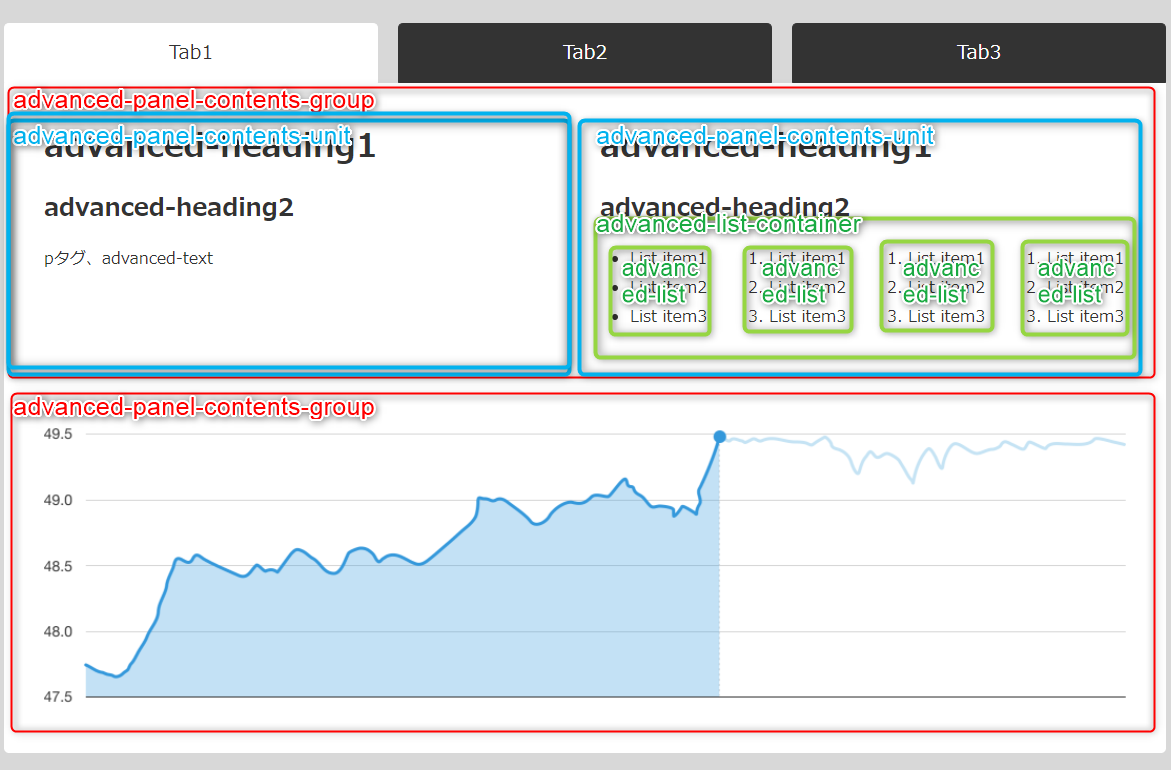
タブの中身の構成
class に advanced-panel-contents が指定されている要素の下の階層は
こんな感じにclassが指定されます。

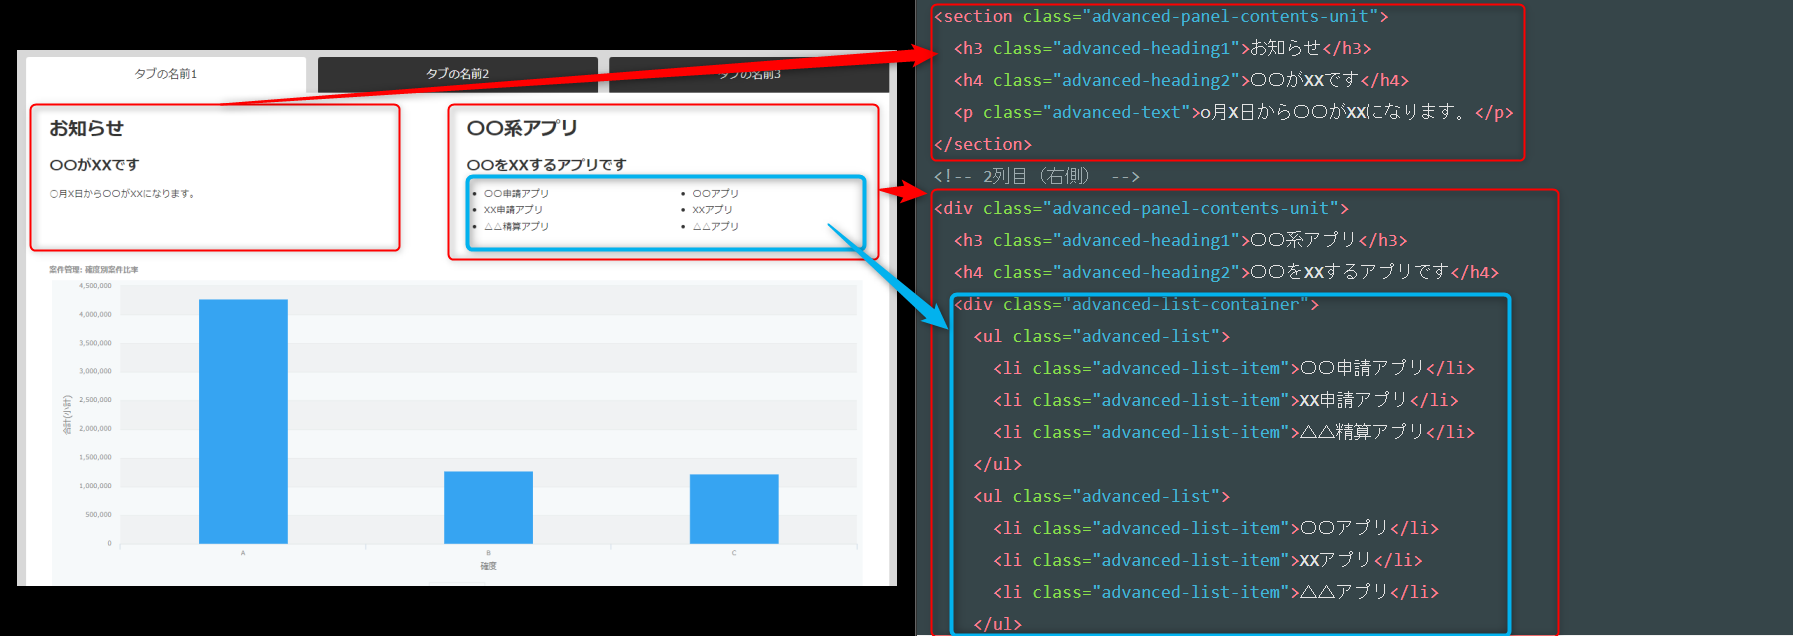
タブの中身
Tab1の中身だけ色々と書きましたがこんな感じに使うことができます。
グラフの埋め込みも可能です。
<!-- Tab1の中身 -->
<div class="advanced-panel-contents advanced-panel-contents--active">
<!-- 1行目 -->
<div class="advanced-panel-contents-group">
<!-- 1列目(左側) -->
<section class="advanced-panel-contents-unit">
<h3 class="advanced-heading1">お知らせ</h3>
<h4 class="advanced-heading2">〇〇がXXです</h4>
<p class="advanced-text">○月X日から〇〇がXXになります。</p>
</section>
<!-- 2列目(右側) -->
<div class="advanced-panel-contents-unit">
<h3 class="advanced-heading1">〇〇系アプリ</h3>
<h4 class="advanced-heading2">〇〇をXXするアプリです</h4>
<div class="advanced-list-container">
<ul class="advanced-list">
<li class="advanced-list-item">〇〇申請アプリ</li>
<li class="advanced-list-item">XX申請アプリ</li>
<li class="advanced-list-item">△△精算アプリ</li>
</ul>
<ul class="advanced-list">
<li class="advanced-list-item">〇〇アプリ</li>
<li class="advanced-list-item">XXアプリ</li>
<li class="advanced-list-item">△△アプリ</li>
</ul>
</div>
</div>
</div>
<!-- 2行目 -->
<div class="advanced-panel-contents-group advanced-data">
<!-- グラフ埋め込み -->
<iframe width="1400" height="600" frameborder="0" src="https://{subdomain}.cybozu.com/k/302/report/portlet?report=5118339&chartType=column&stackType=stacked&title=1"></iframe>
</div>
</div>
<!-- Tab2の中身-->
<div class="advanced-panel-contents">
<h3 class="advanced-heading1">Heading1</h3>
<h4 class="advanced-heading2">Heading2</h4>
<p class="advanced-text">Tab2 is under construction.</p>
<p style="line-height:500px;"> </p>
</div>
<!-- Tab3の中身-->
<div class="advanced-panel-contents">
<h3 class="advanced-heading1">Heading1</h3>
<h4 class="advanced-heading2">Heading2</h4>
<p class="advanced-text">Tab3 is under construction.</p>
<p style="line-height:500px;"> </p>
</div>
まとめ
kintoneポータルはHTML、CSS、JavaScriptによって自由度が高いカスタマイズができるようです。
サンプルテンプレート以外にも、デザインテンプレートギャラリーもあるようですので、試してみてね!


