前回は、webpack-plugin-kintone-pluginを使ってサンプルプラグインをビルドして使えるようにするまでのお話でした。
今回は、kintoneプラグインの設定画面を Vue.js を使う方法と、kintone UI Component を使う方法の2通りのやり方で作ってみたいと思います。
Vue.jsを使って設定画面を作る
まず、manifest.json ファイルの config の js に
Vue の CDN "https://unpkg.com/vue@next" を追加します。
"config": {
  "html": "html/config.html",
  "js": [
    "https://unpkg.com/vue@next",
    "js/dist/config.js"
  ],
  "css": ["css/config.css"],
  "required_params": ["message"]
},
htmlファイルの編集
config.htmlを編集します。
<div id="app">
  <label for="msg">表示したい文字列:</label>
  <input type="text" id="msg" v-model="myMessage">
  <button @click="register">登録</button>
</div>
jsファイルの編集
config.js を編集します。
kintone プラグイン開発手順によると、
↓こんな感じのお作法があるようです。
((PLUGIN_ID) => {
  // 設定更新するプログラムをかく
})(kintone.$PLUGIN_ID);
APIはこんな感じで使います。
プラグインの設定を読み込む
kintone.plugin.app.getConfig(PLUGIN_ID)
プラグインの設定を更新する
kintone.plugin.app.setConfig(param, callback)
設定のsetConfigで送信する param の中身は
manifest.json で設定している
"required_params": ["message"] です。
const param = { message: this.myMessage };
こんなふうに作成しましょう。
((PLUGIN_ID) => {
  "use strict";

  // 設定を読み込む
  const config = kintone.plugin.app.getConfig(PLUGIN_ID);
  const app = Vue.createApp({
    data() {
      // 初期表示は設定内容通りに表示する。
      return { myMessage: config.message };
    },
    methods: {
      // 登録ボタン(htmlの方で作成)をクリックしたら設定を登録する
      register() {
        const param = { message: this.myMessage };
        // 設定を登録する
        kintone.plugin.app.setConfig(param, () => {
          alert("登録しました");
          // プラグイン一覧画面に移動する
          window.location.href = "../../" + kintone.app.getId() + "/plugin/#/";
        });
      },
    },
  });
  const vm = app.mount("#app");

})(kintone.$PLUGIN_ID);
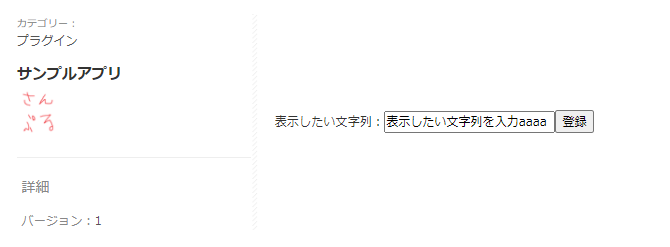
結果
cssを適用していないこともあり質素な感じになりましたが、動作には問題ありません。
kintoneぽくしたい場合は↓こちらを忍ばせてください。
kintone UI Component を使って設定画面を作る
npmでパッケージをインストールする方法 もありますが、今回はCDNを使ってみます。
manifest.json ファイルの config の js に
kintone UI Component の CDN "https://unpkg.com/kintone-ui-component/umd/kuc.min.js" を追加します。
"config": {
  "html": "html/config.html",
  "js": [
    "https://unpkg.com/kintone-ui-component/umd/kuc.min.js",
    "js/dist/config.js"
  ],
  "css": ["css/config.css"],
  "required_params": ["message"]
},
htmlファイルの編集
htmlは次の一行だけです。
<div id="sp"></div>
jsファイルの編集
※テキストボックスだとサイズ変えられなかったのでテキストエリアにしました^^;
((PLUGIN_ID) => {
  "use strict";

  // 設定内容取得
  const config = kintone.plugin.app.getConfig(PLUGIN_ID);

  // テキストエリア作成
  const text = new Kuc.TextArea({
    label: "表示したい文字列",
    value: config.message,  // 初期表示は設定内容
  });

  // ボタン作成
  const button = new Kuc.Button({
    text: "登録",
    type: "submit",
  });

  // divを取得
  const sp = document.getElementById("sp");
  // テキストエリア配置
  sp.appendChild(text);
  // 改行配置
  const br = document.createElement("br");
  sp.appendChild(br);
  // ボタン配置
  sp.appendChild(button);

  // ボタンクリックで設定登録
  button.addEventListener("click", (event) => {
    const param = { message: text.value };
    kintone.plugin.app.setConfig(param, function () {
      alert("登録しました");
      window.location.href = "../../" + kintone.app.getId() + "/plugin/#/";
    });
  });
})(kintone.$PLUGIN_ID);
結果
kintone UI Component だと CSS を気にせずに kintone ぽくできるので、個人的にはVue.jsよりもkintone UI Componentの方が好きだったりします。

