主旨
- M5Stackが入手できたので、開発環境を構築し、BLEタグのRSSI値を取得するところまで試してみました。
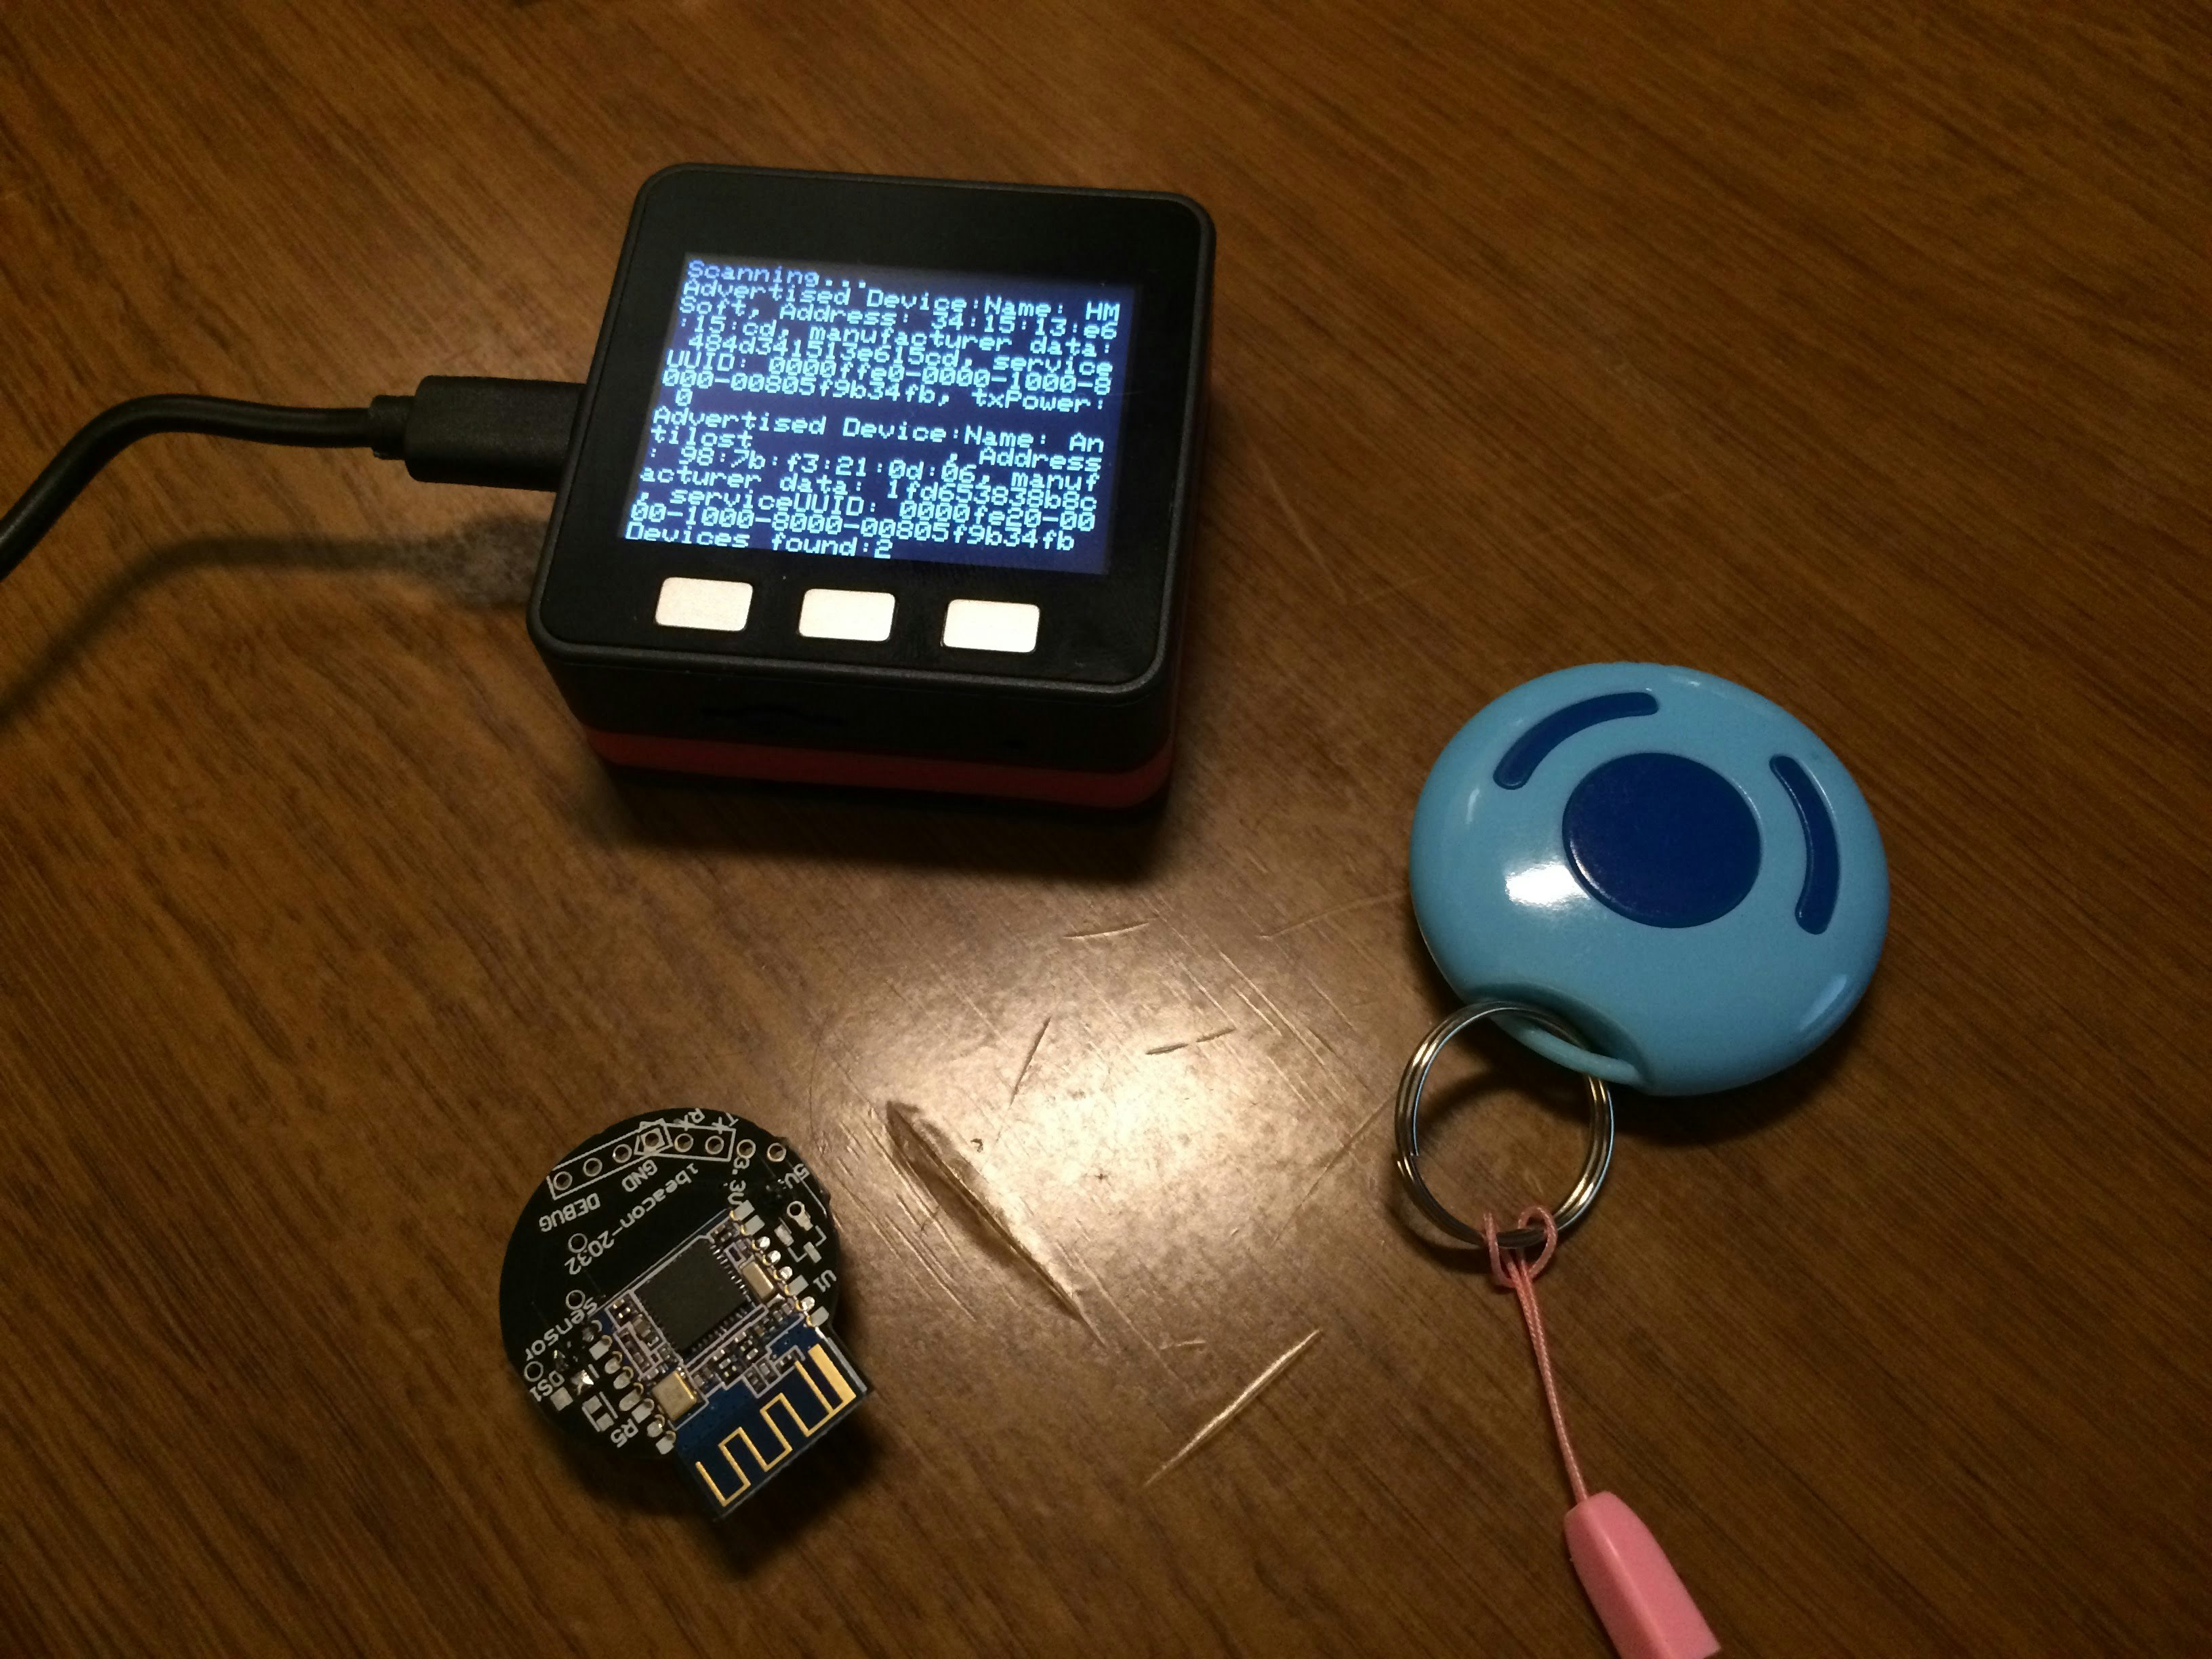
(これはサンプルのスケッチを動かしているところです)
まとめ
- 次の手順で行いました
- Arduino1.8.5をインストールする
- Gitをアップデート(インストール)して、Arduino ESP32 Supportをインストールする
- シリアルドライバをインストールする
- 内蔵Flashのスケッチエリアを大きくする
- board.txtと、default.csvを修正する
- コンパイル時間短縮の設定をする
- Arduinoのメニューから参照できるサンプルスケッチを改造する
手配
- 2018/03/08にaliexpressで購入
- 本体は¥3,767
- バッテリは¥1,712
- 届いたのは2018/03/28でした
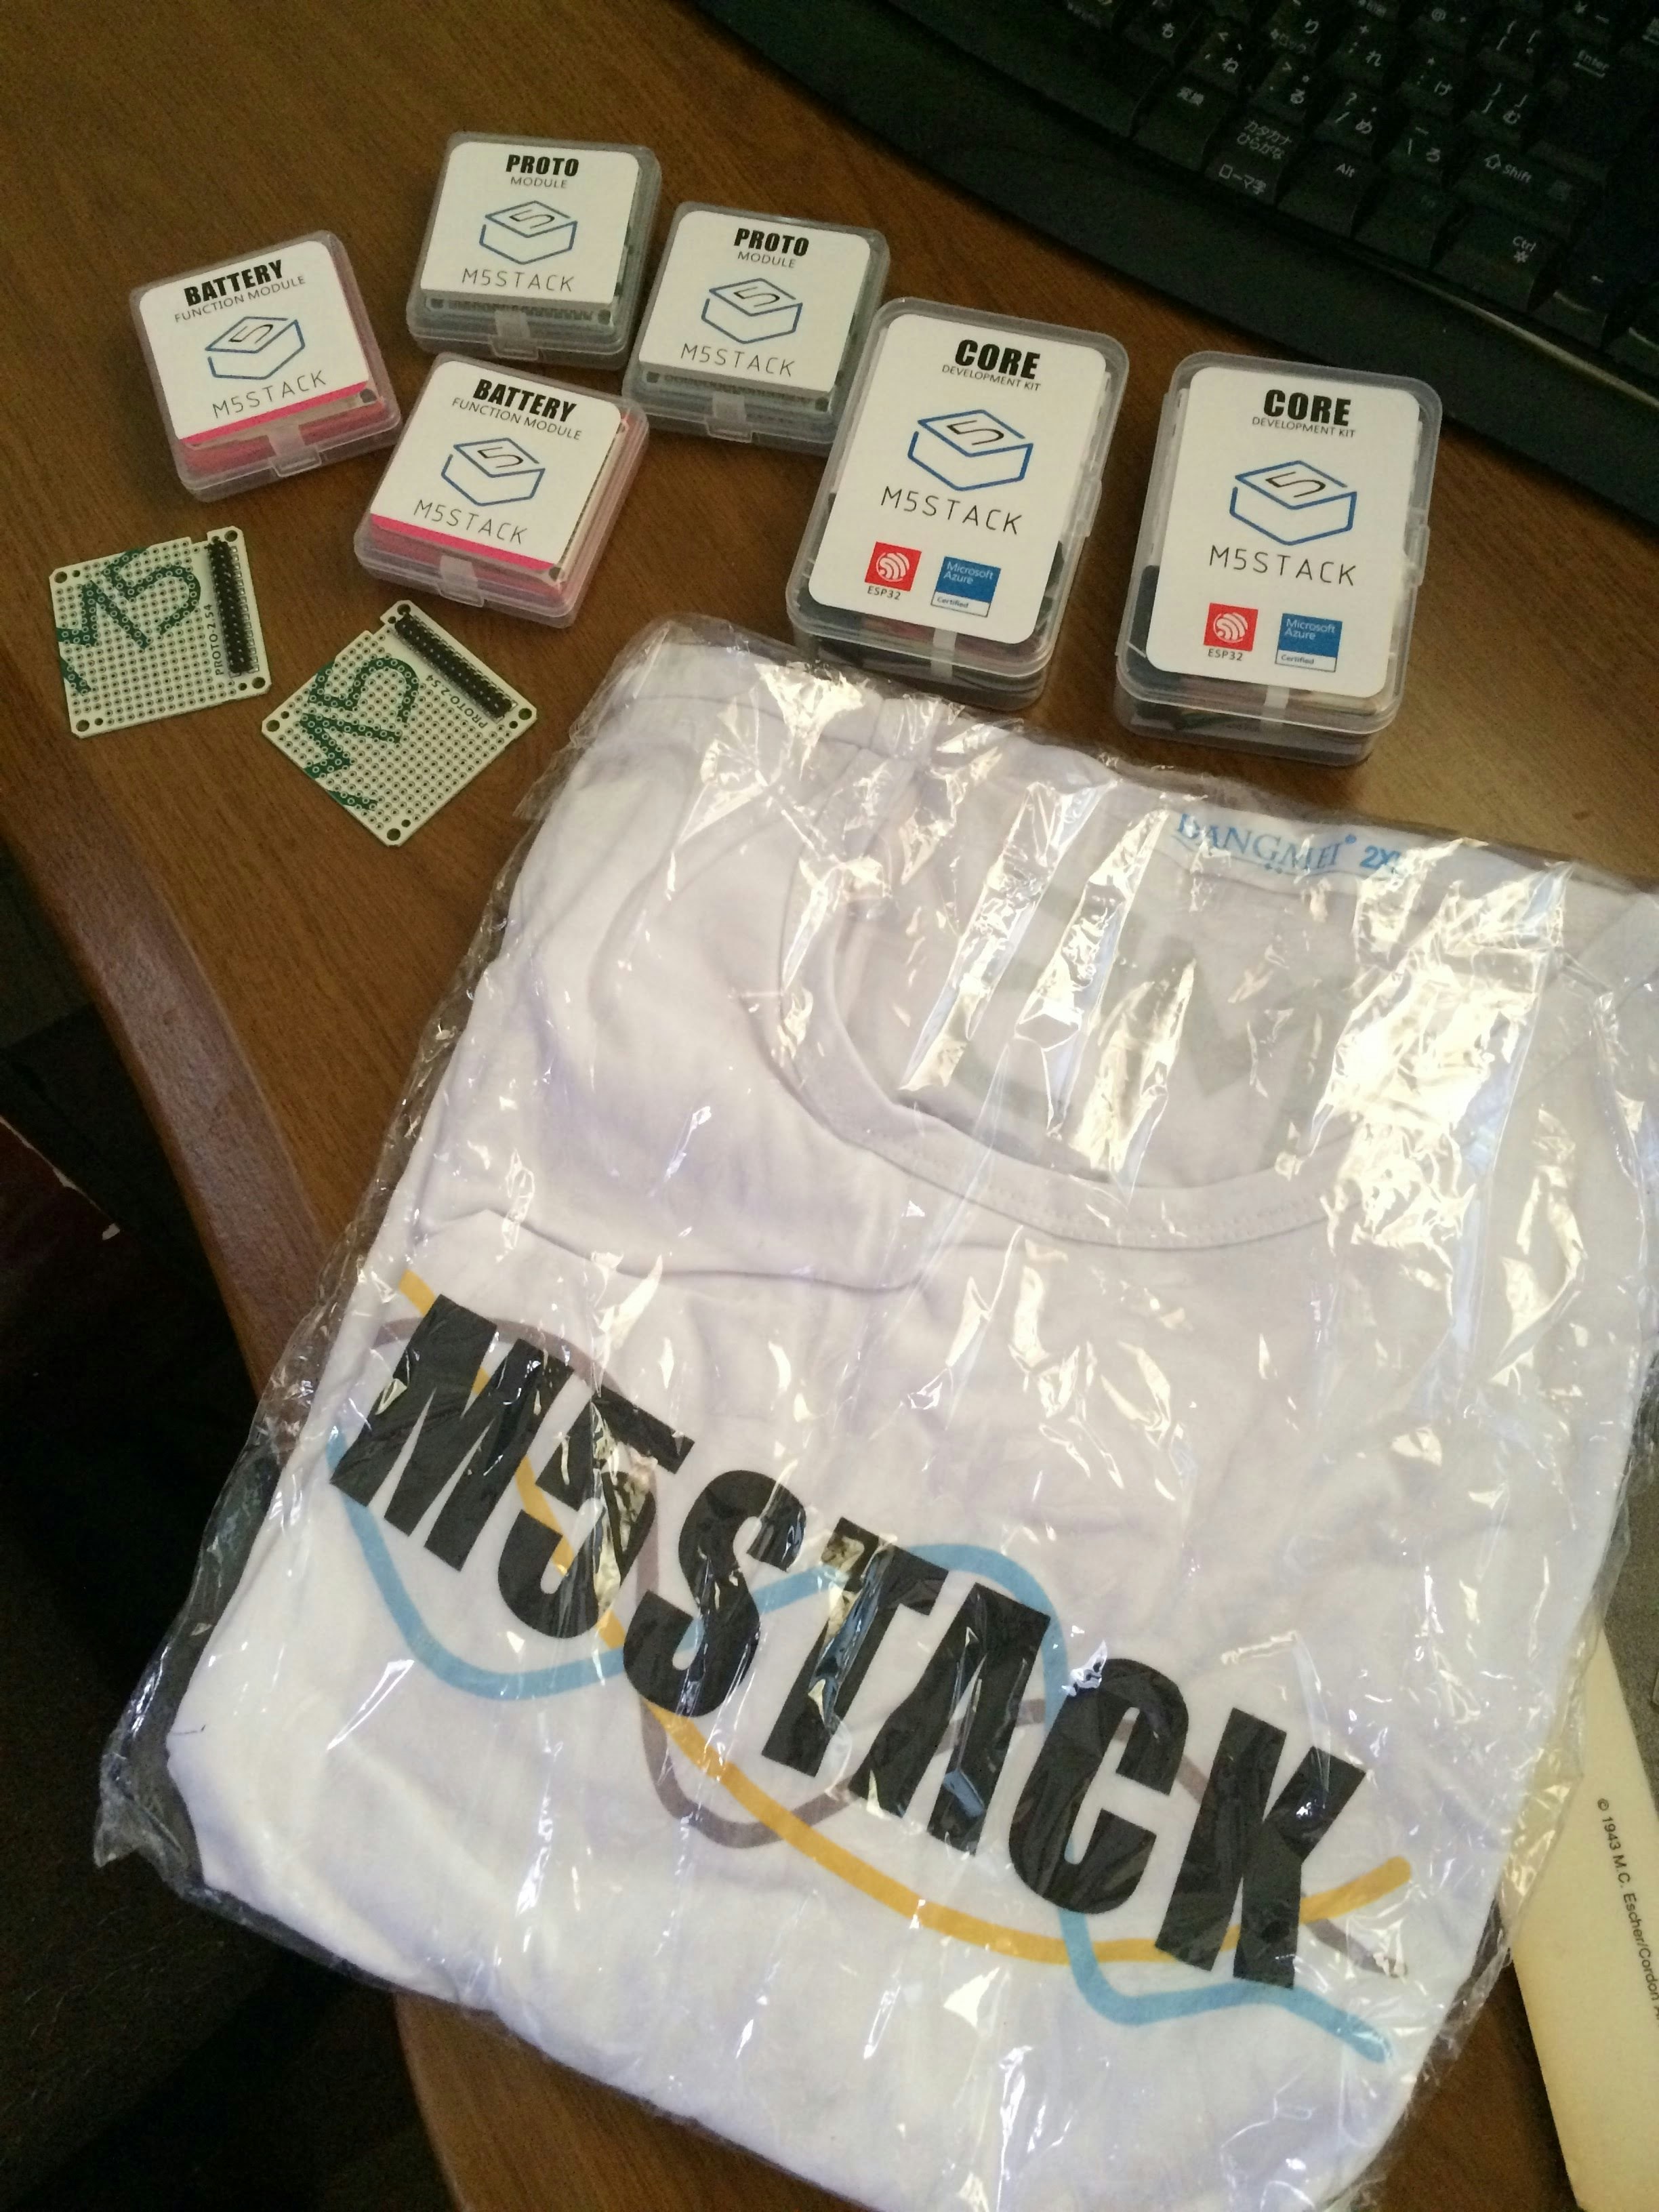
(届いたブツ一式)
準備
このへんを読みました
- http://pages.switch-science.com/letsiot/m5stack_arduino/
- https://github.com/espressif/arduino-esp32/blob/master/docs/arduino-ide/windows.md#steps-to-install-arduino-esp32-support-on-windows
- http://www.m5stack.com/assets/docs/index.html#getting-started
Gitをインストールする
- https://qiita.com/sugasaki/items/3d8e01dc9bb492edad66
- バージョンは 2.16.2。インストールは初期値のまま進めます。
TurtoiseGitをインストールする
- バージョンは 2.6.0
- https://tortoisegit.org/download/
- (Googleドライブ上にインストーラをダウンロードするとなぜかインストーラがファイルを見つけられずにインストールが止まってしまうので別のフォルダにコピーしました)
環境構築
- 基本、このページの通りに進めました
- https://github.com/espressif/arduino-esp32/blob/master/docs/arduino-ide/windows.md#steps-to-install-arduino-esp32-support-on-windows
Arduino1.8.5をインストールする
- https://www.arduino.cc/en/Main/Software
- zipをダウンロードして展開します
- ここでいったんArduinoを起動して、各設定ファイルの場所を確認しておきます
- スケッチファイルの場所
- C:\Users\hogehoge\Documents\Arduino
- 設定ファイルの場所
- C:\Users\hogehoge\AppData\Local\Arduino15\preferences.txt
Arduino ESP32 Supportのインストール
- TurtoiseGitを使って、git cloneします(recursiveにチェックを入れる)
URL = https://github.com/espressif/arduino-esp32.git
clone先 = C:\Users\hogehoge\Documents\Arduino\hardware\espressif\esp32
-
この時、gitクライアントが古いとエラーが出て進みません
-
esp32フォルダを右クリックして「git bash here」する
-
次のコマンドを実行する
git submodule update --init --recursive
- get.exeを実行する(ダウンロードが走る)
- C:\Users\hogehoge\Documents\Arduino\hardware\espressif\esp32\tools\get.exe
- 必要なファイルをダウンロードして展開してくれます
ボードライブラリのインストール(不要かも・・・)
- Arduinoを起動し、「ボードライブラリ-ライブラリを管理」を選択します
- 検索ウィンドウに「m5stack」と入力して検索します
- 結果、2つのライブラリが見つかるのでインストールします
M5Stack 0.1.3--->0.1.6
M5Stack-SD-Updater 0.1.0
- これらのライブラリはC:\Users\hogehoge\AppData\Local\Arduino15\staging\librariesにインストールされるようです。
シリアルドライバをインストールする
- http://www.m5stack.com/assets/docs/index.html
- https://www.silabs.com/products/development-tools/software/usb-to-uart-bridge-vcp-drivers
- universal版 10.1.1はインストールするなと書いてあるのでその通りに、CP210x_Windows_Drivers.zipをダウンロードしてインストールしました
内蔵Flashのスケッチ容量の調整(拡大)
- この状態でBLEとM5Stackを使おうとすると1.3Mのスケッチ容量をオーバーしてしまいます
- M5Stackをincludeしない状態ですでに93%を消費しています
最大1310720バイトのフラッシュメモリのうち、スケッチが1227845バイト(93%)を使っています。
最大294912バイトのRAMのうち、グローバル変数が46628バイト(15%)を使っていて、ローカル変数で248284バイト使うことができます。
-
そこで、2つの設定ファイルを修正してスケッチ容量を拡大します
-
(1)パーティション設定ファイルの修正
-
C:\Users\hogehoge\Documents\Arduino\hardware\espressif\esp32\tools\partitions\default.csvの修正
-
このへんを参考に、https://github.com/espressif/arduino-esp32/issues/703
-
次のようにしました
- 1.3MB--->1.8MBに拡張します
#Name, Type, SubType, Offset, Size, Flags
nvs, data, nvs, 0x9000, 0x5000,
otadata, data, ota, 0xe000, 0x2000,
app0, app, ota_0, 0x10000, 0x1C0000,
app1, app, ota_1, 0x1D0000,0x1C0000,
eeprom, data, 0x99, 0x390000,0x1000,
spiffs, data, spiffs, 0x391000,0x6F000,
- (2)ボードファイルの修正
- C:\Users\hogehoge\Documents\Arduino\hardware\espressif\esp32\board.txtの修正
- M5Stackのボードの設定箇所を探して(たぶんファイルの下のほうにあると思います)次のように修正します
#m5stack-core-esp32.upload.maximum_size=1310720
m5stack-core-esp32.upload.maximum_size=1835008
- 結果、こんな感じになりました(下記スケッチをビルドした状態)
最大1835008バイトのフラッシュメモリのうち、スケッチが1307573バイト(71%)を使っています。
最大294912バイトのRAMのうち、グローバル変数が47740バイト(16%)を使っていて、ローカル変数で247172バイト使うことができます。
ビルドの高速化
- http://nagayasu-shinya.com/arduino-buildpath-fix/ を参考にしてビルド時間が短くなるようにしました
- C:\Users\hogehoge\AppData\Local\Arduino15\preferences.txt
build.path=C:\Users\hogehoge\AppData\Local\Temp\arduino_build
動作確認
- 次のスケッチを使いました(Arduinoのサンプルスケッチに少し手を加えただけです)
/**
 * A BLE client example that is rich in capabilities.
 */

# include "BLEDevice.h"
//#include "BLEScan.h"

# include <M5Stack.h>

// The remote service we wish to connect to.
static BLEUUID serviceUUID("91bad492-b950-4226-aa2b-4ede9fa42f59");
// The characteristic of the remote service we are interested in.
static BLEUUID    charUUID("0d563a58-196a-48ce-ace2-dfec78acc814");

static BLEAddress *pServerAddress;
static boolean doConnect = false;
static boolean connected = false;
static BLERemoteCharacteristic* pRemoteCharacteristic;

int lines = 0;

static void notifyCallback(
  BLERemoteCharacteristic* pBLERemoteCharacteristic,
  uint8_t* pData,
  size_t length,
  bool isNotify) {
    Serial.print("Notify callback for characteristic ");
    Serial.print(pBLERemoteCharacteristic->getUUID().toString().c_str());
    Serial.print(" of data length ");
    Serial.println(length);
}

bool connectToServer(BLEAddress pAddress) {
    Serial.print("Forming a connection to ");
    Serial.println(pAddress.toString().c_str());

    BLEClient*  pClient  = BLEDevice::createClient();
    Serial.println(" - Created client");

    // Connect to the remove BLE Server.
    pClient->connect(pAddress);
    Serial.println(" - Connected to server");

    // Obtain a reference to the service we are after in the remote BLE server.
    BLERemoteService* pRemoteService = pClient->getService(serviceUUID);
    if (pRemoteService == nullptr) {
      Serial.print("Failed to find our service UUID: ");
      Serial.println(serviceUUID.toString().c_str());
      return false;
    }
    Serial.println(" - Found our service");


    // Obtain a reference to the characteristic in the service of the remote BLE server.
    pRemoteCharacteristic = pRemoteService->getCharacteristic(charUUID);
    if (pRemoteCharacteristic == nullptr) {
      Serial.print("Failed to find our characteristic UUID: ");
      Serial.println(charUUID.toString().c_str());
      return false;
    }
    Serial.println(" - Found our characteristic");

    // Read the value of the characteristic.
    std::string value = pRemoteCharacteristic->readValue();
    Serial.print("The characteristic value was: ");
    Serial.println(value.c_str());

    pRemoteCharacteristic->registerForNotify(notifyCallback);
}
/**
 * Scan for BLE servers and find the first one that advertises the service we are looking for.
 */
class MyAdvertisedDeviceCallbacks: public BLEAdvertisedDeviceCallbacks {
 /**
   * Called for each advertising BLE server.
   */
  void onResult(BLEAdvertisedDevice advertisedDevice) {

    Serial.print("BLE Advertised Device found: ");
    Serial.println(advertisedDevice.toString().c_str());
    Serial.println(advertisedDevice.getRSSI());

    lines++;

    if(15 < lines ){
      M5.Lcd.fillScreen(TFT_BLACK);
      M5.Lcd.setCursor(0, 0);
      lines = 0;
    }

    M5.Lcd.print(advertisedDevice.getName().c_str());
    M5.Lcd.print(":");
    M5.Lcd.println(advertisedDevice.getRSSI());

    // We have found a device, let us now see if it contains the service we are looking for.
    if (advertisedDevice.haveServiceUUID() && advertisedDevice.getServiceUUID().equals(serviceUUID)) {

      //
      Serial.print("Found our device!  address: ");
      advertisedDevice.getScan()->stop();

      pServerAddress = new BLEAddress(advertisedDevice.getAddress());
      doConnect = true;

    } // Found our server
  } // onResult
}; // MyAdvertisedDeviceCallbacks


void setup() {
  Serial.begin(115200);
  Serial.println("Starting Arduino BLE Client application...");
  BLEDevice::init("");

  M5.begin();
  //M5.startupLogo();
  M5.Lcd.setBrightness(100);
  M5.Lcd.fillScreen(TFT_BLACK);
  M5.Lcd.setTextSize(2);

  M5.Lcd.println("RTLS Type-A 20180413");

  // Retrieve a Scanner and set the callback we want to use to be informed when we
  // have detected a new device.  Specify that we want active scanning and start the
  // scan to run for 30 seconds.
  BLEScan* pBLEScan = BLEDevice::getScan();
  pBLEScan->setAdvertisedDeviceCallbacks(new MyAdvertisedDeviceCallbacks());
  pBLEScan->setActiveScan(true);
//  pBLEScan->start(10);
} // End of setup.


// This is the Arduino main loop function.
void loop() {

  // If the flag "doConnect" is true then we have scanned for and found the desired
  // BLE Server with which we wish to connect.  Now we connect to it.  Once we are
  // connected we set the connected flag to be true.
  if (doConnect == true) {
    if (connectToServer(*pServerAddress)) {
      Serial.println("We are now connected to the BLE Server.");
      connected = true;
    } else {
      Serial.println("We have failed to connect to the server; there is nothin more we will do.");
    }
    doConnect = false;
  }

  // If we are connected to a peer BLE Server, update the characteristic each time we are reached
  // with the current time since boot.
  if (connected) {
    String newValue = "Time since boot: " + String(millis()/1000);
    Serial.println("Setting new characteristic value to \"" + newValue + "\"");

    // Set the characteristic's value to be the array of bytes that is actually a string.
    pRemoteCharacteristic->writeValue(newValue.c_str(), newValue.length());
  }

  BLEScan* pBLEScan = BLEDevice::getScan();
//  pBLEScan->setAdvertisedDeviceCallbacks(new MyAdvertisedDeviceCallbacks());
//  pBLEScan->setActiveScan(true);
  pBLEScan->start(1);

  delay(1000); // Delay a second between loops.
} // End of loop
- かんじんなところは下の三行です
- なんとなくそれなりの値が取れているのでまずは良しとします
M5.Lcd.print(advertisedDevice.getName().c_str());
M5.Lcd.print(":");
M5.Lcd.println(advertisedDevice.getRSSI());
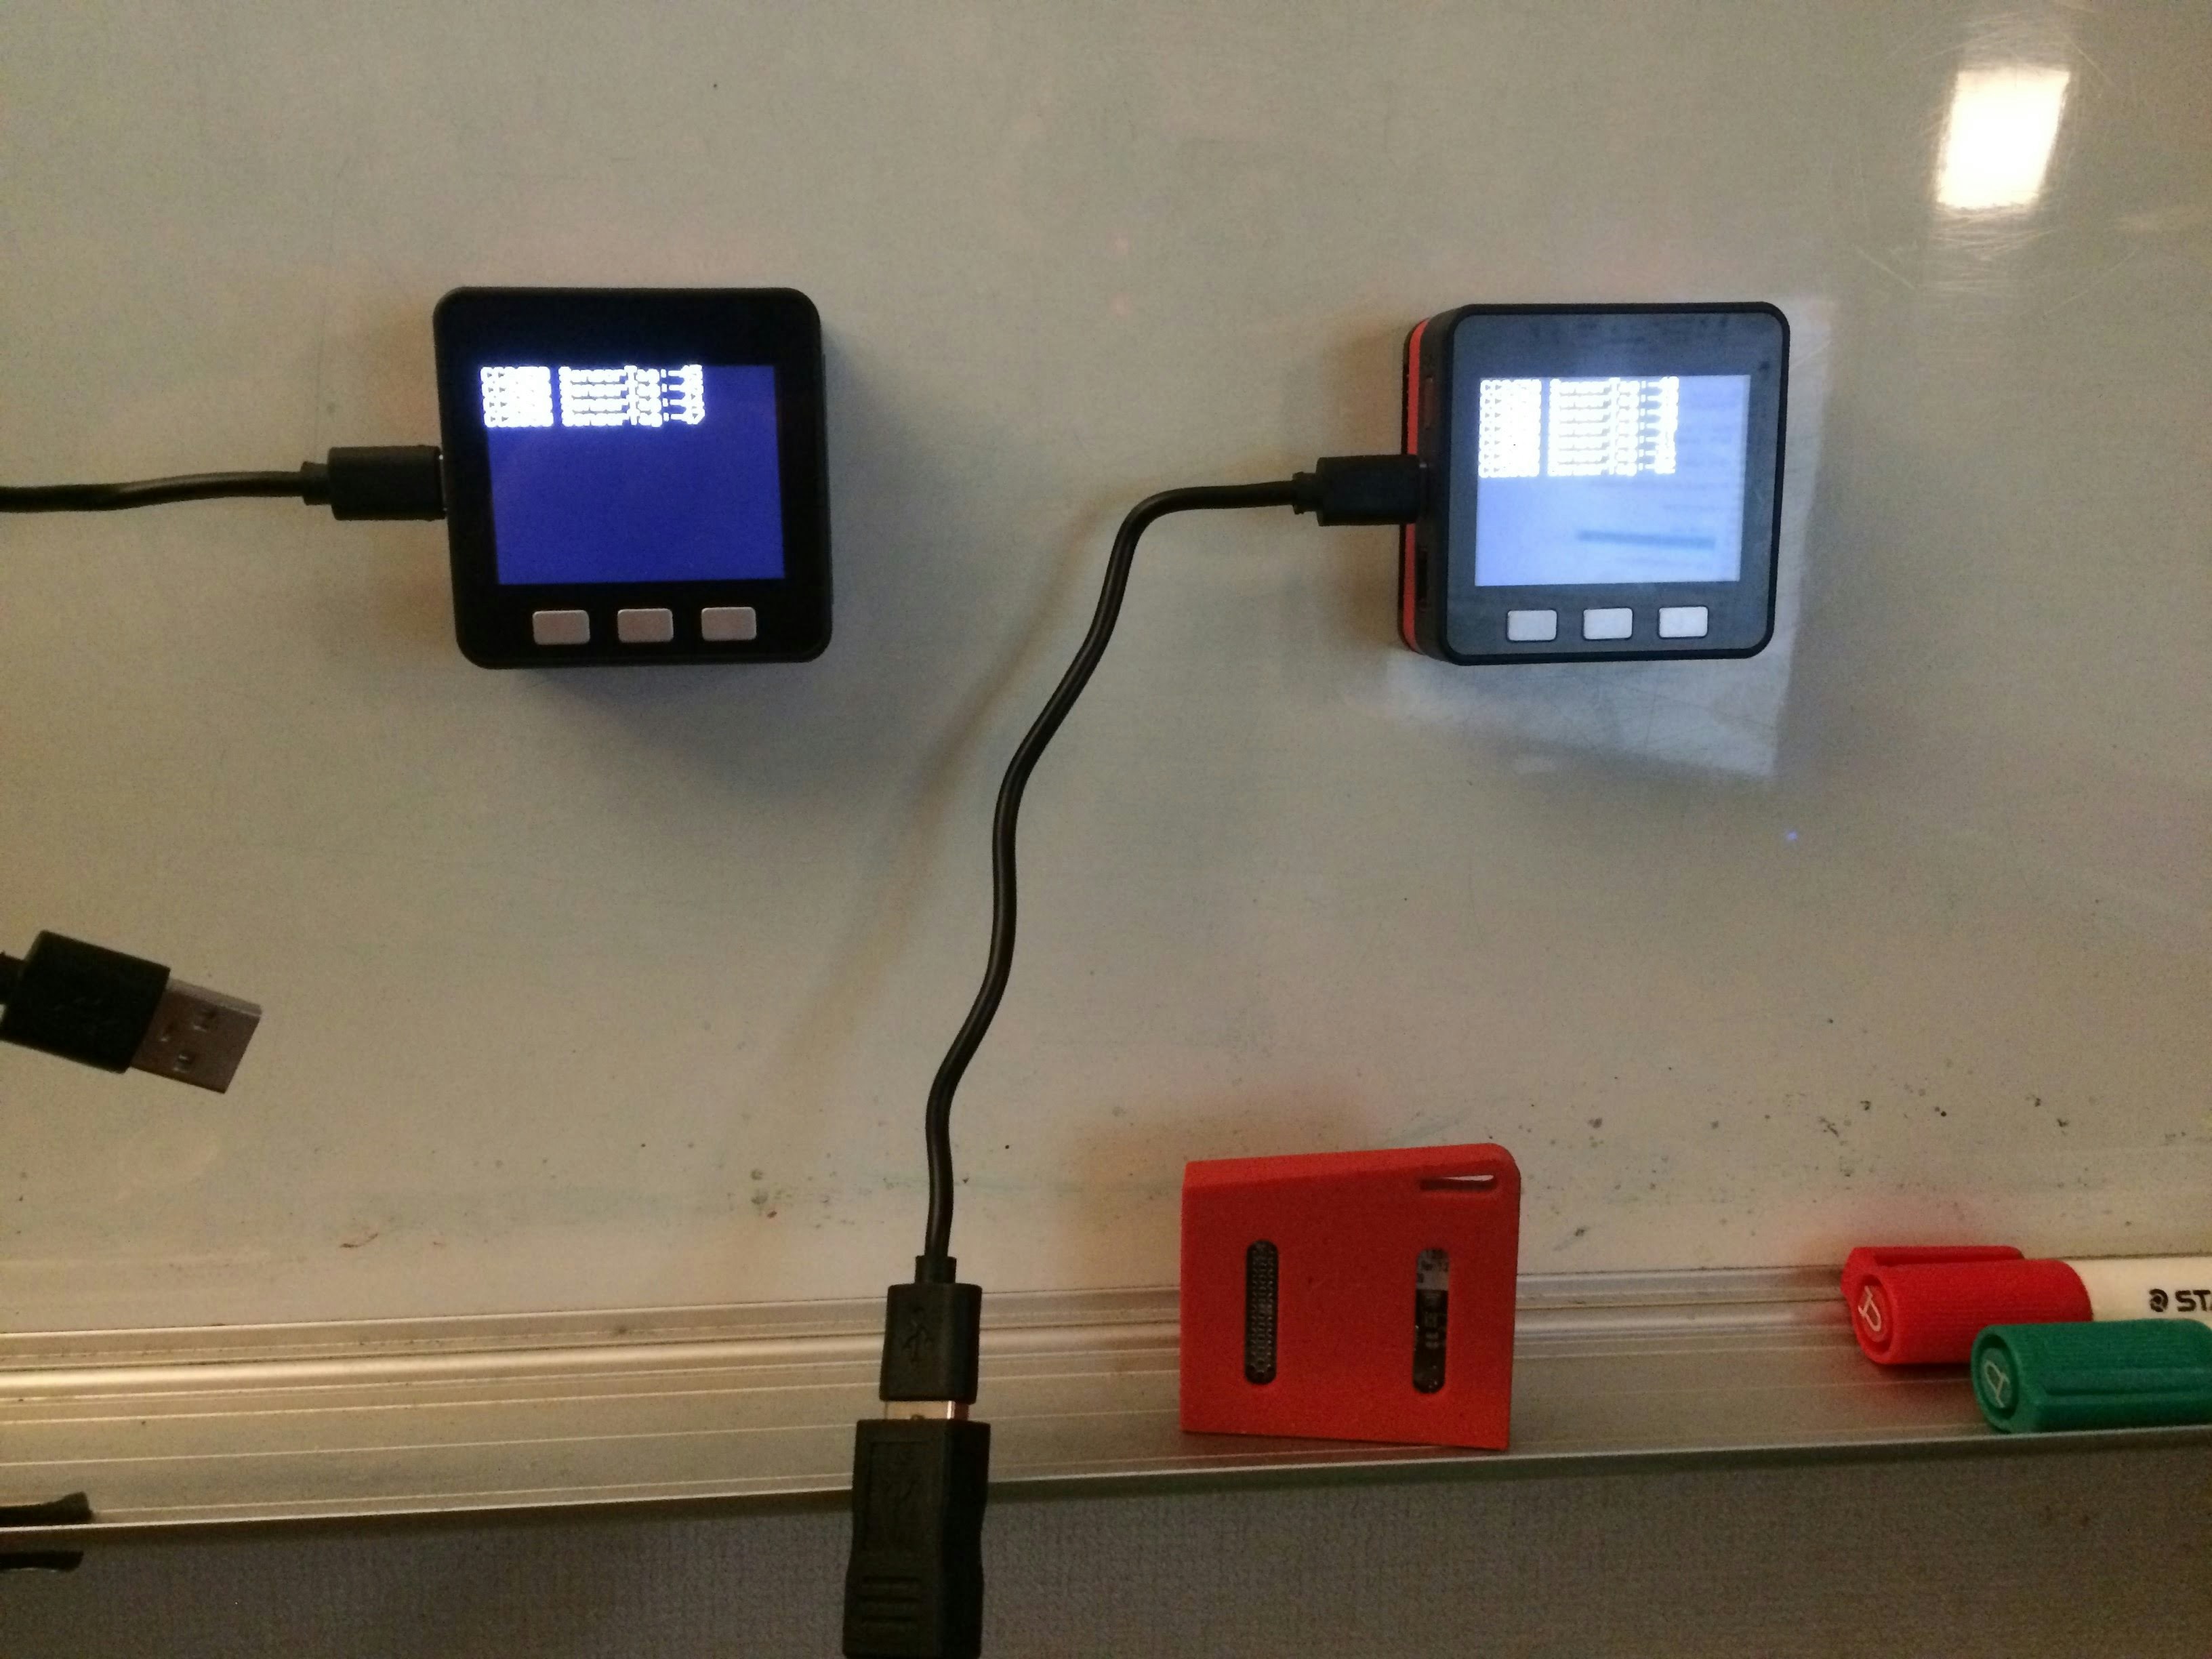
(上記スケッチを動かしているところ。SensorTagでテストしています)
おわりに
- M5StackはWi-Fi、BLE、ボタン、LCDがまとまっていてとても使いやすいです
- 次はWi-Fi経由でBLEのデータをクラウドへ送信してみようと思います
- プレゼントのTシャツは2XLなのに小さくて着られませんでした(^^;