この記事はBoostlogの翻訳記事です。
このチュートリアルでは、Pythonで簡単なDiscordBotを作成する方法を学びます。
Discordは、ゲーマーがターゲットのSkypeのようなサービスです。
Discordでは、複数のサーバーに参加することができます。
これらのサーバーには多くのbotがあることに気がつきました。
これらのbotは、音楽を演奏したり、簡単なチャットのモデレートまで、多くのことを行うことができます。
そんなbotに魅了されたので、Pythonを使って書くことにしました。
設定
初めにbotのアカウントを作成します。
DiscordAppに行き、新しいアプリを作成してください。
botに名前をつけ、プロフィール画像を貼ってください。
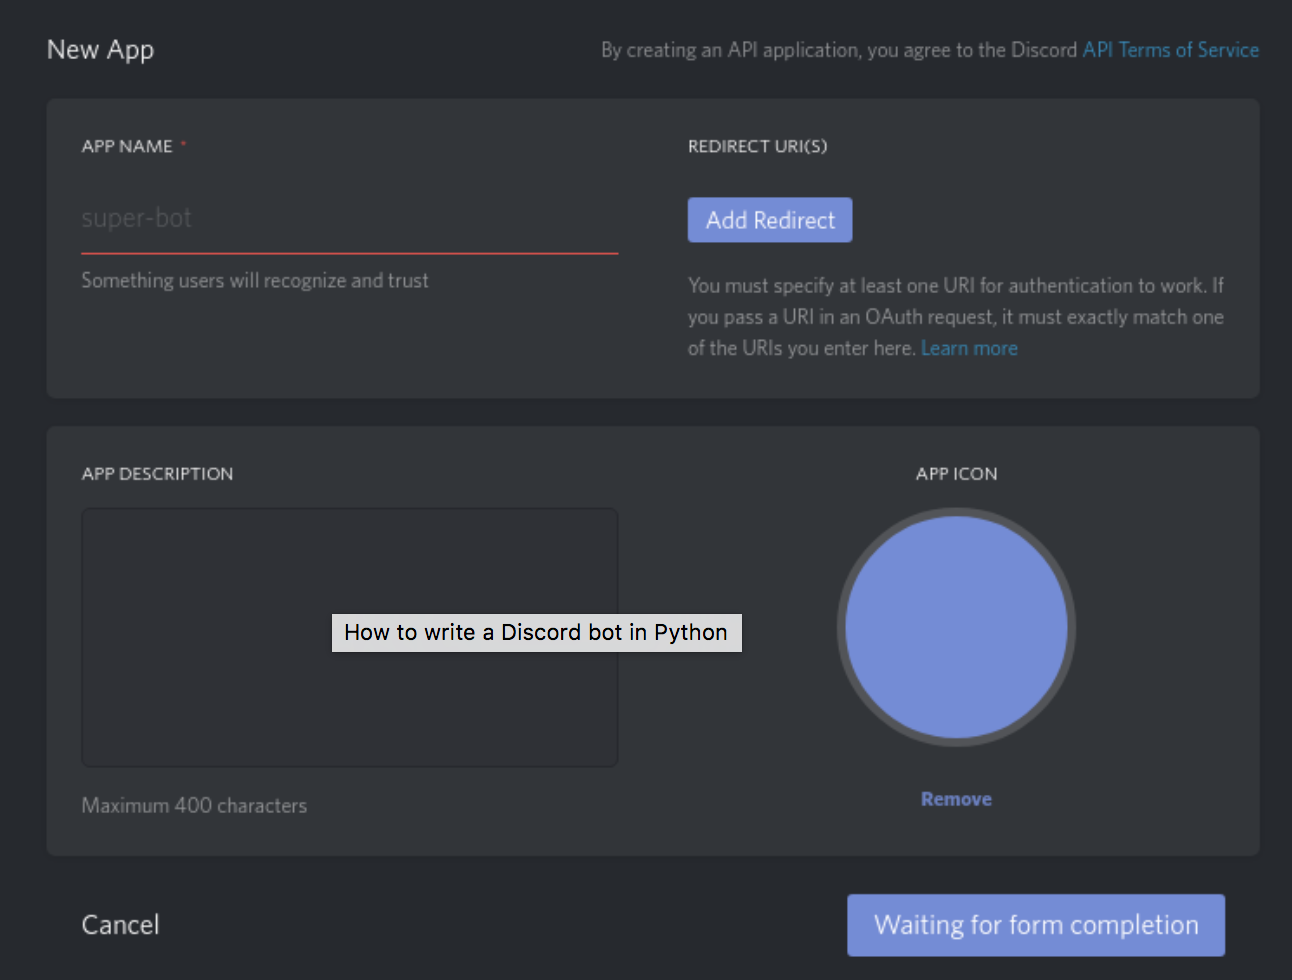
下にスクロールして「Create a Bot User」をクリックします。
完了したら、「secret bot token」を取得できます。

クリックして 「bot token」を表示することができます。
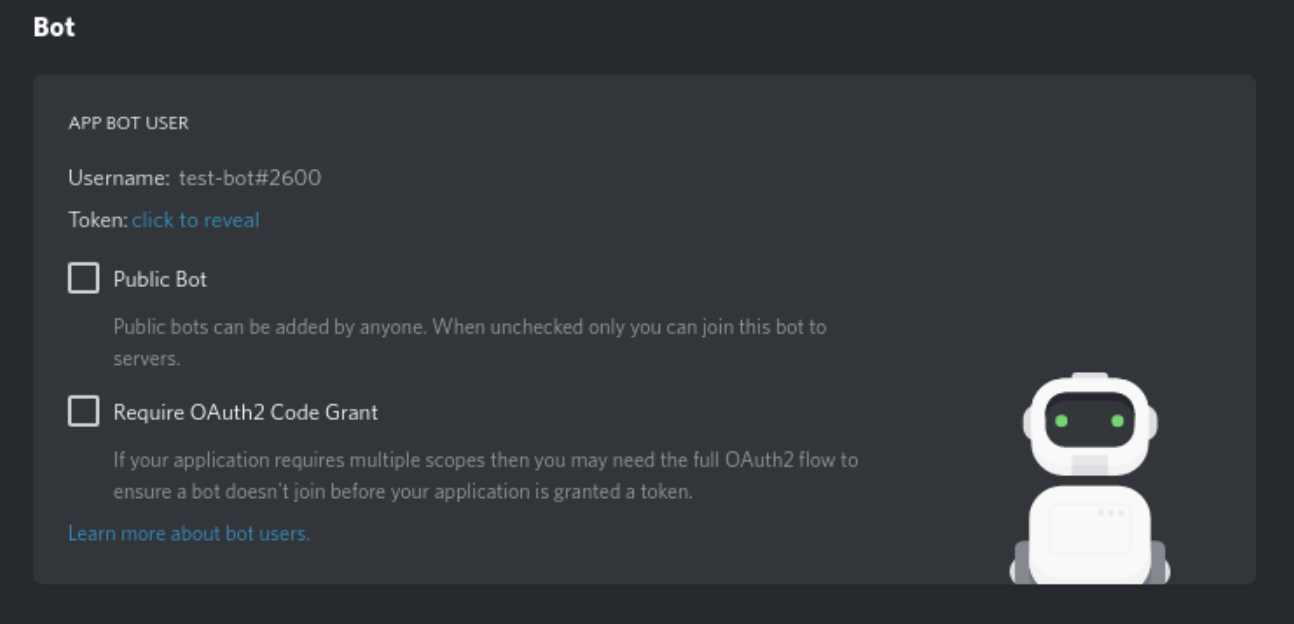
botを乗っ取られるので、このtokenは誰にも共有しないでください。
(記事を書いた後、画像のtokenは変更します。)
コード
前提条件
Discord.py (rewrite)
discord.pyライブラリの書き換えバージョンをインストールします。
pipのdiscord.pyは管理されていないので、rewrite版のライブラリをインストールしてください。
$ python3 -m pip install -U https://github.com/Rapptz/discord.py/archive/rewrite.zip
使用しているdiscord.pyのバージョンの確認
>>> import discord
>>> discord.__version__
'1.0.0a'
botの作成に移りましょう。
import discord
from discord.ext import commands
ModuleNotFoundErrorまたはImportErrorを指定すると、discord.pyのインストールに問題が発生します。
bot = commands.Bot(command_prefix='$', description='A bot that greets the user back.')
command_prefixとは、コマンドを呼び出すために最初にメッセージの内容が含まなければならないものです。
@bot.event
async def on_ready():
    print('Logged in as')
    print(bot.user.name)
    print(bot.user.id)
    print('------')
on_ready() はクライアントがDiscordから受信したデータの準備を完了したときに呼び出されます。
通常はbotのログインが成功した後に呼ばれます。
次に、botにいくつかの機能を追加しましょう。
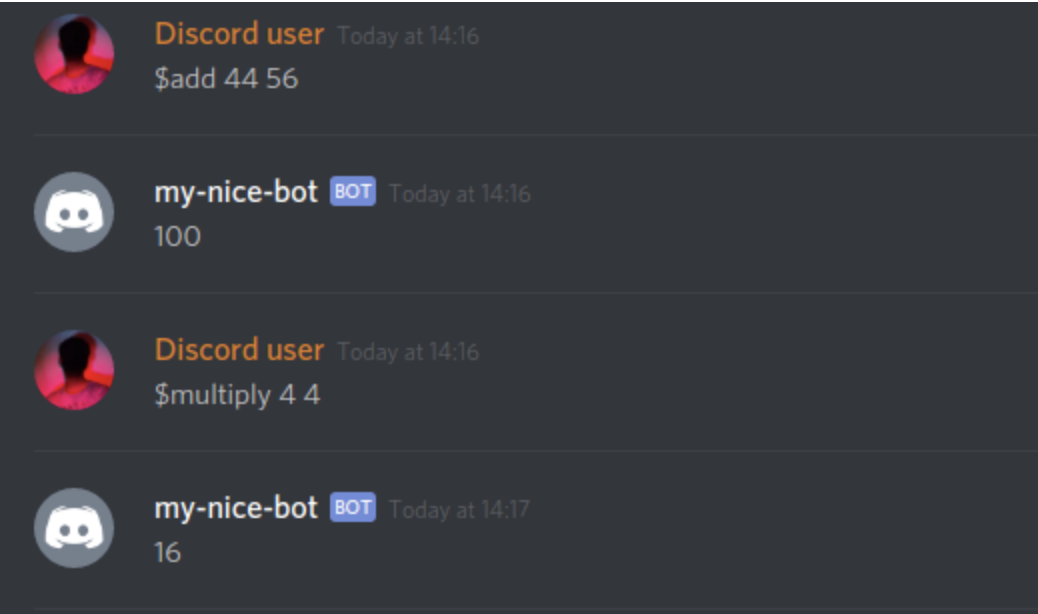
@bot.command()
async def add(ctx, a: int, b: int):
await ctx.send(a+b)
@bot.command()
async def multiply(ctx, a: int, b: int):
await ctx.send(a*b)
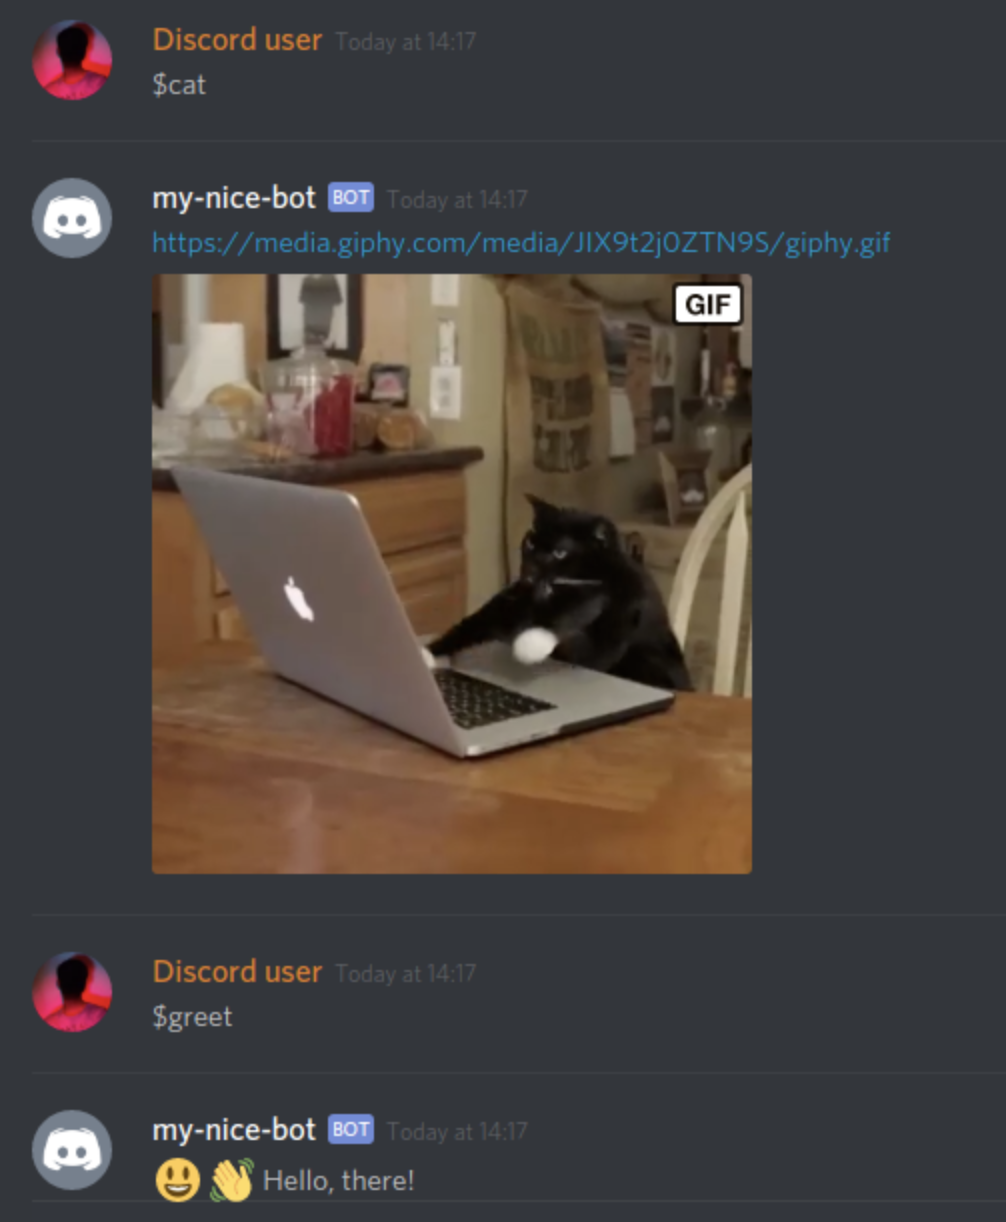
@bot.command()
async def greet(ctx):
await ctx.send(":smiley: :wave: Hello, there!")
@bot.cmmands()
async def cat(ctx):
await ctx.send("https://media.giphy.com/media/JIX9t2j0ZTN9S/giphy.gif")
実行する前に、サーバーにbotを招待する必要があります。
このOAuth2のURLは、botの設定ページから生成できます。
DiscordAppに行き、botのプロフィールをクリックしてoAuth2のURLを生成してください。

ここで、botに与える権限を決めます。
使用するために、メッセージを送信するための許可が必要です。
以下をコマンドラインで実行して、botを実行します。
$ python bot.py

botを試して見ます。
DiscordBotを作る際に良いリファレンスがあります。
こちらを読むことをお勧めします。
Have an info command.
It should provide information about the bot such as what framework it is using and the used version, help command and, most importantly, who made it.
@bot.command()
async def info(ctx):
    embed = discord.Embed(title="nice bot", description="Nicest bot there is ever.", color=0xeee657)

    # give info about you here
    embed.add_field(name="Author", value="<YOUR-USERNAME>")

    # Shows the number of servers the bot is member of.
    embed.add_field(name="Server count", value=f"{len(bot.guilds)}")

    # give users a link to invite thsi bot to their server
    embed.add_field(name="Invite", value="[Invite link](<insert your OAuth invitation link here>)")

    await ctx.send(embed=embed)

The discord.py generates an help command automatically.
So, to write our own, we would first have to remove the one given by it.
discord.pyは自動的にhelpコマンドを生成します。
自分自身で書くために、はじめにこれを削除します。
bot.remove_command('help')
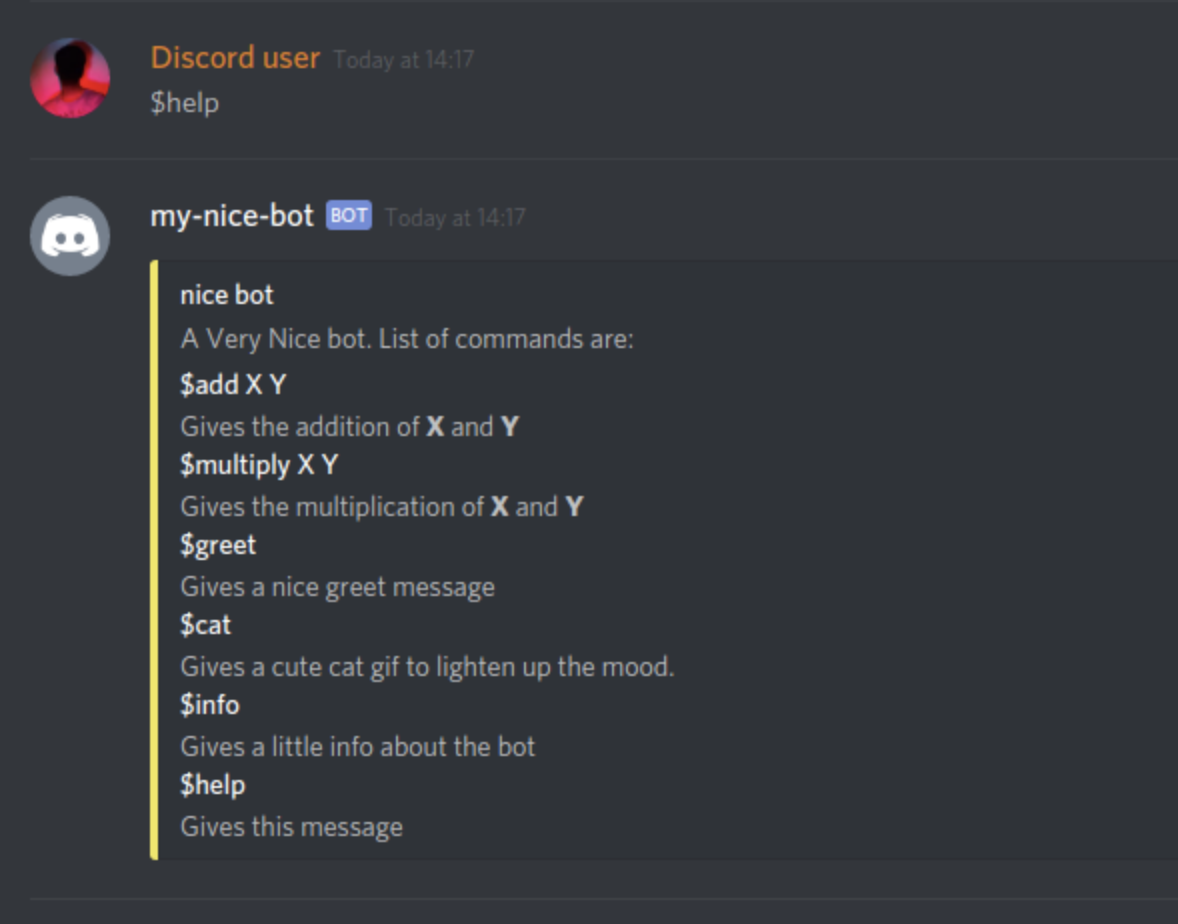
これでhelpコマンドを書くことができます。
ここではbotの使用法について説明します。
@bot.command()
async def help(ctx):
    embed = discord.Embed(title="nice bot", description="A Very Nice bot. List of commands are:", color=0xeee657)

    embed.add_field(name="$add X Y", value="Gives the addition of **X** and **Y**", inline=False)
    embed.add_field(name="$multiply X Y", value="Gives the multiplication of **X** and **Y**", inline=False)
    embed.add_field(name="$greet", value="Gives a nice greet message", inline=False)
    embed.add_field(name="$cat", value="Gives a cute cat gif to lighten up the mood.", inline=False)
    embed.add_field(name="$info", value="Gives a little info about the bot", inline=False)
    embed.add_field(name="$help", value="Gives this message", inline=False)

    await ctx.send(embed=embed)
Pythonで書かれたDiscordBotを作成できました。
ホスティング
今のところは、botはスクリプトを実行するまでオンラインになっているだけです。
botを常に実行したい場合は、オンラインでホストする必要があります。
また、RaspberryPiなどでローカルにホストすることもできます。
ホスティングサービスは無料のもの(Heroku's Free Tier)から有料(Digital Ocean)のものもあります。
私は無料のHerokuでbotを走らせてますが、これまでどんな問題も発生してません。
ソースコード
import discord
from discord.ext import commands

bot = commands.Bot(command_prefix='$')

@bot.event
async def on_ready():
    print('Logged in as')
    print(bot.user.name)
    print(bot.user.id)
    print('------')

@bot.command()
async def add(ctx, a: int, b: int):
    await ctx.send(a+b)

@bot.command()
async def multiply(ctx, a: int, b: int):
    await ctx.send(a*b)

@bot.command()
async def greet(ctx):
    await ctx.send(":smiley: :wave: Hello, there!")

@bot.command()
async def cat(ctx):
    await ctx.send("https://media.giphy.com/media/JIX9t2j0ZTN9S/giphy.gif")

@bot.command()
async def info(ctx):
    embed = discord.Embed(title="nice bot", description="Nicest bot there is ever.", color=0xeee657)

    # give info about you here
    embed.add_field(name="Author", value="<YOUR-USERNAME>")

    # Shows the number of servers the bot is member of.
    embed.add_field(name="Server count", value=f"{len(bot.guilds)}")

    # give users a link to invite thsi bot to their server
    embed.add_field(name="Invite", value="[Invite link](<insert your OAuth invitation link here>)")

    await ctx.send(embed=embed)

bot.remove_command('help')

@bot.command()
async def help(ctx):
    embed = discord.Embed(title="nice bot", description="A Very Nice bot. List of commands are:", color=0xeee657)

    embed.add_field(name="$add X Y", value="Gives the addition of **X** and **Y**", inline=False)
    embed.add_field(name="$multiply X Y", value="Gives the multiplication of **X** and **Y**", inline=False)
    embed.add_field(name="$greet", value="Gives a nice greet message", inline=False)
    embed.add_field(name="$cat", value="Gives a cute cat gif to lighten up the mood.", inline=False)
    embed.add_field(name="$info", value="Gives a little info about the bot", inline=False)
    embed.add_field(name="$help", value="Gives this message", inline=False)

    await ctx.send(embed=embed)

bot.run('NDE0MzIyMDQ1MzA0OTYzMDcy.DWl2qw.nTxSDf9wIcf42te4uSCMuk2VDa0')