概要
- Inkbird IBS-TH1からbluetoothでデータを取得する
- 取得したデータをAmbientに送付する
背景
うさぎを飼っています。
うさぎは暑さに弱いので夏場は室温をキチンと制御することが必要です。そのためにInkbird IBS-TH1を購入して室温の状況を記録していました。
 「エアコンの設定がxxx度だと、室温のログはこのぐらいだった。じゃぁ明日はこれぐらいにしよう」というふうにエアコンの適正温度の調整に役立ててます。
ただこれでは、エアコンが故障した場合に気づく事ができません。もし、夏場エアコンが故障して室温が上昇したら、うさぎは?と思うと仕事に手がつきません。
ということで、仕事先でも室温を確認できる仕組みを作ってみました。
仕組み
webで調べていると、NodejsでInkbird IBS-TH1 (BLE温湿度センサー) から温度湿度情報を得るを発見。手元のrasberry piがあるので、リアルタイムにデータの取得はできそうです。
あとは、これをクラウドに保存して表示するだけです。
最初、データの表示は、google spreadsheetを使おうと思っていたのですが、とAmbient が簡単そうだったので今回はこちらを使いました。
最終的に以下の仕組みになりました
- IBS-TH1 → rasberry pi で温度、湿度データ10分ごとに取得
- 取得した温度、湿度データをAmbientへ送信して保存
- 1と2を定期ジョブ(cron)にする
環境
- Inkbird IBS-TH1 plus (miniでもOK)
- rasberry pi 3b
- BlueZがインストール済
- python 2.7 (3でも多分大丈夫)
手順
IBS-THI → rasberry pi で温度、湿度データ取得
InkbirdのMACアドレス取得
bluetoothで情報を得るためには機器(今回はIBS-TH1)のMACアドレスが必要です。scanしてもいいのですが、デバイス名が表示されないこともあるので、一番簡単なのは、Inkbirdのアプリで接続する時に表紙される情報をメモすることです。
実際は下記の通りです。
機器登録するときに画面下部に出る(赤矢印)MACアドレスをメモしてください。

Inkbird IBS-TH1 からデータを取得してみる
以下はすべて、raberry piでの操作です。
(BlueZをインストールしておいてください。インストールの仕方はwebに紹介記事がたくさんあるので割愛します。)
まず、gatttoolを使って、IBS-TH1からデータを取得してみましょう。
下記でhandleを指定して取得できる情報の一覧が表示されます。
gatttool -b XX:XX:XX:XX:XX:XX --characteristics
この中に目的とするデータがあるのですが・・・ただ、これだけだとさっぱりわからない。
ただ、こちらにhandle情報が書かれていました。これさえればOKです。
このhandleをもとに温度データを取得してみます。
gatttool -b XX:XX:XX:XX:XX:XX --char-read --handle=0x002d
Characteristic value/descriptor: cf 0a ee 17 00 1c 0d
取得できました!
cf 0a ee 17 00 1c 0d というところが温度、湿度データです。
これを、実際に読めるデータに変換します。
前述のサイトによると
c8 0a uint16 Little Endian temperature value * 100
a8 16 uint16 Little Endian humidity value * 100
と、あります。
つまり、1バイト目と2バイト目が温度、3バイト目と4バイト目が湿度のデータです。さらに little endianで格納されているので下記の通り変換されます。
- 温度は
0acfが 2767。なので、温度は 100で割った値、すなわち27.67度 - 湿度が
17eeが 6126。なので、湿度は 100で割った値、すなわち 61.26%
pythonで取得してみる
pythonを使って、情報を取得してみます。 bluepy ライブラリを使います。 (事前にblueZのインストールが必要です!)
下記のコードを実行してください。ただいsm PERIPHERAL_MAC_ADDRESS はご自身のIBS-TH1のMACアドレスを入れてください。
main() を実行すると温度と湿度が表示されるはずです。
from bluepy import btle
import binascii


PERIPHERAL_MAC_ADDRESS = 'XX:XX:XX:XX:XX:XX'
HANDLE = 0x002d


def main():
    peripheral = btle.Peripheral(PERIPHERAL_MAC_ADDRESS)
    characteristic = get_characteristic(peripheral, HANDLE)
    temperature = characteristic_to_temperature(characteristic)
    humidity = characteristic_to_humidity(characteristic)
    print(temperature)
    print(humidity)


def get_characteristic(peripheral, handle):
    return peripheral.readCharacteristic(handle)


def characteristic_to_temperature(characteristic):
    temp_hex = binascii.b2a_hex(characteristic[1]) + binascii.b2a_hex(characteristic[0])
    return float(int(temp_hex, 16)) / 100


def characteristic_to_humidity(characteristic):
    humid_hex = binascii.b2a_hex(characteristic[3]) + binascii.b2a_hex(characteristic[2])
    return float(int(humid_hex, 16)) / 100
ちょっと解説すると
peripheral = btle.Peripheral(PERIPHERAL_MAC_ADDRESS)
ここで、デバイスに接続します。
次に、handleを指定してデータを読み出します。
peripheral.readCharacteristic(handle)
あとは、下記で読み出したデータから温度数値と湿度数値へ変換を行います。考え方は前記のデータ取得の箇所と同じです。
def characteristic_to_temperature(characteristic):
    temp_hex = binascii.b2a_hex(characteristic[1]) + binascii.b2a_hex(characteristic[0])
    return float(int(temp_hex, 16)) / 100


def characteristic_to_humidity(characteristic):
    humid_hex = binascii.b2a_hex(characteristic[3]) + binascii.b2a_hex(characteristic[2])
    return float(int(humid_hex, 16)) / 100
取得した温度、湿度データをAmbientへ送信して保存
ユーザー登録
まずAmbientでユーザー登録します。

普通にメールアドレスとパスワードなどを入力すると確認メールが送信されるので、確認作業をすれば登録完了です。
チャネル作成
データを送信するためにチャネルを作成します。
チャネルを作るボタンを押すと即時にチャネルが追加されます。
設定を押します。
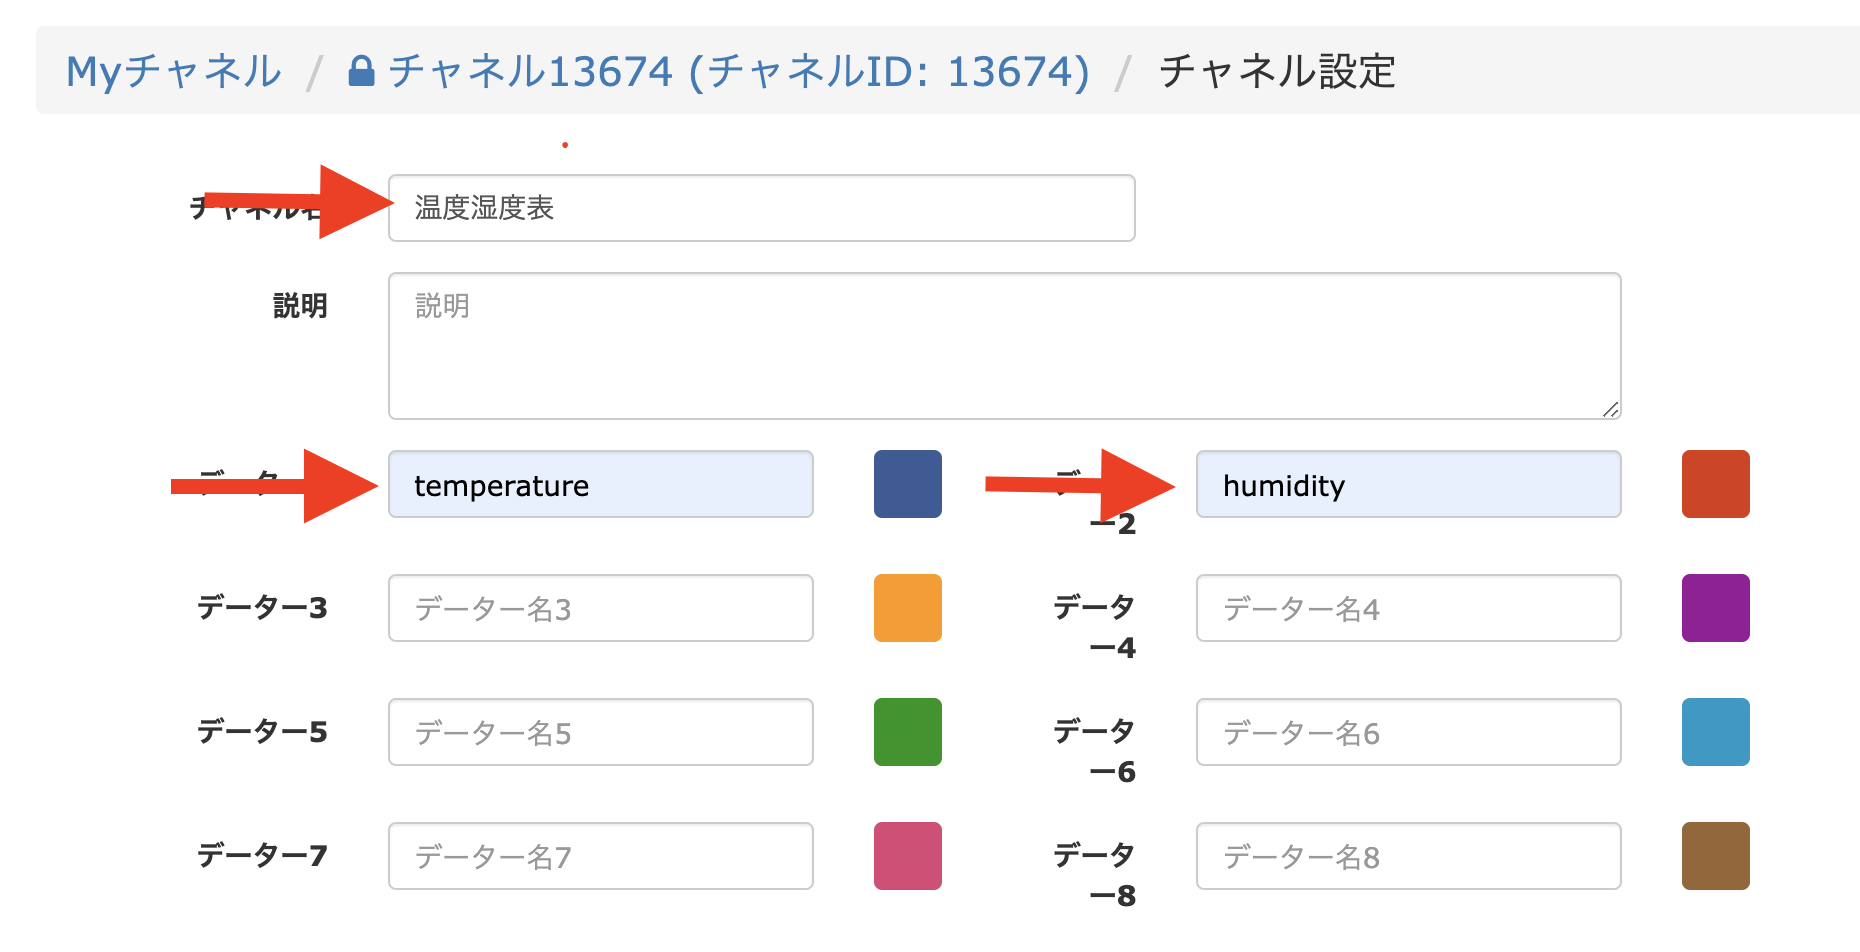
チャネル名とデータ1、データ2を下記のように入力します。
ambient送信
チャネル名とライトキーをメモしてください。(下記のキーは実際には存在しません。)
このデータを元にambieデータの送信を追加します。
該当箇所のみ抜粋すると以下の通りです。
import ambient


CHANNEL_ID = 'あなたのチャネルiD'
WRITE_KEY = 'あなたのライトキー'

def main():
    # 省略
    data = send_data_params(temperature, humidity)
    peripheral.disconnect
    return send_ambient(data, CHANNEL_ID, WRITE_KEY)


def send_ambient(data, channel_id, write_key):
    am = ambient.Ambient(channel_id, write_key)
    am.send(data)


def send_data_params(temperature, humidity):
    return {
        'd1': temperature,
        'd2': humidity,
    }
ambientの設定画面の順番に従うので、d1 が temperature, d2 がhumidityです。
定期ジョブ(cron)にする
最終的なコード
最終的なコードは以下の通りです。
from bluepy import btle
import binascii
import ambient


CHANNEL_ID = 'あなたのチャネルiD'
WRITE_KEY = 'あなたのライトキー'

PERIPHERAL_MAC_ADDRESS = 'あなたのデバイスのMACアドレス'
HANDLE = 0x002d


def main():
    peripheral = btle.Peripheral(PERIPHERAL_MAC_ADDRESS)
    characteristic = get_characteristic(peripheral, HANDLE)
    temperature = characteristic_to_temperature(characteristic)
    humidity = characteristic_to_humidity(characteristic)
    data = send_data_params(temperature, humidity)
    peripheral.disconnect
    return send_ambient(data, CHANNEL_ID, WRITE_KEY)


def send_ambient(data, channel_id, write_key):
    am = ambient.Ambient(channel_id, write_key)
    am.send(data)


def get_characteristic(peripheral, handle):
    return peripheral.readCharacteristic(handle)


def characteristic_to_temperature(characteristic):
    temp_hex = binascii.b2a_hex(characteristic[1]) + binascii.b2a_hex(characteristic[0])
    return float(int(temp_hex, 16)) / 100


def characteristic_to_humidity(characteristic):
    humid_hex = binascii.b2a_hex(characteristic[3]) + binascii.b2a_hex(characteristic[2])
    return float(int(humid_hex, 16)) / 100


def send_data_params(temperature, humidity):
    return {
        'd1': temperature,
        'd2': humidity,
    }


main()
上記を python ./inkbird.py で実行すると、ambientでデータが更新されるのが確かめられるはずです。
cronで定期実行する
上記のコードが実行されることが確認できたら、cronで定期実行にします。
cronでの実行は普通のやり方です。
たとえば、1分ごとに同期する場合の例です。
まずcrontab -e を実行します。すると、cronの設定が追加できる画面になります。そこで、末尾に下記を挿入します。
*/1 * * * * python /home/junara/inkbird.py
/home/junara/inkbird.py は今回実行したいpythonファイルの絶対パスです。
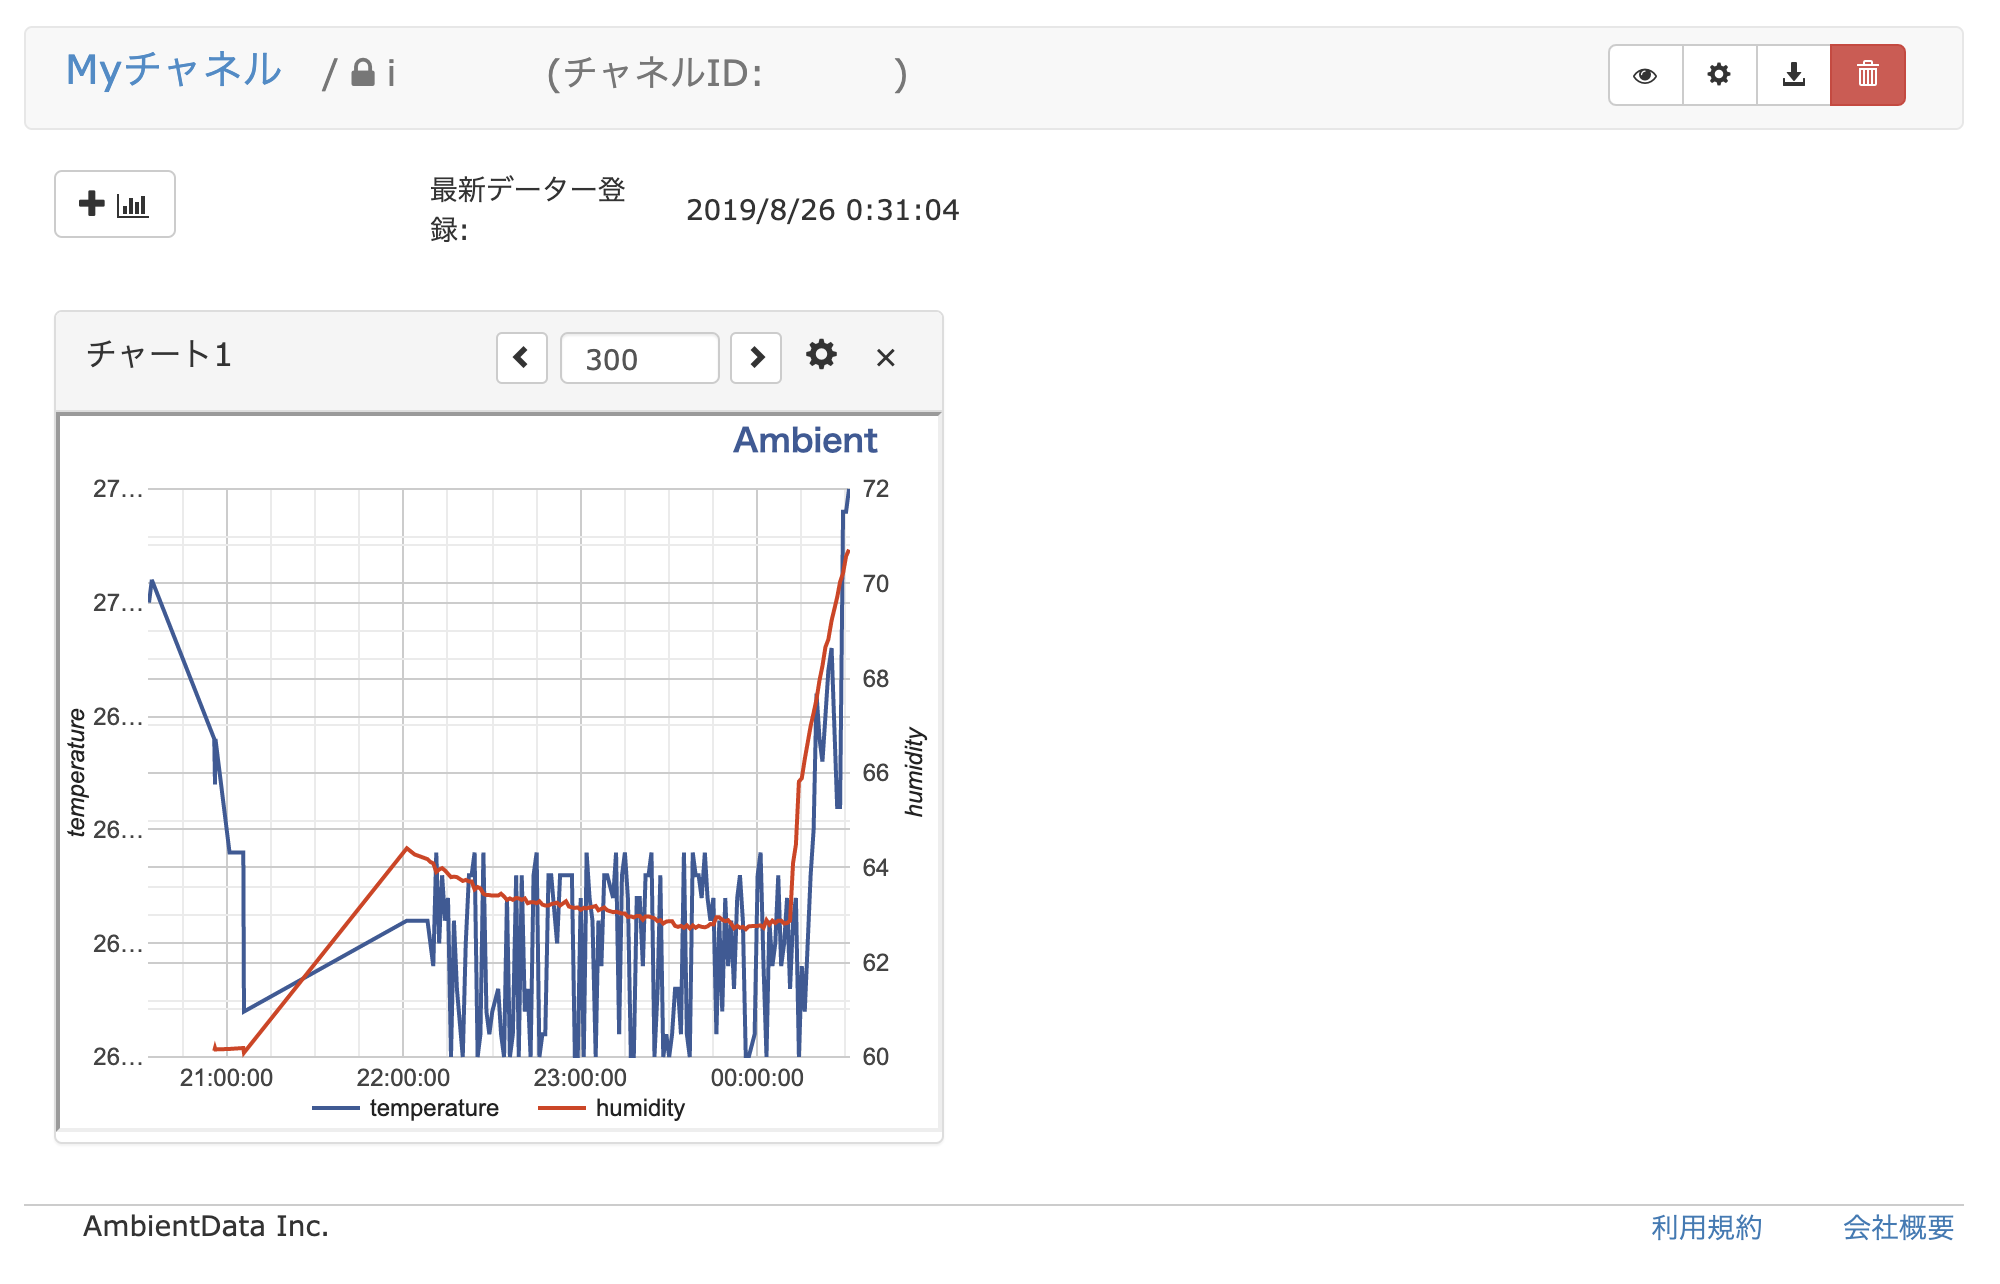
うまく行くとAmbientの Myチャネルから https://ambidata.io/ch/channel.html?id=XXXXX&private=true を開いておけば、下記のようなグラフが表示されます。1分ごとにデータが更新されます!
(上記は1分ごと更新のときのぐらふですが、最終的には10分毎更新にしました。)
このグラフを、画面の片隅に開いておいて眺めておけば、安心して仕事できますね!
所感
- handleがわかれば、bluetoothのデータ扱うの難しくないです。
- Ambient使うと可視化楽ちんです。
- 送信するだけで、作成日次を自動的に付与してくれるのは嬉しいです。
- 心配な場合は、バックアップも兼ねて
main()の処理の中に、ローカルのCSV書き出しもやっておくとよいかも。
- コード https://gist.github.com/junara/229b2d324cb2928eb8966092db733078


