AWS Cognito ユーザープールとは
- AWSが提供するユーザ管理サービスです。
- サインイン/サインアップのためのしくみがGUIやユーザ情報データベースを含めて提供されています。
- AWS Cognito ユーザープールを使えばユーザ情報管理に関わる全てをAWSのマネージドサービスに移譲できます。
- Google、Amazon、Twitter、LINE などの外部認証サービスとも連携できます。
- Amazon Cognito の機能
この記事の目的
- AWS Cognitoのユーザプールを作成します。
- Angularを使ったWebアプリケーションからCognitoのAPIを呼び出し認証トークン(JWT形式)を取得します。
- この認証トークンはAWS API Gatewayを呼び出す際の認証トークンとして利用できます。
- これによりセキュリティが確保されたログイン制御が実現できます。
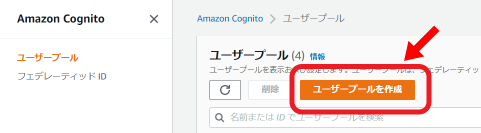
Cognito ユーザープールの作成
-
AWSコンソールからCognito ユーザープールを作成します。
-
各種オプションは適当に指定します。
-
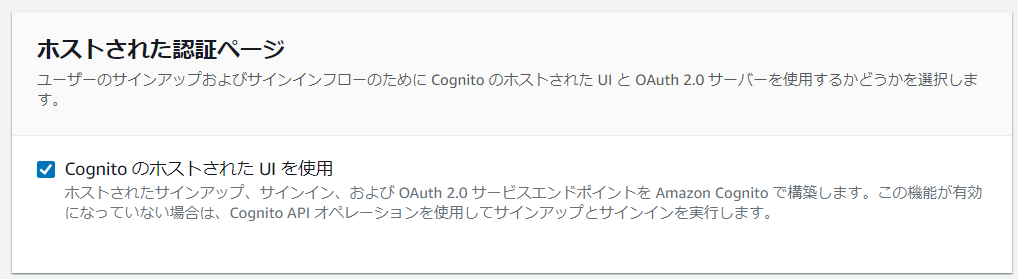
ホストされた認証ページを有効にします。
-
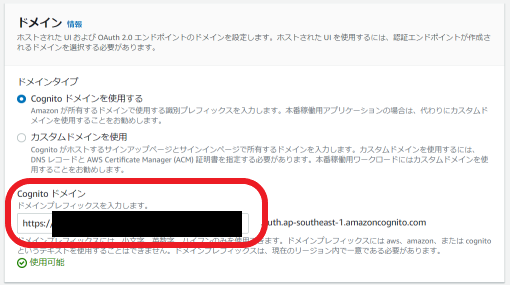
Cognitoドメインに任意の名称を指定します。
-
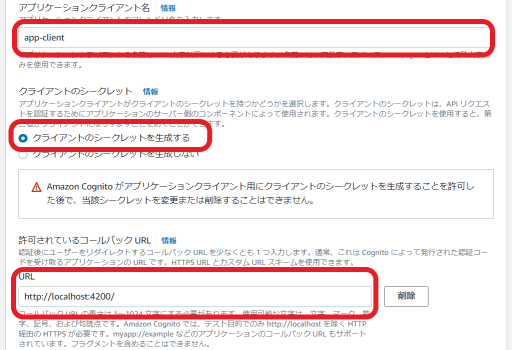
アプリケーションクライアント名は任意の名称を指定します。
-
クライアントのシークレットを生成するを指定します。
-
許可されているコールバック URLには
http://localhost:4200/を指定します。
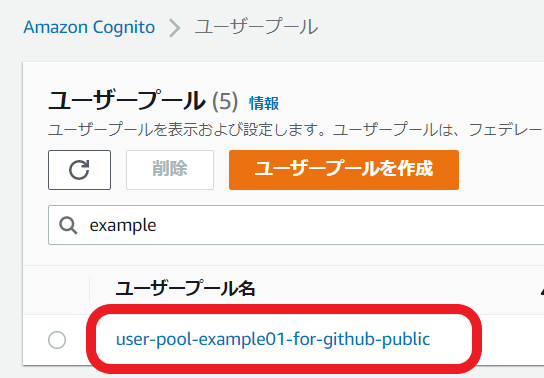
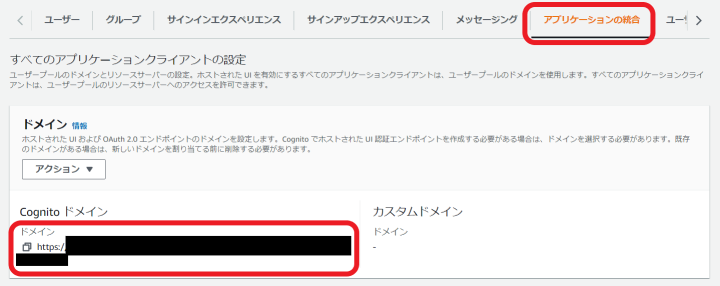
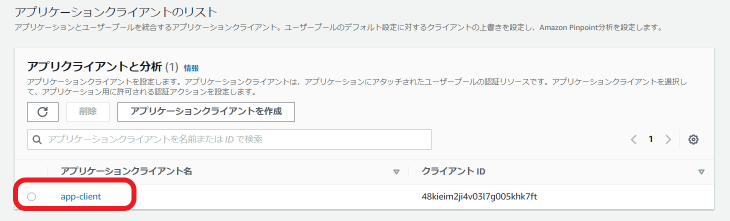
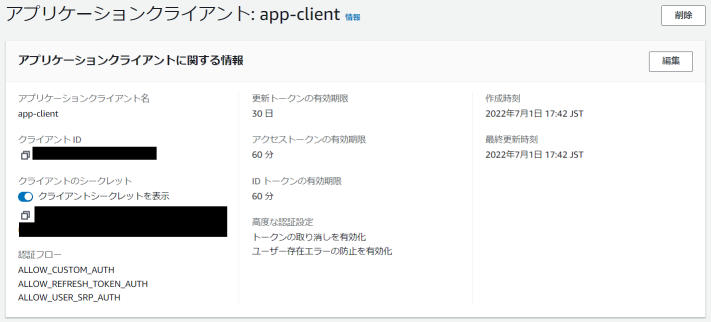
Cognito ユーザープールの必要な情報を確認
-
一覧から作成したユーザープールを選択します。
-
アプリケーションの統合タブから"Cognito ドメイン"に記載されたURLを取得します。このURLがCognitoのAPIを呼び出す際のエンドポイントのURLです。
-
アプリケーションクライアントを選択します。
-
"クライアントID"と"クライアントシークレット"を取得します。
認証コード発行用のURLを作成
- 認可エンドポイントに記載されたとおりURLを組み立てます。
GET https://mydomain.auth.us-east-1.amazoncognito.com/oauth2/authorize?
     response_type=code&
     client_id=[クライアントID]&
     redirect_uri=http://localhost:4200/&
     state=STATE&
     scope=openid+email

例)
https://mydomain.auth.us-east-1.amazoncognito.com/oauth2/authorize?response_type=code&client_id=xxxxxxxxxxxxxxxxxxxx&redirect_uri=http://localhost:4200/&state=STATE&scope=openid+email
👇これより先は下記記事の内容を前提とします
認証画面への遷移を組み込み
- 認証を必要とする処理から下記処理が呼び出されるよう処理を記載します。
-
location.hrefを使って認可エンドポイントへ遷移させます。
[common.service.ts]
  func01(){
    location.href="https://mydomain.auth.us-east-1.amazoncognito.com/oauth2/authorize?response_type=code&client_id=xxxxxxxxxxx&redirect_uri=http://localhost:4200/&state=STATE&scope=openid+email";
  }
-
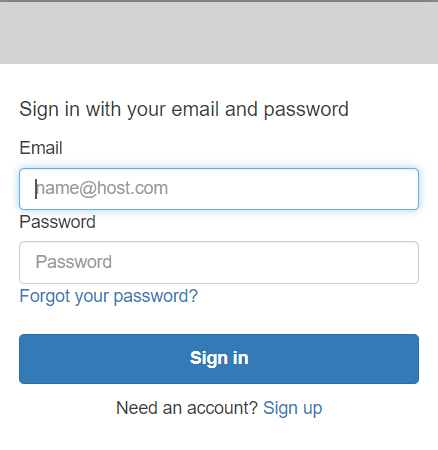
ログイン認証画面が表示されます。
-
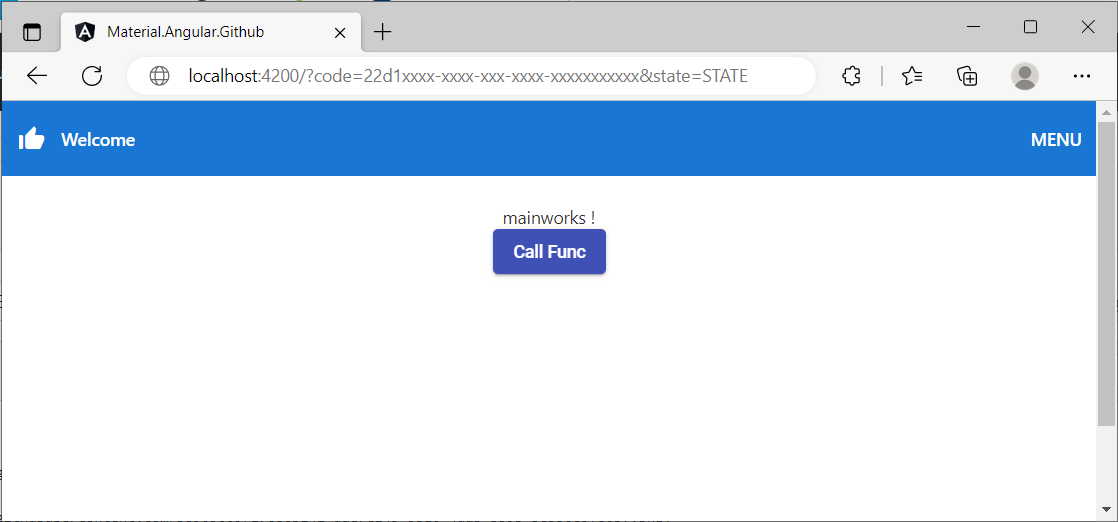
認証に成功すると、
http://localhost:4200/へリダイレクトされ、この際code=xxxxxxの形式のURLパラメータによって認証コードが付与されます。
認証トークンの発行
- 発行された認証コードを使って認証トークンを取得します。
- 発行された認証コードをURLパラメータから取得する関数を定義。
[common.service.ts]
  getParamValue(key: string){
    let ret_value = "";
    if(location.search.substring(1) != ""){
        var pair = location.search.substring(1).split('&');
        for(var i=0;pair[i];i++) {
            var kv = pair[i].split('=');
            if(kv[0] == key){
                ret_value = kv[1];
                break;
            }
        }
    }
    return ret_value;
  }
- HttpClientを利用してトークンエンドポイントから認証トークンを取得する関数を定義。
この際、AuthorizationにはクライアントIDとクライアントシークレットを":"で連結した文字列をBASE64エンコードして、Basicに続けて指定します。 - 詳細はトークンエンドポイントにしっかり記載されているのですが、分かりにくいです・・・
Authorization
クライアントがシークレットで発行された場合、クライアントはその client_id および client_secret をベーシック HTTP 認証を介して認証ヘッダーに渡す必要があります。認証ヘッダー文字列は Basic Base64Encode(client_id:client_secret) です。次の例は、アプリケーションクライアント djc98u3jiedmi283eu928 のクライアントシークレット abcdef01234567890 が付いた認証ヘッダーです。文字列 djc98u3jiedmi283eu928:abcdef01234567890 の Base64 エンコードされたバージョンを使用します。
[common.service.ts]
import { Buffer } from 'buffer'

cognitoAuth(){
    let code = this.getParamValue("code");
    if(code){
      console.log("code:" + code);
      // "xxxxxx1"にはクライアントID を指定
      // "xxxxxx2"にはクライアントシークレット を指定
      let auth_code_base64 = Buffer.from('xxxxxx1:xxxxxx2').toString('base64');
      console.log("auth_code_base64:" + auth_code_base64);
      let httpHeaders = new HttpHeaders({
        'Authorization': 'Basic ' + auth_code_base64,
        'Content-Type' : 'application/x-www-form-urlencoded',
          });

      let options = {
        headers: httpHeaders,
      };

      const postParam = new HttpParams()
        .set("grant_type","authorization_code")
        .set("client_id","xxxxxx1")
        .set("code",code)
        .set("redirect_uri","http://localhost:4200/")

      const url = "https://mydomain.auth.us-east-1.amazoncognito.com/oauth2/token";

      this.http.post<any>(url, postParam, options).subscribe({
        next:(data) => {
          console.log("ok");
          console.log(data);
          let id_token = data["id_token"];
          console.log("id_token:" + id_token);
        },
        error:(e) =>{
          console.log("ng");
          console.error(e);
        },
        complete: () => {
          console.log("complete");
        }
      })

    }
  }
- ページ読み込み時に
cognitoAuthを呼び出すよう設定。
[main.component.ts]
  ngOnInit(): void {
    this.commonService.cognitoAuth();
  }
