0
1

Delete article

Deleted articles cannot be recovered.

Draft of this article would be also deleted.

Are you sure you want to delete this article?

More than 1 year has passed since last update.

AWS Cognito ユーザープールにGoogleサインイン連携を設定する

Last updated at Posted at 2022-07-09

この記事の目的

  • Cognito ユーザープールにGoogleサインイン連携を設定
  • これによりGoogleアカウント認証を使って独自サービスのログイン制御を実現できます

👇これより先は下記記事の内容を前提とします

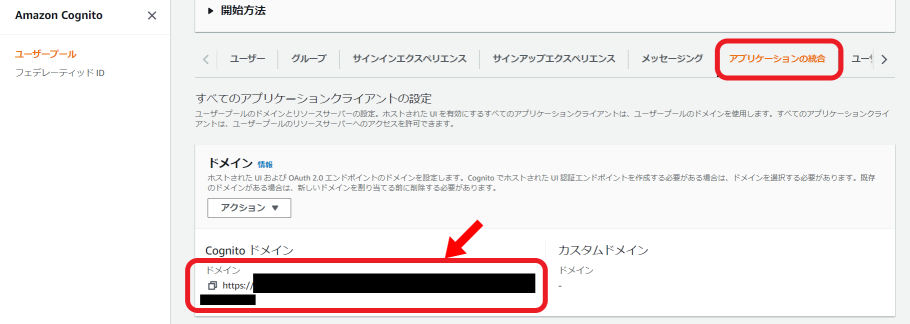
Cognitoドメインの取得

  • 後で必要になるので、Cognitoの設定画面からCognitoドメインを取得します。
    image

ソーシャルIDプロバイダーの追加

  • Google クラウドプラットフォームコンソールにサインインします。

  • プロジェクト選択を表示します。
    image

  • 新しいプロジェクトを選択します。
    image

  • プロジェクト名を指定してプロジェクトを作成します。
    image

  • 作成したプロジェクトを選択し、APIとサービスからOAuth同意画面を指定します。
    image

  • User Type に外部を指定し、作成を実行します。
    image

  • スコープに email profile openid を指定します。
    image

  • 認証情報を作成から、OAuthクライアントIDを選択します。
    image

  • アプリケーションの種類にウェブアプリケーションを指定します。

  • 承認済のJavaScript生成元に上記[Cognitoドメインの取得]で取得したURLを指定します。

  • 承認済のリダイレクトURLに上記[Cognitoドメインの取得]で取得したURLに続けて[/oauth2/idpresponse]を指定します。
    image

  • OAuthクライアントのクライアントIDとクライアントシークレットを取得します。
    image

  • Cognitoユーザプール設定からアイデンティティプロバイダーを追加を選択します。
    image

  • アイデンティティプロバイダーにGoogleを指定します。
    image

  • クライアント IDに上記OAuthクライアントのクライアントIDを指定します。

  • クライアントのシークレットに上記OAuthクライアントクライアントシークレットを指定します。

  • 許可されたスコープに[profile email openid]を指定します。

  • Google属性にemailを指定します。
    image

  • Cognitoユーザプールのアプリケーションの統合タブを選択します。
    image

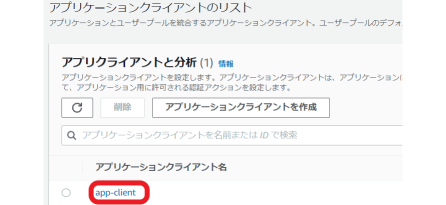
  • アプリケーションクライアントを選択します。
    image

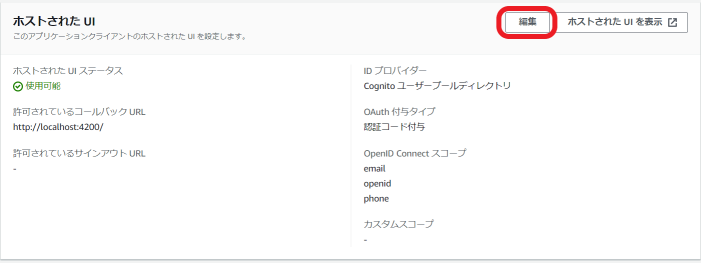
  • ホストされた UI の編集を選択します。
    image

  • IDプロバイダーでGoogleを選択します。
    image
    image

  • 変更を保存します。
    image

動作確認

  • Googleログインがログイン画面に追加されます。
    image

👇前提記事

👇関連記事

👇参考URL

0
1
0

Register as a new user and use Qiita more conveniently

  1. You get articles that match your needs
  2. You can efficiently read back useful information
  3. You can use dark theme
What you can do with signing up
0
1

Delete article

Deleted articles cannot be recovered.

Draft of this article would be also deleted.

Are you sure you want to delete this article?