Reactサンプル:redux-sagaとreact-router v4でWebAPIの結果に応じて画面遷移させる。(前編)
からの続きです。
6. redux-sagaからAPIを呼びだす。
6.1 redux-sagaを追加
GET_ADDRESS_REQUESTEDアクションが送出されたらAPIをリクエストしてその結果を待ち、結果が返ってきたら何かをするという同期処理を実現するのに redux-saga を使います。
$ yarn add redux-saga
上記により、以下が package.json に追加されました。
"redux-saga": "^0.16.0"
6.2 getAddress sagaの実装
src/ducks/address.js の冒頭に以下を追加します。
import { takeLatest, put } from 'redux-saga/effects';
import api from "../api/postcode-jp";
GET_ADDRESS_REQUESTEDアクションを受け取ったら、3.1 郵便番号から住所を取得 で用意しておいたAPIを呼び、その結果が
- 成功なら
GET_ADDRESS_SUCCEEDED - 失敗なら
GET_ADDRESS_FAILED
を発生させるsagaを以下のように実装して、これを src/ducks/address.js に追加します。
// Sagas
function* getAddress(action) {
  const res = yield api.getAddress(action.payload.zipCode);
  if (res.data && res.data.length > 0) { // 成功: 指定された郵便番号に該当する住所が存在した。
    yield put({
      type: GET_ADDRESS_SUCCEEDED,
      payload: {
        zipCode: action.payload.zipCode,
        address: res.data[0].allAddress,
        error: false,
      }
    });
  } else { // 失敗: 指定された郵便番号に該当する住所が存在しなかった。
    const message = res.validationErrors ? res.validationErrors[0].message : null;
    yield put({
      type: GET_ADDRESS_FAILED,
      payload: new Error(message),
      error: true,
    });
  }
};

function* watchLastGetZipData() {
  yield takeLatest(GET_ADDRESS_REQUESTED, getAddress);
}

export const sagas = [
  watchLastGetZipData,
];
6.3 reduxにsagaMiddlewareを追加
上記で作成した saga をreduxと連携させる処理を src/index.js に追加します。
import React from 'react';
import { render } from 'react-dom';
import { BrowserRouter, Route, Switch } from 'react-router-dom';
import { applyMiddleware, createStore } from 'redux';
import { Provider } from 'react-redux';
import { createLogger } from 'redux-logger';
import createSagaMiddleware from 'redux-saga';
import { all } from 'redux-saga/effects';
import { InputForm, Success, Failure } from './containers'
import address, { initialState, sagas } from "./ducks/address";

const allSagas = [ ...sagas, ];

function* rootSaga() {
  yield all(allSagas.map(f => f()));
}

const sagaMiddleware = createSagaMiddleware();

const store = createStore(
  address,
  initialState,
  applyMiddleware(sagaMiddleware, createLogger()),
);

sagaMiddleware.run(rootSaga);

const App = () => (
  <BrowserRouter>
    <Provider store={store}>
      <Switch>
        <Route exact path="/" component={ InputForm } />
        <Route exact path="/success" component={ Success } />
        <Route exact path="/failure" component={ Failure } />
      </Switch>
    </Provider>
  </BrowserRouter>
);

render(<App />, document.querySelector('#app'));
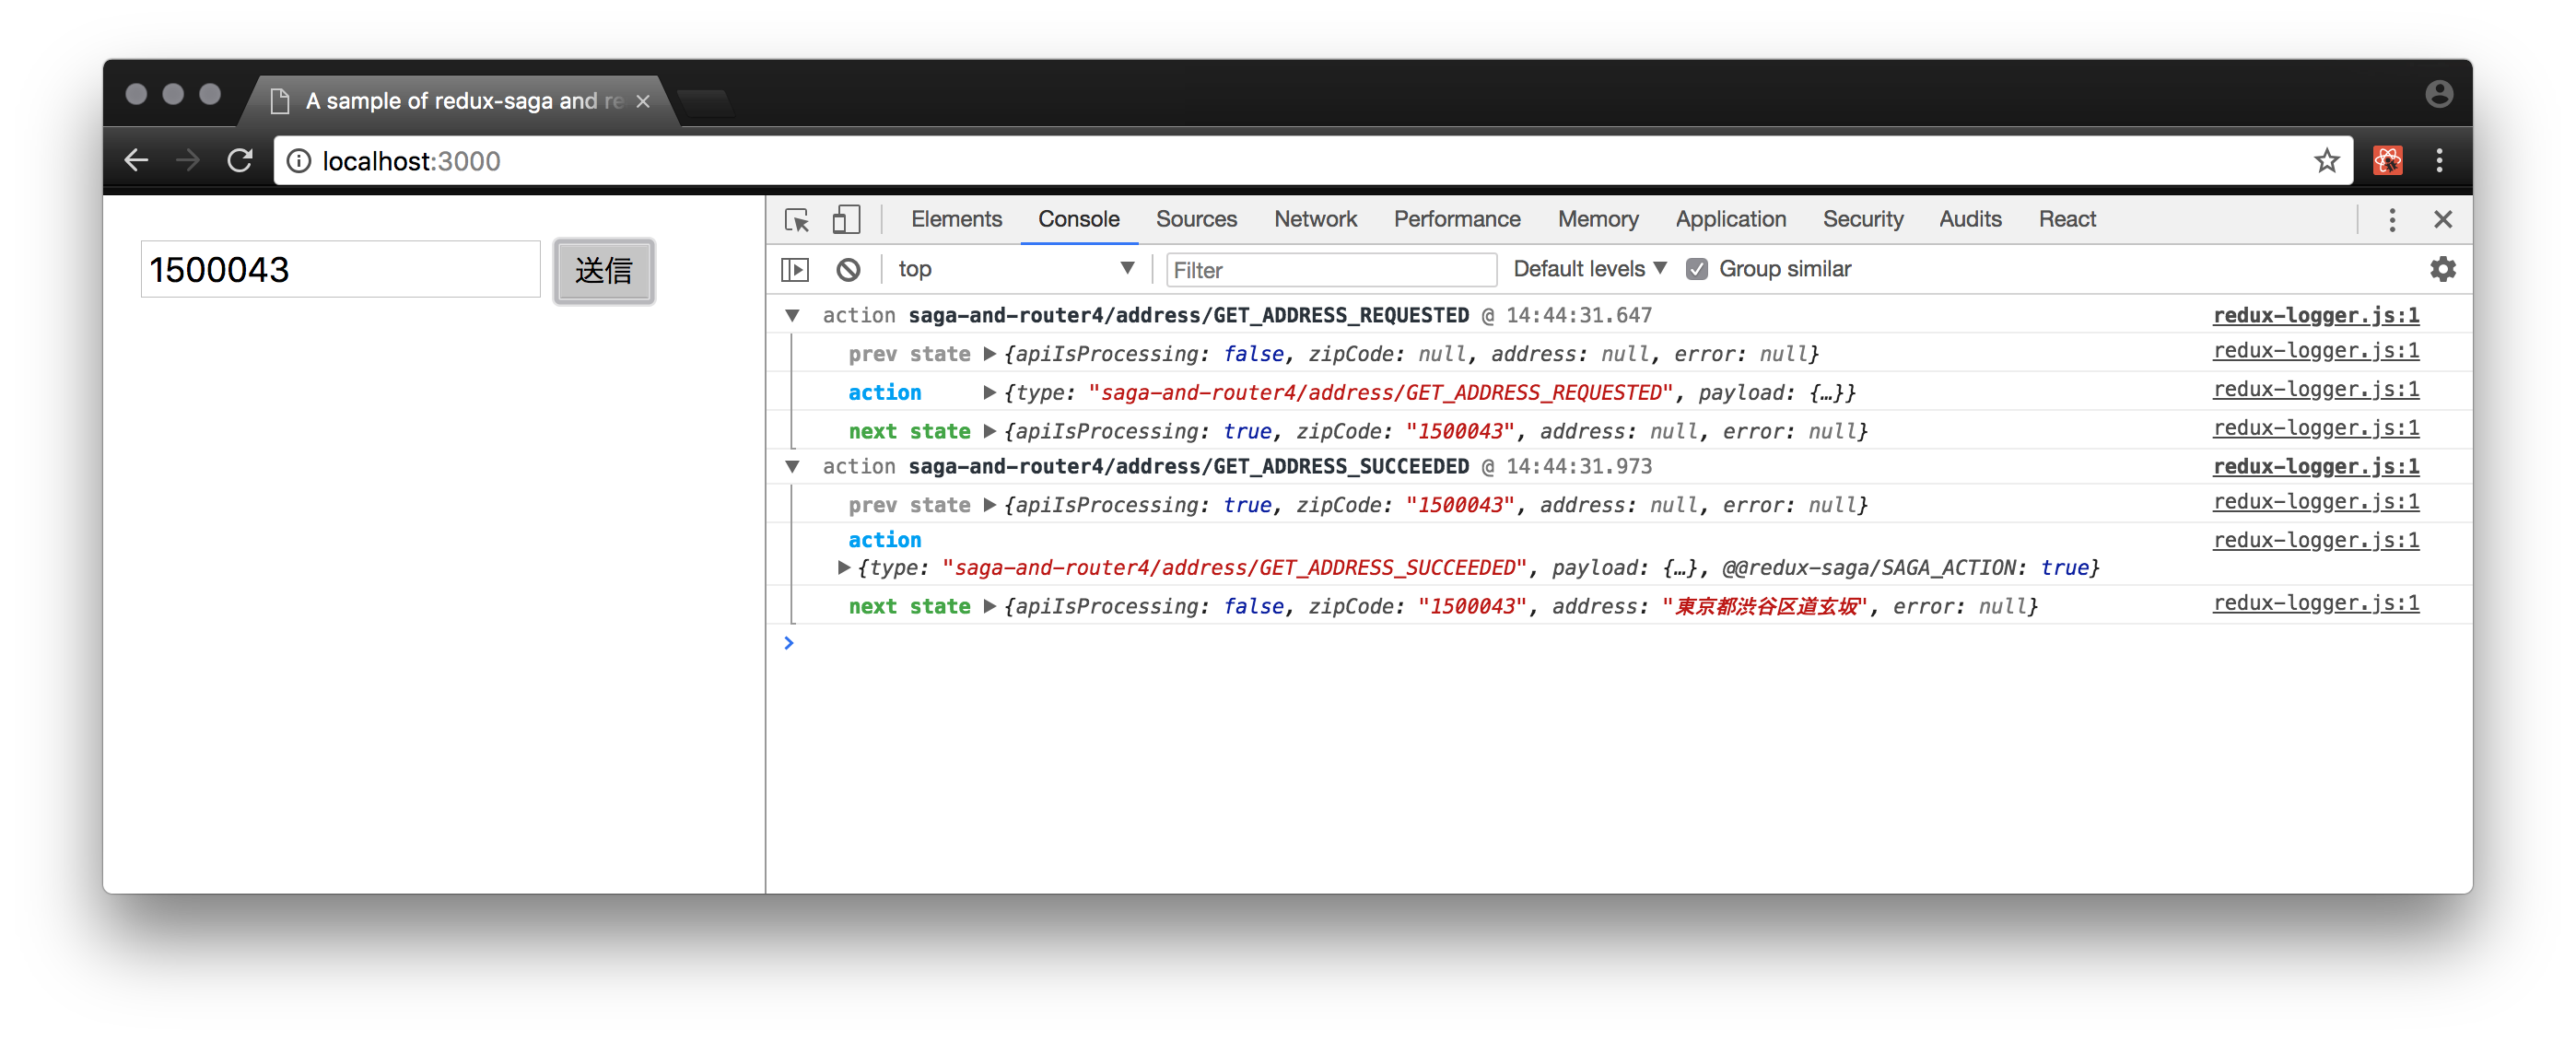
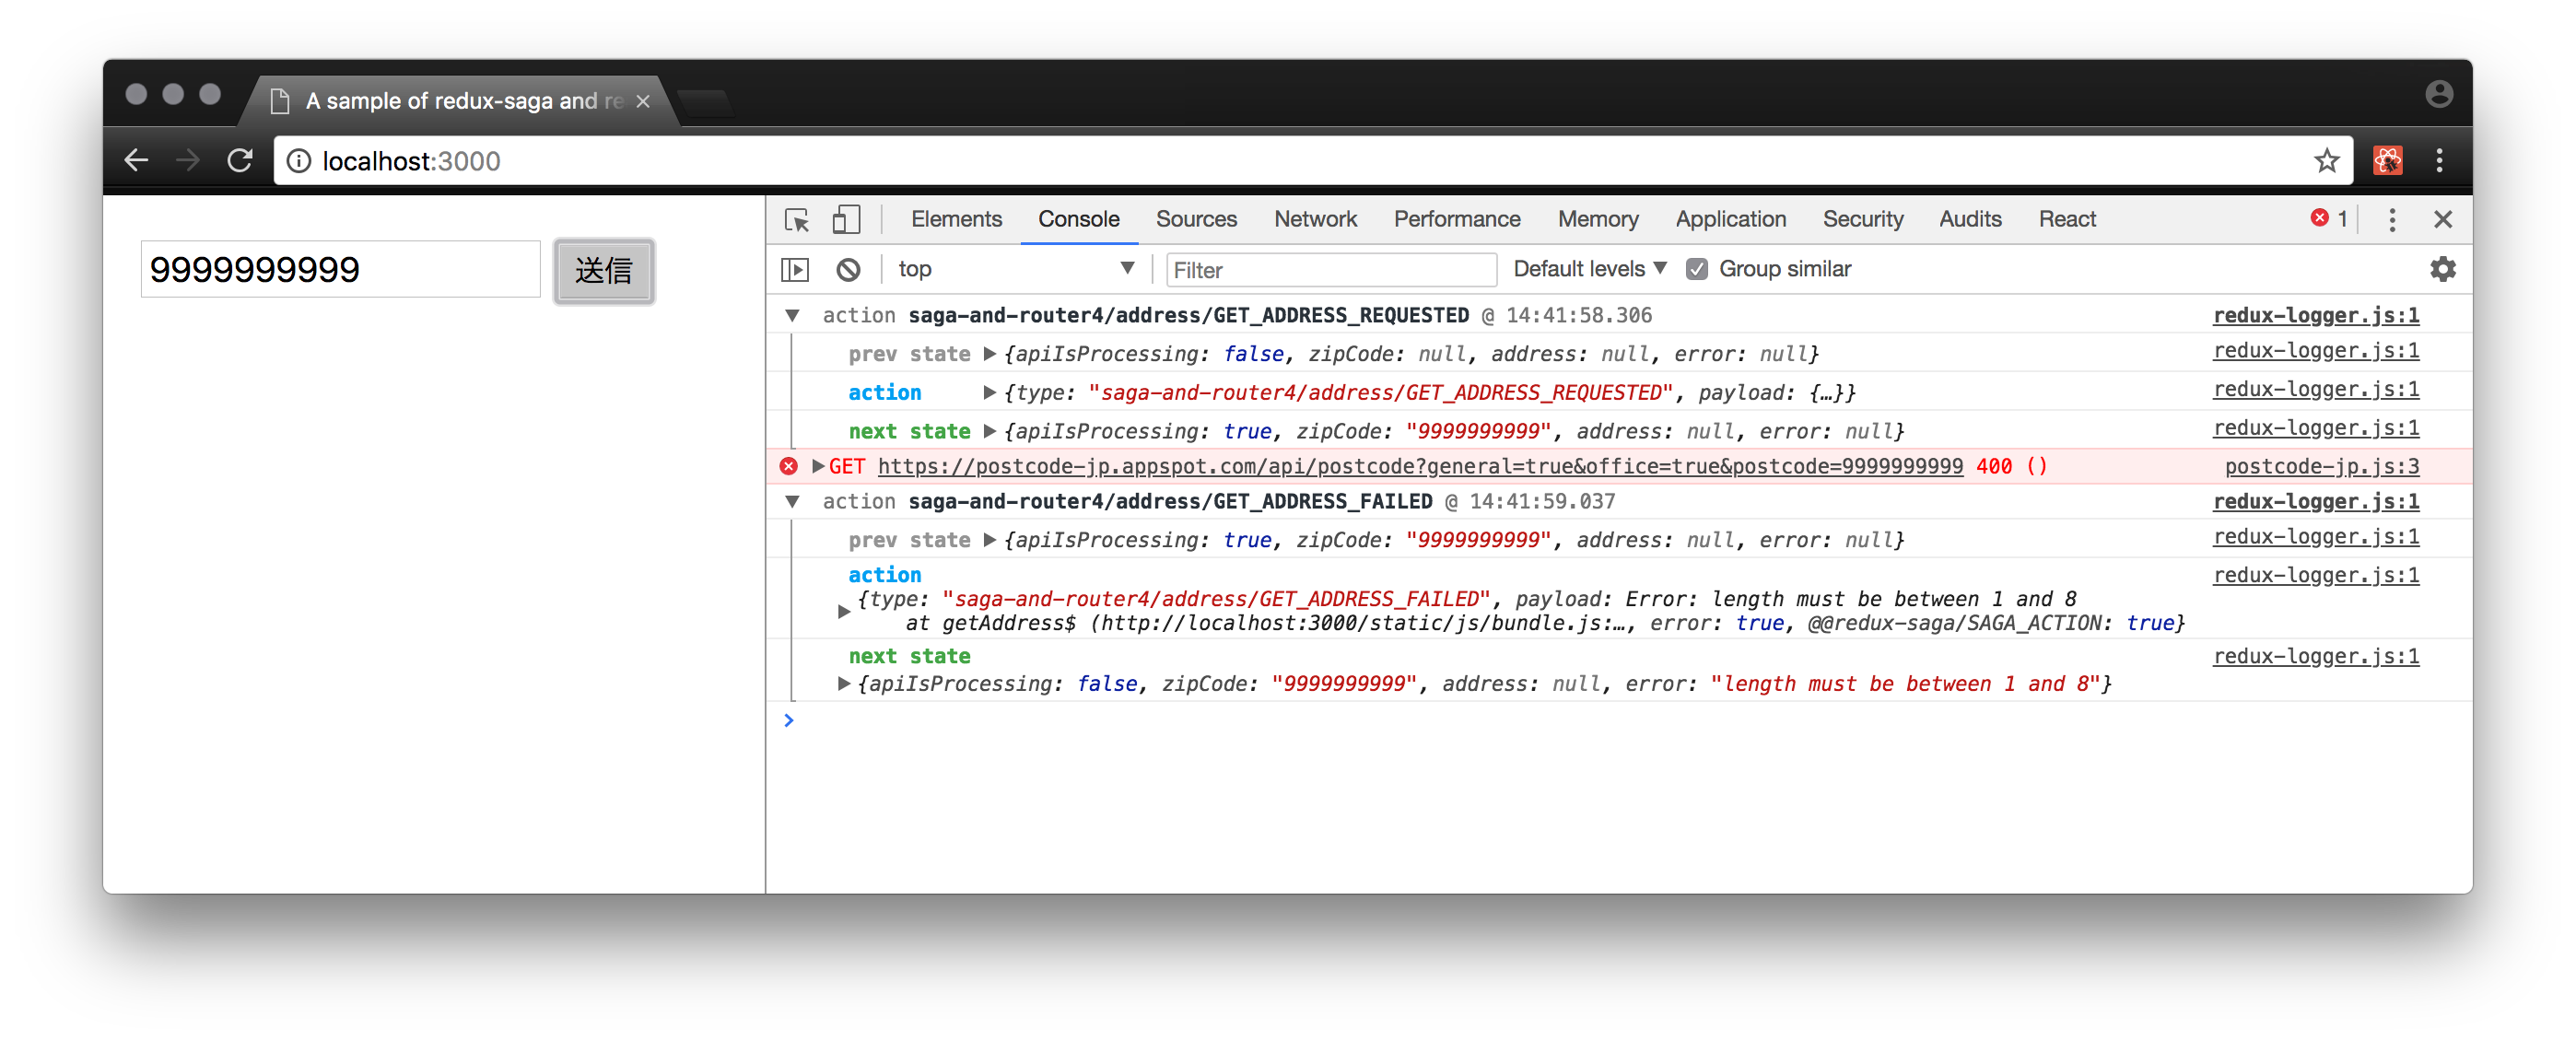
上記の修正後、フォームから住所を調べたい郵便番号を入力して、送信ボタンをクリックすると、以下のようになります。
-
1540043を入力して、送信をクリックすると、レスポンスの内容から成功と判断され、GET_ADDRESS_SUCCEEDEDが送出される。

-
9999999999を入力して、送信をクリックすると、APIのレスポンスから失敗と判断され、GET_ADDRESS_FAILEDが送出される。

🐾ここまでの追加・修正コミット: SagaからAPIをリクエストして結果に応じたアクションを送出
7. APIの結果に応じた画面遷移の実装
前節までで、入力された郵便番号を付加してAPIを呼び、その結果に応じたアクションを送出し、意図どおりにstateが変更されることを確認できました。次に、本稿の主題である、APIの成功時に/success に遷移し、失敗時には /failure に遷移させる処理を追加していきます。
7.1 参考にした GitHub issue
redux-saga から何らかの非同期処理(本スパイクでは fetch() によるWebAPIの呼び出し)を行い、それが終わってから画面遷移させるには、どういう実装方法が定番なのかを調べたところ、ReactTraining/react-router のissue
Using v4 with redux-saga
https://github.com/ReactTraining/react-router/issues/3972
の下記3点のコメントを参考にしてスパイクしました。
- trabianmatt commented on 4 Oct 2016
- pshrmn commented on 5 Dec 2016
- nateq314 commented on 10 Feb 2017
7.2 アクションにリクエスト処理後に遷移するページを追加する。
GET_ADDRESS_REQUESTEDアクションに、リクエスト処理後に遷移するページを追加します。
FSAの説明に、action の追加プロパティとして
meta
The optional meta property MAY be any type of value. It is intended for any extra information that is not part of the payload.
とありますので、この meta に成功時および失敗時の遷移先を与えることにします。
src/ducks/address.js のアクションクリエータgetAddressRequested の引数に meta を追加して以下のようにします。
// Action Creators
export const getAddressRequested = (zipCode, meta) => (
  {
    type: GET_ADDRESS_REQUESTED,
    payload: { zipCode },
    meta
  }
);
src/containers/form/InputForm.jsx の handleSubmit で、アクションをdispatchする際に、上記の meta として
成功時の遷移先(pageOnSuccess)と、失敗時の遷移先(pageOnFailure)を指定し、以下のようにします。
  handleSubmit(e) {
    e.preventDefault();
    const meta = {
      pageOnSuccess: '/success',
      pageOnFailure: '/failure'
    };
    this.props.dispatch(getAddressRequested(this.state.zipCode, meta));
  }
7.3 saga に historyを渡す
次に、react-router/issues/3972#issuecomment-264805667 のコード例:
import history from './history'

export function* signin(api, { payload }) {
  const response = yield call(api.auth.signin, payload);

  if (response.ok) {
    yield put(AuthActions.signinSuccess({ user: response.data.data }));
    yield call(history.push, '/dashboard');
と同様に history.push をsaga の中で使うことで画面遷移させることを考えます。 saga に historyを渡す実装としては、react-router/issues/3972#issuecomment-251189856 で、saga に routerを渡しているコードを参考にします。
まず、 モジュールhistory を追加します。
$ yarn add history
以下が package.json に追加されます。
"history": "^4.7.2",
src/index.js の BrowserRouter を Router に変更し、明示的に作成したhistoryを持たせます。
そして、この history を sagaMiddleware.run させるときに与えて、sageで使えるようにします。
import React from 'react';
import { render } from 'react-dom';
import { Router, Route, Switch } from 'react-router-dom';
import { applyMiddleware, createStore } from 'redux';
import { Provider } from 'react-redux';
import { createLogger } from 'redux-logger';
import createSagaMiddleware from 'redux-saga';
import { all } from 'redux-saga/effects';
import createHistory from 'history/createBrowserHistory';
import { InputForm, Success, Failure } from './containers';
import address, { initialState, sagas } from "./ducks/address";

const allSagas = [ ...sagas, ];

function* rootSaga(context) {
  yield all(allSagas.map(f => f(context)));
}

const sagaMiddleware = createSagaMiddleware();

const store = createStore(
  address,
  initialState,
  applyMiddleware(sagaMiddleware, createLogger()),
);

const history = createHistory();

sagaMiddleware.run(rootSaga, { history });

const App = () => (
  <Router history={history}>
    <Provider store={store}>
      <Switch>
        <Route exact path="/" component={ InputForm } />
        <Route exact path="/success" component={ Success } />
        <Route exact path="/failure" component={ Failure } />
      </Switch>
    </Provider>
  </Router>
);

render(<App />, document.querySelector('#app'));
7.4 sagaでhistory.pushして画面遷移させる
次に、saga のほうで、{ history }を受け取って、これを画面遷移のために使うようにします。
src/ducks/address.js の冒頭で、redux-saga/effects から call も import します。
import { takeLatest, put, call } from 'redux-saga/effects';
call と、 src/index.jsから渡された { history } を使うことで、
以下のようにgetAddressを修正して、画面遷移を実装します。
// Sagas
function* getAddress(context, action) {
  const meta = action.meta || {};
  const res = yield api.getAddress(action.payload.zipCode);
  if (res.data && res.data.length > 0) { // 成功: 指定された郵便番号に該当する住所が存在した。
    yield put({
      type: GET_ADDRESS_SUCCEEDED,
      payload: {
        zipCode: action.payload.zipCode,
        address: res.data[0].allAddress,
        error: false,
      }
    });
    if (meta.pageOnSuccess)
      yield call(context.history.push, meta.pageOnSuccess);
  } else { // 失敗: 指定された郵便番号に該当する住所が存在しなかった。
    const message = res.validationErrors ? res.validationErrors[0].message : null;
    yield put({
      type: GET_ADDRESS_FAILED,
      payload: new Error(message),
      error: true,
    });
    if (meta.pageOnFailure)
      yield call(context.history.push, meta.pageOnFailure);
  }
};

function* watchLastGetZipData(context) {
  yield takeLatest(GET_ADDRESS_REQUESTED, getAddress, context);
}
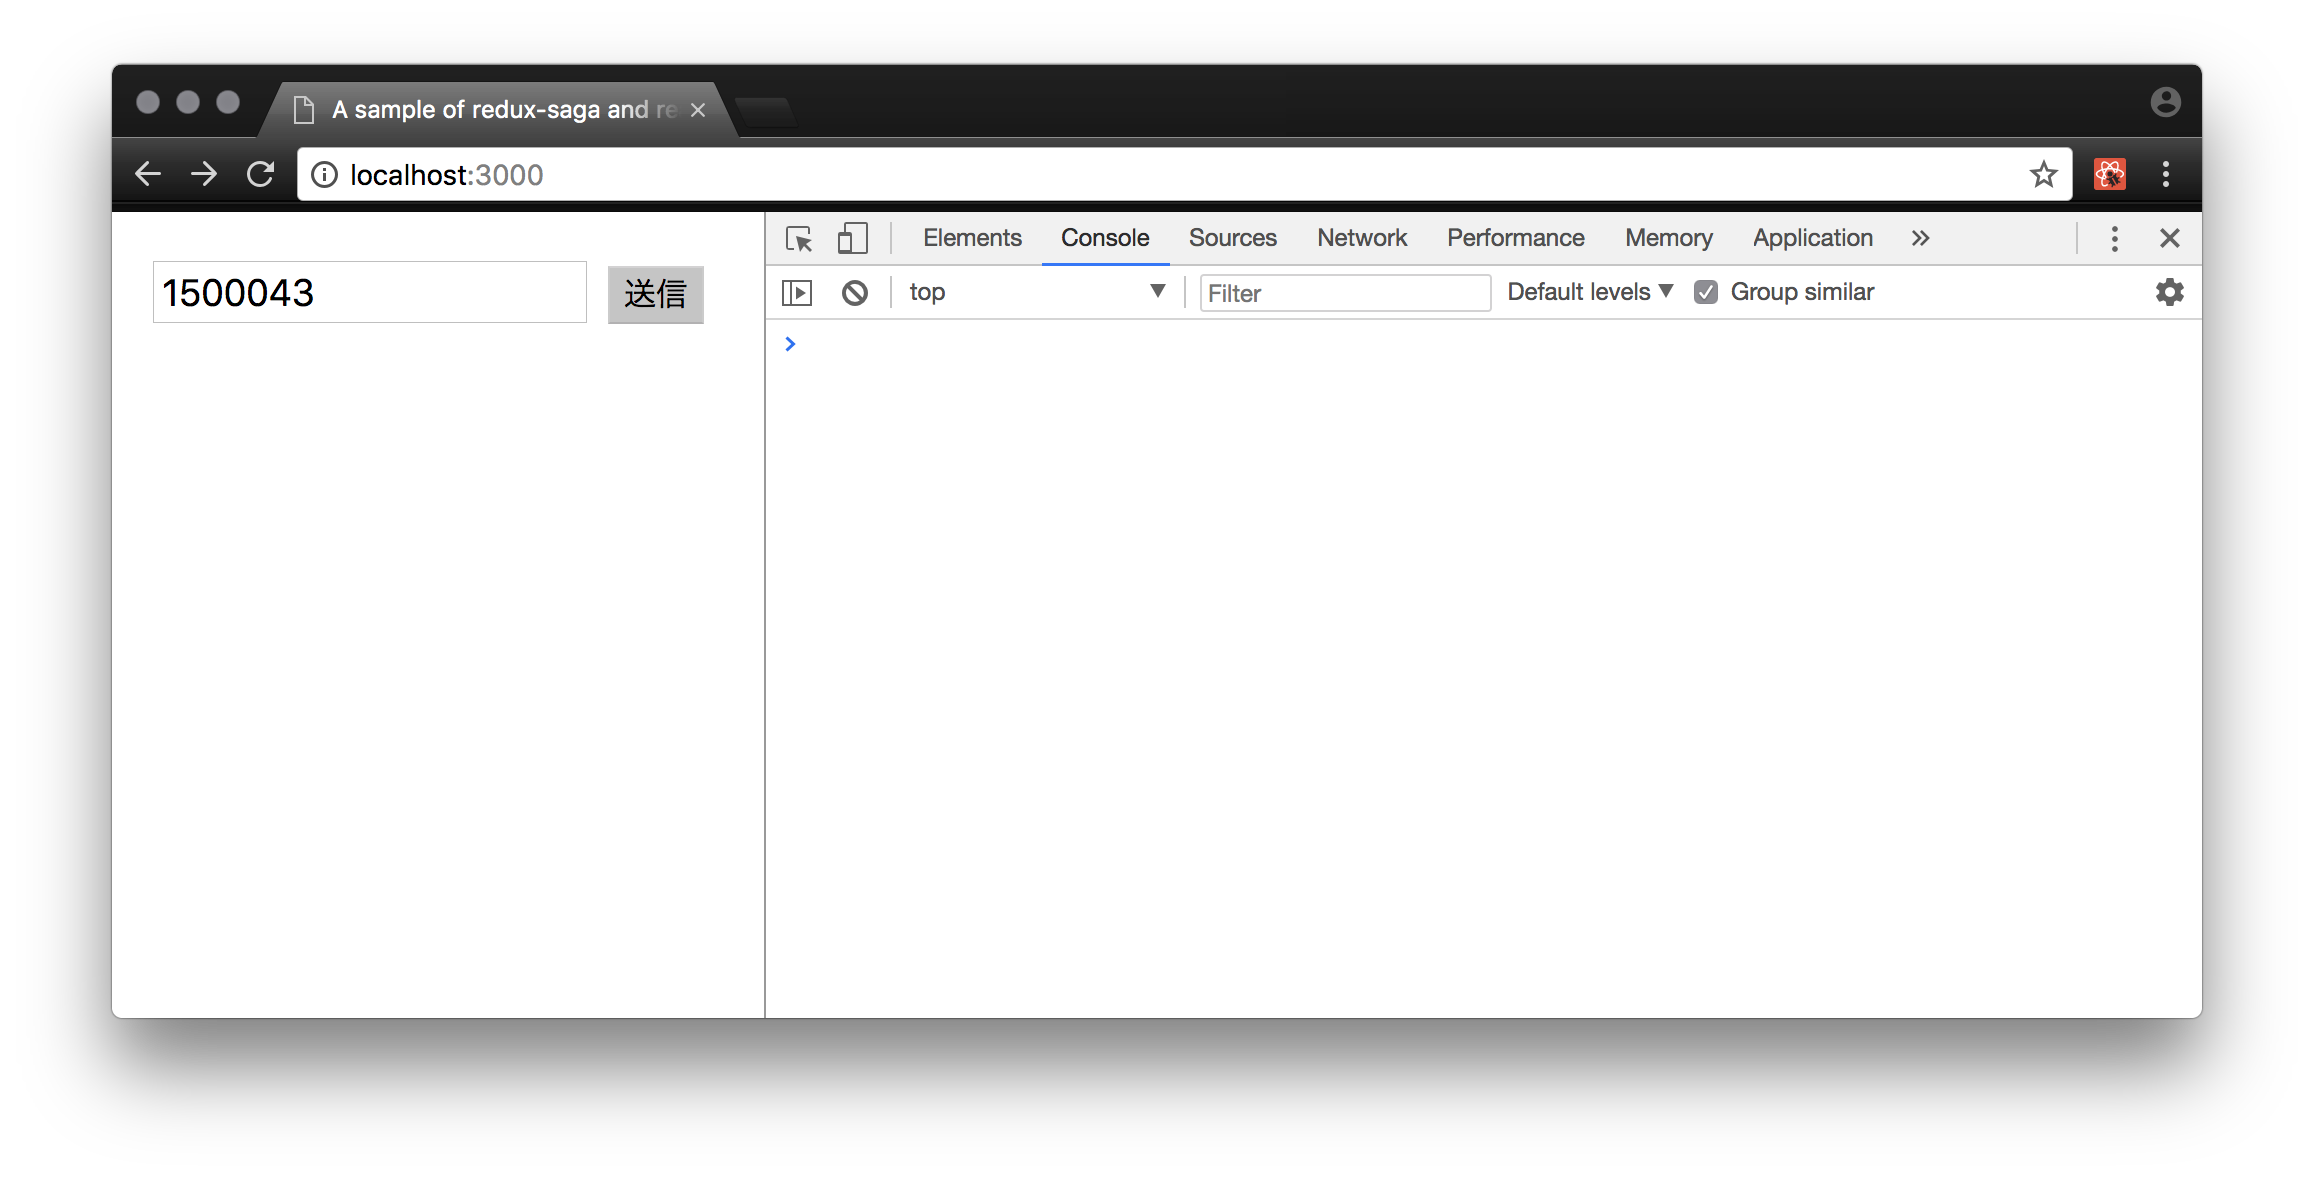
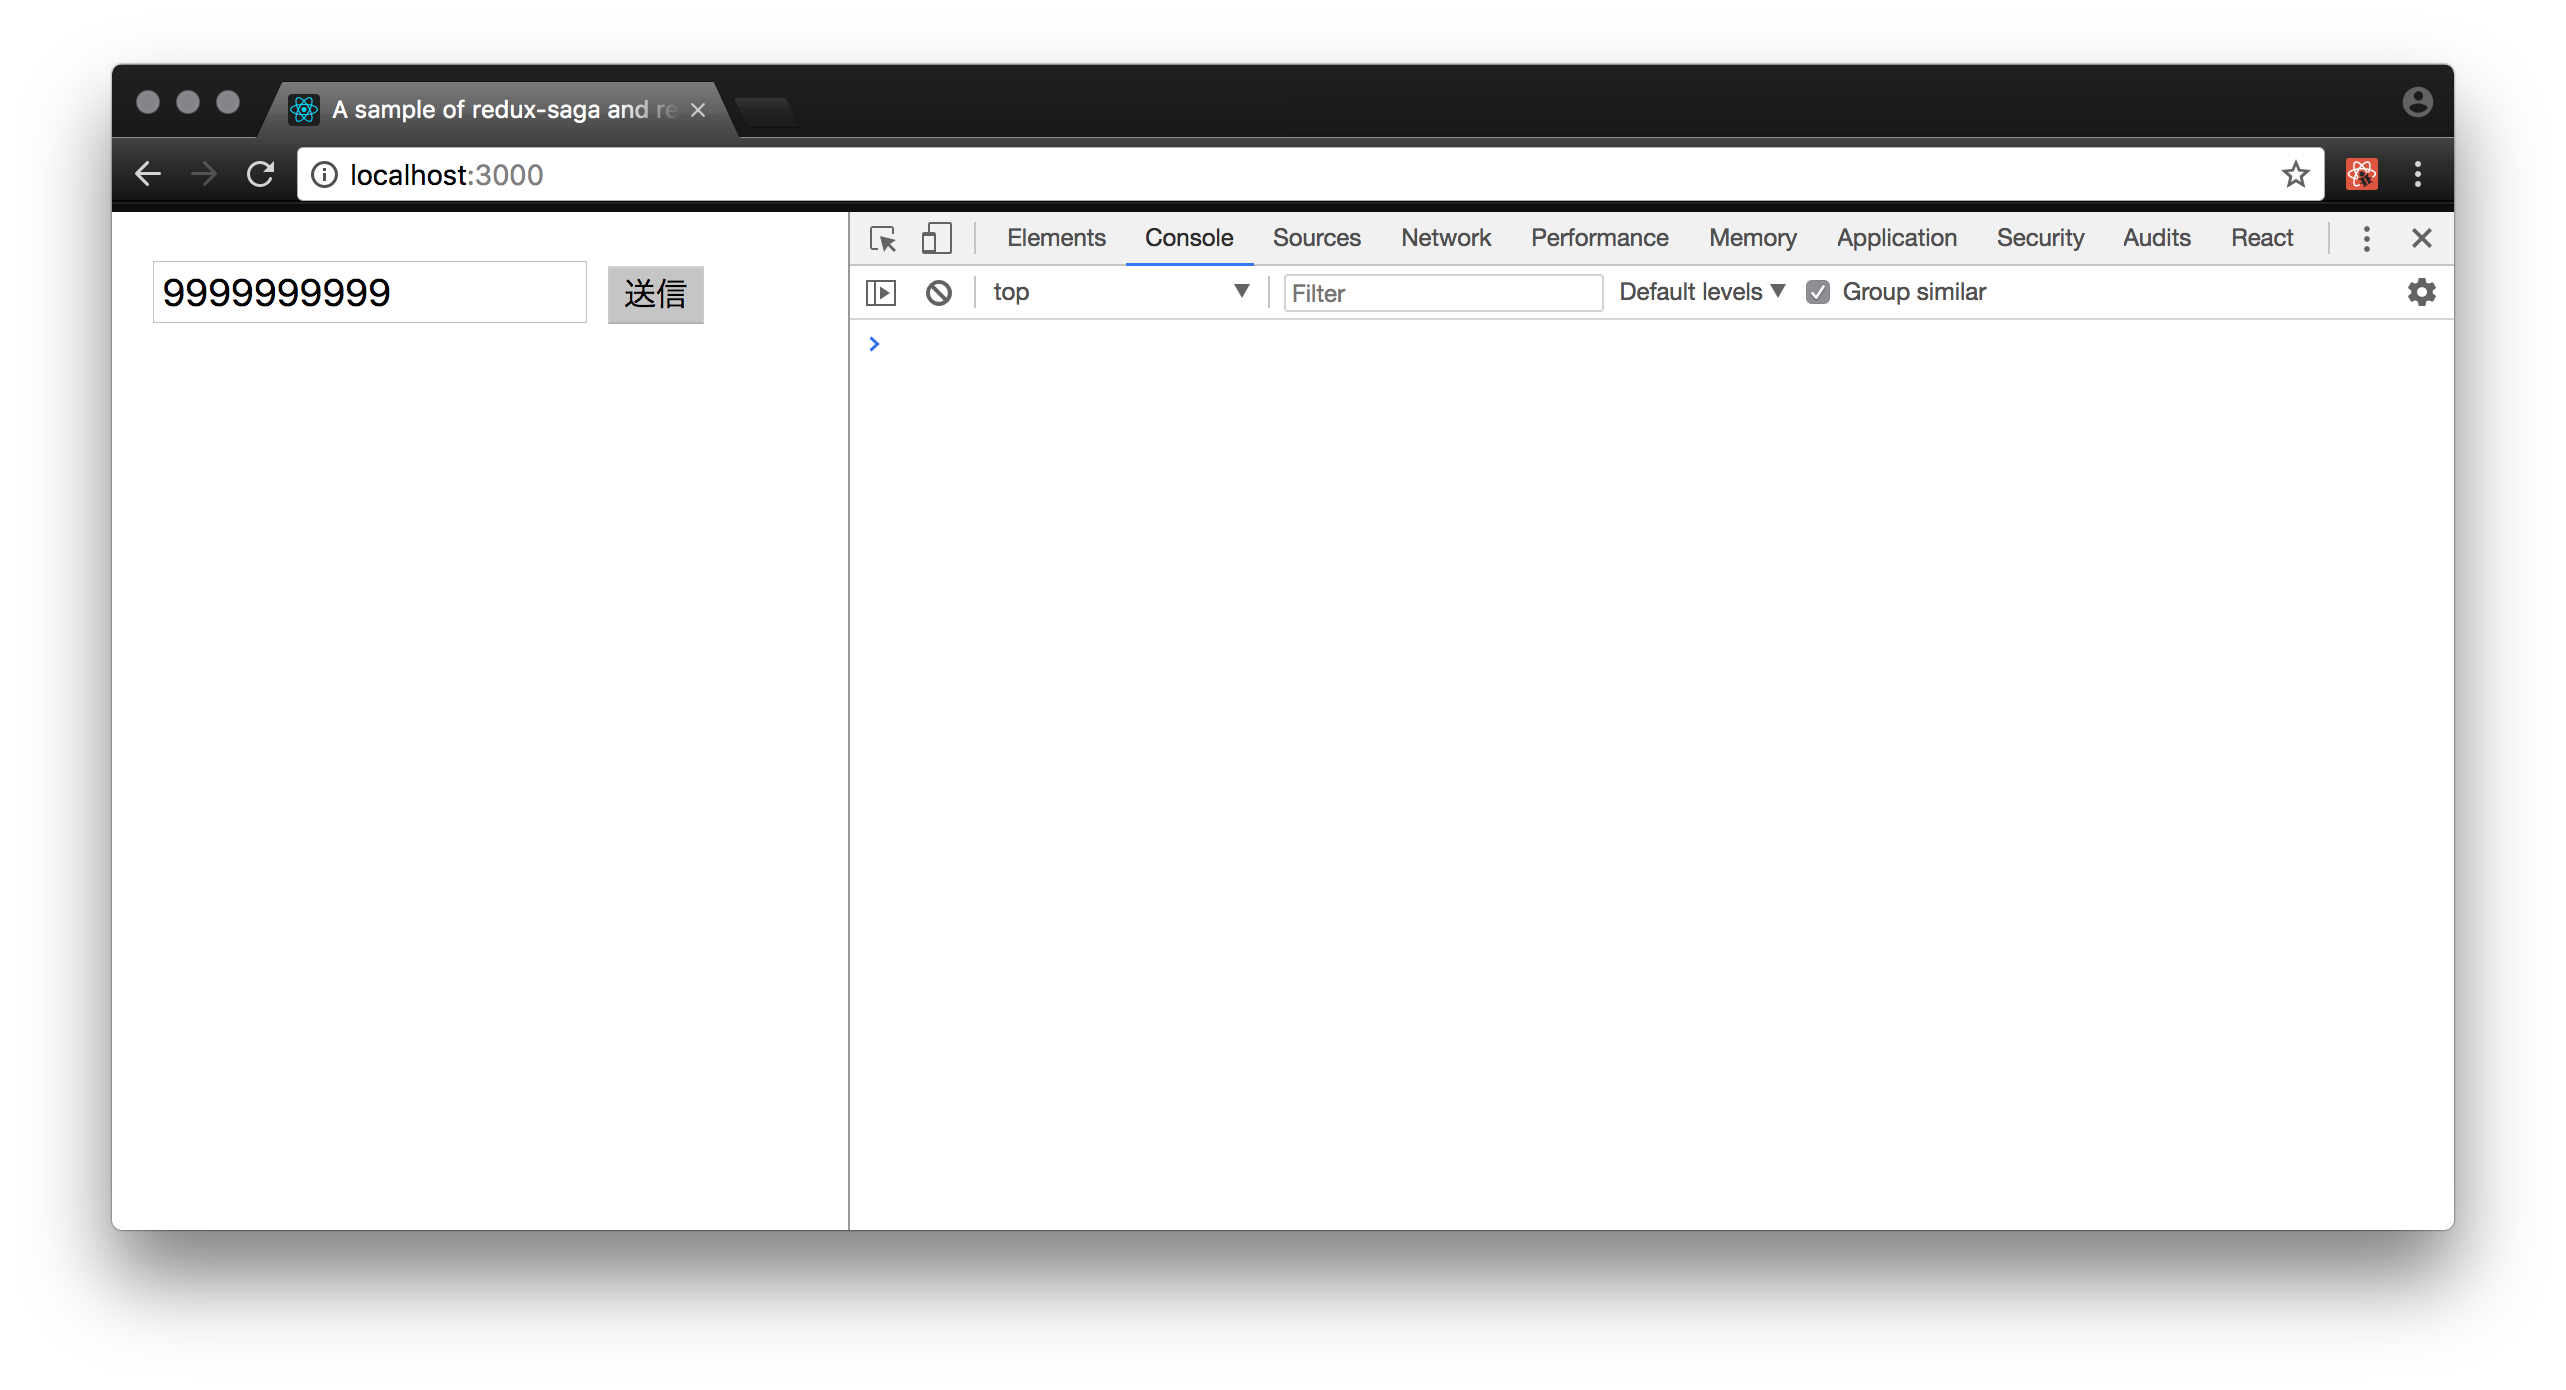
上記の修正後、フォームから 1500043 および 9999999999 を入力して、送信ボタンをクリックすると、以下のように意図したとおりに画面遷移します。
7.4.1 成功時
 上記で、送信をクリックすると、以下のように `/success` に遷移して、 `Success`コンテナが renderされる。

7.4.2 失敗時
 上記で、送信をクリックすると、以下のように `/failure` に遷移して、 `Failure`コンテナが renderされる。

🐾ここまでの追加・修正コミット: sagaとhistoryによる画面遷移
以上で、スパイクの主題であった、
WebAPIをリクエストし、その結果に応じた画面遷移をredux-sagaとreact-routerで実現するには?
という問題は解決されました。ですが、もう少し手を入れてアプリらしくしてみます。
8. 画面表示の改良
以下の5点を改良します。
-
成功時、
/successにて該当した住所を表示 -
失敗時、
/failureにてエラーメッセージを表示(有効なエラーメッセージがレスポンスに含まれる場合) -
成功時、失敗時ともに、フォームにもどるリンクを追加
-
もどるリンクから、フォームに戻ったときに、前回入力した郵便番号をテキスト入力のデフォルト値として表示
-
フォームで送信ボタンをクリックされた後、APIのレスポンス待ちの間、ローディングアイコンを表示
以下、上記の改良を施したソースです。
8.1 結果表示画面
src/containers/Success.jsx
import React, { Component } from 'react';
import { connect } from "react-redux";
import { Link } from 'react-router-dom';

class Success extends Component {

  render() {
    return(
      <div>
        <div className="message success">住所の取得に成功しました。</div>
        <br />
        <div>入力された値:<span className="em">{this.props.zipCode}</span></div>
        <div>取得された住所:<span className="em">{this.props.address}</span></div>
        <br />
        <Link to='/'>もどる</Link>
      </div>
    );
  }
}

function mapStateToProps(state) {
  return state
}

export default connect(mapStateToProps)(Success);
src/containers/Failure.jsx
import React, { Component } from 'react';
import { connect } from "react-redux";
import { Link } from 'react-router-dom';

class Failure extends Component {

  render() {
    return(
      <div>
        <div className="message failed">住所の取得に失敗しました。</div>
        <br />
        <div>入力された値:<span className="em">{this.props.zipCode}</span></div>
        {this.props.error && <div>エラーメッセージ:<span className="em">{this.props.error}</span></div>}
        <br />
        <Link to='/'>もどる</Link>
      </div>
    );
  }
}

function mapStateToProps(state) {
  return state
}

export default connect(mapStateToProps)(Failure);
8.2 入力フォーム画面
src/containers/forms/InputForm.jsx
import React, { Component } from 'react';
import { connect } from "react-redux";
import { getAddressRequested } from "../../ducks/address";

class InputForm extends Component {
  constructor(props) {
    super(props);
    this.state = { zipCode: this.props.zipCode || '' };

    this.handleChange = this.handleChange.bind(this);
    this.handleSubmit = this.handleSubmit.bind(this);
  }

  handleChange(e) {
    this.setState({ zipCode: e.target.value.replace(/[^0-9]/, '') });
  }

  handleSubmit(e) {
    e.preventDefault();
    const meta = {
      pageOnSuccess: '/success',
      pageOnFailure: '/failure'
    };
    this.props.dispatch(getAddressRequested(this.state.zipCode, meta));
  }

  render() {
    return(
      <div className="form">
        <form onSubmit={this.handleSubmit}>
          <input
            type="text"
            name="zipCode"
            value={this.state.zipCode}
            placeholder="半角数字で入力"
            onChange={this.handleChange} />
          { this.props.apiIsProcessing ?
            <span className="loading">処理中・・・
              <img alt='loading' className="loading-icon" src='/img/loading.gif'/></span>  :
            <input type="submit" value="送信" /> }
        </form>
      </div>
    );
  }
}

function mapStateToProps(state) {
  return state
}

export default connect(mapStateToProps)(InputForm);
上記で、ローディングアイコン loading.gif は以下のようなものです。
この画像を public/img/ に保存します。
8.3 スタイルシート
最後に、public/css/style.css にいくつか追記して、以下のようにします。
div#app {
  padding-top: 16px;
  padding-left: 12px;
}

input[type="text"] {
  font-size: 14pt;
  margin-right: 10px;
  padding: 3px;
}

input[type="submit"] {
  font-size: 12pt;
  background-color: #CCC;
  color: #000;
}

.form { position: relative; }
.loading { color: #888; }
.loading-icon { height: 32px; position: absolute; bottom: 0;}
.message { padding-left: 10px; font-size: 16pt; color: white; }
.success { background-color: #005B98; }
.failed { background-color: #F20000; }
.em { font-weight: bold; }
🐾ここまでの追加・修正コミット: 画面表示の改良
8.4 動作確認
前節までの修正によって、以下のように表示されます。
8.4.1 成功時

送信ボタンをクリックすると、以下が表示される。

8.4.2 失敗時

送信ボタンをクリックすると、以下が表示される。

おわりに
本稿では、redux-sagaとreact-router v4でWebAPIの結果に応じて画面遷移させるスパイクを行い、
とりあえず意図どおりに動くものができました。
最後までお読みいただき、ありがとうございました。
