はじめに
GithubでPull Requetを作成したら、masterにマージする前に自動でビルドされてテストやリンターが走ったら便利。実務ではデプロイツールと連携させたり、AWSやGCP、Slackなどと連携させたりしてさらに効率化を図るけど、ここではCircleCIだけをささっと導入する手順を書く。CircleCIで設定する環境と、実際にアプリを運用する環境をできるだけ合わせることがポイント。手軽に導入できて、設定もYAMLベースでできて簡単なので、CircleCIはとても良い。その他のCIツールとの比較記事はこちら
前提
- Githubで管理しているRailsプロジェクトのリポジトリがある
- CircleCIのアカウントがある
- CircleCIとGithubを連携してある
CircleCIのアカウントがなかったらCircleCIの公式サイトへ行ってサインアップ。CircleCIとGithubを連携してなかったらそのサイトからポチポチボタンを押すだけでできる。
リポジトリの連携
-
CircleCIのダッシュボードのメニューから
ADD PROJECTSをクリック。 - Githubにあげてあるリポジトリの一覧が表示される。
- 連携したいプロジェクトの
Set Up Projectをクリック。
公式のサンプル設定をコピペ
- 自分のローカルのプロジェクトのルートディレクトリ(
appディレクトリが存在するディレクトリ)に戻る。 -
.circleci/config.ymlを作成。 - CircleCIのRuby用のドキュメントのページへ行って、Sample Configurationをコピー。
- 先程作成した
config.ymlにペースト。
設定
CircleCIが管理しているRubyイメージ一覧から適切なイメージを選択・設定
イメージの設定の構造としては、jobs, build, docker以下に、複数のimageが記述できるようになっていて、それぞれにenvironmentが設定できるようになっている。
簡単な注意点は以下。
- イメージのRubyバージョンがプロジェクトのRubyバージョンと一致している。(なかったらDockerイメージを自作するのが早いが、とりあえずはマイナーバージョン(例えば、2.4.1とあったら、2.4まで)までが一致していれば、不具合はそう起こらない。)
- Webpackerなどを使っていてNode.jsが必要な場合は、
nodeと書いてあるイメージを入れる - APIモードで使っていたり、Webpackerを使っていない場合は、とりあえずバージョンだけ気にすればよい。
手順
-
config.ymlを開く。 -
jobs,build,docker,imageとたどって、circleci/ruby:以下を書き換える。(例えば、- image: circleci/ruby:2.5-stretch-node-browsers) -
RAILS_ENVはtestに。
DBイメージ一覧から適切なイメージを選択
-
Rubyの場合と同様に書き換える。(例: - image: circleci/postgres:10.5-alpine)
-
environment以下のDB名の設定は、
database.yml中のテストDBの名前と同一に設定。
Webpackerを使用していない場合
Yarnを使用しないので下記の部分を削除。Webpackerを使用する場合はそのまま。
      # Only necessary if app uses webpacker or yarn in some other way
      - restore_cache:
          keys:
            - rails-demo-yarn-{{ checksum "yarn.lock" }}
            - rails-demo-yarn-

      - run:
          name: Yarn Install
          command: yarn install --cache-folder ~/.cache/yarn

      # Store yarn / webpacker cache
      - save_cache:
          key: rails-demo-yarn-{{ checksum "yarn.lock" }}
          paths:
            - ~/.cache/yarn
Rails4を使用している場合
railsコマンドとrakeコマンドが統一されていないので、bin/rails db:schema:loadを実行しようとすると、Error: Command 'db:schema:load' not recognizedと怒られる。下記のように変更。
      - run:
          name: Database setup
          command: bundle exec rake db:schema:load --trace
Gem rspec_junit_formatterを入れる
group :test do
  gem 'rspec_junit_formatter'
end
bundle
設定例
version: 2 # use CircleCI 2.0
jobs: # a collection of steps
  build: # runs not using Workflows must have a `build` job as entry point
    parallelism: 3 # run three instances of this job in parallel
    docker: # run the steps with Docker
      - image: circleci/ruby:2.3-jessie-node-browsers # ...with this image as the primary container; this is where all `steps` will run
        environment: # environment variables for primary container
          BUNDLE_JOBS: 3
          BUNDLE_RETRY: 3
          BUNDLE_PATH: vendor/bundle
          PGHOST: 127.0.0.1
          PGUSER: circleci-demo-ruby
          RAILS_ENV: test
      - image: circleci/postgres:10.5-alpine # database image
        environment: # environment variables for database
          POSTGRES_USER: circleci-demo-ruby
          POSTGRES_DB: sample-app_test
          POSTGRES_PASSWORD: ""
    steps: # a collection of executable commands
      - checkout # special step to check out source code to working directory

      # Which version of bundler?
      - run:
          name: Which bundler?
          command: bundle -v

      # Restore bundle cache
      - restore_cache:
          keys:
            - rails-demo-bundle-v2-{{ checksum "Gemfile.lock" }}
            - rails-demo-bundle-v2-

      - run:
          name: Bundle Install
          command: bundle check || bundle install

      # Store bundle cache
      - save_cache:
          key: rails-demo-bundle-v2-{{ checksum "Gemfile.lock" }}
          paths:
            - vendor/bundle

      - run:
          name: Wait for DB
          command: dockerize -wait tcp://localhost:5432 -timeout 1m

      - run:
          name: Database setup
          command: bundle exec rake db:schema:load --trace

      - run:
          name: Run rspec in parallel
          command: |
            bundle exec rspec --profile 10 \
                              --format RspecJunitFormatter \
                              --out test_results/rspec.xml \
                              --format progress \
                              $(circleci tests glob "spec/**/*_spec.rb" | circleci tests split --split-by=timings)

      # Save test results for timing analysis
      - store_test_results:
          path: test_results
      # See https://circleci.com/docs/2.0/deployment-integrations/ for example deploy configs
実行する
試しにブランチを切って実行してみる。ローカルでmasterブランチにいるとして、
git add.
git commit -m "test commit"
git push -u origin master:test_branch
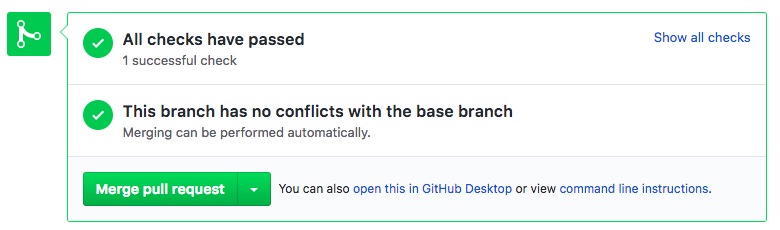
Github上でこのブランチについてPRを作ると、こんな感じでCircleCIが走っていることがわかる。
また、https://circleci.com/gh/Githubアカウント名/プロジェクト名 に行くと、RUNNINGとかSUCCESSとかFAILEDと出ている。