まえおき
- この内容はメモです。間違っている場合があります・・・。
- うまくいかない場合や間違っている指摘、アドバイスはコメントでお願いします。
- デザイン知識ゴミな開発者なので、コピペで実装できる方法を探してTailwind CSSを試行しています。
筆者環境
- VisualStudio2022 CommunityEdition v17.2.0 preview5 (17.0.4はバグでHotReloadが動かない)
- .NET 6.0
- Blazor WASM
- Node.js v16.13.2
- Tailwind CSS v3.0.23
これを読んでできること
- BlazorWASMのプロジェクトを作成し、TailwindCSS仕様に変更する。
- ログイン機能の実装(作成中)
- 成果物
https://github.com/enngawa/BlazorTailwind/tree/%E7%AC%AC1%E5%9B%9E/BlazorTailwind
プロジェクト作成
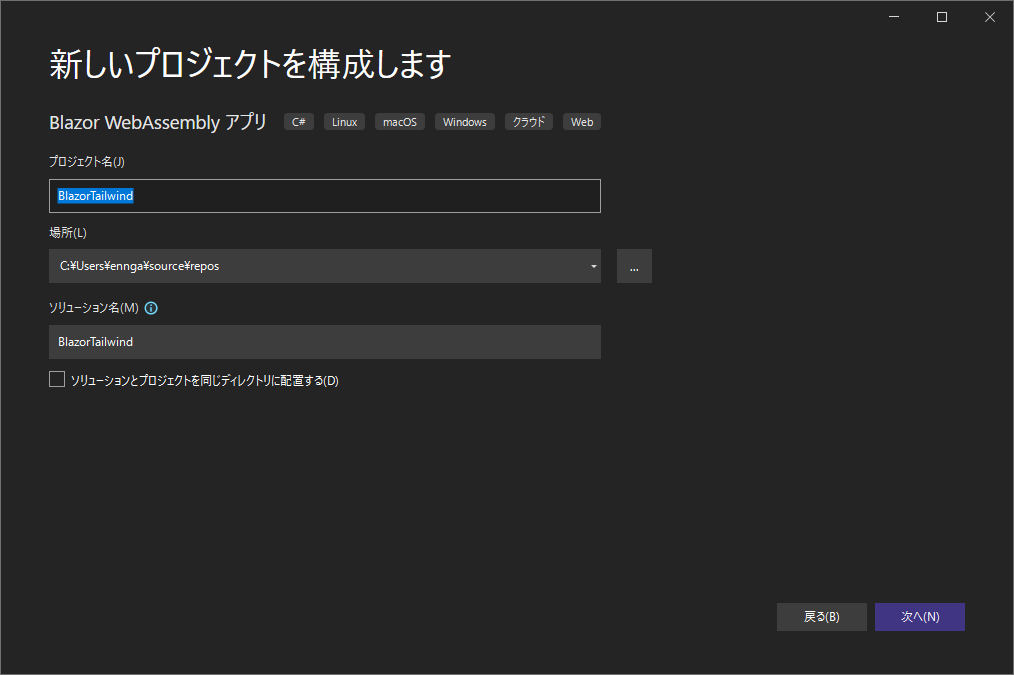
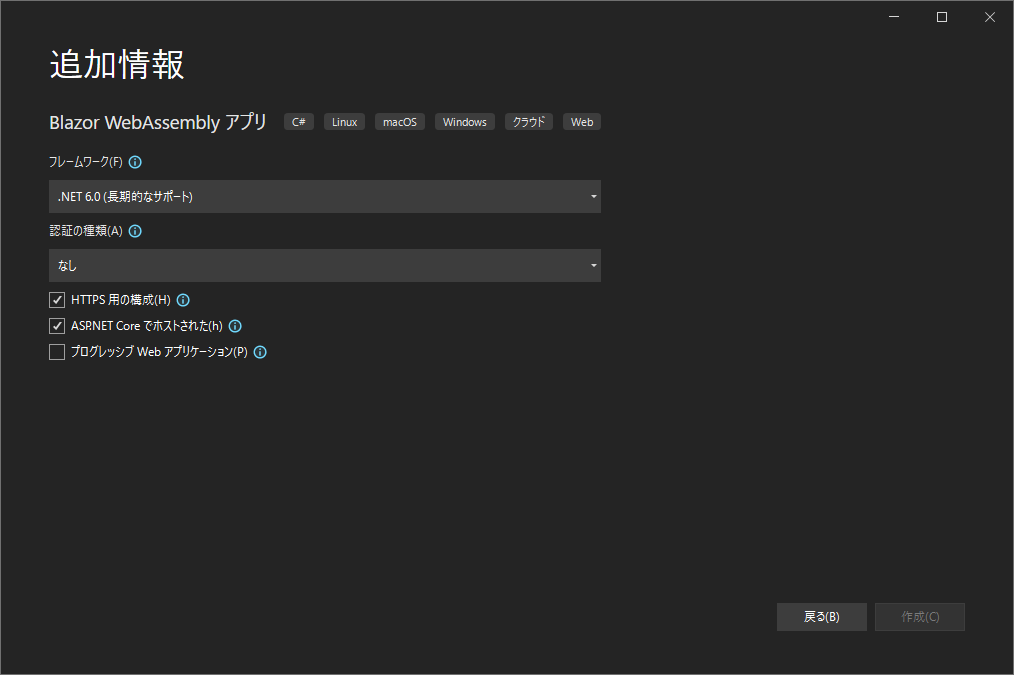
Blazor WASMプロジェクトの作成
#Tailwind CSSの導入
参考: codewithmukesh - Integrating Tailwind CSS with Blazor – Detailed Guide
https://codewithmukesh.com/blog/integrating-tailwind-css-with-blazor/
TailwindCSSのインストール
ソリューションエクスプローラーから、Clientプロジェクトを右クリックして、「ターミナルで開く」
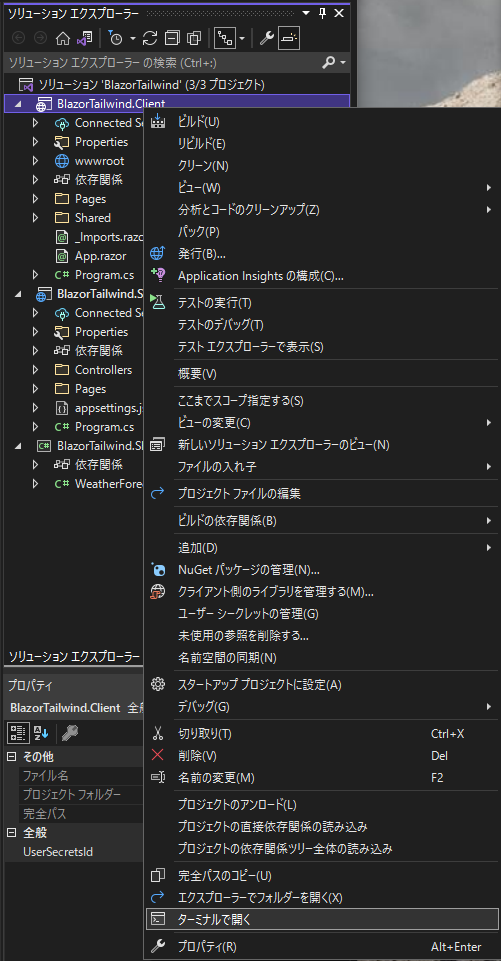
開いた開発用PowerShell(以下、ターミナル)で、「npm version」を実行しnpmが実行できることを確認する。

正常にインストールされている場合は、nodeの各コンポーネントのバージョンが表示される。
nodeがインストールされていない場合、古い場合は、LTSバージョンのnodeをインストールする。
https://nodejs.org/ja/download/
ターミナルで「npm init」コマンドを実行。実行すると設定値を聞かれるので、設定する。

よくわからなければ、何も入力せずにエンター(初期値が設定される)を押して進める。
npmパッケージ用の設定ファイル「package.json」が Clientフォルダに作成される。
「npm install tailwindcss postcss autoprefixer postcss-cli」コマンドを実行する。

npmにより、tailwindcss、postcss、autoprefixer、postcss-cliがインストールされる。
「[ClientProject]/postcss.config.js」を追加する。


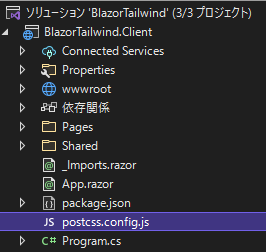
追加した「postcss.config.js」ファイルに以下のコードを貼り付け、保存する。
module.exports = {
  plugins: {
    tailwindcss: {},
    autoprefixer: {},
  }
}
ターミナルで「npx tailwindcss init」コマンドを実行する。

作成された「tailwind.config.js」を以下のように書き換える
module.exports = {
    content: [
        './**/*.html',
        './**/*.razor'
    ],
    variants: {
        extend: {},
    },
    plugins: [],
}
Clientプロジェクトの「[ClientProject]/wwwroot/css」フォルダ配下をすべて削除する。(bootstrapを排除する)
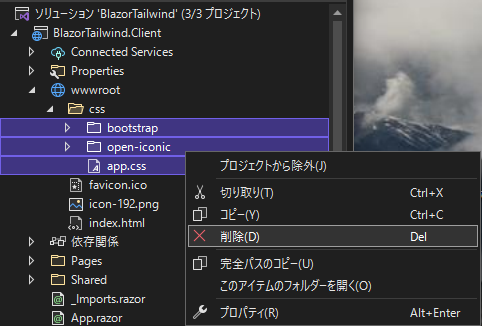

「[ClientProject]/wwwroot/css/app.css」を作成する。


「[ClientProject]/wwwroot/css/app.css」に以下のコードに書き換える。
@tailwind base;
@tailwind components;
@tailwind utilities;

#blazor-error-ui {
    background: lightyellow;
    bottom: 0;
    box-shadow: 0 -1px 2px rgba(0, 0, 0, 0.2);
    display: none;
    left: 0;
    padding: 0.6rem 1.25rem 0.7rem 1.25rem;
    position: fixed;
    width: 100%;
    z-index: 1000;
}

    #blazor-error-ui .dismiss {
        cursor: pointer;
        position: absolute;
        right: 0.75rem;
        top: 0.5rem;
    }
「[ClientProject]/package.json」を開き、「"buildcss" :"postcss wwwroot/css/app.css -o wwwroot/css/app.min.css"」をscriptsへ追加する。
{
  "name": "client",
  "version": "1.0.0",
  "description": "",
  "main": "index.js",
  "scripts": {
    "test": "echo \"Error: no test specified\" && exit 1",
    "buildcss": "postcss wwwroot/css/app.css -o wwwroot/css/app.min.css"
  },
  "author": "",
  "license": "ISC",
  "dependencies": {
    "autoprefixer": "^10.4.2",
    "postcss": "^8.4.7",
    "postcss-cli": "^9.1.0",
    "tailwindcss": "^3.0.23"
  }
}
ターミナルで「npm run buildcss」を実行する。(cssファイルを生成する。)

「[ClientProject]/wwwroot/css/app.min.css」が生成される。
今後スタイルシートを更新した際は、このコマンドを実行して「app.min.css」ファイルを更新する必要がある。
Clientプロジェクトのファイル(.csproj)をテキストエディタ等で開いて、ビルドのたびにコマンドを実行する設定を追加する。
<Target Name="PostBuild" AfterTargets="PostBuildEvent">
  <Exec Command="npm run buildcss" />
</Target>

追加すると、ビルド時の出力に実行されている様子が確認できる。

「[ClientProject]/wwwroot/index.html」をtailwind仕様に書き換える。
<!DOCTYPE html>
<html lang="ja">
    <head>
        <meta charset="utf-8" />
        <meta name="viewport" content="width=device-width, initial-scale=1.0, maximum-scale=1.0, user-scalable=no" />
        <title>BlazorTailwind</title>
        <base href="/" />
        <!--<link href="css/bootstrap/bootstrap.min.css" rel="stylesheet" />
        <link href="css/app.css" rel="stylesheet" />-->
        <link href="css/app.min.css" rel="stylesheet" />
        <link href="BlazorTailwind.Client.styles.css" rel="stylesheet" />
    </head>
    <body class="font-custom">
        <div id="app">Loading...</div>

        <div id="blazor-error-ui">
            An unhandled error has occurred.
            <a href="" class="reload">Reload</a>
            <a class="dismiss">🗙</a>
        </div>
        <script src="_framework/blazor.webassembly.js"></script>
    </body>
</html>
行ったこと
htmlタグのlangをjaに変更
bootstrapとapp.cssをコメントアウト
app.min.cssを追加。
「[ClientProject]/Pages/Index.razor」にtailwindのサンプルを追記する。
@page "/"

<PageTitle>Index</PageTitle>

<h1>Hello, world!</h1>

Welcome to your new app.

<SurveyPrompt Title="How is Blazor working for you?" />

<!-- ここから追加 -->
<div class="bg-gray-50">
    <div class="mx-auto py-12 px-4">
        <div class="mt-8 flex">
            <button class="bg-gray-500 hover:bg-purple-600 p-4 shadow-md rounded-md text-white m-10">
                Download
            </button>
            <button class="bg-gray-500 hover:bg-red-600 p-4 shadow-md rounded-md text-white m-10">
                Visit
            </button>
        </div>
    </div>
</div>
デバッグ実行し、DownloadとVisitボタンにスタイルが適用された状態で、以下のように表示されたら導入完了。

うまく表示されない場合は、リビルド+キャッシュを消してリトライ。
TailWindCSS用にファイル構成を変更
@inherits LayoutComponentBase

<div class="page">
    <main class='container mx-auto'>
        @Body
    </main>
</div>
削除するファイル
「[ClientProject]/Pages/Counter.razor」「[ClientProject]/Pages/FetchData.razor」「[ClientProject]/Shared/NavMenu.razor」「[ClientProject]/Pages/SurveyPrompt.razor」
「[ServerProject]/Controllers/WeatherForecastController.cs」
「[SharedProject]/WeatherForecast.cs」
ファイルの削除に伴い、「[ClientProject]/Pages/Index.razor」を修正
@page "/"
<PageTitle>Index</PageTitle>
ログイン画面の実装
実装にあたり、Tailwind CSSのLoginFormテンプレートを使用します。
https://flowrift.com/
■ライセンス:https://github.com/n6ai/flowrift/blob/main/LICENSE
⇒ Flowrift Code License:私用・商用プロジェクト関係なくコピー・変更・配布して使用できます。
ログイン画面(デザイン)の実装
「[ClientProject]/Pages/Login.razor」を作成

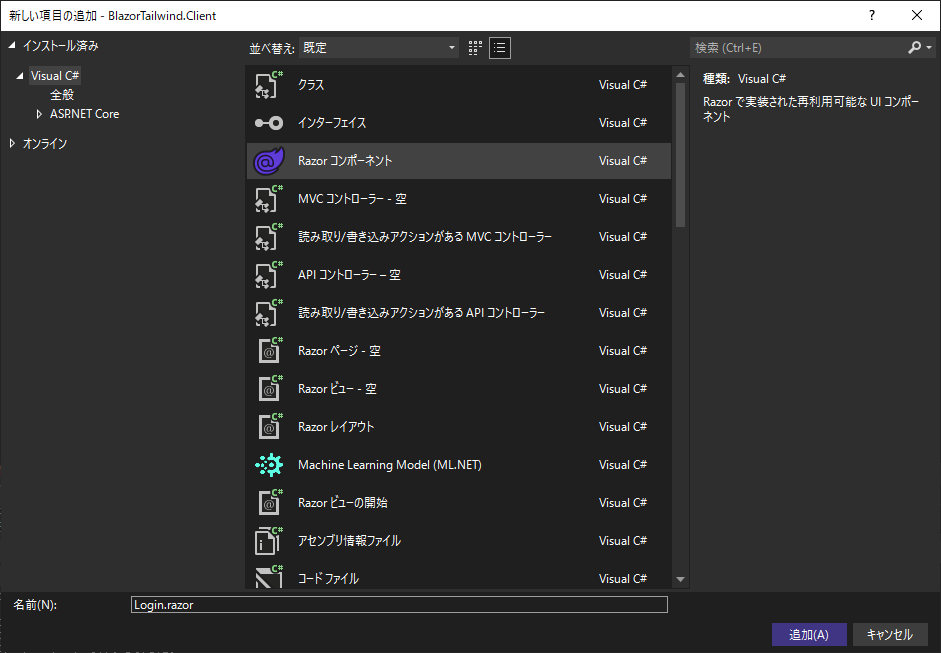
デフォルトのコードをすべて消し、「@page "/Login"」と「<PageTitle>ログイン</PageTitle>」を追加。
次にFlowriftのログインフォームテンプレートを使用する。コードをコピーして貼り付ける。
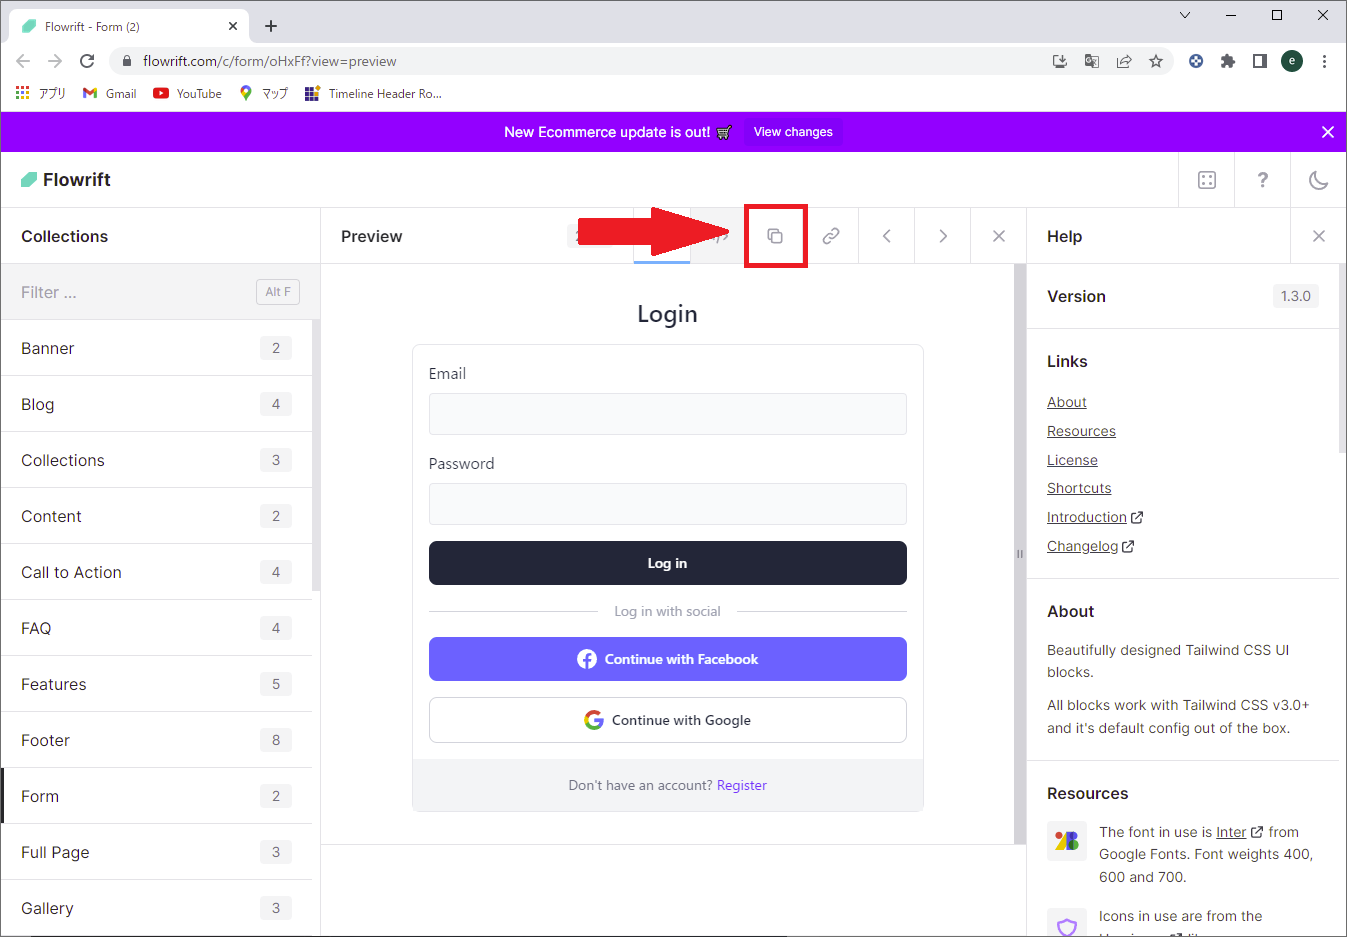
Flowrift - form(2)
https://flowrift.com/c/form/oHxFf?view=preview
テンプレートのコードコピーはここをクリックすれば可能
@page "/Login"

<PageTitle>ログイン</PageTitle>

<div class="bg-white py-6 sm:py-8 lg:py-12">
  <div class="max-w-screen-2xl px-4 md:px-8 mx-auto">
    <h2 class="text-gray-800 text-2xl lg:text-3xl font-bold text-center mb-4 md:mb-8">Login</h2>

    <form class="max-w-lg border rounded-lg mx-auto">
      <div class="flex flex-col gap-4 p-4 md:p-8">
        <div>
          <label for="email" class="inline-block text-gray-800 text-sm sm:text-base mb-2">Email</label>
          <input name="email" class="w-full bg-gray-50 text-gray-800 border focus:ring ring-indigo-300 rounded outline-none transition duration-100 px-3 py-2" />
        </div>

        <div>
          <label for="password" class="inline-block text-gray-800 text-sm sm:text-base mb-2">Password</label>
          <input name="password" class="w-full bg-gray-50 text-gray-800 border focus:ring ring-indigo-300 rounded outline-none transition duration-100 px-3 py-2" />
        </div>

        <button class="block bg-gray-800 hover:bg-gray-700 active:bg-gray-600 focus-visible:ring ring-gray-300 text-white text-sm md:text-base font-semibold text-center rounded-lg outline-none transition duration-100 px-8 py-3">Log in</button>

        <div class="flex justify-center items-center relative">
          <span class="h-px bg-gray-300 absolute inset-x-0"></span>
          <span class="bg-white text-gray-400 text-sm relative px-4">Log in with social</span>
        </div>

        <button class="flex justify-center items-center bg-blue-500 hover:bg-blue-600 active:bg-blue-700 focus-visible:ring ring-blue-300 text-white text-sm md:text-base font-semibold text-center rounded-lg outline-none transition duration-100 gap-2 px-8 py-3">
          <svg class="w-5 h-5 shrink-0" width="24" height="24" viewBox="0 0 24 24" fill="none" xmlns="http://www.w3.org/2000/svg">
            <path d="M12 0C5.37273 0 0 5.37273 0 12C0 18.0164 4.43182 22.9838 10.2065 23.8516V15.1805H7.23764V12.0262H10.2065V9.92727C10.2065 6.45218 11.8996 4.92655 14.7878 4.92655C16.1711 4.92655 16.9025 5.02909 17.2489 5.076V7.82945H15.2787C14.0525 7.82945 13.6244 8.99182 13.6244 10.302V12.0262H17.2178L16.7302 15.1805H13.6244V23.8773C19.4815 23.0825 24 18.0747 24 12C24 5.37273 18.6273 0 12 0Z" fill="white" />
          </svg>

          Continue with Facebook
        </button>

        <button class="flex justify-center items-center bg-white hover:bg-gray-100 active:bg-gray-200 border border-gray-300 focus-visible:ring ring-gray-300 text-gray-800 text-sm md:text-base font-semibold text-center rounded-lg outline-none transition duration-100 gap-2 px-8 py-3">
          <svg class="w-5 h-5 shrink-0" width="24" height="24" viewBox="0 0 24 24" fill="none" xmlns="http://www.w3.org/2000/svg">
            <path d="M23.7449 12.27C23.7449 11.48 23.6749 10.73 23.5549 10H12.2549V14.51H18.7249C18.4349 15.99 17.5849 17.24 16.3249 18.09V21.09H20.1849C22.4449 19 23.7449 15.92 23.7449 12.27Z" fill="#4285F4" />
            <path d="M12.2549 24C15.4949 24 18.2049 22.92 20.1849 21.09L16.3249 18.09C15.2449 18.81 13.8749 19.25 12.2549 19.25C9.12492 19.25 6.47492 17.14 5.52492 14.29H1.54492V17.38C3.51492 21.3 7.56492 24 12.2549 24Z" fill="#34A853" />
            <path d="M5.52488 14.29C5.27488 13.57 5.14488 12.8 5.14488 12C5.14488 11.2 5.28488 10.43 5.52488 9.71V6.62H1.54488C0.724882 8.24 0.254883 10.06 0.254883 12C0.254883 13.94 0.724882 15.76 1.54488 17.38L5.52488 14.29Z" fill="#FBBC05" />
            <path d="M12.2549 4.75C14.0249 4.75 15.6049 5.36 16.8549 6.55L20.2749 3.13C18.2049 1.19 15.4949 0 12.2549 0C7.56492 0 3.51492 2.7 1.54492 6.62L5.52492 9.71C6.47492 6.86 9.12492 4.75 12.2549 4.75Z" fill="#EA4335" />
          </svg>

          Continue with Google
        </button>
      </div>

      <div class="flex justify-center items-center bg-gray-100 p-4">
        <p class="text-gray-500 text-sm text-center">Don't have an account? <a href="#" class="text-indigo-500 hover:text-indigo-600 active:text-indigo-700 transition duration-100">Register</a></p>
      </div>
    </form>
  </div>
</div>
デバッグ実行し、URLに「/Login」追記してアクセス。以下の画面が表示されればOK
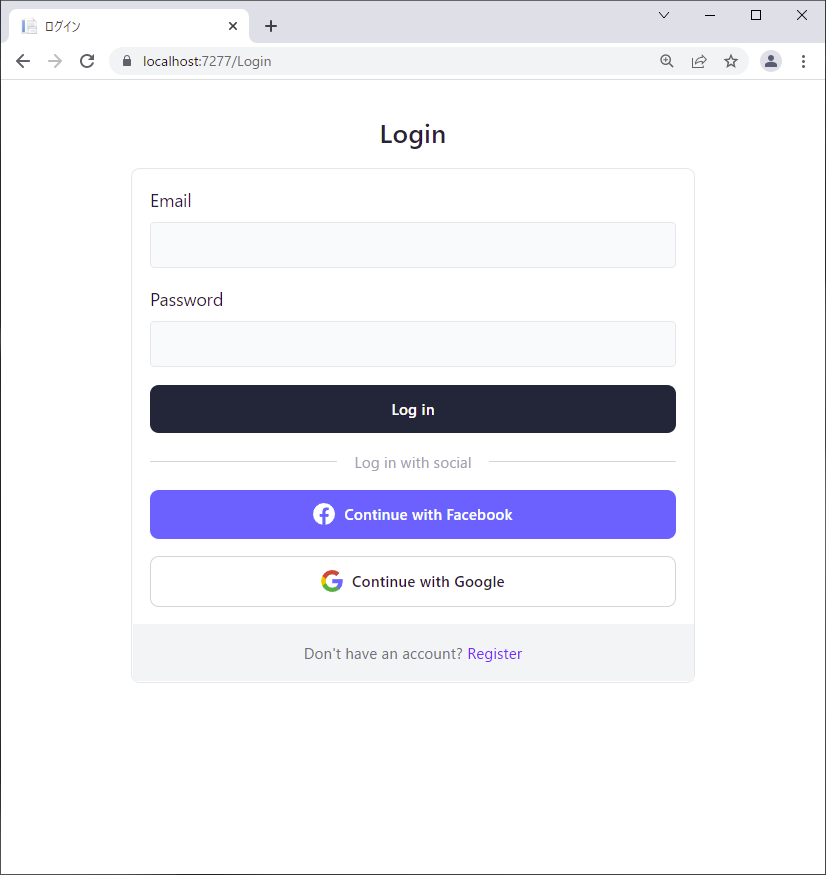
動作が確認できたので、使わないソーシャルログイン削除やら、日本語化やら、placeholderやらカスタマイズ調整
@page "/Login"

<PageTitle>ログイン</PageTitle>

<div class="bg-white py-6 sm:py-8 lg:py-12">
  <div class="max-w-screen-2xl px-4 md:px-8 mx-auto">
    <h2 class="text-gray-800 text-2xl lg:text-3xl font-bold text-center mb-4 md:mb-8">Login</h2>

    <form class="max-w-lg border rounded-lg mx-auto">
      <div class="flex flex-col gap-4 p-4 md:p-8">
        <div>
          <label for="id" class="inline-block text-gray-800 text-sm sm:text-base mb-2">ログインID</label>
          <input name="id" placeholder="Account ID" class="w-full bg-gray-50 text-gray-800 border focus:ring ring-indigo-300 rounded outline-none transition duration-100 px-3 py-2" />
        </div>

        <div>
          <label for="password" class="inline-block text-gray-800 text-sm sm:text-base mb-2">パスワード</label>
          <input name="password" placeholder="Password" class="w-full bg-gray-50 text-gray-800 border focus:ring ring-indigo-300 rounded outline-none transition duration-100 px-3 py-2" />
        </div>

        <button class="block bg-gray-800 hover:bg-gray-700 active:bg-gray-600 focus-visible:ring ring-gray-300 text-white text-sm md:text-base font-semibold text-center rounded-lg outline-none transition duration-100 px-8 py-3">ログイン</button>

        <div class="flex justify-center items-center relative">
          <span class="h-px bg-gray-300 absolute inset-x-0"></span>
          <span class="bg-white text-gray-400 text-sm relative px-4">または</span>
        </div>

        <button class="flex justify-center items-center bg-blue-500 hover:bg-blue-600 active:bg-blue-700 focus-visible:ring ring-blue-300 text-white text-sm md:text-base font-semibold text-center rounded-lg outline-none transition duration-100 gap-2 px-8 py-3">
          パスワードを忘れた場合
        </button>
      </div>

      <div class="flex justify-center items-center bg-gray-100 p-4">
        <p class="text-gray-500 text-sm text-center">アカウントをお持ちでない場合は <a href="#" class="text-indigo-500 hover:text-indigo-600 active:text-indigo-700 transition duration-100">こちら</a></p>
      </div>
    </form>
  </div>
</div>
認証機能はMicrosoft.AspNetCore.Components.Authorizationを使用する。
ASP.NET Core Blazor の認証と承認
https://docs.microsoft.com/ja-jp/aspnet/core/blazor/security/?view=aspnetcore-6.0
ログイン機能の実装
「ツール ⇒ Nugetパッケージマネージャー ⇒ ソリューションのNugetパッケージの管理」から
「Microsoft.AspNetCore.Components.Authorization」
「Microsoft.AspNetCore.Authorization」
を[ClientProject]にチェックをつけて「インストール」をクリック
注:安定板をインストールすること。
[ClientProject]/Pages/_Imports.razorに
「@using Microsoft.AspNetCore.Components.Authorization」
「@using Microsoft.AspNetCore.Authorization」
を追記
@using System.Net.Http
@using System.Net.Http.Json
@using Microsoft.AspNetCore.Components.Forms
@using Microsoft.AspNetCore.Components.Routing
@using Microsoft.AspNetCore.Components.Web
@using Microsoft.AspNetCore.Components.Web.Virtualization
@using Microsoft.AspNetCore.Components.WebAssembly.Http
@using Microsoft.JSInterop
@using BlazorTailwind.Client
@using BlazorTailwind.Client.Shared

@using Microsoft.AspNetCore.Components.Authorization
@using Microsoft.AspNetCore.Authorization
「[ClienProject]/Pages/Index.razor.cs」を追加


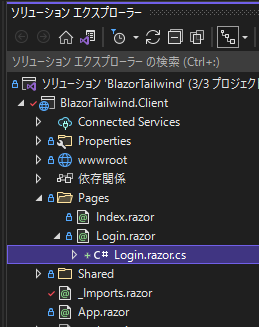
[ClientProject]/Programs.csに以下を追加。
「builder.Services.AddOptions();」
「builder.Services.AddAuthorizationCore();」
using BlazorTailwind.Client;
using Microsoft.AspNetCore.Components.Web;
using Microsoft.AspNetCore.Components.WebAssembly.Hosting;

var builder = WebAssemblyHostBuilder.CreateDefault(args);
builder.RootComponents.Add<App>("#app");
builder.RootComponents.Add<HeadOutlet>("head::after");

builder.Services.AddOptions();
builder.Services.AddAuthorizationCore();

builder.Services.AddScoped(sp => new HttpClient { BaseAddress = new Uri(builder.HostEnvironment.BaseAddress) });

await builder.Build().RunAsync();
現状の課題
- ホットリロードの対応ができない。(解決済)
- 公式フォーラムに情報があった。VS2022のバグっぽい。17.1.0 preview5をインストールして解決した。
https://developercommunity.visualstudio.com/t/Hot-Reload-For-CSS-Not-Working-With-Blaz/1590384?space=8&q=hot+reload+css
- 公式フォーラムに情報があった。VS2022のバグっぽい。17.1.0 preview5をインストールして解決した。
- Blazorのエラー発生時にerror-uiを表示できない。(解決済)
- app.cssに設定を入れれば、治るらしい。
https://medium.com/@georgemr/tailwind-css-in-blazor-asp-net-core-app-with-grunt-24a627cd9f3a
- app.cssに設定を入れれば、治るらしい。
- コンポーネントの置き場所をどう整理するかルール決め
- 認証周りの実装
- https://qiita.com/nobu17/items/91c96ede1bd043fe1373 これで検討中(firebaseは使わないけど。)
coming soon...
ログイン機能の実装
bUnitテストの実装
