vagrant+ContOS7+php7.2+nginx+phalcon4 環境構築と問題記録
参考資料:
https://qiita.com/wjtnk/items/f2d72fb3790d008a3154
ツールのインストール:
https://www.virtualbox.org/
https://www.vagrantup.com/
1.仮想環境の立ち上げ
$ mkdir phalcon
$ cd phalcon
$ mkdir sync
$ vagrant init CentOS7
phalcon/Vagrantfileを編集する
Vagrant.configure("2") do |config|
  config.vm.box = "centos/7"
  #ローカルでアクセスするときのIPアドレス。
  config.vm.network "private_network", ip: "192.168.10.10"
  #同期先を指定。「カレントディレクトリ(.)を/vagrant以下に同期」と、「syncディレクトリを/var/www/」以下に同期する。
  config.vm.synced_folder ".", "/vagrant"
  config.vm.synced_folder "sync", "/var/www/"
  config.vm.network "forwarded_port", guest: 80, host: 8080
  #ここで、epelとremiを使えるようにします。
  config.vm.provision "shell", inline: <<-SHELL
    sudo yum update -y
    sudo yum -y install epel-release
    sudo rpm -Uvh http://rpms.famillecollet.com/enterprise/remi-release-7.rpm
  SHELL
end
vagrantを立ち上げる
$ cd phalcon
$ vagrant up --provision
エラーが発生していると、エラーメッセージにより対処する。
Vagrant was unable to mount VirtualBox shared folders. This is usually
because the filesystem "vboxsf" is not available. This filesystem is
made available via the VirtualBox Guest Additions and kernel module.
Please verify that these guest additions are properly installed in the
guest. This is not a bug in Vagrant and is usually caused by a faulty
Vagrant box. For context, the command attempted was:
下記で解消する:
$ vagrant plugin install vagrant-vbguest
2.仮想環境に必要なアプリケーションをインストール
$ vagrant ssh
$ sudo yum install --enablerepo=remi-php72 php php-mbstring php-mcrypt php-mysqlnd php-pdo php-fpm nginx -y
php-fpmの設定の編集
$ sudo vi /etc/php-fpm.d/www.conf
補足:「/」でvimに検索します
; user = apache
; group = apache
; listen = 127.0.0.1:9000
;listen.owner = nobody
;listen.group = nobody

user = nginx
group = nginx
listen = /run/php-fpm/php-fpm.sock
listen.owner = nginx
listen.group = nginx
nginxの設定の編集
sudo vi /etc/nginx/nginx.conf
rootに、前述したVagrantfileに指定したrootディレクトリーに指定。
「allow all;」と設定しましたが、Nginx でIPアドレスによるアクセス制御を行う時、別途設定する。
参考:
https://dev.classmethod.jp/articles/nginx-ip-access-control/
 server {
        listen       80 default_server;
        listen       [::]:80 default_server;
        server_name  _;
        root         /var/www;
        index index.php index.html index.htm;
        # Load configuration files for the default server block.
        include /etc/nginx/default.d/*.conf;
        location / {
            #$_SERVER['REQUEST_URI']を使う
            try_files $uri $uri/ /index.php;
        }

        error_page 404 /404.html;
            location = /40x.html {
        }

        error_page 500 502 503 504 /50x.html;
            location = /50x.html {
        }

        location ~ .php$ {
            fastcgi_pass unix:/run/php-fpm/php-fpm.sock;
            fastcgi_index index.php;
            fastcgi_param SCRIPT_FILENAME $document_root/$fastcgi_script_name;
            include fastcgi_params;
        }
    }
この段階で、一旦サーバーをテストする
$ exit
$ cd sync
$ touch index.php
<?php phpinfo();
設定が完了したら、仮想環境で、file は反映されているかをチェック
[vagrant@localhost /]$ cd var/www
[vagrant@localhost www]$ ls
cgi-bin  html  index.php
サーバーを起動する。注意:phpのextensionなど新しい追加が発生する時、再起動は必要。
$ vagrant ssh
$ sudo systemctl restart php-fpm
$ sudo systemctl restart nginx

## 状態確認、activeの場合は成功
$ sudo systemctl status php-fpm
$ sudo sudo systemctl status nginx
192.168.10.10 にアクセスし、phpinfoページが出てきたら成功。
たまに「Nginxで403 Forbidden」の場合、「/var/www」の配下のファイルの権限を変更するか、またSELinuxを無効にするか、どちらかの対処策あります。
参考資料:https://engineers.weddingpark.co.jp/?p=1765
3.phalcon4をインストール
$ sudo yum install --enablerepo=remi-php72 php-phalcon4 -y
インストールされたphalcon.soを探す。
$ find / -name phalcon.so
下記の箇所に見つかりました。
/usr/lib64/php/modules/phalcon.so
/usr/lib64/php-zts/modules/phalcon.so
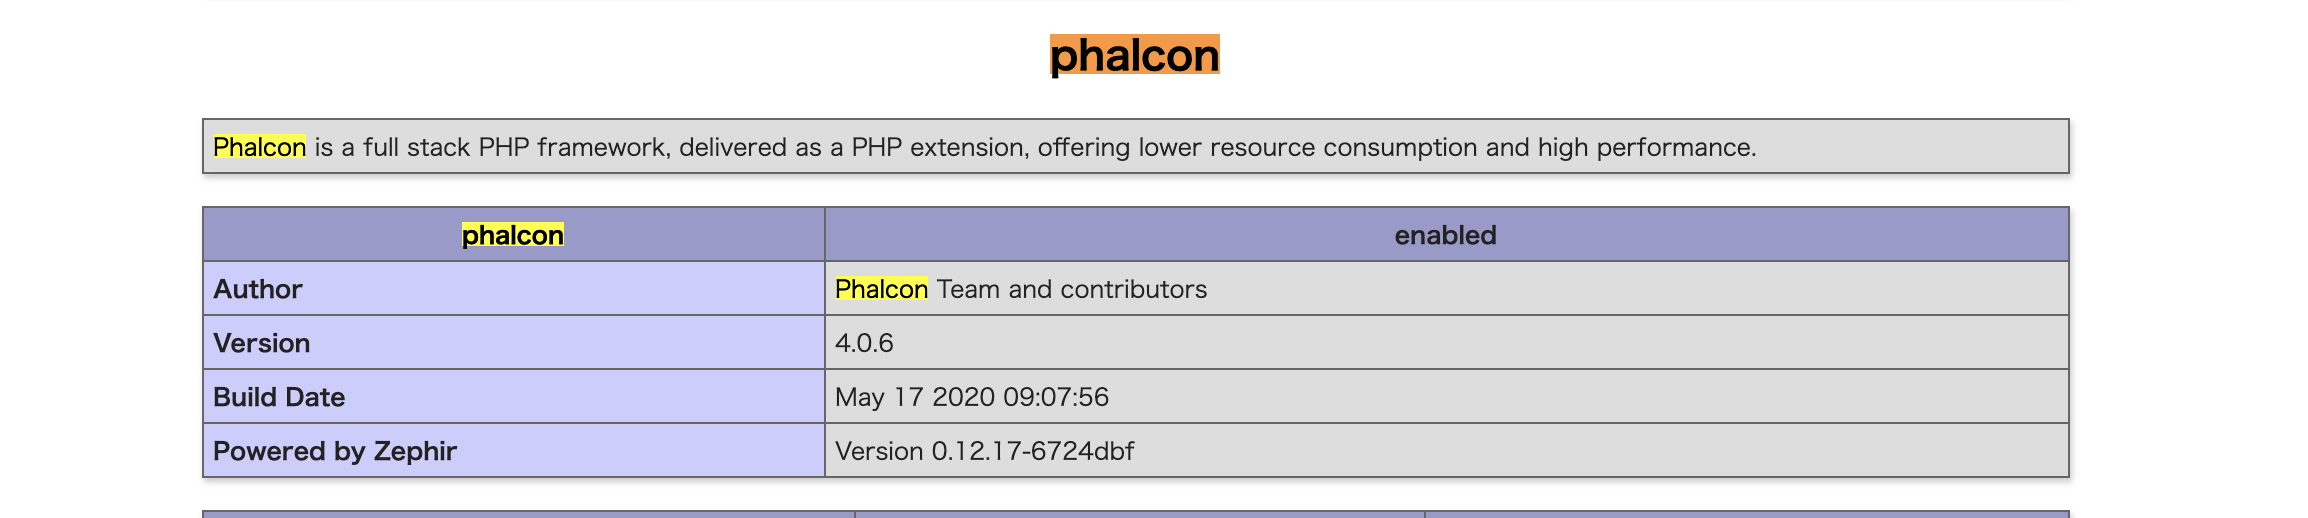
php --info | grep phalcon
下記で出力すれば完了:
/etc/php.d/50-phalcon.ini
phalcon
phalcon => enabled
再度192.168.10.10にアクセスし、phpinfoページに「phalcon」が出てきたら成功。