先週メルカリのグループ会社ソウゾウがリリースした「アッテ」の開発の裏側を聞けるatte FeS【Go・Swift開発編】に行ってきました。
その際の発表資料がこちらで公開されており、その中でもSwiftとRxSwiftの内容を聞いてRxSwiftに興味を持ったので今更ですが入門してみました。
RxSwiftとは
ReactiveX(Reactive Extensions)のSwift実装です。他にもRxJavaやRxJSなど各言語や各プラットフォーム用のRxがあります。
ReacitveXというのは
ReactiveX is a library for composing asynchronous and event-based programs by using observable sequences.
らしいです。
observableのシークエンスを使って非同期でイベントベースのプログラムを実現するためのライブラリ。
という感じでしょうか?
このobservableというのがキモらしいのですがよくわからないので実際に動かしてから勉強しようと思いました。
導入してみる
RxSwiftのinstllationを見るとCocoaPodsやCarthageで導入できるようです。今回はCocoaPodsで導入してみます。
まずRxSwiftSampleというプロジェクトを作成します。
そしてPodfileに下記のように記述。
use_frameworks!

target 'RxSwiftSample' do
    pod 'RxSwift',    '~> 2.0'
    pod 'RxCocoa',    '~> 2.0'
end

# RxTests and RxBlocking have most sense in the context of unit/integration tests
target 'RxSwiftSampleTest' do
    pod 'RxBlocking', '~> 2.0'
    pod 'RxTests',    '~> 2.0'
end
下記のコマンドを実行します。
$ pod install
...
Installing RxBlocking (2.4)
Installing RxCocoa (2.4)
Installing RxSwift (2.4)
Installing RxTests (2.4)
...
ということで2.4が入ったようです。
その他の環境は下記で試しています。
Xcode
Version 7.3 (7D175)

pod --version
0.39.0
RxSwiftを使って実装してみる
テキストフィールドの変更をラベルに自動反映
さっそくSwiftとRxSwiftのP37にある「テキストフィールドの変更をラベルに自動反映」を試してみます。
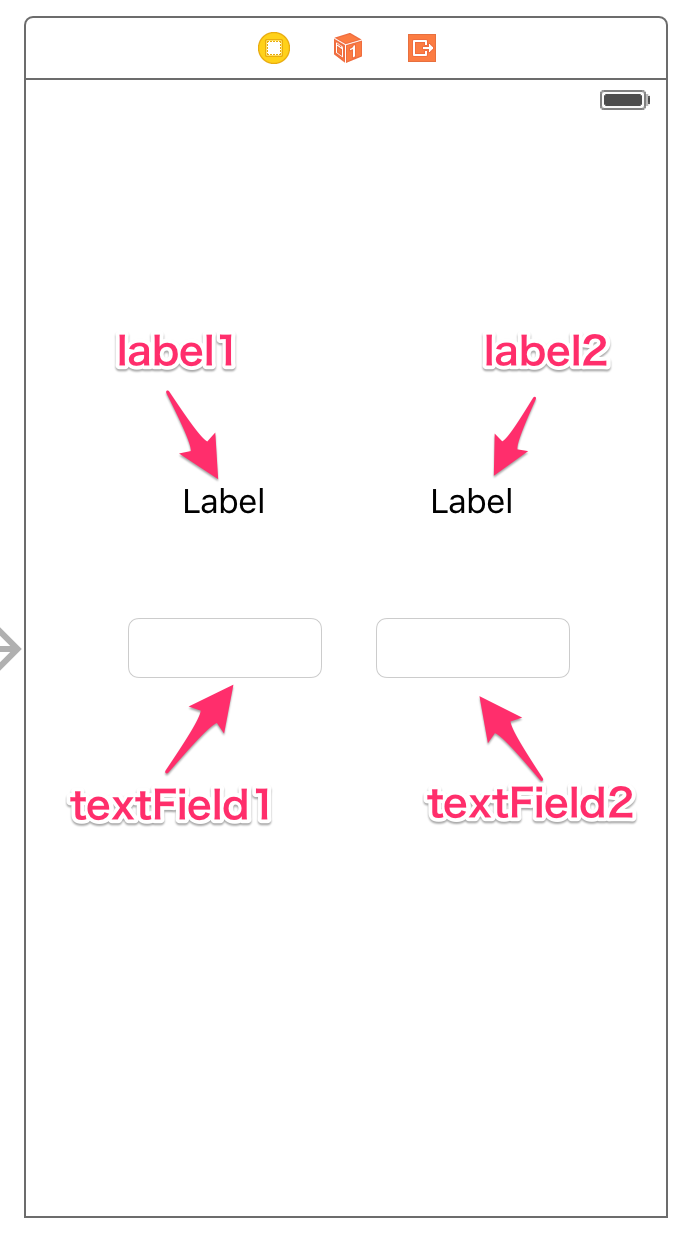
Rxを使わない実装と比較するためにラベルとテキストフィールドを2つずつ配置します。
左側をRxを使った実装(label1, textField1)、右側を既存実装(label2, textField2)としてみます。
とりあえずRxSwiftを使った実装は下記。
import UIKit
import RxSwift		// 1. RxSwiftインポート
import RxCocoa		// 2. RxCocoaインポート

let disposeBag = DisposeBag()	// 3. unsubscribeに必要なもの?

class ViewController: UIViewController {

    // for Rx impl
    @IBOutlet weak var label1: UILabel!
    @IBOutlet weak var textField1: UITextField!

    override func viewDidLoad() {
        super.viewDidLoad()

        textField1.rx_text					// 4. rx_textは後述
            .map {"「\($0)」"}				// 5. 変更があった要素に「」つけて
            .bindTo(label1.rx_text)			// 6. labelに反映
            .addDisposableTo(disposeBag)	// 7. 不要になったらunsubscribe
    }

	// ...

}
おお、これだけでテキストフィールドの変更がさくさくラベルに反映される!楽しい。
rx_textとは?
さて、突然textField1にrx_textというプロパティができていますが、
見てみるとRxCocoaが下記のようなextensionでrx_textを定義していました。
extension UITextField {
    /**
    Reactive wrapper for `text` property.
    */
    public var rx_text: ControlProperty<String> {
        return UIControl.rx_value(
            self,
            getter: { textField in
                textField.text ?? ""
            }, setter: { textField, value in
                textField.text = value
            }
        )
    }
}
さらに掘っていくとrx_textはObservableTypeというprotocolに適合していました。
こいつがobservable!(まだ全然わかってないけど)
そしてそのrx_textをmap, bindTo, addDisposableToといろいろ操作をしていくようです。
詳しくはまた今度見ようと思いますが、
- obsevableを一個一個処理して(map)
- observerに紐付けて(bindTo)
- いらなくなったらremoveObserver(addDisposableTo)
と想像。
既存実装で同じ動きを実装してみる
比較のためRxSwiftを使わないで実装してみます。
いくつか実装方法はあると思いますが、テキストが変更されたときに通知されるUITextFieldTextDidChangeNotificationを使って実装してみます。
import UIKit

class ViewController: UIViewController {

    // for existing impl
    @IBOutlet weak var label2: UILabel!
    @IBOutlet weak var textField2: UITextField!

    override func viewDidLoad() {
        super.viewDidLoad()

        // for existing impl
        label2.text = "「」"
        NSNotificationCenter.defaultCenter().addObserver(self, selector: #selector(UITextInputDelegate.textDidChange(_:)), name: UITextFieldTextDidChangeNotification, object: self.textField2)
    }

	// ...

    func textDidChange(notification: NSNotification) {
        if let text = textField2.text {
            label2.text = "「\(text)」"
        }
    }

    deinit {
        NSNotificationCenter.defaultCenter().removeObserver(self)
    }
}
これでも同じ動きは実装できましたが、テキストが変更されたときの処理やremoveObserverの処理を別メソッドとして離れた場所に実装することになるので対象のViewの数が増えるとどれがどの処理がわかりにくくなりそうです。
一方でRxSwiftを使うとすべてをviewDidLoadの1箇所に書けるので、Rxの流儀に慣れればすごくソースが読みやすくなる気がしました。
まとめ
とりあえずなんとなくどう動いているのかというのとRx素敵そうというイメージが掴めました。次はなぞのobservableに具体的にどんなことができるのか見ていこうと思います。
