はじめに
NextAuthの設定に毎回手こずるので、最短と思われる設定方法をまとめておきます。
NextAuthは、v5を利用します。
認証プロバイダーにはAuth0を利用しています。
Auth0は無料枠でテストができるので、適当なアプリケーションを「Single Page Application」タイプで作成してもらって、テスト用のユーザーを作成しておいてください。
Step 1. Next.jsの初期化
Next.jsは、v15を利用します。
$ npx create-next-app@15
project nameは、next-appにしました。
質問には全部エンターボタンをそのまま押していきます。
Step 2. NextAuthをインストールする
beta版のNextAuthをインストールします。
$ npm install next-auth@beta
Step 3. auth.tsを作成する
next-appフォルダの直下にauth.tsファイルを作成します。
今回は、Auth0を使って認証テストをするので、Auth0の情報をここに書いています。
認証プロバイダーの情報は必要に応じて書き換えてください。
import NextAuth from "next-auth"
import Auth0Provider from "next-auth/providers/auth0";

export const { auth, handlers, signIn, signOut } = NextAuth({
  providers: [
    Auth0Provider({
      clientId: process.env.AUTH0_CLIENT_ID as string,
      clientSecret: process.env.AUTH0_CLIENT_SECRET as string,
      issuer: process.env.AUTH0_ISSUER
    })
  ],
})
Step 4. api routeを設定する
app/api/auth/[...nextaut]フォルダを作ります。
$ mkdir -p app/api/auth/[...nextauth]
作ったフォルダにroute.tsファイルを作成します。
import { handlers } from "@/auth"
export const { GET, POST } = handlers
Step 5. .env.localを作成する
next-app直下に.env.localファイルを作成し、Auth0の設定をします。
AUTH0_CLIENT_ID={Auth0のClient ID}
AUTH0_CLIENT_SECRET={Auth0のClient Secret}
AUTH0_ISSUER=https://{Auth0のDomain}
NEXTAUTH_SECRET={「openssl rand -base64 32」コマンドで生成した値}
NEXTAUTH_URL=http://localhost:3000
Step 6. テスト用コンテンツを作成する
青いサインインボタンを作ります
"use client"

import { signIn } from "next-auth/react"

export default () => {
  return (
    <div>
      <button type="button" onClick={() => signIn()} className="text-white bg-blue-700 rounded-lg text-sm px-5 py-2.5 me-2 mb-2">Sign in</button>
    </div>
  )
}
赤いサインアウトボタンを作ります
"use client"

import { signOut } from "next-auth/react"

export default () => {
  return (
    <div>
      <button type="button" onClick={() => signOut()} className="text-white bg-red-700 rounded-lg text-sm px-5 py-2.5 me-2 mb-2">Sign out</button>
    </div>
  )
}
レイアウトをスッキリさせます
import type { Metadata } from "next";
import "./globals.css";

export const metadata: Metadata = {
  title: "Next Auth v5のテストページ",
  description: "Next Auth v5の動作テストを行うページです",
};

export default function RootLayout({
  children,
}: Readonly<{
  children: React.ReactNode;
}>) {
  return (
    <html lang="en">
      <body>
        <div className="h-screen">
          {children}
        </div>
      </body>
    </html>
  );
}
ページの内容を作ります
import { auth } from "@/auth";
import SignIn from "@/components/SignIn";
import SignOut from "@/components/SignOut";

const Home = async () => {
  const session = await auth()
  console.log(session)

  return (
    <div>
      <h1>Page Contents</h1>
      <p>Welcome {session?.user.name ?? "Foo"}!</p>
      <SignIn />
      <SignOut />
    </div>
  );
};

export default Home;
Step 7. 動作テスト
next.jsを起動します。
cd next-app
npm run dev
Webブラウザで、http://localhost:3000 にアクセスします。
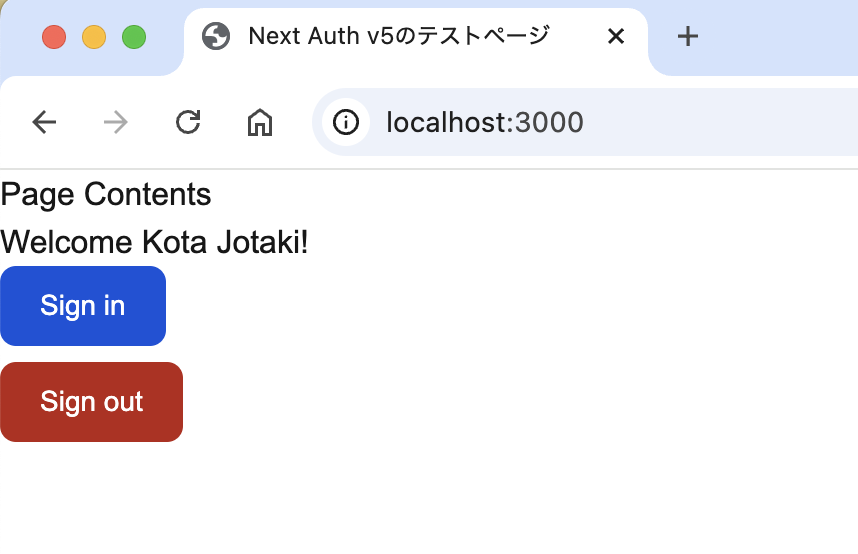
Sign inしていない状態だと、Welcomeのあとの名前が、「Foo」と表示されます。
Sign inボタンを押すと、Auth0へのリンクボタンが表示されます。
転送されたAuth0で認証が完了するとWelcomのあとに名前が表示されると思います。
これで認証成功です。
コンソールにもsession情報が表示されていると思います。
Sign outボタンを押すとsession情報が破棄されて「Welcome Foo!」に戻ると思います。
まとめ
今回、利用したファイルの位置がわかりにくいと思ったので、簡単にまとめました。
next-app (Root Dirctory)
├ auth.ts
├ .env.local
├ components
│   ├ SignIn/index.tsx
│   └ SignOut/index.tsx
└ app
    ├ api/auth/[...nextauth]/route.ts
    ├ layout.tsx
    └ page.tsx
以上で、たぶん最短の手順になるNextAuth v5の設定方法をまとめてみました。
どなたかのお役にたてれば、幸いです。


