はじめに
タイトルの通り自分の備忘も兼ねてphpからmysqlを操作する方法をまとめます。
環境
CentOS7.4
php5.4.16
5.5.56-MariaDB(mysql)
※mariadbはmysqlの後継みたいなものと思ってください。基本的な使い方は変わりません。
◆DBサーバの構築
以下のコマンドでmariadbをインストール。
yum -y install mariadb mariadb-server
とりあえずmariadbを起動。※enableはシステム起動時にmariadbを自動的に起動させるためのコマンド。
systemctl start mariadb
systemctl enable mariadb
しっかりmariadbが起動しているか確認。
systemctl status mariadb
DBサーバに接続。
コマンド実行後にWelcome to the MariaDB monitor ~~という文字列が出てくることを確認。
mysql -u root
パスワードの設定。
※()内のpasswordは任意の文字列に変更!
SET PASSWORD for root@localhost = password('password');
アクセスを許可するユーザ、ホストを指定。passowordは先ほど指定したパスワードに適宜書き換え。
※ここではユーザはrootを指定。
ちなみにGRANT ALL PRIVILEGES ON . のONの後で接続できるDBとテーブルを指定できる。
GRANT ALL PRIVILEGES ON *.* TO root@ホスト名 IDENTIFIED BY 'password' WITH GRANT OPTION;
例:rootで192.169.0.1からsampledbというDBのsampletableというテーブルにアクセス許可する場合。
GRANT ALL PRIVILEGES ON sampledb.sampletable TO root@192.168.0.1 IDENTIFIED BY 'password' WITH GRANT OPTION;
設定の反映。
flush privileges;
今回は練習用のDBとして以下リンクからダウンロードできるサンプルDBを利用。
world databaseのGZIPをダウンロード。
[https://dev.mysql.com/doc/index-other.html]
DBサーバの適当なところにダウンロードしたファイル(world.sql)を配置。/tmpあたりでいいかなと思います。
配置先のディレクトリに移動して、以下のコマンドで解凍。
gunzip world.sql.gz
-pの部分に自分で指定したパスワードを書いて実行するとデータベースを取り込める。
mysql -u root -p password < world.sql
DBに入って取り込めたか確かめる。
mysql -u root -p
※パスワード入力後次のコマンドを実行
show databases;
表示されるDBにworldがあれば問題なし。
firewallの設定でmariadbを許可。以下3つのコマンド実行後にsuccessと表示されることを確認。
firewall-cmd --add-service=mysql –zone=public
firewall-cmd --add-service=mysql –zone=public --permanent
firewall-cmd --reload
以下コマンドでservicesの欄にmysqlが記載されていることを確認。
firewall-cmd -–list-all
◆webサーバの構築
1. phpインストール
以下のコマンドを実行してapache、php、DBに接続するためのドライバ(mysql_pdo)をインストール。
yum -y install httpd php php-pdo_mysql
とりあえずhttpdを起動。※enableはシステム起動時にapacheを自動的に起動させるためのコマンド。
systemctl start httpd
systemctl enable httpd
しっかりhttpdが起動しているか確認。
systemctl status httpd
firewallの設定でhttpを許可。以下3つのコマンド実行後にsuccessと表示されることを確認。
firewall-cmd -–add-service=http -–zone=public
firewall-cmd -–add-service=http -–zone=public --permanent
firewall-cmd -–reload
以下コマンドでservicesの欄にhttpが記載されていることを確認。
firewall-cmd -–list-all
httpの設定ファイルでDocumentRootとDirectoryIndexの確認。
cat /etc/httpd/conf/httpd.conf | grep DocumentRoot
DocumentRoot "/var/www/html"
⇒デフォルトで上記のディレクトリが指定。これ以外にしている場合は後述のindex.phpはここで指定したディレクトリに配置。
このほかもgrepに引っかかるがコメントアウトされているので無視。
cat /etc/httpd/conf/httpd.conf | grep DirectoryIndex
DirectoryIndex index.php index.html
⇒とりあえず一番左にindex.phpが指定されていればOK。
IfModuleで括られた中にあっても効かなかったりするのでとりあえずここは一番外側でDirectoryIndexが指定されていることを確認できればOK.
以下のコマンドを打ってその下のスクリプトをコピペ。
vim /var/www/html/index.php
<?php
phpinfo();
?>
以下コマンドでhttpdを再起動。エラーがないことを確認。
systemctl restart httpd
systemctl status httpd
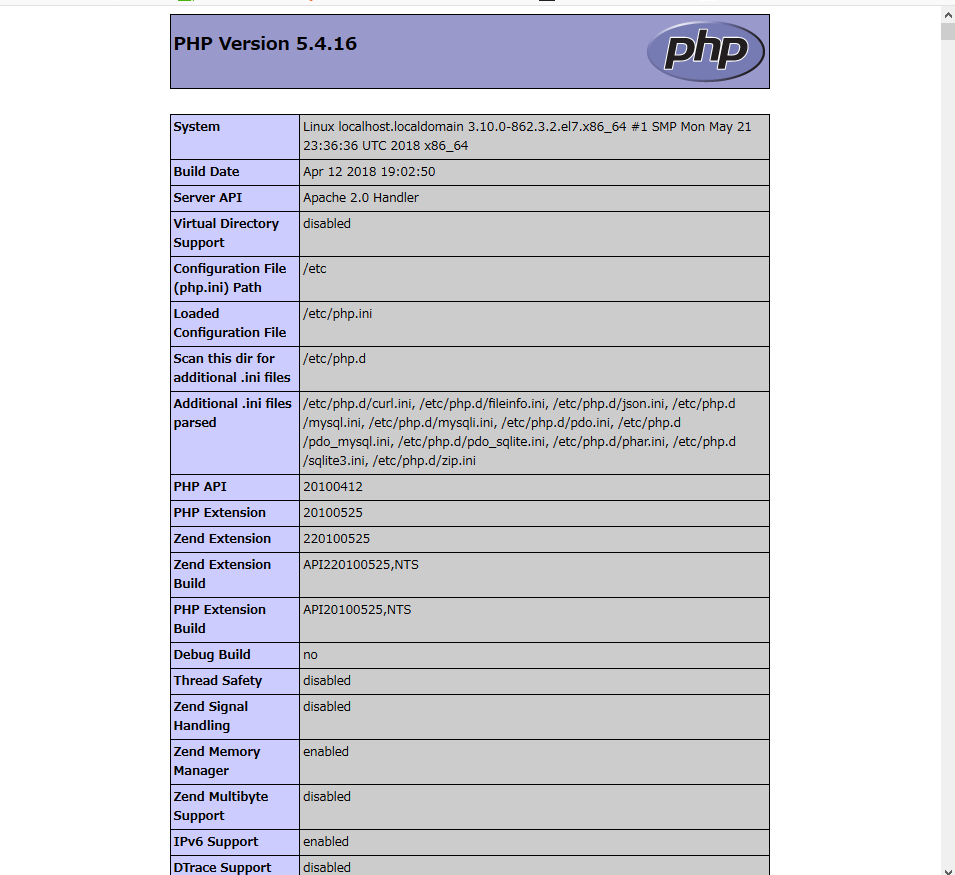
ブラウザでwebサーバにアクセスして以下のような画面が表示されることを確認。

この画面はphpの設定パラメータを一通り表示しているページ。
パラメータの中の以下のようなPDO driversという項目があるのでここにmysqlというドライバーが表示されていることを確認。

index.phpを以下の内容に編集。接続元IP or HOST名とpasswordを自分の環境、及び設定した値に書き換えて保存。
<?php
# phpinfo();

try{
    $db=new PDO("mysql:host=接続元IP or HOST名;dbname=world", "root", "password");
    $db->setAttribute(PDO::ATTR_ERRMODE,PDO::ERRMODE_EXCEPTION);
    print "Connected<br>";
    #$db->query('USE world');
    $res=$db->query('SELECT * FROM city');

    while ($result=$res->fetch()) {
        print $result[0];
        print " : ";
        print $result[1];
        print " : ";
        print $result[2];
        print " : ";
        print $result[3];
        print " : ";
        print $result[4];
        print "<br>";
    }
   } catch(PDOException $e){
        print "Error happened. The messesage is following sentence : " .$e->getMessage();
    }

?>
以下コマンドでhttpdを再起動。エラーがなければ自分のサーバにアクセスしてみてDBの中身が取れるか確認。
systemctl restart httpd
systemctl status httpd
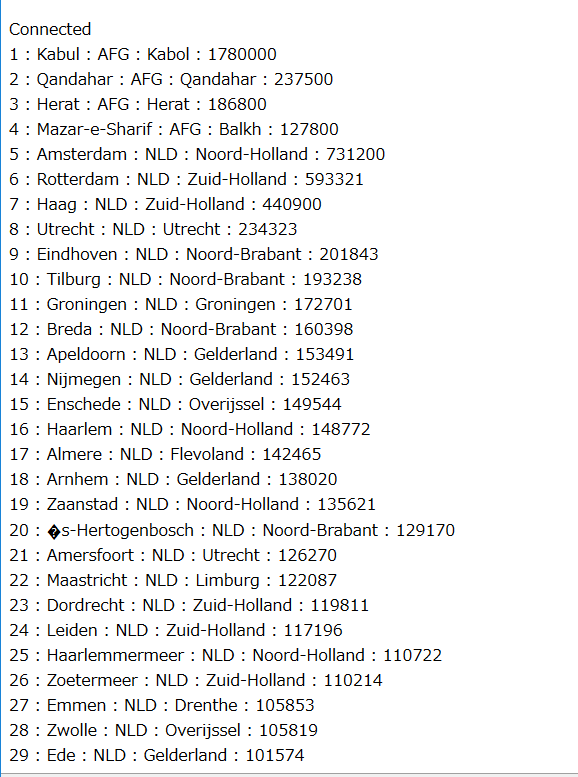
下のような感じでDBの中身がズラッと表示されたら成功。
もし万が一失敗したらerrorメッセージを画面に表示するに作っているのでそちらを参考にして解決してください。
