iOSでtfliteモデルが使えたら便利ですよね。

基本的には、
CocoaPodsでTensorFlowLiteを追加して、
あとはInterpreterがモデルの初期化、画像から入力テンソルの作成、推論、をクラスメソッドでしてくれます。
TensorFlowのexampleプロジェクトのモデル推論に必要な部分を抜粋・解説した内容です。
(コードは公式のものほとんどそのまま)
基本手順
TensorFlowLiteをインポート
Cocoa PodでTensorFlowLitePodを追加(pod install)します。
use_frameworks!
pod 'TensorFlowLiteSwift'
import TensorFlowLiteSwift
TensorFlowLiteモデルをXcodeプロジェクトにドロップしてバンドルします。
ラベルを使う場合はラベルファイルもドロップしてバンドルします。
モデルの初期化
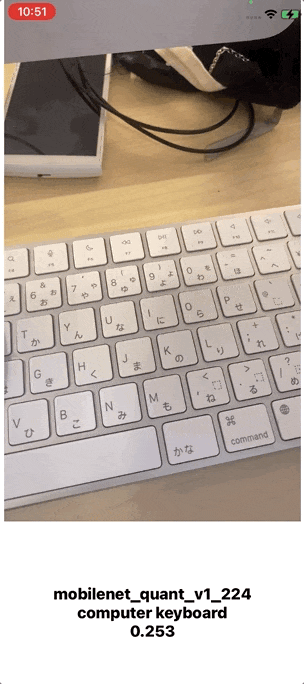
guard let modelPath = Bundle.main.path(forResource: "mobilenet_quant_v1_224", ofType: "tflite") else { print("Failed to load the model."); return nil }

var options = InterpreterOptions()
options.threadCount = 1
do {
   // Interpreter(通訳者)として初期化
   interpreter = try Interpreter(modelPath: modelPath, options: options)
   // 入力テンソルのためにメモリを割り当てる
   try interpreter.allocateTensors()
} catch let error {
   print("Failed to create the interpreter with error: \(error.localizedDescription)")
   return nil
}
クラス・ラベルもStringの配列として読み込んでおきます。
guard let fileURL = Bundle.main.url(forResource: "labels", withExtension: "txt") else { fatalError("Labels file not found in bundle. Please add a labels.") }
do {
    let contents = try String(contentsOf: fileURL, encoding: .utf8)
    self.labels = contents.components(separatedBy: .newlines)
} catch {
    fatalError("Labels file cannot be read.")
}
入力の準備
モデルの入力フォーマットに合わせたCVPixelBufferを入力します。
// モデルのパラメーター例
let batchSize = 1
let inputChannels = 3
let inputWidth = 224
let inputHeight = 224
TensorFlow公式のesampleプロジェクトのPixelBuffer変換メソッドを使うために、kCMPixelFormat_32BGRA形式の設定にします。
videoDataOutput.videoSettings = [ String(kCVPixelBufferPixelFormatTypeKey) : kCMPixelFormat_32BGRA]
PixelBufferを正方形にクロップします。
extension CVPixelBuffer {

  /**
   Returns thumbnail by cropping pixel buffer to biggest square and scaling the cropped image to
   model dimensions.
   */
  func centerThumbnail(ofSize size: CGSize ) -> CVPixelBuffer? {

    let imageWidth = CVPixelBufferGetWidth(self)
    let imageHeight = CVPixelBufferGetHeight(self)
    let pixelBufferType = CVPixelBufferGetPixelFormatType(self)

    assert(pixelBufferType == kCVPixelFormatType_32BGRA)

    let inputImageRowBytes = CVPixelBufferGetBytesPerRow(self)
    let imageChannels = 4

    let thumbnailSize = min(imageWidth, imageHeight)
    CVPixelBufferLockBaseAddress(self, CVPixelBufferLockFlags(rawValue: 0))

    var originX = 0
    var originY = 0

    if imageWidth > imageHeight {
      originX = (imageWidth - imageHeight) / 2
    }
    else {
      originY = (imageHeight - imageWidth) / 2
    }

    // Finds the biggest square in the pixel buffer and advances rows based on it.
    guard let inputBaseAddress = CVPixelBufferGetBaseAddress(self)?.advanced(
        by: originY * inputImageRowBytes + originX * imageChannels) else {
      return nil
    }

    // Gets vImage Buffer from input image
    var inputVImageBuffer = vImage_Buffer(
        data: inputBaseAddress, height: UInt(thumbnailSize), width: UInt(thumbnailSize),
        rowBytes: inputImageRowBytes)

    let thumbnailRowBytes = Int(size.width) * imageChannels
    guard  let thumbnailBytes = malloc(Int(size.height) * thumbnailRowBytes) else {
      return nil
    }

    // Allocates a vImage buffer for thumbnail image.
    var thumbnailVImageBuffer = vImage_Buffer(data: thumbnailBytes, height: UInt(size.height), width: UInt(size.width), rowBytes: thumbnailRowBytes)

    // Performs the scale operation on input image buffer and stores it in thumbnail image buffer.
    let scaleError = vImageScale_ARGB8888(&inputVImageBuffer, &thumbnailVImageBuffer, nil, vImage_Flags(0))

    CVPixelBufferUnlockBaseAddress(self, CVPixelBufferLockFlags(rawValue: 0))

    guard scaleError == kvImageNoError else {
      return nil
    }

    let releaseCallBack: CVPixelBufferReleaseBytesCallback = {mutablePointer, pointer in

      if let pointer = pointer {
        free(UnsafeMutableRawPointer(mutating: pointer))
      }
    }

    var thumbnailPixelBuffer: CVPixelBuffer?

    // Converts the thumbnail vImage buffer to CVPixelBuffer
    let conversionStatus = CVPixelBufferCreateWithBytes(
        nil, Int(size.width), Int(size.height), pixelBufferType, thumbnailBytes,
        thumbnailRowBytes, releaseCallBack, nil, nil, &thumbnailPixelBuffer)

    guard conversionStatus == kCVReturnSuccess else {

      free(thumbnailBytes)
      return nil
    }

    return thumbnailPixelBuffer
  }

  static func buffer(from image: UIImage) -> CVPixelBuffer? {
    let attrs = [
      kCVPixelBufferCGImageCompatibilityKey: kCFBooleanTrue,
      kCVPixelBufferCGBitmapContextCompatibilityKey: kCFBooleanTrue
    ] as CFDictionary

    var pixelBuffer: CVPixelBuffer?
    let status = CVPixelBufferCreate(kCFAllocatorDefault,
                                     Int(image.size.width),
                                     Int(image.size.height),
                                     kCVPixelFormatType_32BGRA,
                                     attrs,
                                     &pixelBuffer)

    guard let buffer = pixelBuffer, status == kCVReturnSuccess else {
      return nil
    }

    CVPixelBufferLockBaseAddress(buffer, [])
    defer { CVPixelBufferUnlockBaseAddress(buffer, []) }
    let pixelData = CVPixelBufferGetBaseAddress(buffer)

    let rgbColorSpace = CGColorSpaceCreateDeviceRGB()
    guard let context = CGContext(data: pixelData,
                                  width: Int(image.size.width),
                                  height: Int(image.size.height),
                                  bitsPerComponent: 8,
                                  bytesPerRow: CVPixelBufferGetBytesPerRow(buffer),
                                  space: rgbColorSpace,
                                  bitmapInfo: CGImageAlphaInfo.noneSkipLast.rawValue) else {
      return nil
    }

    context.translateBy(x: 0, y: image.size.height)
    context.scaleBy(x: 1.0, y: -1.0)

    UIGraphicsPushContext(context)
    image.draw(in: CGRect(x: 0, y: 0, width: image.size.width, height: image.size.height))
    UIGraphicsPopContext()

    return pixelBuffer
  }

}
PixelBufferを3チャネルにします(VImageで)。TensorFlow公式のexampleプロジェクトからの引用です。
import Accelerate

...

private func rgbDataFromBuffer(
    _ buffer: CVPixelBuffer,
    byteCount: Int,
    isModelQuantized: Bool
) -> Data? {
    CVPixelBufferLockBaseAddress(buffer, .readOnly)
    defer {
        CVPixelBufferUnlockBaseAddress(buffer, .readOnly)
    }
    guard let sourceData = CVPixelBufferGetBaseAddress(buffer) else {
        return nil
    }

    let width = CVPixelBufferGetWidth(buffer)
    let height = CVPixelBufferGetHeight(buffer)
    let sourceBytesPerRow = CVPixelBufferGetBytesPerRow(buffer)
    let destinationChannelCount = 3
    let destinationBytesPerRow = destinationChannelCount * width

    var sourceBuffer = vImage_Buffer(data: sourceData,
                                     height: vImagePixelCount(height),
                                     width: vImagePixelCount(width),
                                     rowBytes: sourceBytesPerRow)

    guard let destinationData = malloc(height * destinationBytesPerRow) else {
        print("Error: out of memory")
        return nil
    }

    defer {
        free(destinationData)
    }

    var destinationBuffer = vImage_Buffer(data: destinationData,
                                          height: vImagePixelCount(height),
                                          width: vImagePixelCount(width),
                                          rowBytes: destinationBytesPerRow)

    let pixelBufferFormat = CVPixelBufferGetPixelFormatType(buffer)

    switch (pixelBufferFormat) {
    case kCVPixelFormatType_32BGRA:
        vImageConvert_BGRA8888toRGB888(&sourceBuffer, &destinationBuffer, UInt32(kvImageNoFlags))
    case kCVPixelFormatType_32ARGB:
        vImageConvert_ARGB8888toRGB888(&sourceBuffer, &destinationBuffer, UInt32(kvImageNoFlags))
    case kCVPixelFormatType_32RGBA:
        vImageConvert_RGBA8888toRGB888(&sourceBuffer, &destinationBuffer, UInt32(kvImageNoFlags))
    default:
        // Unknown pixel format.
        return nil
    }

    let byteData = Data(bytes: destinationBuffer.data, count: destinationBuffer.rowBytes * height)
    if isModelQuantized {
        return byteData
    }

    // Not quantized, convert to floats
    let bytes = Array<UInt8>(unsafeData: byteData)!
    var floats = [Float]()
    for i in 0..<bytes.count {
        floats.append(Float(bytes[i]) / 255.0)
    }
    return Data(copyingBufferOf: floats)
}
上記メソッドのためのextension
extension Data {
    /// Creates a new buffer by copying the buffer pointer of the given array.
    ///
    /// - Warning: The given array's element type `T` must be trivial in that it can be copied bit
    ///     for bit with no indirection or reference-counting operations; otherwise, reinterpreting
    ///     data from the resulting buffer has undefined behavior.
    /// - Parameter array: An array with elements of type `T`.
    init<T>(copyingBufferOf array: [T]) {
        self = array.withUnsafeBufferPointer(Data.init)
    }
}

extension Array {
    /// Creates a new array from the bytes of the given unsafe data.
    ///
    /// - Warning: The array's `Element` type must be trivial in that it can be copied bit for bit
    ///     with no indirection or reference-counting operations; otherwise, copying the raw bytes in
    ///     the `unsafeData`'s buffer to a new array returns an unsafe copy.
    /// - Note: Returns `nil` if `unsafeData.count` is not a multiple of
    ///     `MemoryLayout<Element>.stride`.
    /// - Parameter unsafeData: The data containing the bytes to turn into an array.
    init?(unsafeData: Data) {
        guard unsafeData.count % MemoryLayout<Element>.stride == 0 else { return nil }
# if swift(>=5.0)
        self = unsafeData.withUnsafeBytes { .init($0.bindMemory(to: Element.self)) }
# else
        self = unsafeData.withUnsafeBytes {
            .init(UnsafeBufferPointer<Element>(
                start: $0,
                count: unsafeData.count / MemoryLayout<Element>.stride
            ))
        }
# endif  // swift(>=5.0)
    }
}
推論
推論実行します。
let outputTensor: Tensor
do {
    let inputTensor = try interpreter.input(at: 0)

    // PixelBufferを3チャネルのDataに
    guard let rgbData = rgbDataFromBuffer(
        pixelBuffer,
        byteCount: batchSize * inputWidth * inputHeight * inputChannels,
        isModelQuantized: inputTensor.dataType == .uInt8
    ) else { print("Failed to convert the image buffer to RGB data."); return nil }

    // Data を Tensorに.
    try interpreter.copy(rgbData, toInputAt: 0)

    // 推論実行

    try interpreter.invoke()

    // 出力
    outputTensor = try interpreter.output(at: 0)
} catch let error {
    print("Failed to invoke the interpreter with error: \(error.localizedDescription)") ;return }
出力の取得
出力がuInt8だったら、Floatに直します。
let results: [Float]
switch outputTensor.dataType {
case .uInt8:
    guard let quantization = outputTensor.quantizationParameters else {
        print("No results returned because the quantization values for the output tensor are nil.")
        return
    }
    let quantizedResults = [UInt8](outputTensor.data)
    results = quantizedResults.map {
         quantization.scale * Float(Int($0) - quantization.zeroPoint)
    }
case .float32:
    results = [Float32](unsafeData: outputTensor.data) ?? []
default:
    print("Output tensor data type \(outputTensor.dataType) is unsupported for this example app.")
    return
}
結果はFloatの配列です。
今回の画像認識の場合、クラスラベル全てについての信頼度として返ってきます。
たとえば、1000クラスの場合は、1000個のFloatです。
// ラベル番号と信頼度のtupleの配列を作る [(labelIndex: Int, confidence: Float)]
let zippedResults = zip(labels.indices, results)

// 信頼度の高い順に並べ替え、上位一個の個数取得
let sortedResults = zippedResults.sorted { $0.1 > $1.1 }.prefix(1)

let label = labels[sortedResults[0].0]
let confidence = sortedResults[0].1

print("label:\(label)\nconfidence:\(confidence)")
}
label:spotlight
confidence:0.84118
GitHubサンプル
TensorFlowのexampleプロジェクトのモデル推論に必要な部分を抜粋・解説した内容です。
(コードは公式のものほとんどそのまま)
🐣
フリーランスエンジニアです。
お仕事のご相談こちらまで
rockyshikoku@gmail.com
Core MLやARKitを使ったアプリを作っています。
機械学習/AR関連の情報を発信しています。