高解像度の画像をさらに4倍にする方法です
RealESRGANで超解像します。
16kってどんな???
16K画像って見たことありますか?
超解像は画像の解像度を上げたりデテイルをはっきりさせる技術ですが、もともと高解像度の画像にも適用できるのでしょうか?
メモリが足りない
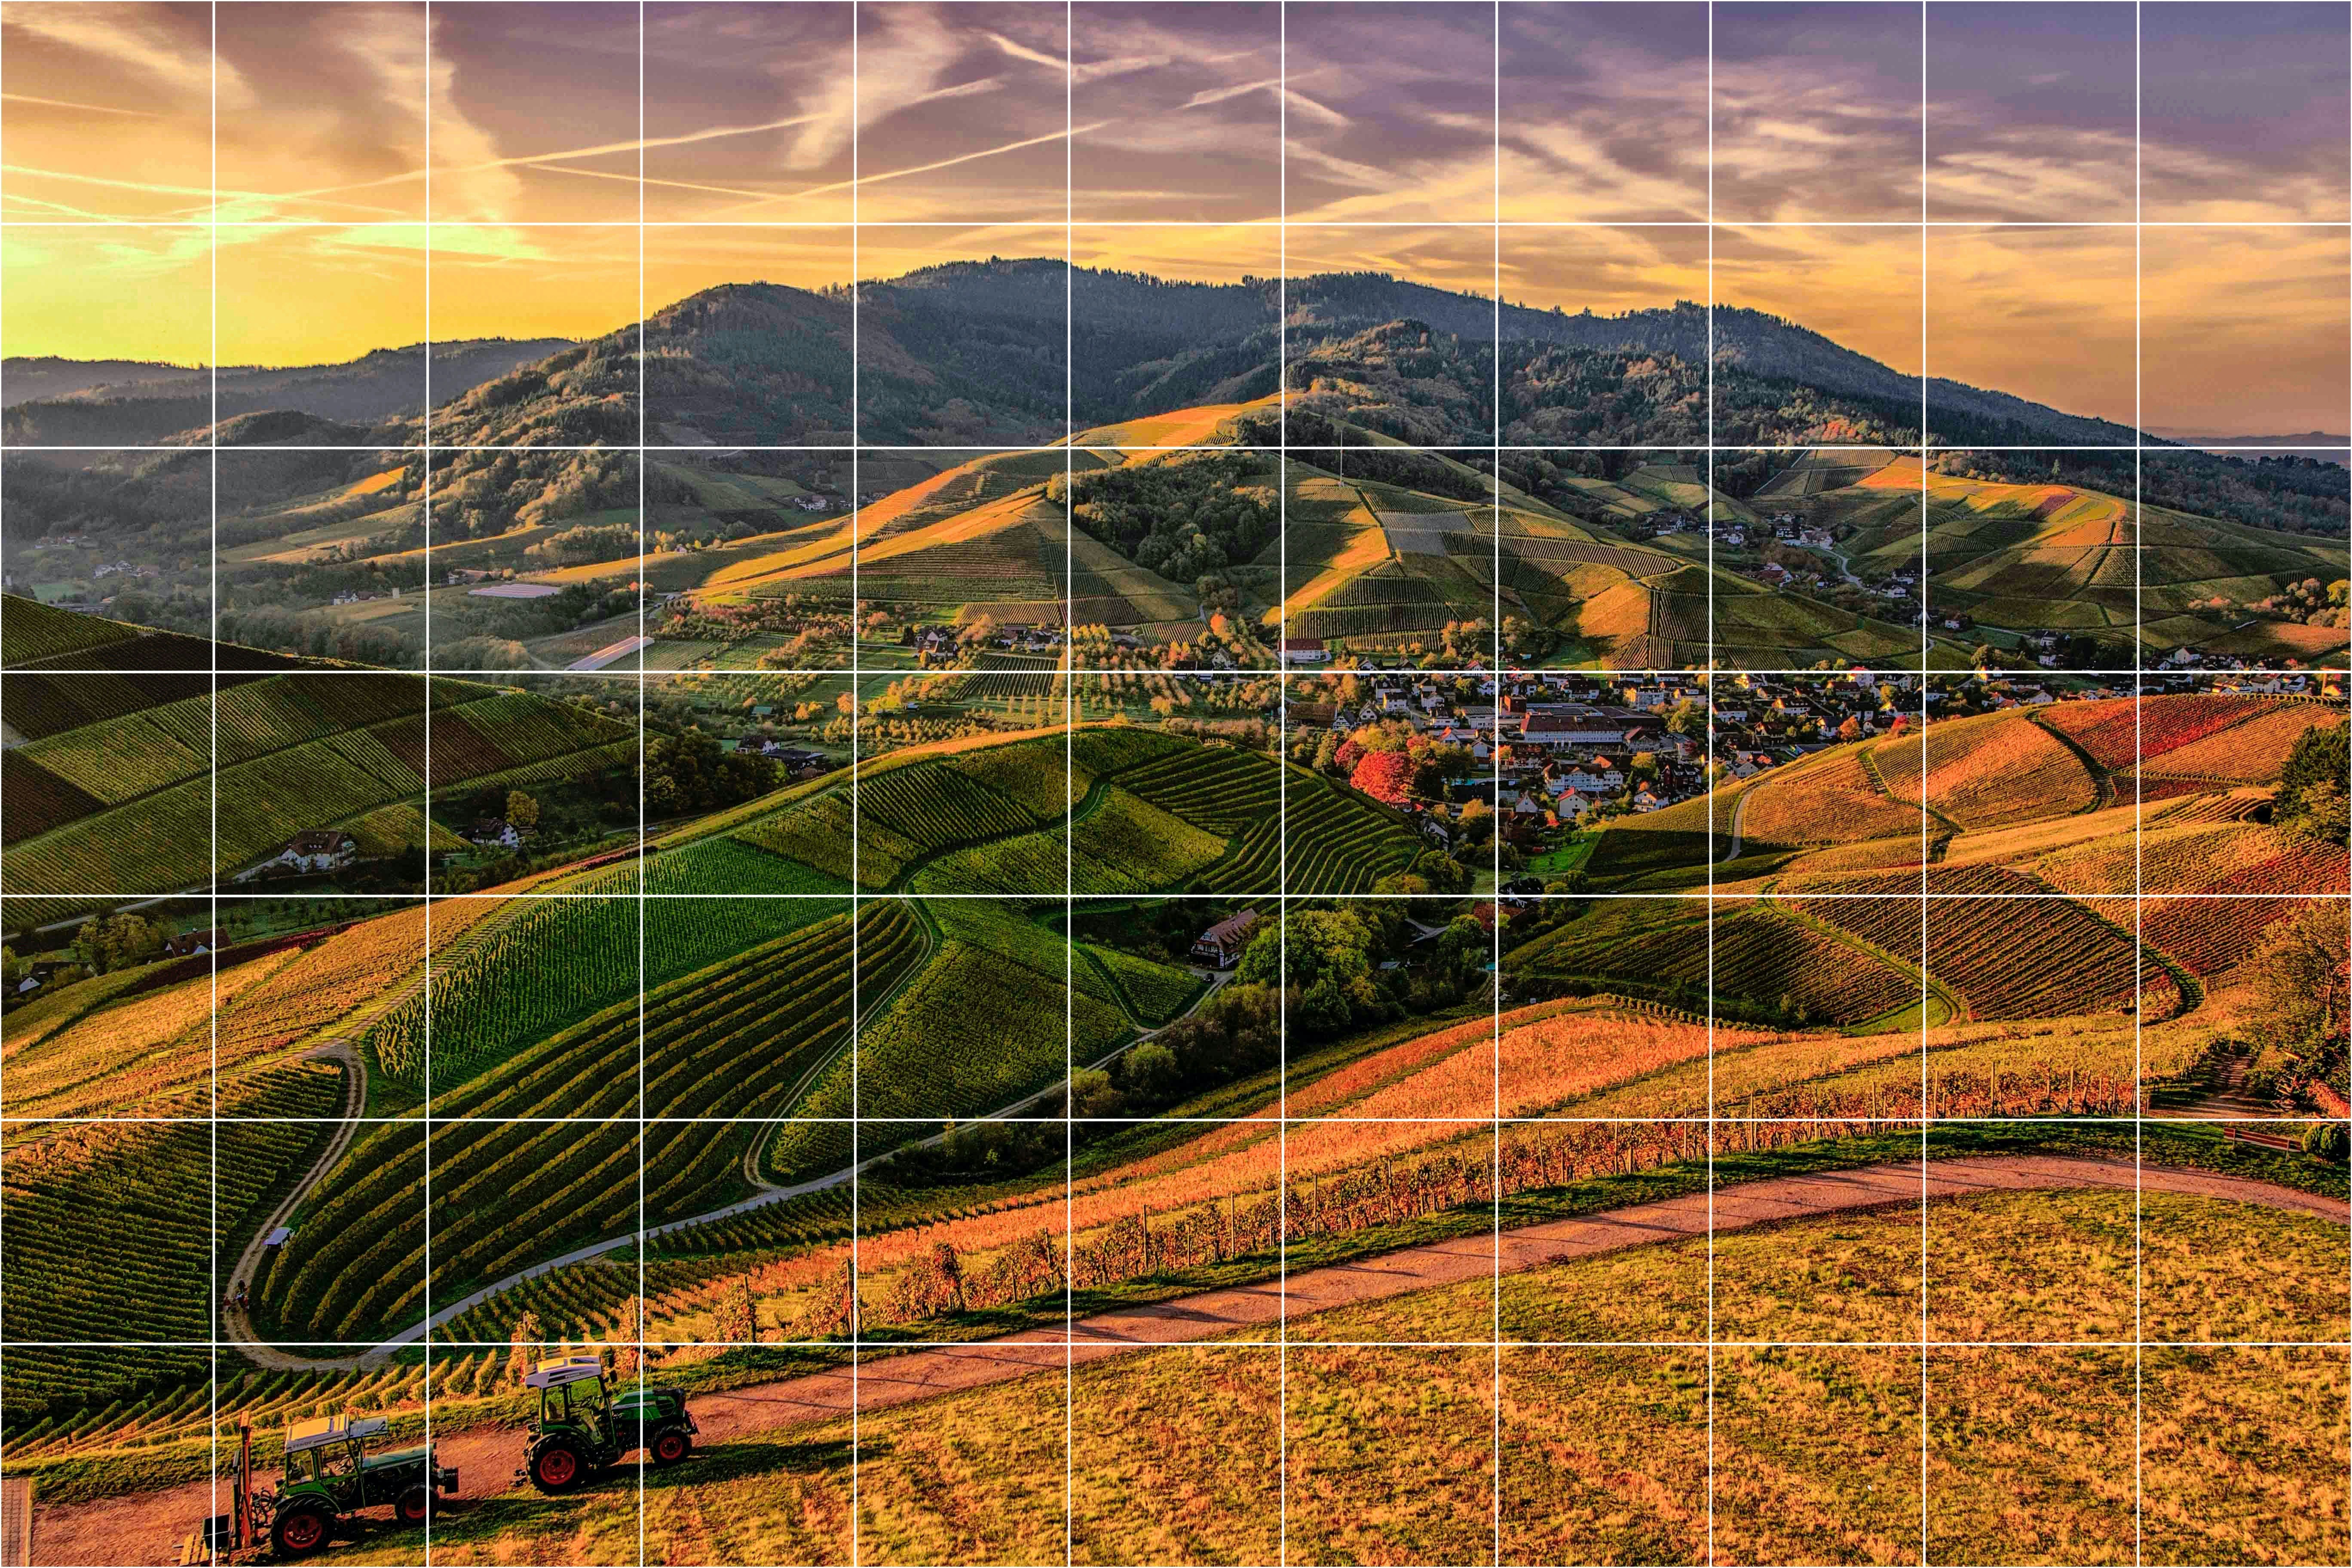
今回はこちらの画像をつかいます。

解像度は5472x3648です。
4Kの解像度が3840x2160なので、さらに大きい画像ということになります。
この画像をcolabでRealESRGANに入力してみます。
!python inference_realesrgan.py -n RealESRGAN_x4plus -i upload --outscale 4
Error CUDA out of memory. Tried to allocate 2.38 GiB (GPU 0; 15.90 GiB total capacity; 14.56 GiB already allocated; 345.75 MiB free; 14.57 GiB reserved in total by PyTorch)
メモリのキャパシティー・オーバーで、エラーになりました。
大きな画像を一度に超解像しようとすると、たくさんのメモリが必要になるようです。
Tileで解決
画像を小さいサイズに分割して、それぞれ超解像してから、再度一枚の画像に構成することで、大きな画像を超解像できます。
RealESRGANは、このtileの機能をつけてくれています。
def tile_process(self):
    """It will first crop input images to tiles, and then process each tile.
    Finally, all the processed tiles are merged into one images.

    Modified from: https://github.com/ata4/esrgan-launcher
     """
    batch, channel, height, width = self.img.shape
    output_height = height * self.scale
    output_width = width * self.scale
    output_shape = (batch, channel, output_height, output_width)

    # start with black image
    self.output = self.img.new_zeros(output_shape)
    tiles_x = math.ceil(width / self.tile_size)
    tiles_y = math.ceil(height / self.tile_size)

    # loop over all tiles
    for y in range(tiles_y):
        for x in range(tiles_x):
            # extract tile from input image
            ofs_x = x * self.tile_size
            ofs_y = y * self.tile_size
            # input tile area on total image
            input_start_x = ofs_x
            input_end_x = min(ofs_x + self.tile_size, width)
            input_start_y = ofs_y
            input_end_y = min(ofs_y + self.tile_size, height)

            # input tile area on total image with padding
            input_start_x_pad = max(input_start_x - self.tile_pad, 0)
            input_end_x_pad = min(input_end_x + self.tile_pad, width)
            input_start_y_pad = max(input_start_y - self.tile_pad, 0)
            input_end_y_pad = min(input_end_y + self.tile_pad, height)

            # input tile dimensions
            input_tile_width = input_end_x - input_start_x
            input_tile_height = input_end_y - input_start_y
            tile_idx = y * tiles_x + x + 1
            input_tile = self.img[:, :, input_start_y_pad:input_end_y_pad, input_start_x_pad:input_end_x_pad]

            # upscale tile
            try:
                with torch.no_grad():
                   output_tile = self.model(input_tile)
            except RuntimeError as error:
                print('Error', error)
            print(f'\tTile {tile_idx}/{tiles_x * tiles_y}')

            # output tile area on total image
            output_start_x = input_start_x * self.scale
            output_end_x = input_end_x * self.scale
            output_start_y = input_start_y * self.scale
            output_end_y = input_end_y * self.scale

            # output tile area without padding
            output_start_x_tile = (input_start_x - input_start_x_pad) * self.scale
            output_end_x_tile = output_start_x_tile + input_tile_width * self.scale
            output_start_y_tile = (input_start_y - input_start_y_pad) * self.scale
            output_end_y_tile = output_start_y_tile + input_tile_height * self.scale

            # put tile into output image
            self.output[:, :, output_start_y:output_end_y,
                            output_start_x:output_end_x] = output_tile[:, :, output_start_y_tile:output_end_y_tile,
                                                                       output_start_x_tile:output_end_x_tile]
--tile オプションをつけることで実行できます。
!python inference_realesrgan.py -n RealESRGAN_x4plus -i upload --outscale 4 --tile 512
512x512のタイル画像に分割するので、
横(5472/512)の切り上げ x 縦(3648/512)の切り上げ
で88枚の画像に分割され、それぞれ超解像されます。
結果
21888x14592の画像が出力されました。
サイズは100.8MBです。
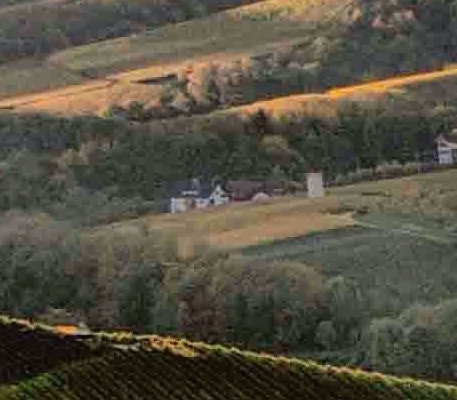
元画像4K
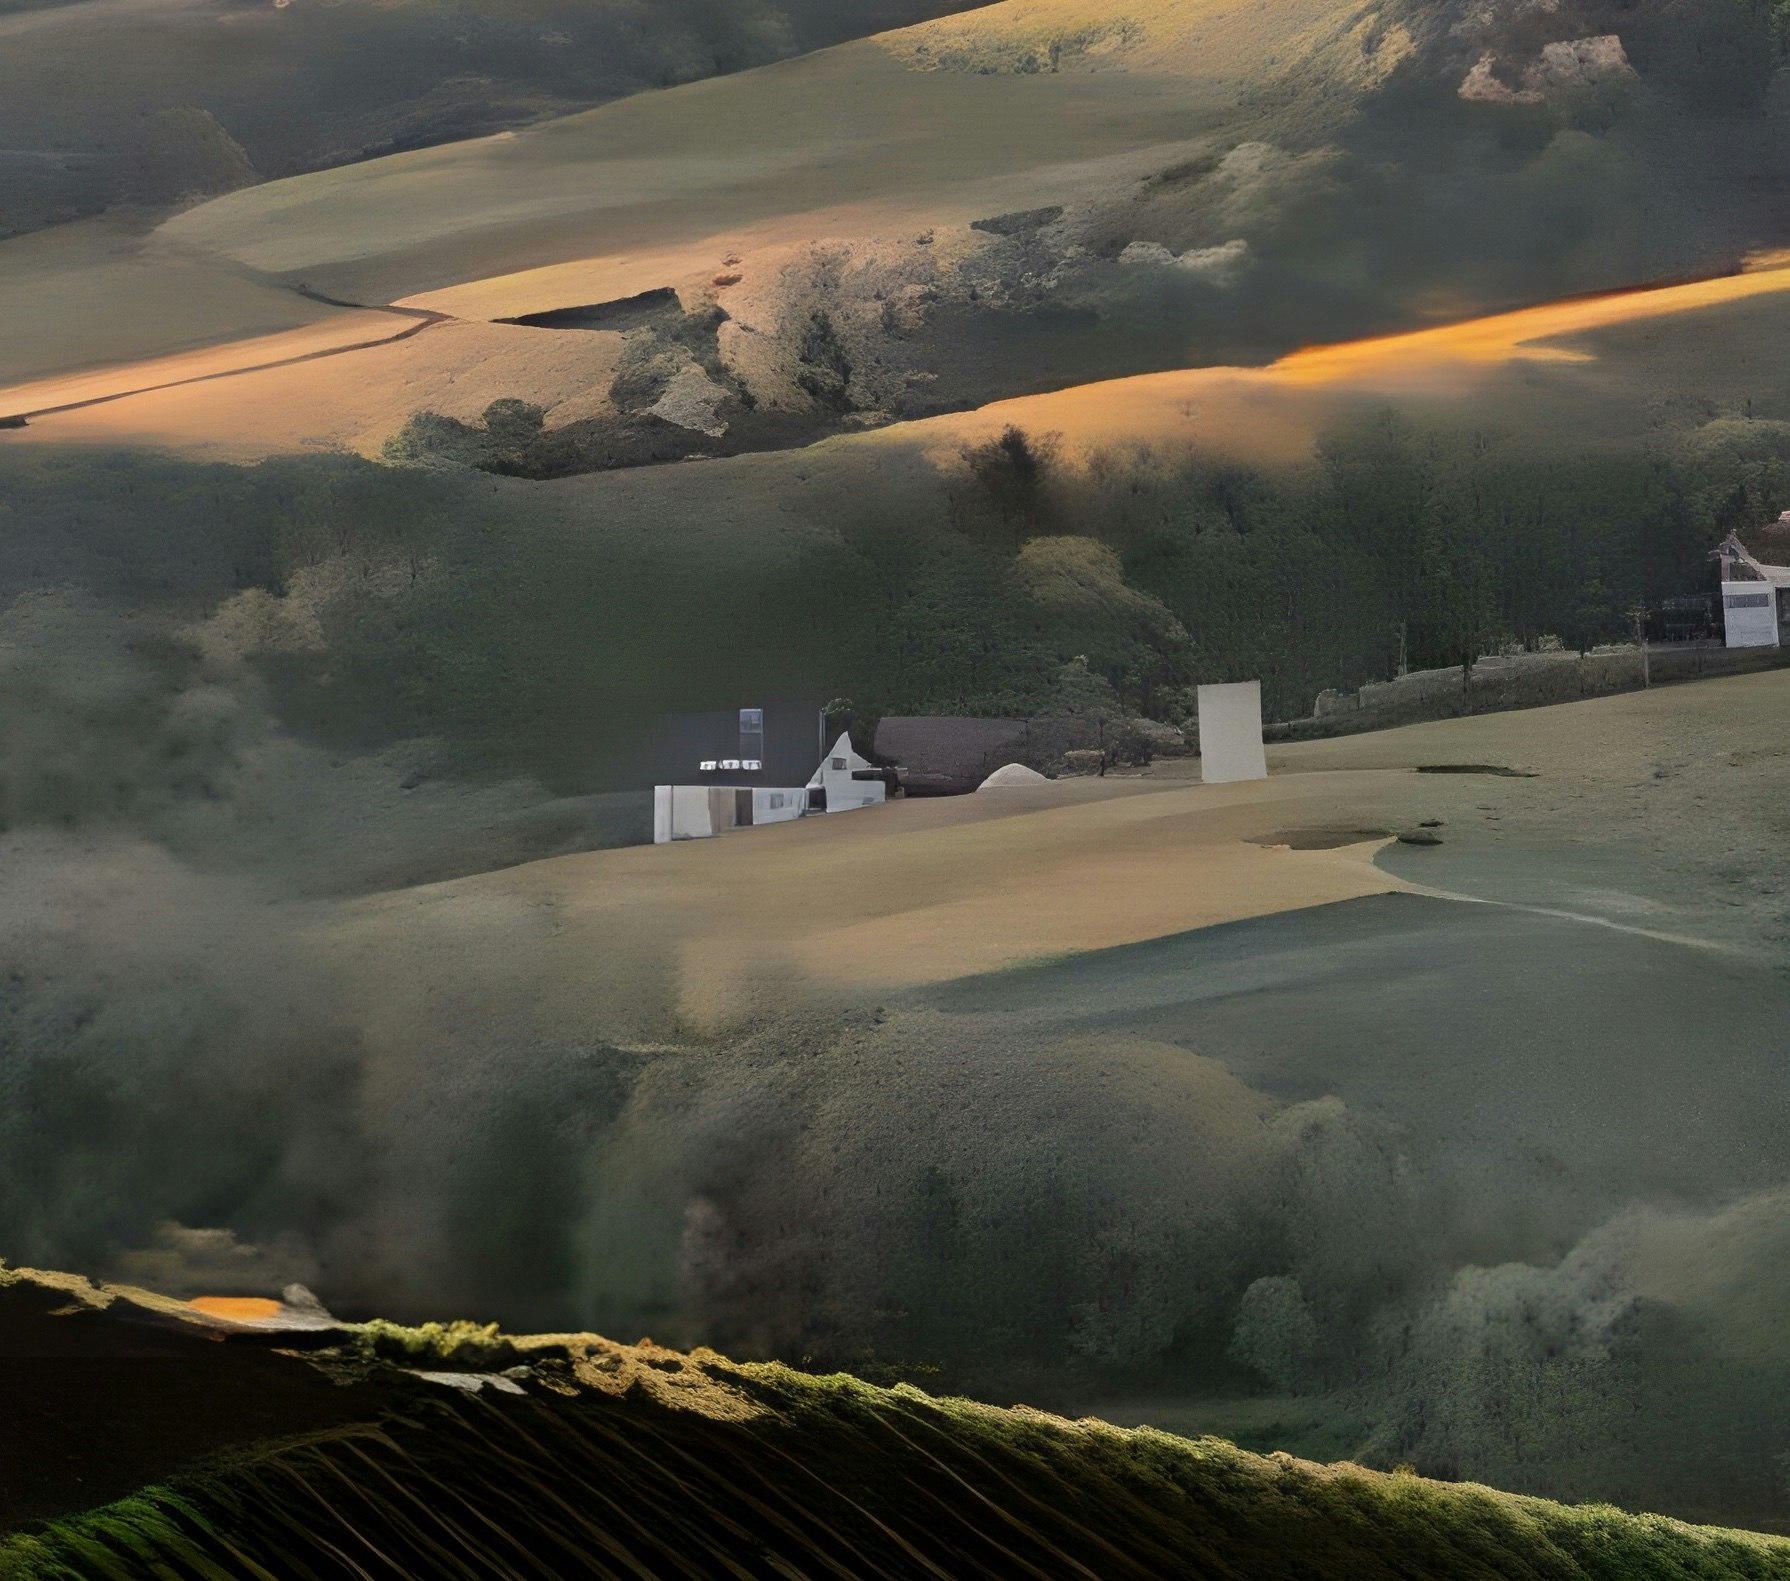
超解像16K

画像のアップロード上限により、再度小さくリサイズしたものしか載せられませんでしたが、GoogleDriveに16K画像をアップロードしましたので、興味のある方はリンクからダウンロードしてみてください。
RealESRGANはディテイルを強化するので、拡大して比較すると、たとえば左奥の家がはっきりしているのがわかります。
元画像
超解像
超解像はいろんな目的に使える
低解像度の強化だけでなく、高解像度の更なる高解像化もできることがわかりました。
🐣
フリーランスエンジニアです。
お仕事のご相談こちらまで
rockyshikoku@gmail.com
Core MLやARKitを使ったアプリを作っています。
機械学習/AR関連の情報を発信しています。