好きなオブジェクトを切り抜きたい
既存のセグメンテーションモデルでは、切り抜きたいオブジェクトが対象ではないことがあります。
独自のデータでセグメンテーションモデルをトレーニングすればいい
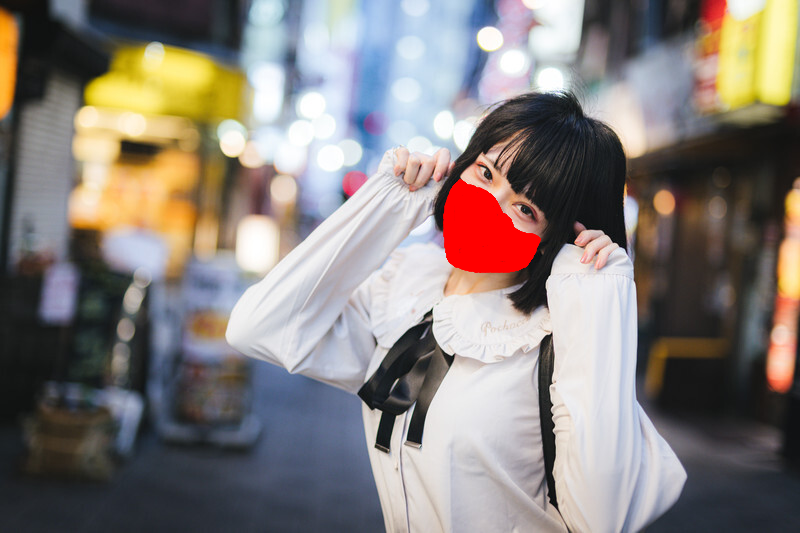
U2netは顕著性セグメンテーションのモデルですが、独自のデータセットでトレーニングして、好きなオブジェクトを切り抜くモデルを作ることができます。
たとえば、(感染症予防の)マスクは、一般的なセグメンテーションデータセットに含まれていませんが、自分でマスクのデータセットを用意してマスクを切り抜くモデルを作成できます。
手順1:データセットを作る
U2Netのデータセットは、
・画像
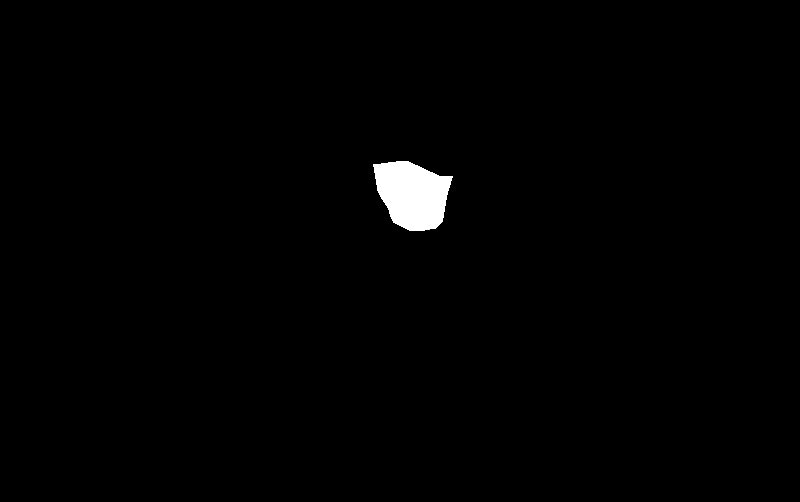
・マスク画像(セグメンテーション対象物が白(255)、それ以外が黒(0)のピクセルになったオリジナル画像と同じサイズの画像)
で構成されます。
画像とマスク画像は、以下のようにそれぞれのディレクトリに、同名で保存します。
my_dataset
   |
   |___images
   |      |__image0.jpg
   |      |__image1.jpg
   |      |__image2.jpg
   |
   |
   |___masks
           |__image0.png
           |__image1.png
           |__image2.png
画像を集める
オリジナル画像を集めます。
フェイスマスクのようなそれほどパターンのないオブジェクトなら、200枚程度でも十分だと思います。
アノテーションツールでマスク画像を作る
アノテーションツールはなんでも構いませんが、今回は無料ツールのlabelMeを使います。
以下のリンクから、各OS用のGUIアプリケーションを直接ダウンロードできます。
labelMeのアプリケーションを開き、集めた画像のディレクトリを開きます。
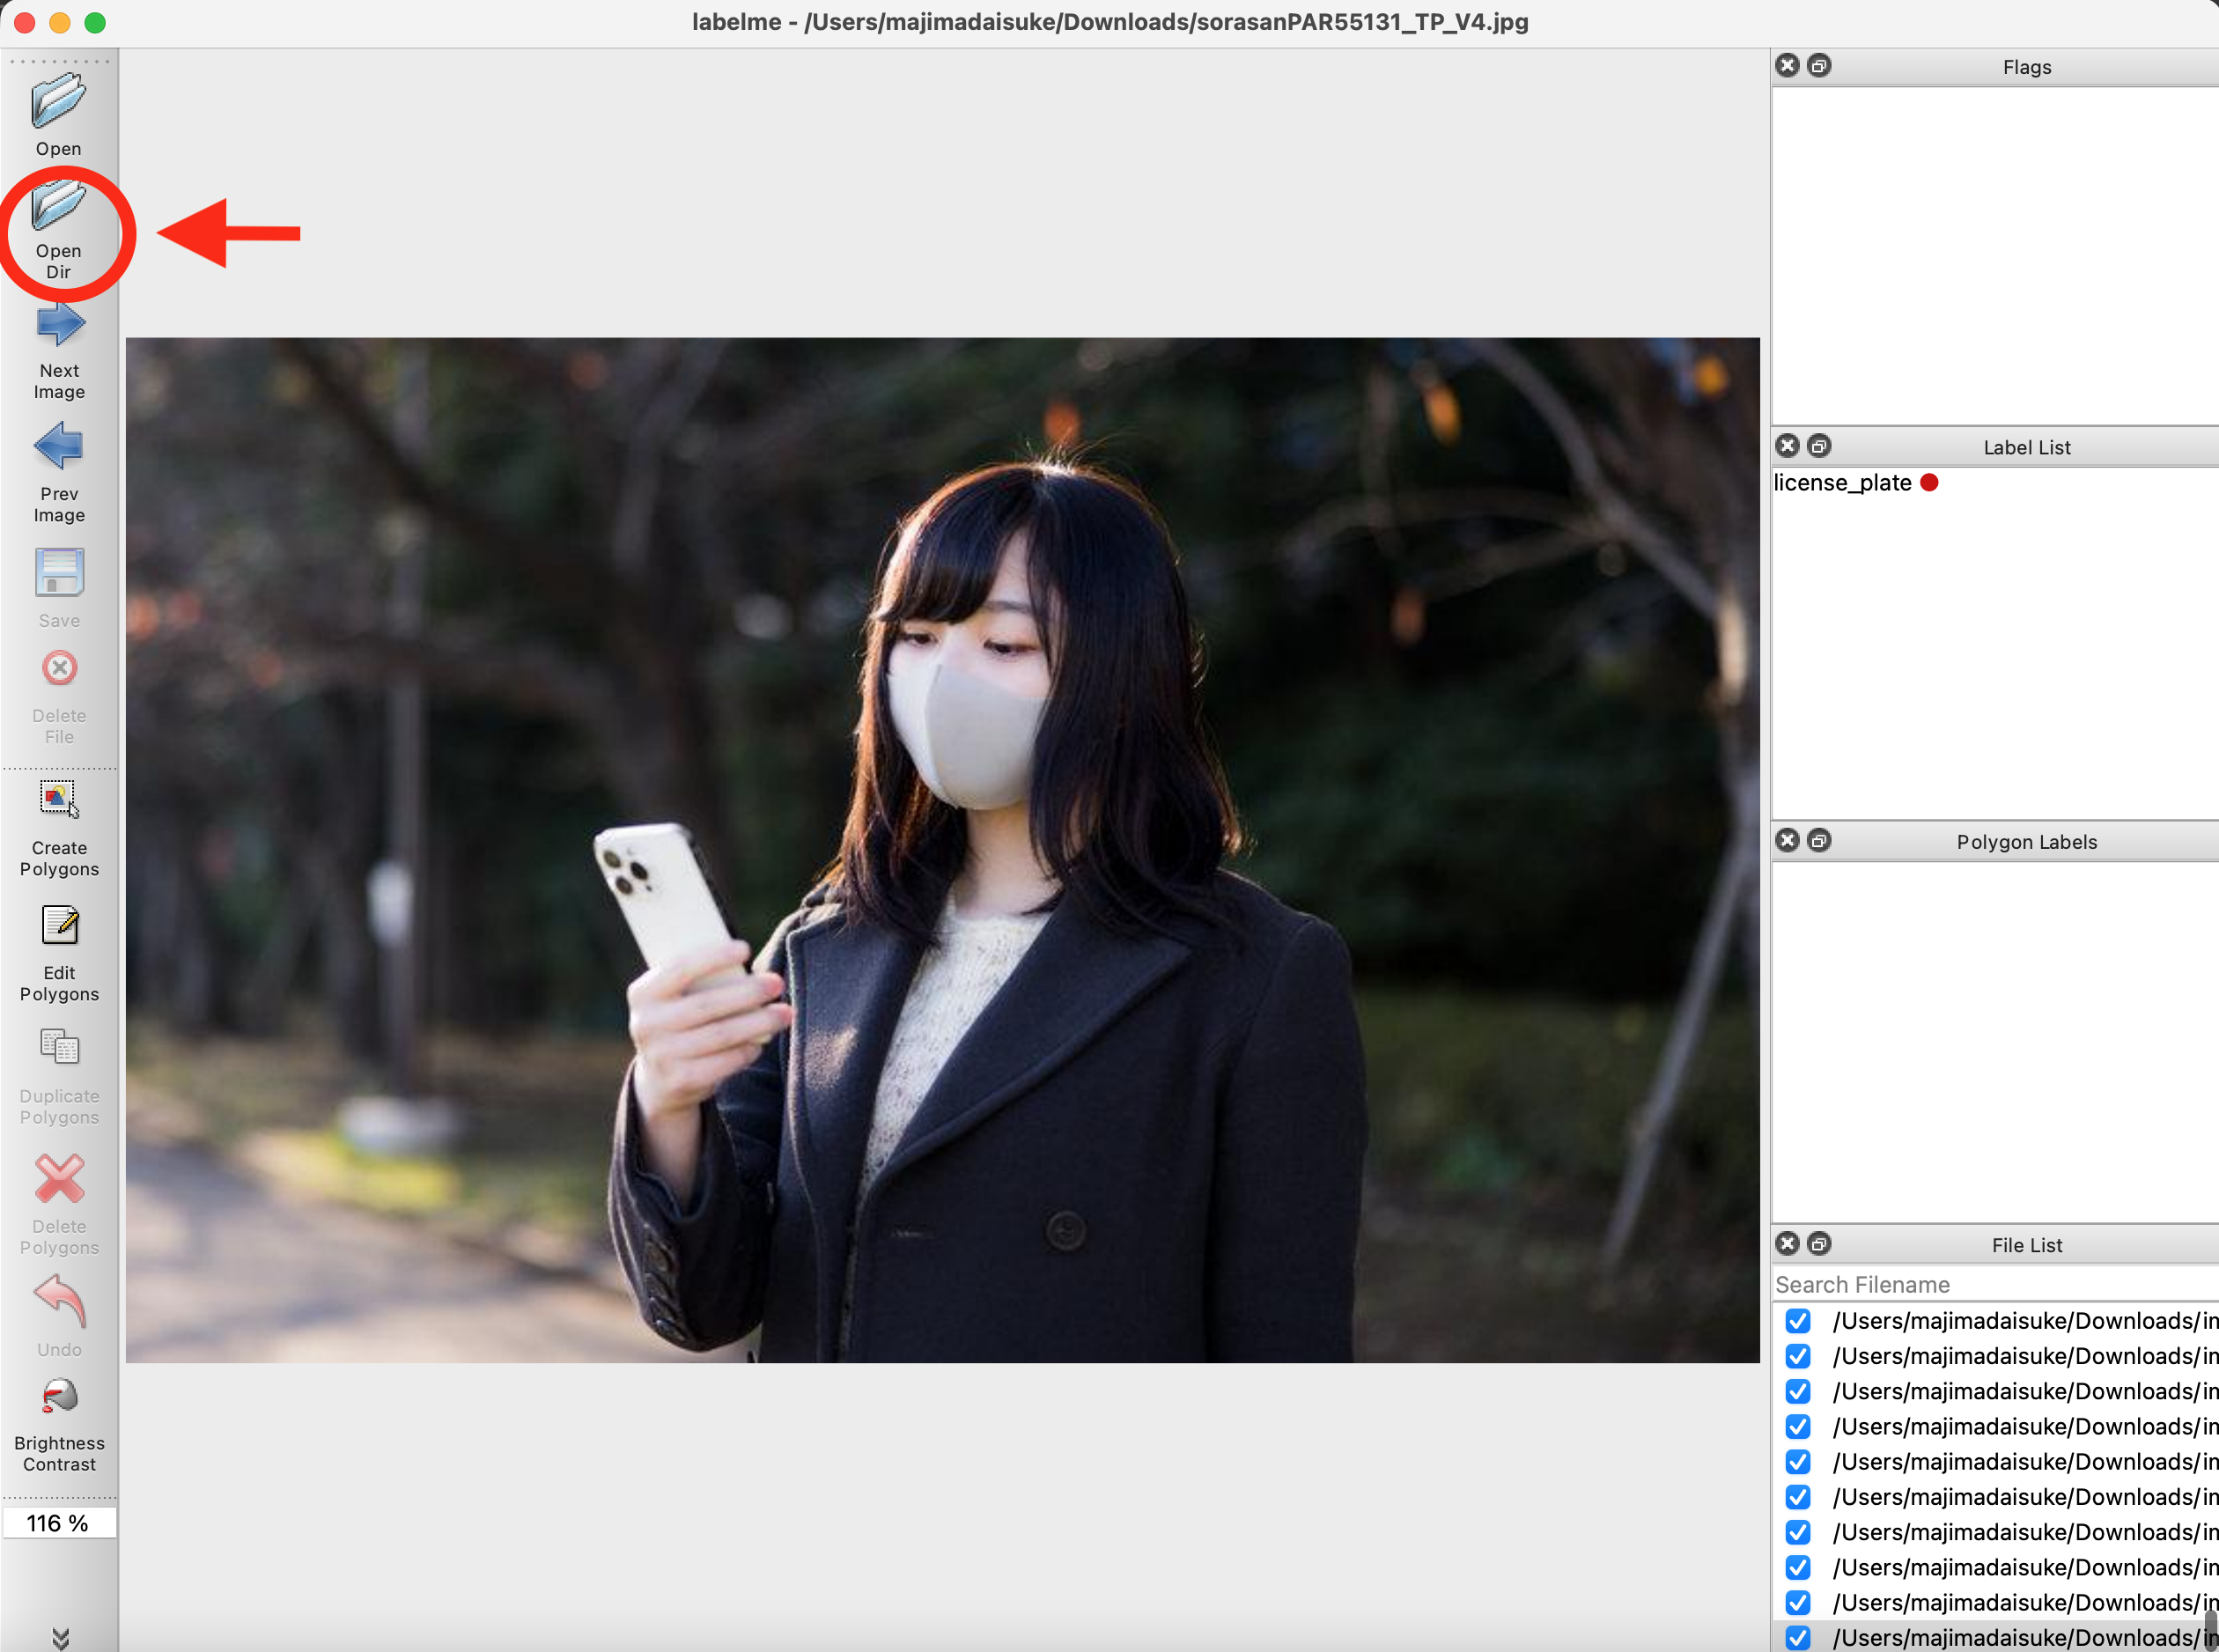
CreatePolygonsボタンを押してから、対象オブジェクトの輪郭の頂点をクリックしていき、囲みます。
開始点まで来ると、ラベル名を選ぶウインドウが開くのでラベル名を選びます。
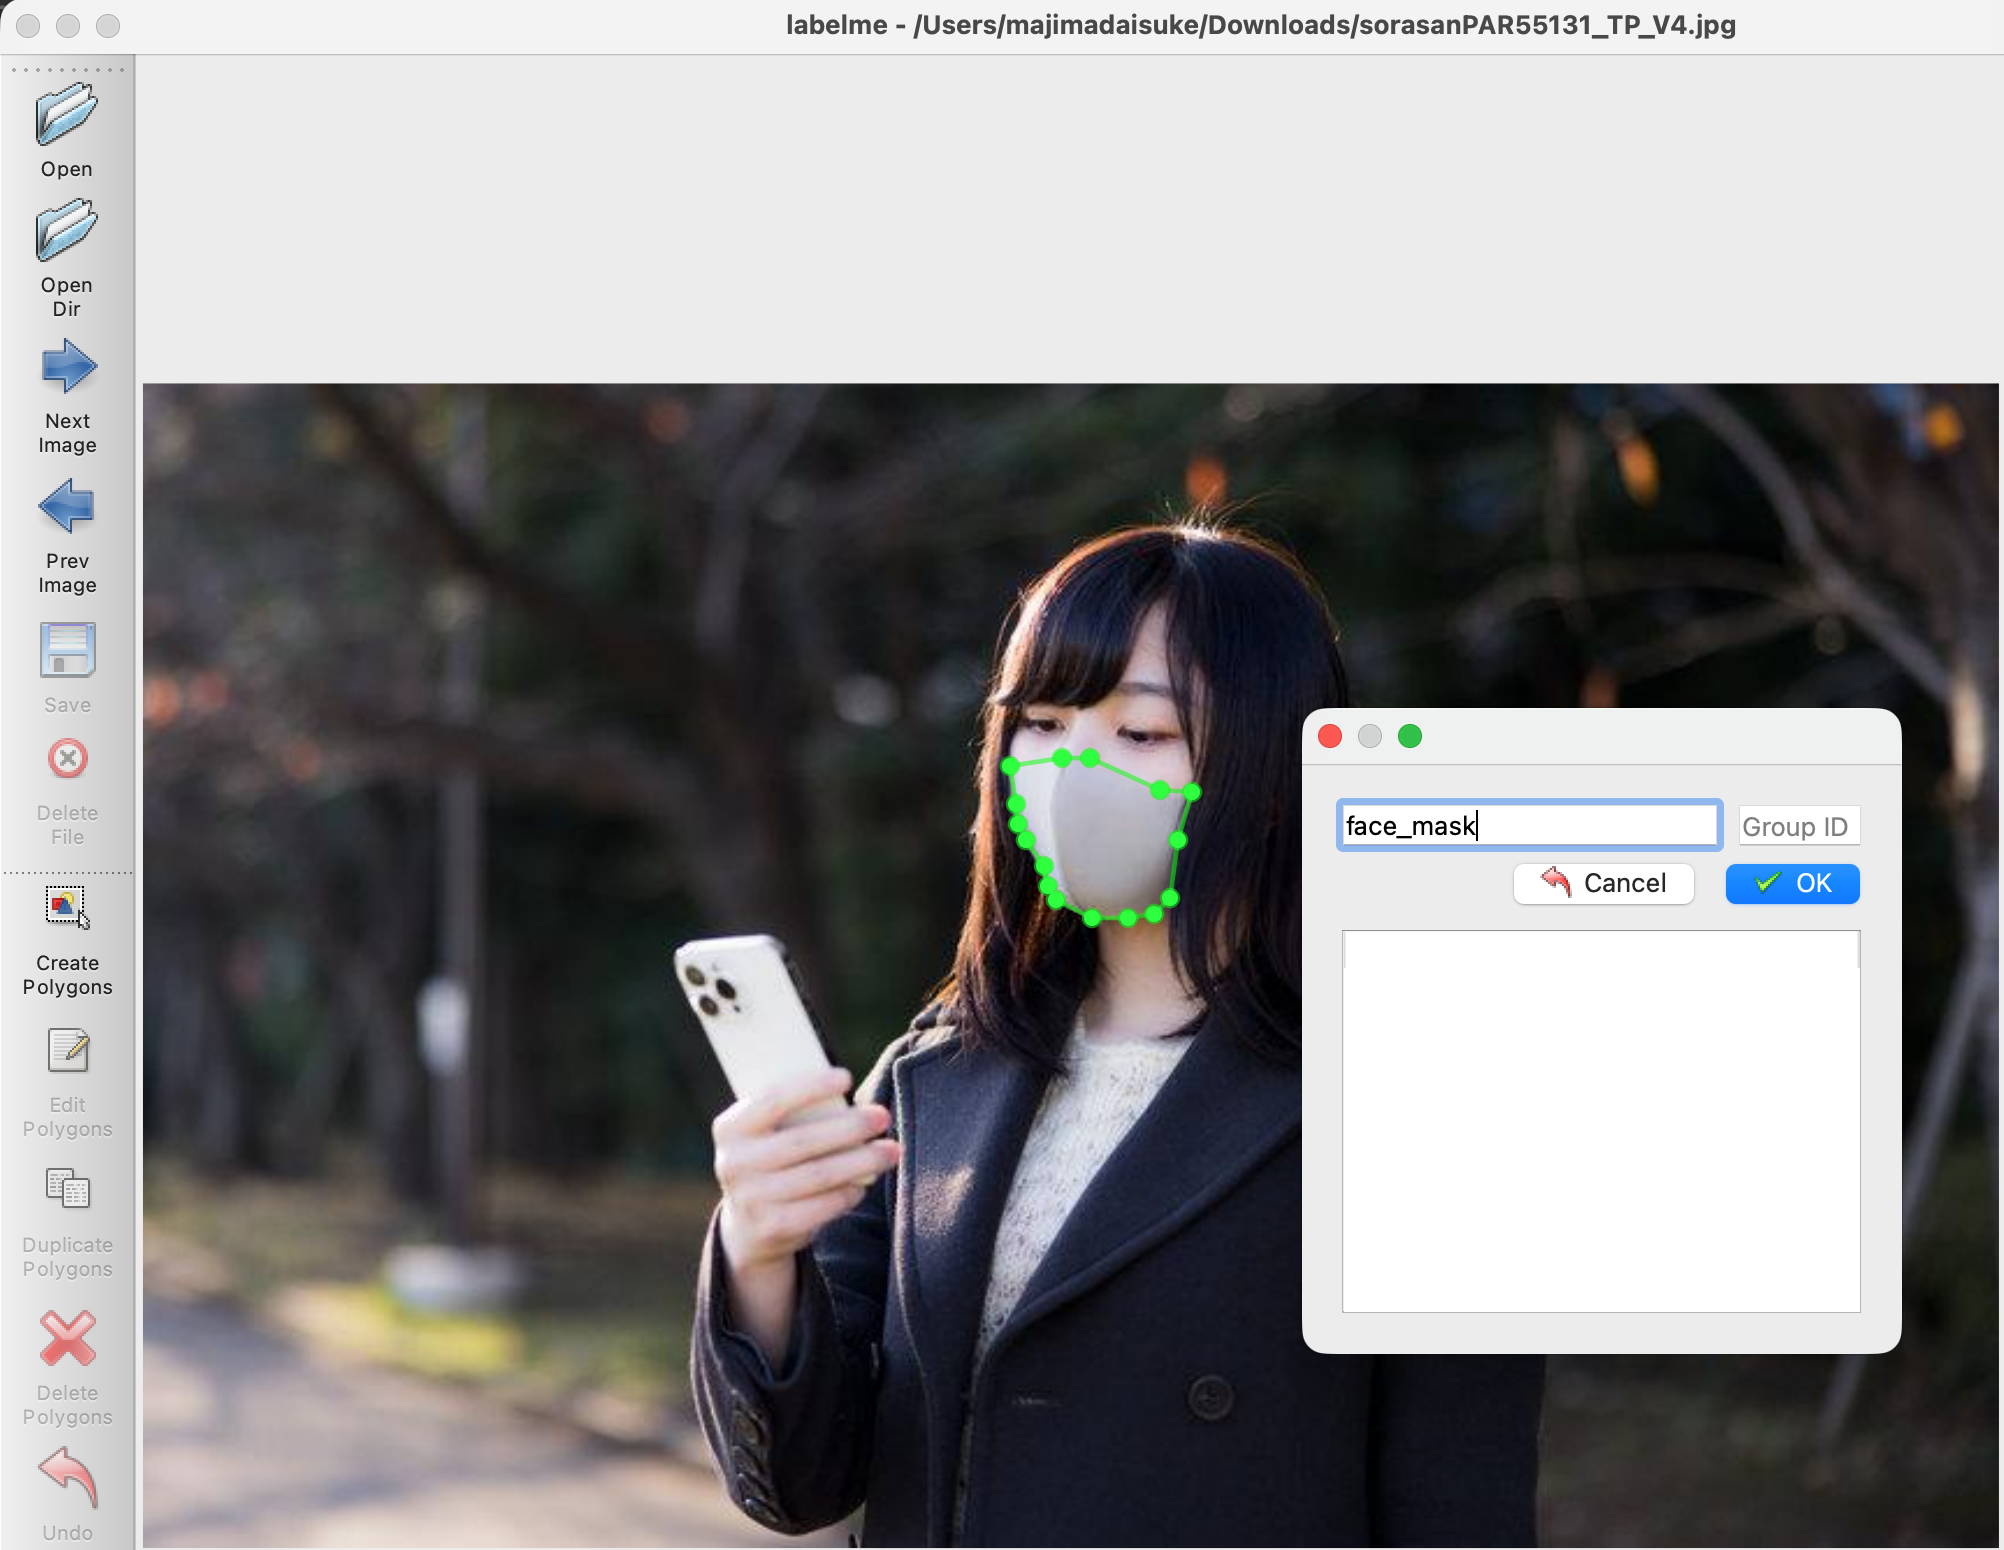
Saveボタンを押して、画像と同名のアノテーションjsonファイルを保存します。
image0.jpgなら、image0.jsonというファイルが保存されます。
次の関数でjsonファイルからマスク画像を作ります。
import numpy as np
import math
from PIL import ImageDraw, Image

def shape_to_mask(
    img_shape, points, shape_type=None, line_width=10, point_size=5
):
    mask = np.zeros(img_shape[:2], dtype=np.uint8)
    mask = Image.fromarray(mask)
    draw = ImageDraw.Draw(mask)
    xy = [tuple(point) for point in points]
    if shape_type == "circle":
        assert len(xy) == 2, "Shape of shape_type=circle must have 2 points"
        (cx, cy), (px, py) = xy
        d = math.sqrt((cx - px) ** 2 + (cy - py) ** 2)
        draw.ellipse([cx - d, cy - d, cx + d, cy + d], outline=1, fill=1)
    elif shape_type == "rectangle":
        assert len(xy) == 2, "Shape of shape_type=rectangle must have 2 points"
        draw.rectangle(xy, outline=1, fill=1)
    elif shape_type == "line":
        assert len(xy) == 2, "Shape of shape_type=line must have 2 points"
        draw.line(xy=xy, fill=1, width=line_width)
    elif shape_type == "linestrip":
        draw.line(xy=xy, fill=1, width=line_width)
    elif shape_type == "point":
        assert len(xy) == 1, "Shape of shape_type=point must have 1 points"
        cx, cy = xy[0]
        r = point_size
        draw.ellipse([cx - r, cy - r, cx + r, cy + r], outline=1, fill=1)
    else:
        assert len(xy) > 2, "Polygon must have points more than 2"
        draw.polygon(xy=xy, outline=1, fill=1)
    mask = np.array(mask, dtype=bool)
    return mask
import json
import cv2

dest_dir = 'my_dataset/masks/'

with open(json_path, "r",encoding="utf-8") as f:
  dj = json.load(f)
  # dj['shapes'][0]は今回一つのラベルのため。
  mask = shape_to_mask((dj['imageHeight'],dj['imageWidth']), dj['shapes'][0]['points'], shape_type=None,line_width=1, point_size=1)
  mask_img = mask.astype(np.int)#booleanを0,1に変換
  dest = os.path.join(dest_dir, os.path.splitext(os.path.basename(json_path))[0]+".jpg")
  cv2.imwrite(dest,mask_img*255)
トレーニング
U2netのリポジトリをクローンします。
u2net_train.pyの以下の部分のパスを独自のものに書き換えます。
51行目のデータの親ディレクトリ(data_dir)
52行目の画像ディレクトリ(tra_image_dir)
53行目のマスクディレクトリ(tra_label_dir)
58行目のトレーニングしたモデルウェイト保存先
data_dir = "my_data/"
tra_image_dir = 'images/'
tra_label_dir = 'masks/'
...
model_dir = 'my_saved_models/'
dataloader.pyの221行目を以下のように書き換えます。
##		return {'imidx':torch.from_numpy(imidx), 'image': torch.from_numpy(tmpImg), 'label': torch.from_numpy(tmpLbl)}

## ↓ .copy() をつける

		return {'imidx':torch.from_numpy(imidx), 'image': torch.from_numpy(tmpImg.copy()), 'label': torch.from_numpy(tmpLbl.copy())}
トレーニングを開始します。
python u2net_train.py
u2net_train.py116行目のsave_frq(デフォルトは2000)のイテレーションごとに、モデルウェイトが保存されます。
保存したウェイトは通常の推論と同じ手順で使えます。
途中で止めた学習を再開したい場合
net.load_state_dict(torch.load(model_path))
python:u2net_train.pyの102行目に以下を追加してtrainを実行すると、途中のウェイトから学習を再開できます。
🐣
フリーランスエンジニアです。
お仕事のご相談こちらまで
rockyshikoku@gmail.com
機械学習、ARアプリ(Web/iOS)を作っています。
機械学習/AR関連の情報を発信しています。