概要
LINE ChatBotのロジックをNode-RED Flowで作成して、enebularのExport to Other ServicesでAWS Lambdaにデプロイ後、AWS API GatewayでAPI化してLINE ChatBotから呼び出します。
1. FlowエディタでLINE ChatBotロジックを作成
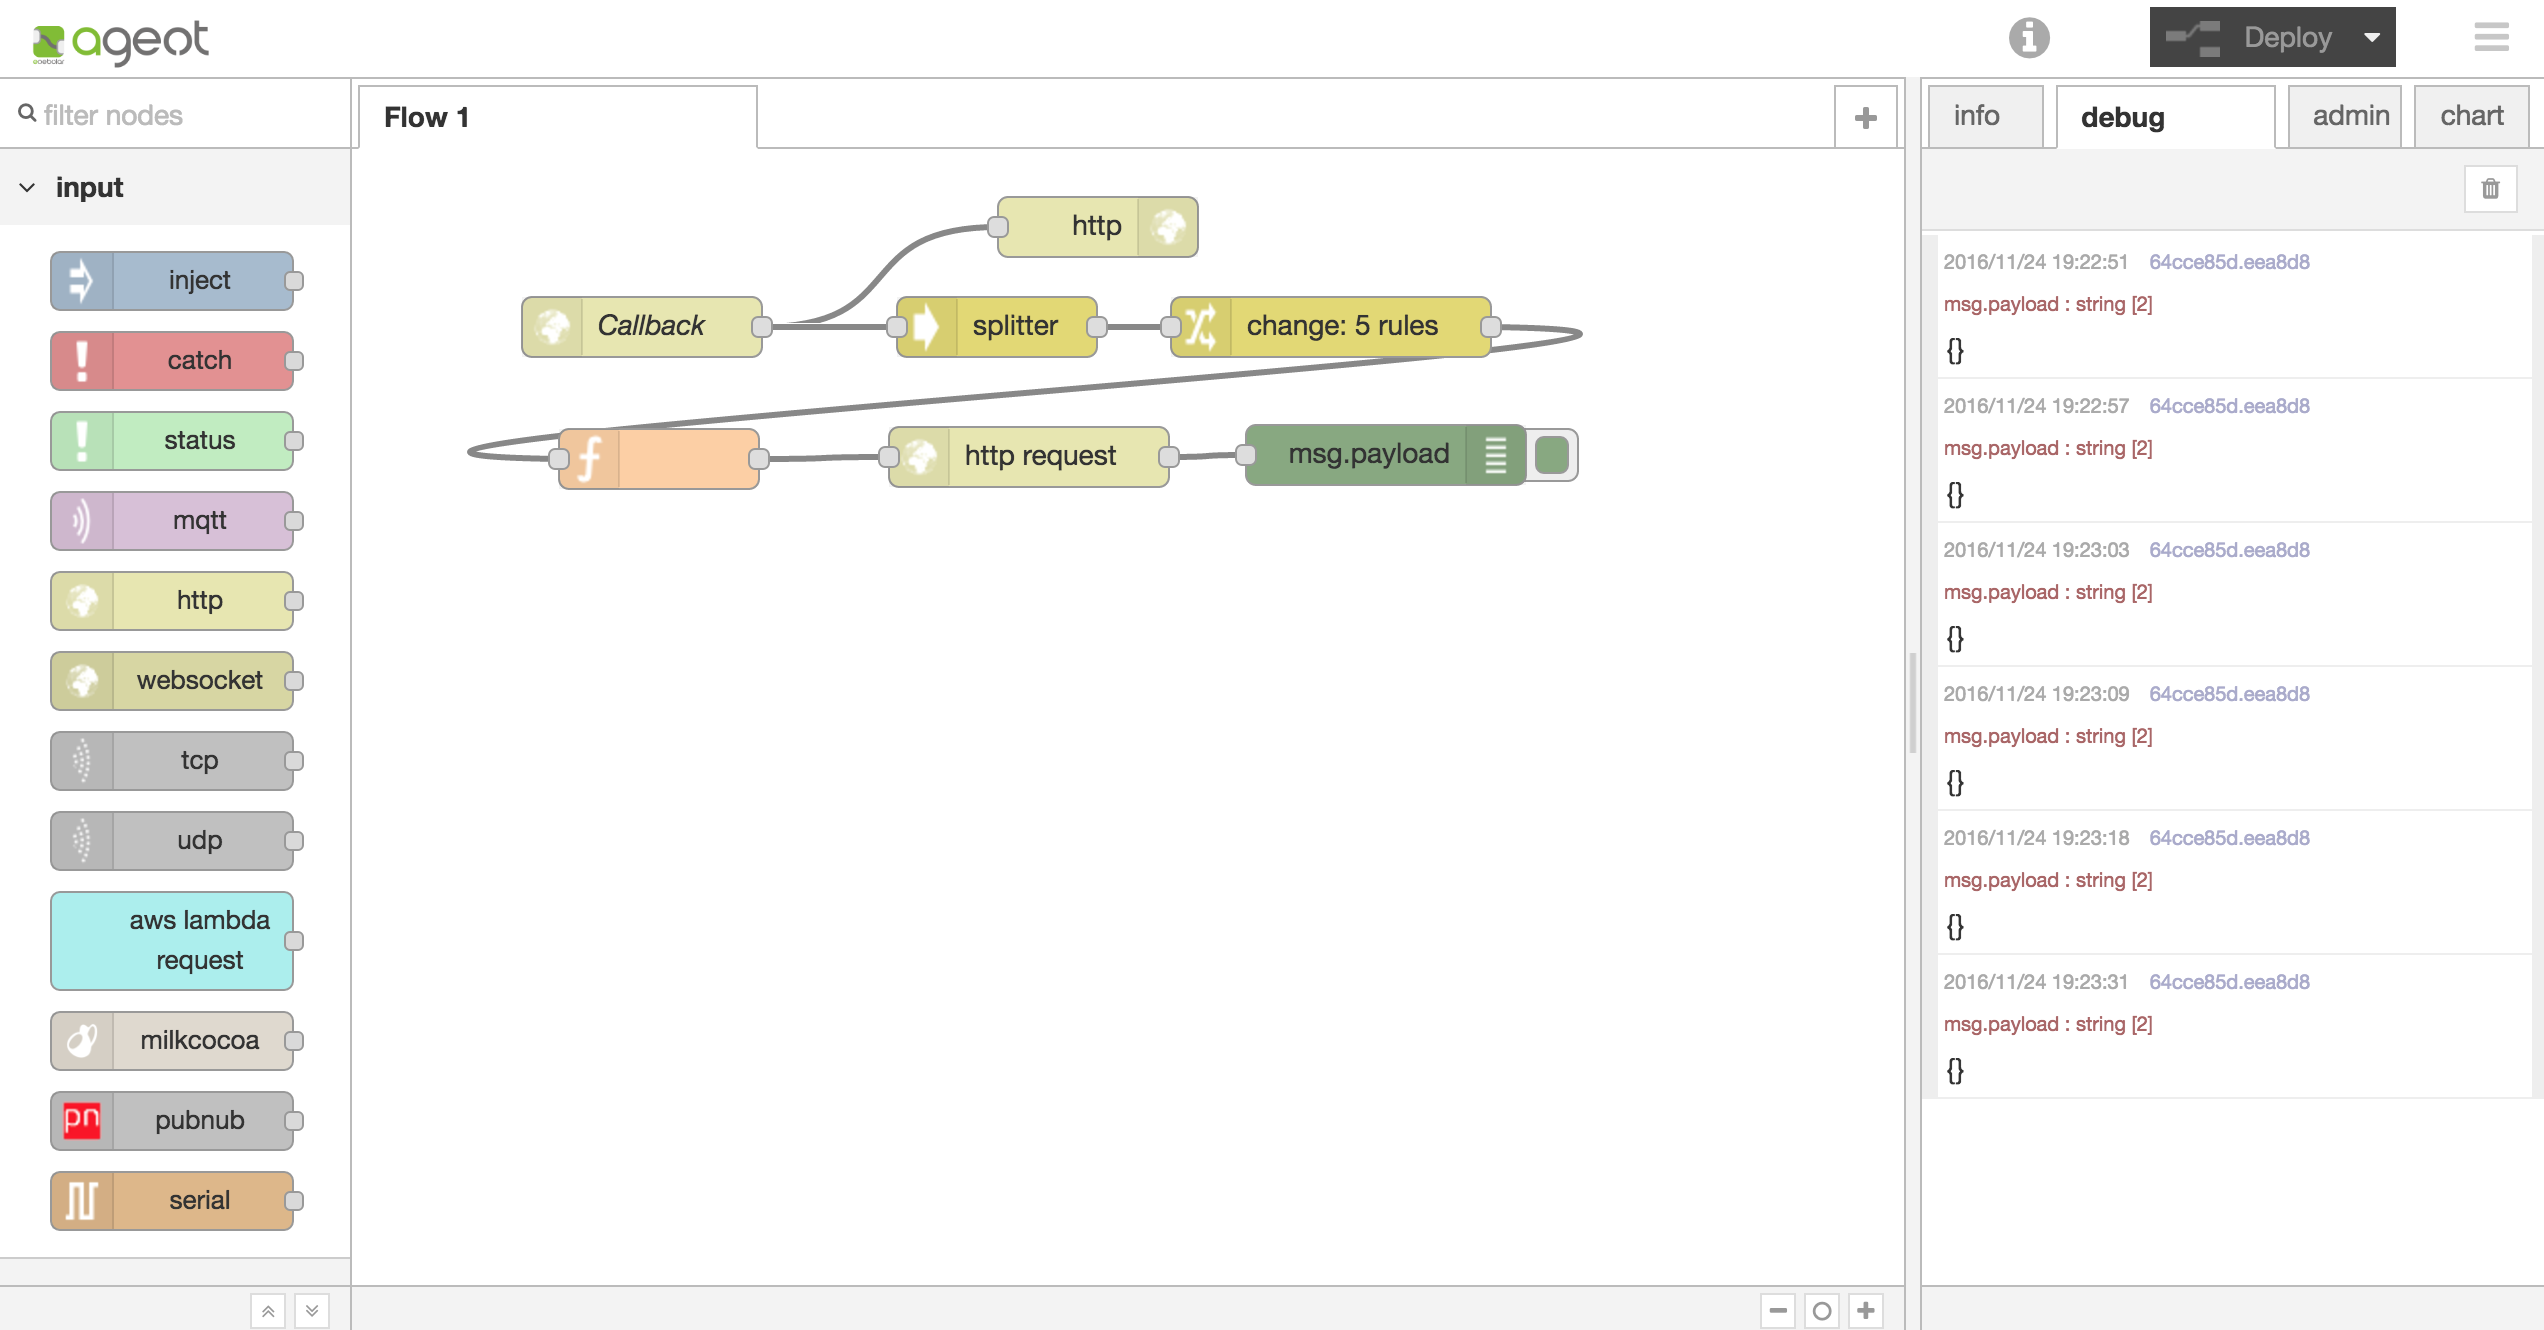
今回は受けたメッセージをオウム返しするだけのロジックを組みます。Flowは以下です。<Your Channel Access Token>の部分は自分のBotのAccess Tokenに置き換えます。この辺のことやLINE ChatBotの設定はここらへんを参照ください。
[{"id":"f4b89745.a64f28","type":"http in","z":"f509b523.6a1b78","name":"Callback","url":"/callback","method":"post","swaggerDoc":"","x":145,"y":89,"wires":[["be71747.da51888","d584c44f.c4df98"]]},{"id":"be71747.da51888","type":"http response","z":"f509b523.6a1b78","name":"","x":373,"y":39,"wires":[]},{"id":"64cce85d.eea8d8","type":"debug","z":"f509b523.6a1b78","name":"","active":true,"console":"false","complete":"false","x":517,"y":153,"wires":[]},{"id":"94a4eecf.f9a29","type":"http request","z":"f509b523.6a1b78","name":"","method":"POST","ret":"txt","url":"https://api.line.me/v2/bot/message/reply","x":338.5,"y":154,"wires":[["64cce85d.eea8d8"]]},{"id":"e4839e91.5a68e","type":"change","z":"f509b523.6a1b78","name":"","rules":[{"t":"set","p":"headers.Authorization","pt":"msg","to":"Bearer <Your Channel Access Token>","tot":"str"},{"t":"delete","p":"payload.type","pt":"msg"},{"t":"delete","p":"payload.source","pt":"msg"},{"t":"delete","p":"payload.timestamp","pt":"msg"},{"t":"delete","p":"payload.message.id","pt":"msg"}],"action":"","property":"","from":"","to":"","reg":false,"x":489.5,"y":89,"wires":[["7ef7bdc3.bfe364"]]},{"id":"7ef7bdc3.bfe364","type":"function","z":"f509b523.6a1b78","name":"","func":"msg.payload.messages = [msg.payload.message];\ndelete msg.payload.message;\nreturn msg;","outputs":1,"noerr":0,"x":153.5,"y":155,"wires":[["94a4eecf.f9a29"]]},{"id":"d584c44f.c4df98","type":"splitter","z":"f509b523.6a1b78","name":"","property":"payload.events","x":322.5,"y":89,"wires":[["e4839e91.5a68e"]]}]
LINE Messaging APIドキュメントを見ると配列でメッセージが飛んで来る点と、Replyのメッセージ部分も配列で返す必要がある点に気をつけます。
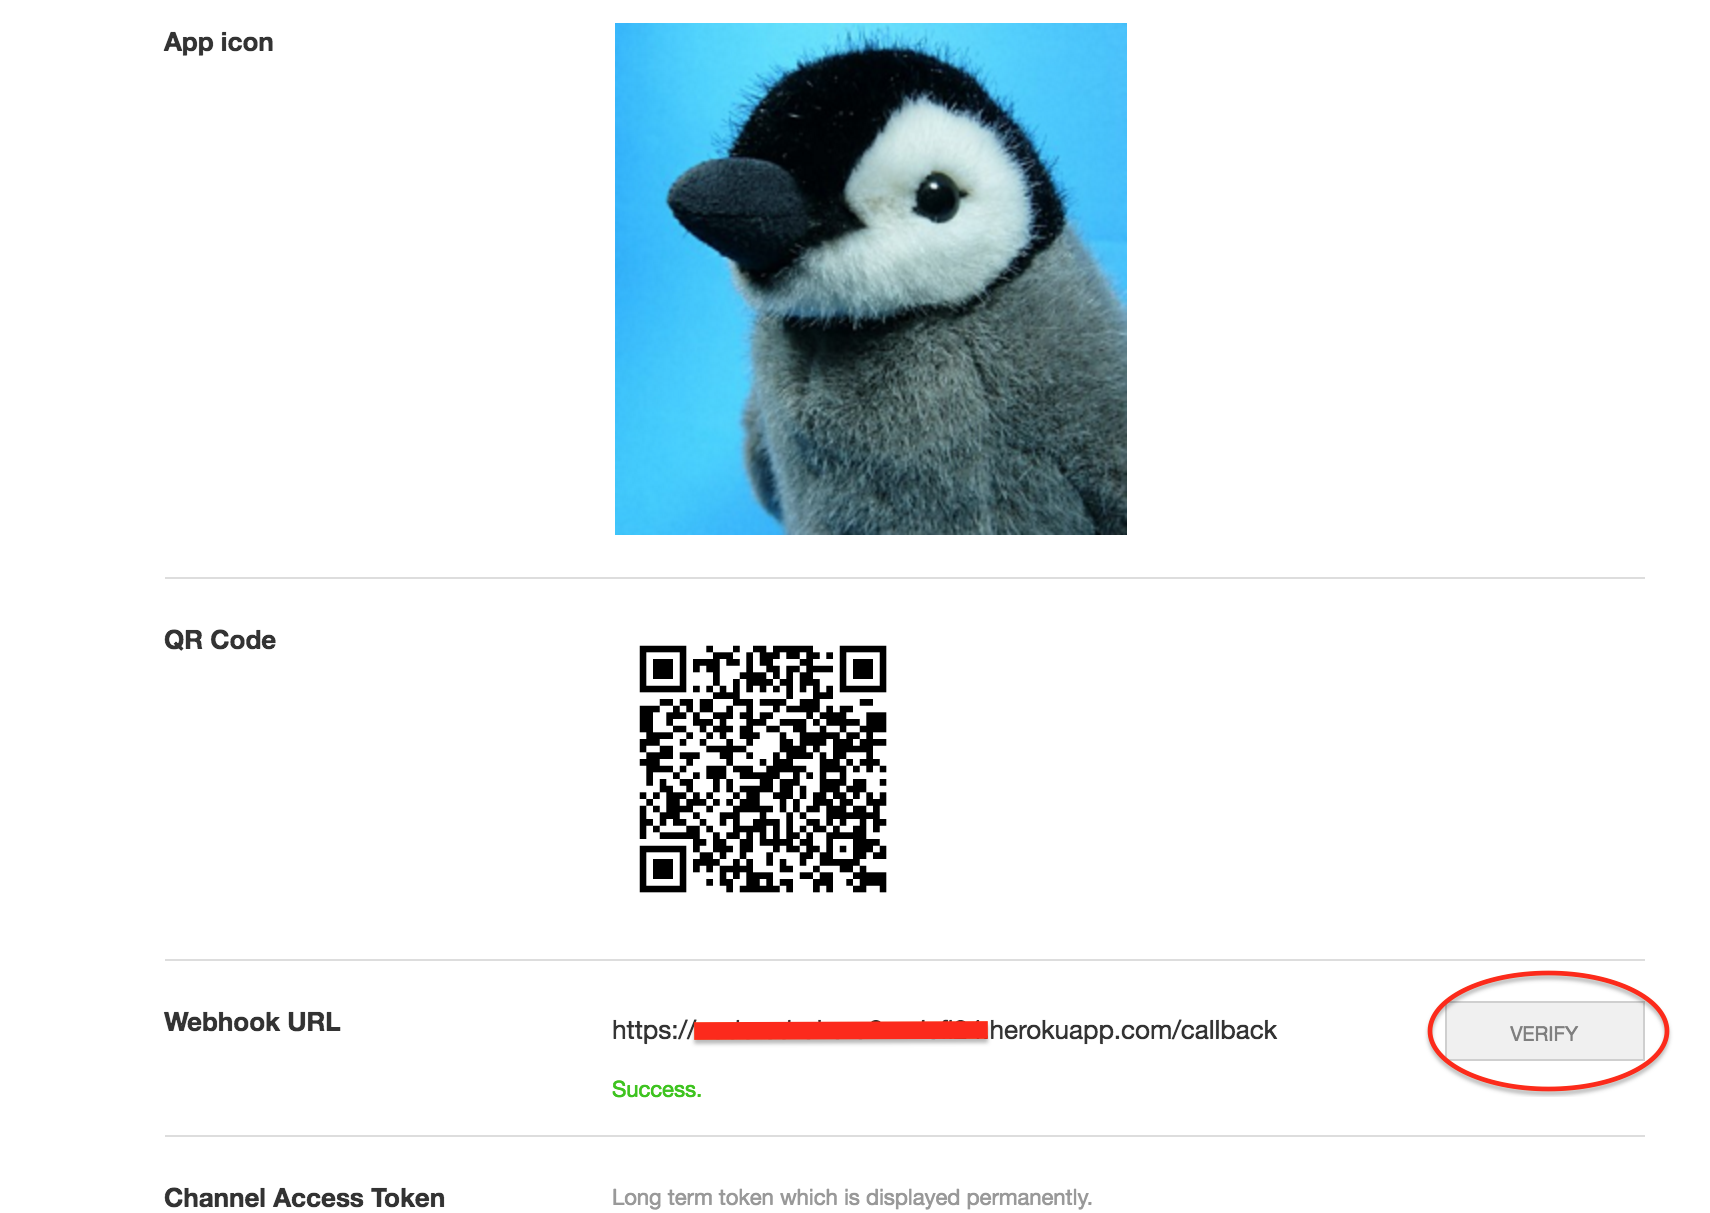
Flowで作成したhttps://<your host>/callbackというようなURLをChannel設定のWebhook URLへ登録します。とりあえずの疎通確認はVERIFYボタンで可能です。成功すれば以下のようにSuccess.が表示されます。
ちなみにenebularのエディタのホストは以下のiマークをクリックすると表示されます。
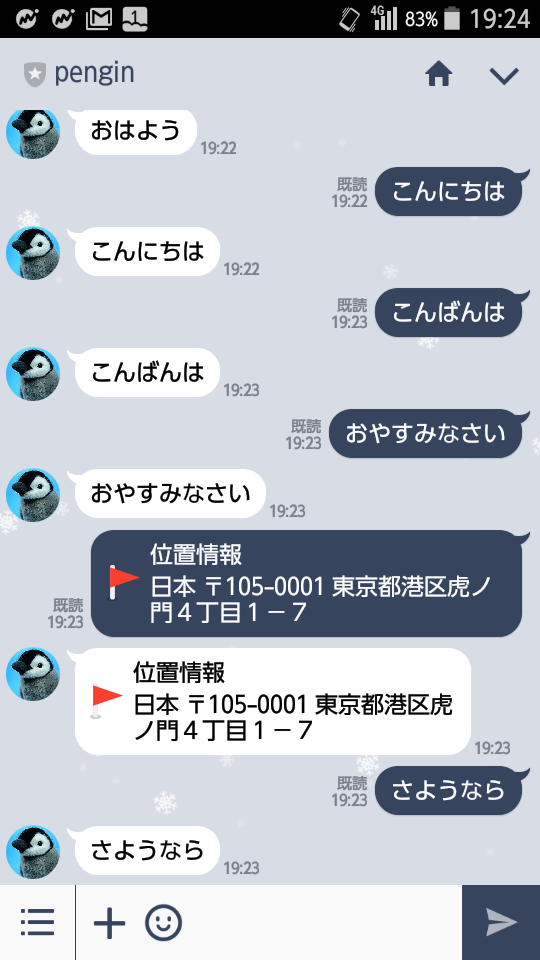
ボットを友だち登録して会話してオウム返しになればロジックは完成です。
2. Export to Other ServicesでAWS Lambdaにデプロイ
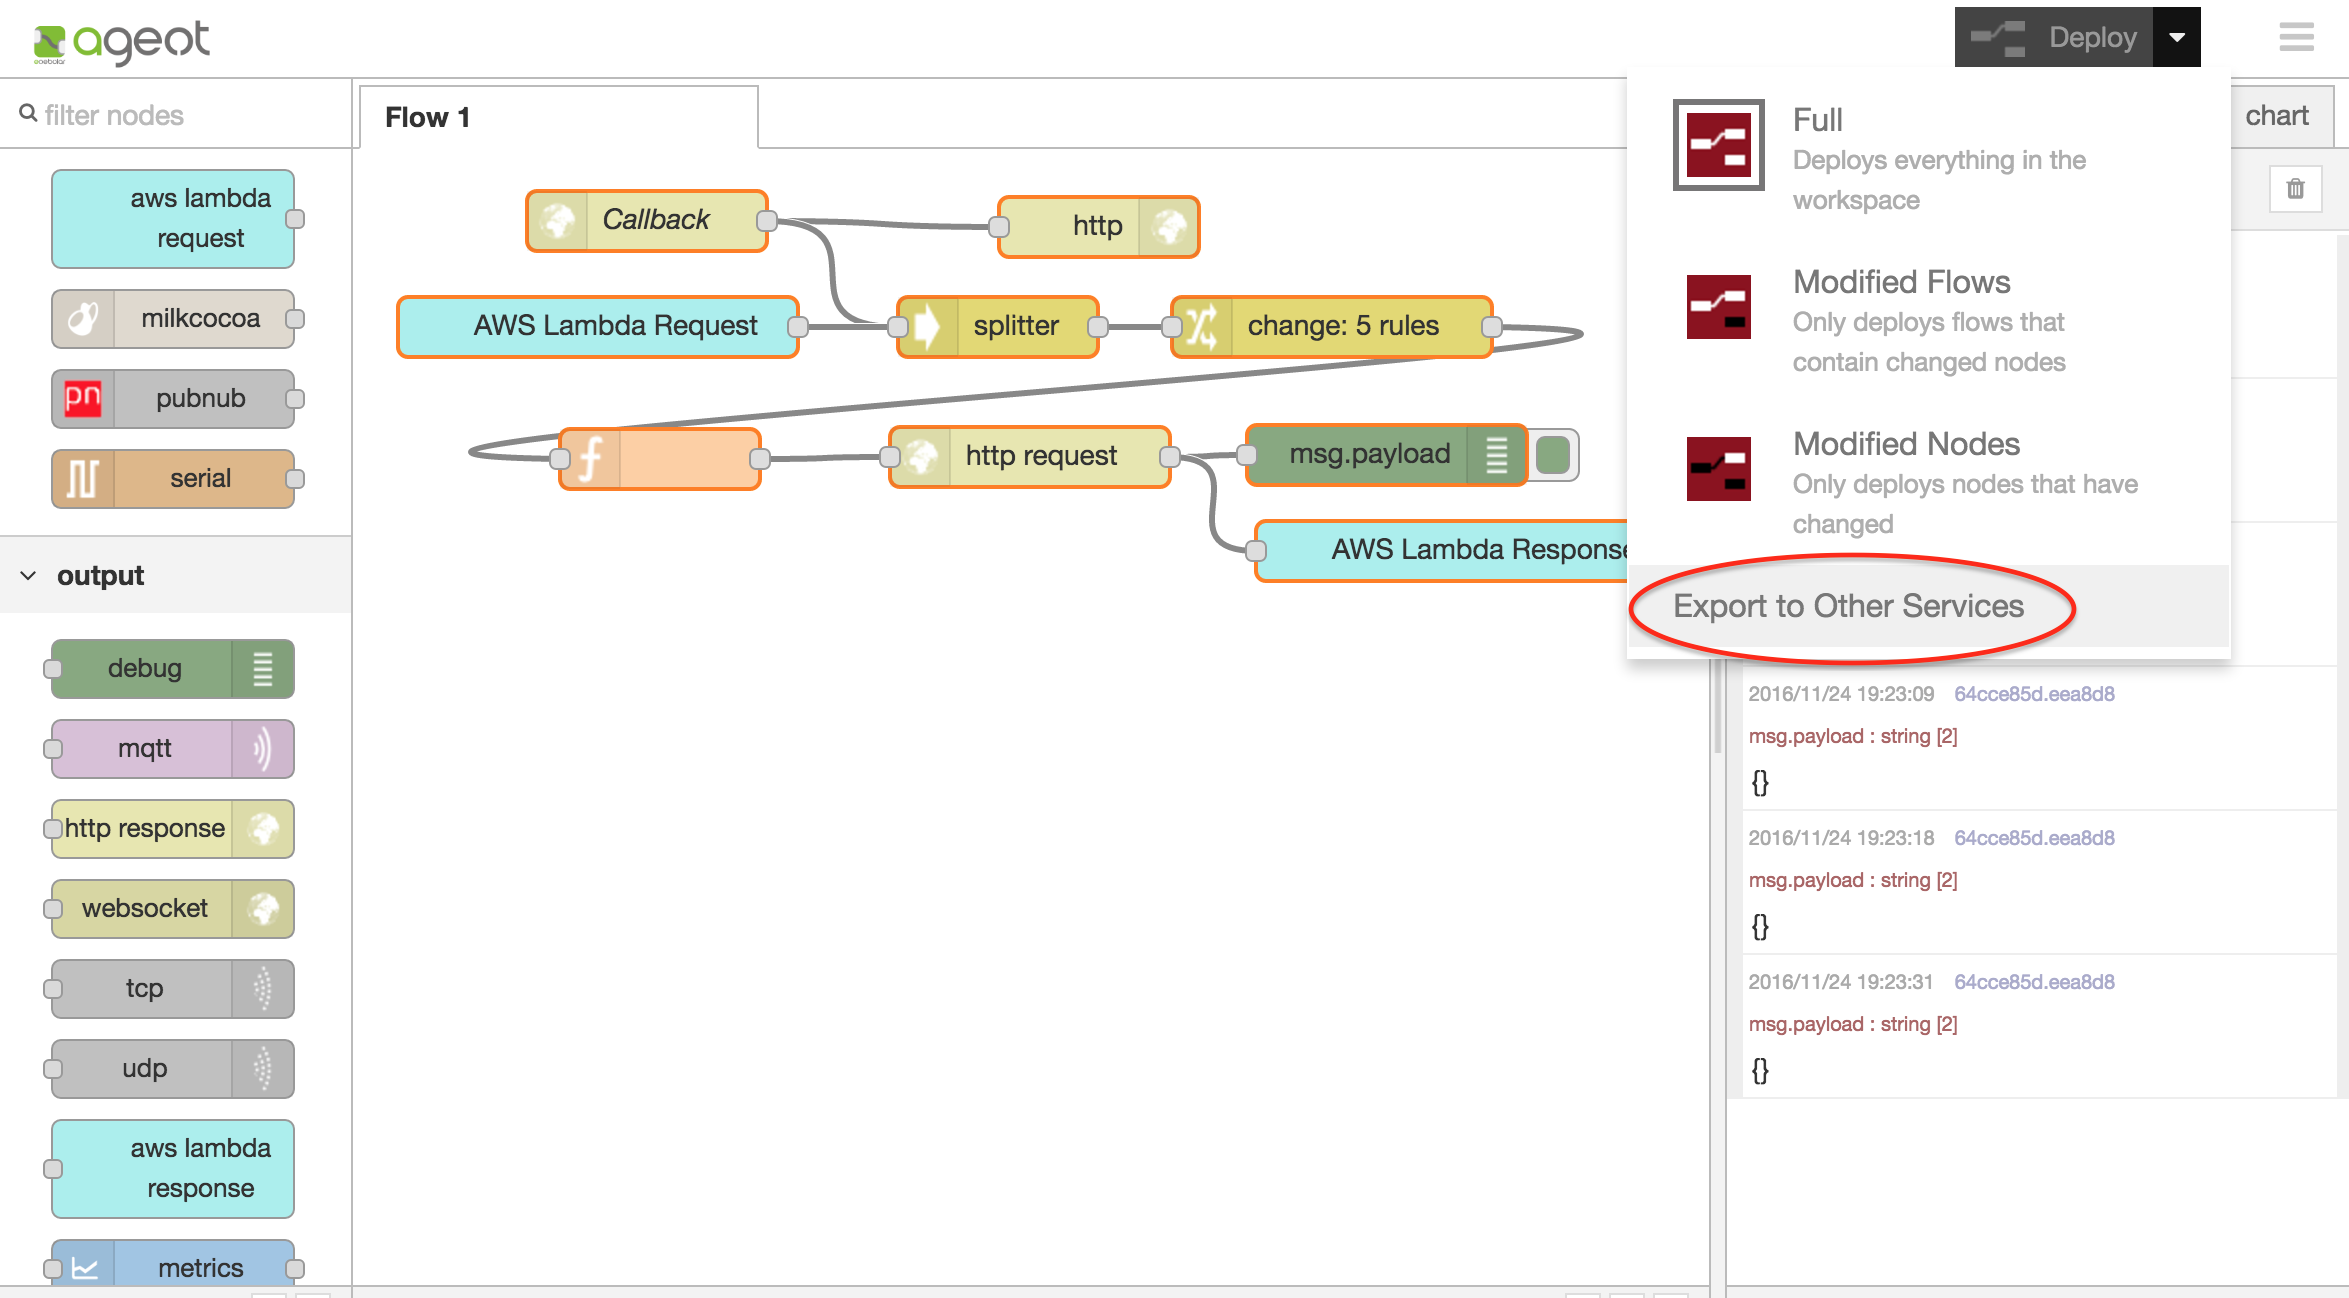
enebularのFlowエディタは開発用途で一時的に利用するものなので作成したロジックを安定した環境で動かすためにExport to Other ServicesでAWS Lambdaにデプロイします。AWS Lambdaで動かすためにはAWS LambdaのInput/Outputで起動するようにaws lambda request/responseノードをFlowに追加します。
[{"id":"f4b89745.a64f28","type":"http in","z":"f509b523.6a1b78","name":"Callback","url":"/callback","method":"post","swaggerDoc":"","x":147,"y":36,"wires":[["be71747.da51888","d584c44f.c4df98"]]},{"id":"be71747.da51888","type":"http response","z":"f509b523.6a1b78","name":"","x":373,"y":39,"wires":[]},{"id":"64cce85d.eea8d8","type":"debug","z":"f509b523.6a1b78","name":"","active":true,"console":"false","complete":"false","x":517,"y":153,"wires":[]},{"id":"94a4eecf.f9a29","type":"http request","z":"f509b523.6a1b78","name":"","method":"POST","ret":"txt","url":"https://api.line.me/v2/bot/message/reply","x":338.5,"y":154,"wires":[["64cce85d.eea8d8","490ec436.76a0dc"]]},{"id":"e4839e91.5a68e","type":"change","z":"f509b523.6a1b78","name":"","rules":[{"t":"set","p":"headers.Authorization","pt":"msg","to":"Bearer <Your Channel Access Token>","tot":"str"},{"t":"delete","p":"payload.type","pt":"msg"},{"t":"delete","p":"payload.source","pt":"msg"},{"t":"delete","p":"payload.timestamp","pt":"msg"},{"t":"delete","p":"payload.message.id","pt":"msg"}],"action":"","property":"","from":"","to":"","reg":false,"x":489.5,"y":89,"wires":[["7ef7bdc3.bfe364"]]},{"id":"7ef7bdc3.bfe364","type":"function","z":"f509b523.6a1b78","name":"","func":"msg.payload.messages = [msg.payload.message];\ndelete msg.payload.message;\nreturn msg;","outputs":1,"noerr":0,"x":153.5,"y":155,"wires":[["94a4eecf.f9a29"]]},{"id":"d584c44f.c4df98","type":"splitter","z":"f509b523.6a1b78","name":"","property":"payload.events","x":322.5,"y":89,"wires":[["e4839e91.5a68e"]]},{"id":"be3a19b9.239858","type":"aws-lambda-request","z":"f509b523.6a1b78","x":122.5,"y":89,"wires":[["d584c44f.c4df98"]]},{"id":"490ec436.76a0dc","type":"aws-lambda-response","z":"f509b523.6a1b78","x":561.5,"y":201,"wires":[]}]
次に以下のようにしてAWS Lambdaデプロイ画面を開きます。
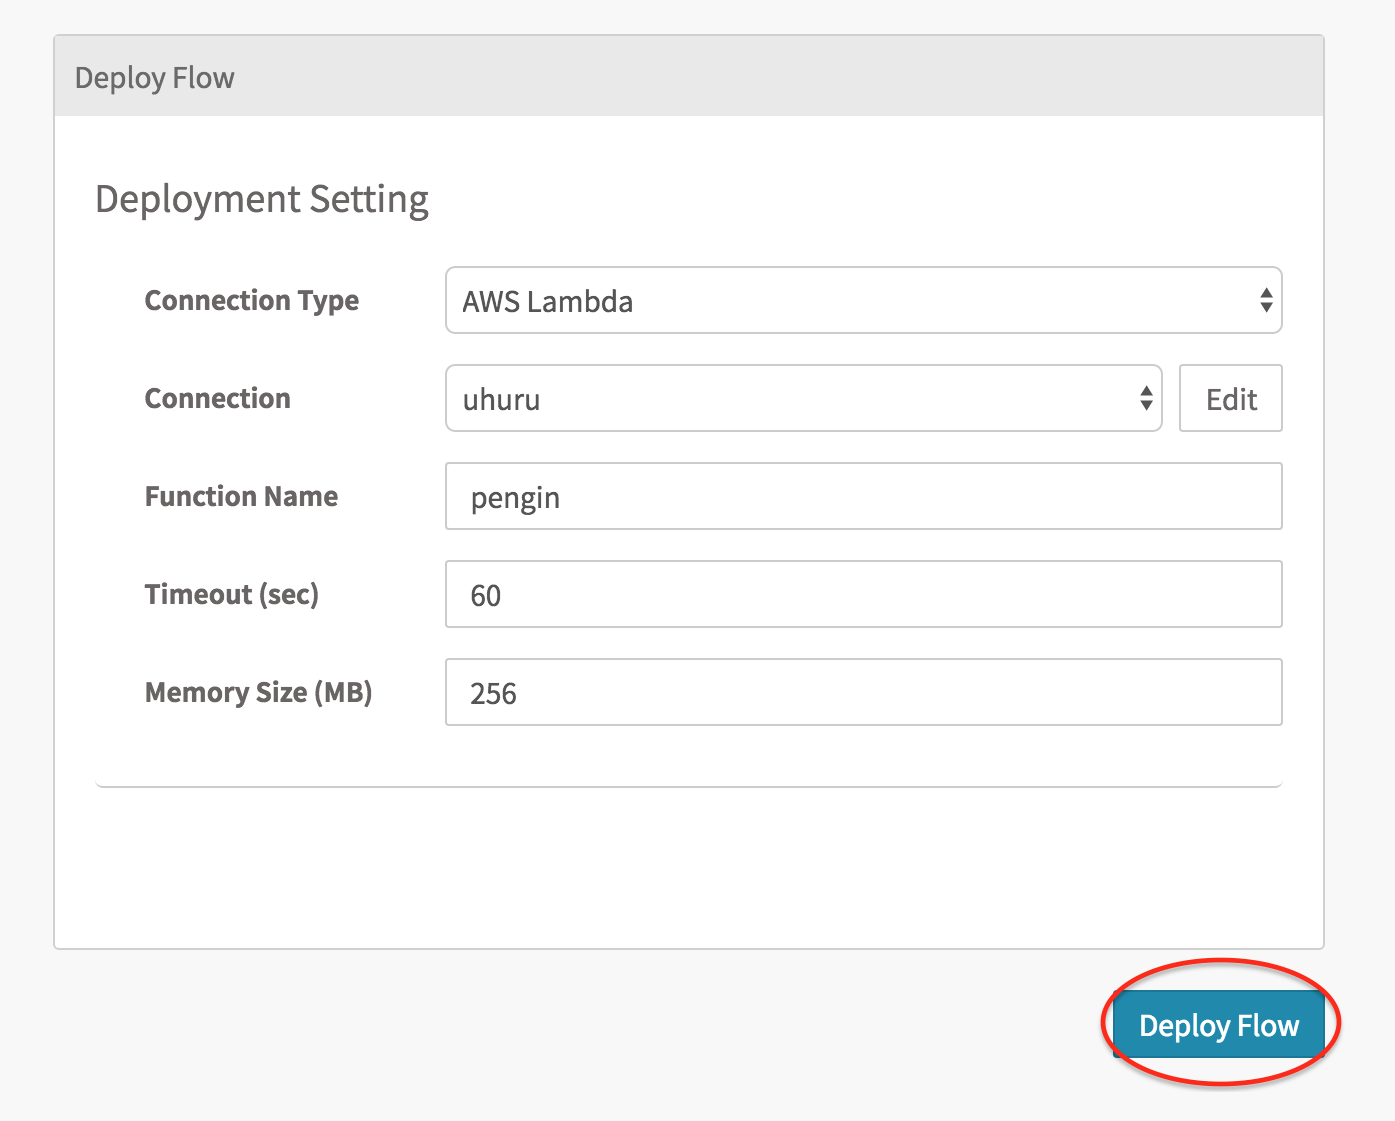
functionの属性を入力してデプロイします。この辺りの詳細はenebular Depelopersを参照ください。
3. Channel設定のWebhook URLをAWS API Gatewayで作成したURLに変更
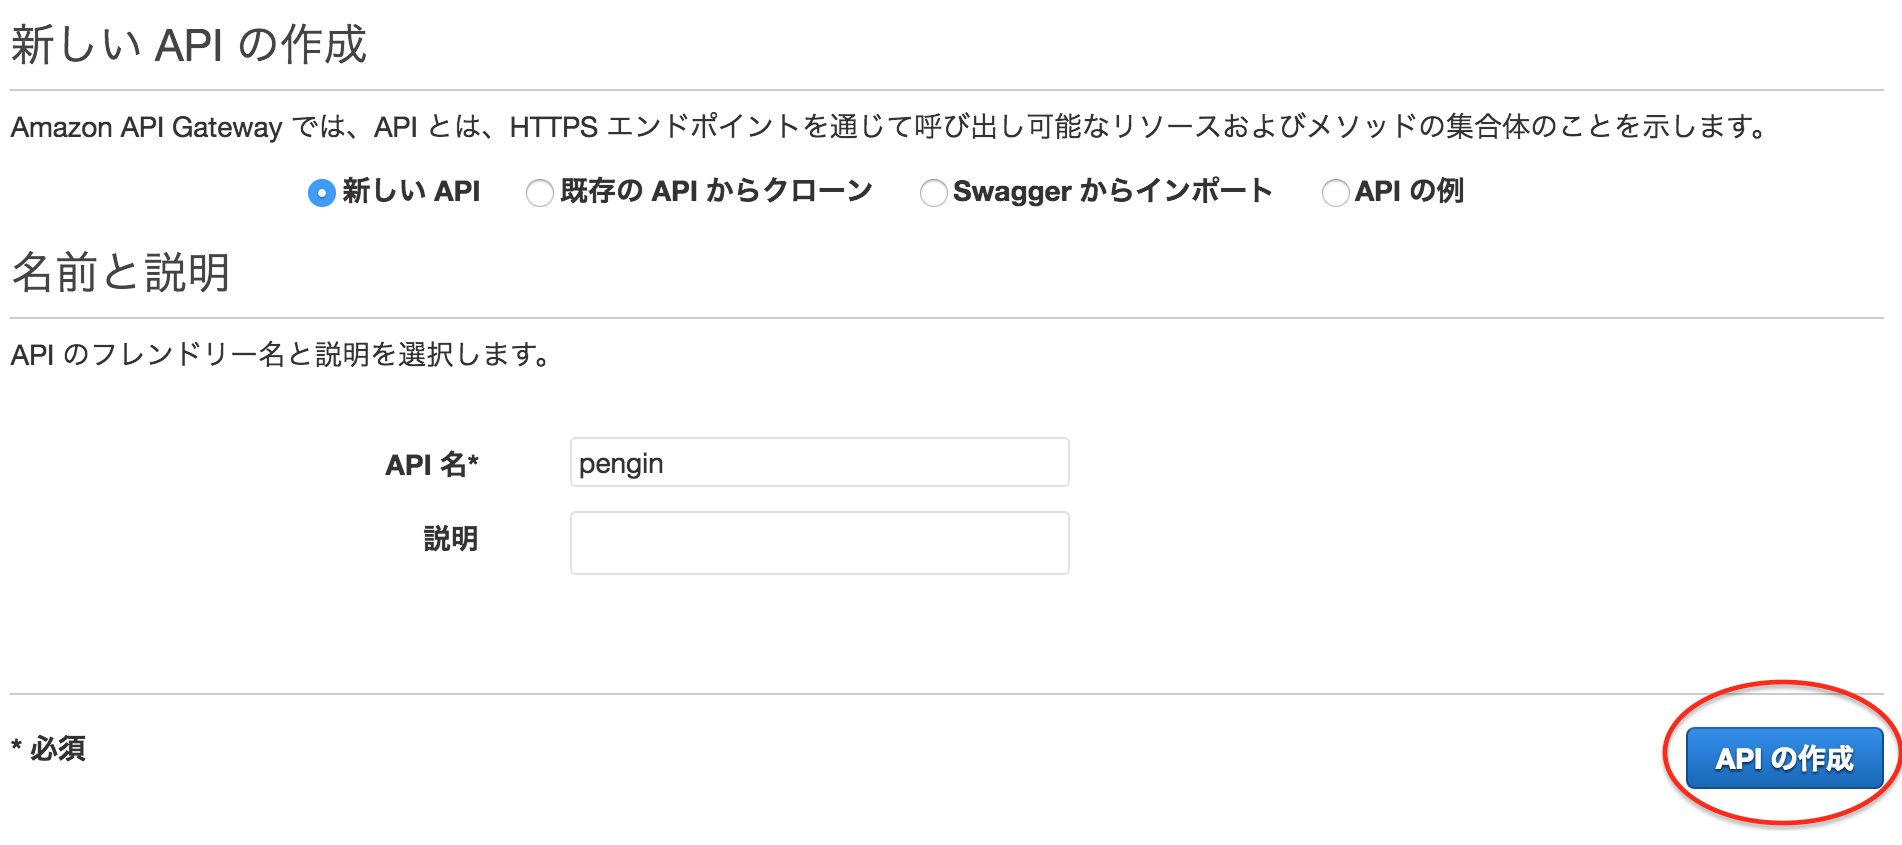
最後にAWS API Gatewayの設定を行います。以下の"APIの作成"ボタンから始めます。
次にAPI名を入力して"APIの作成"ボタンをクリックします。
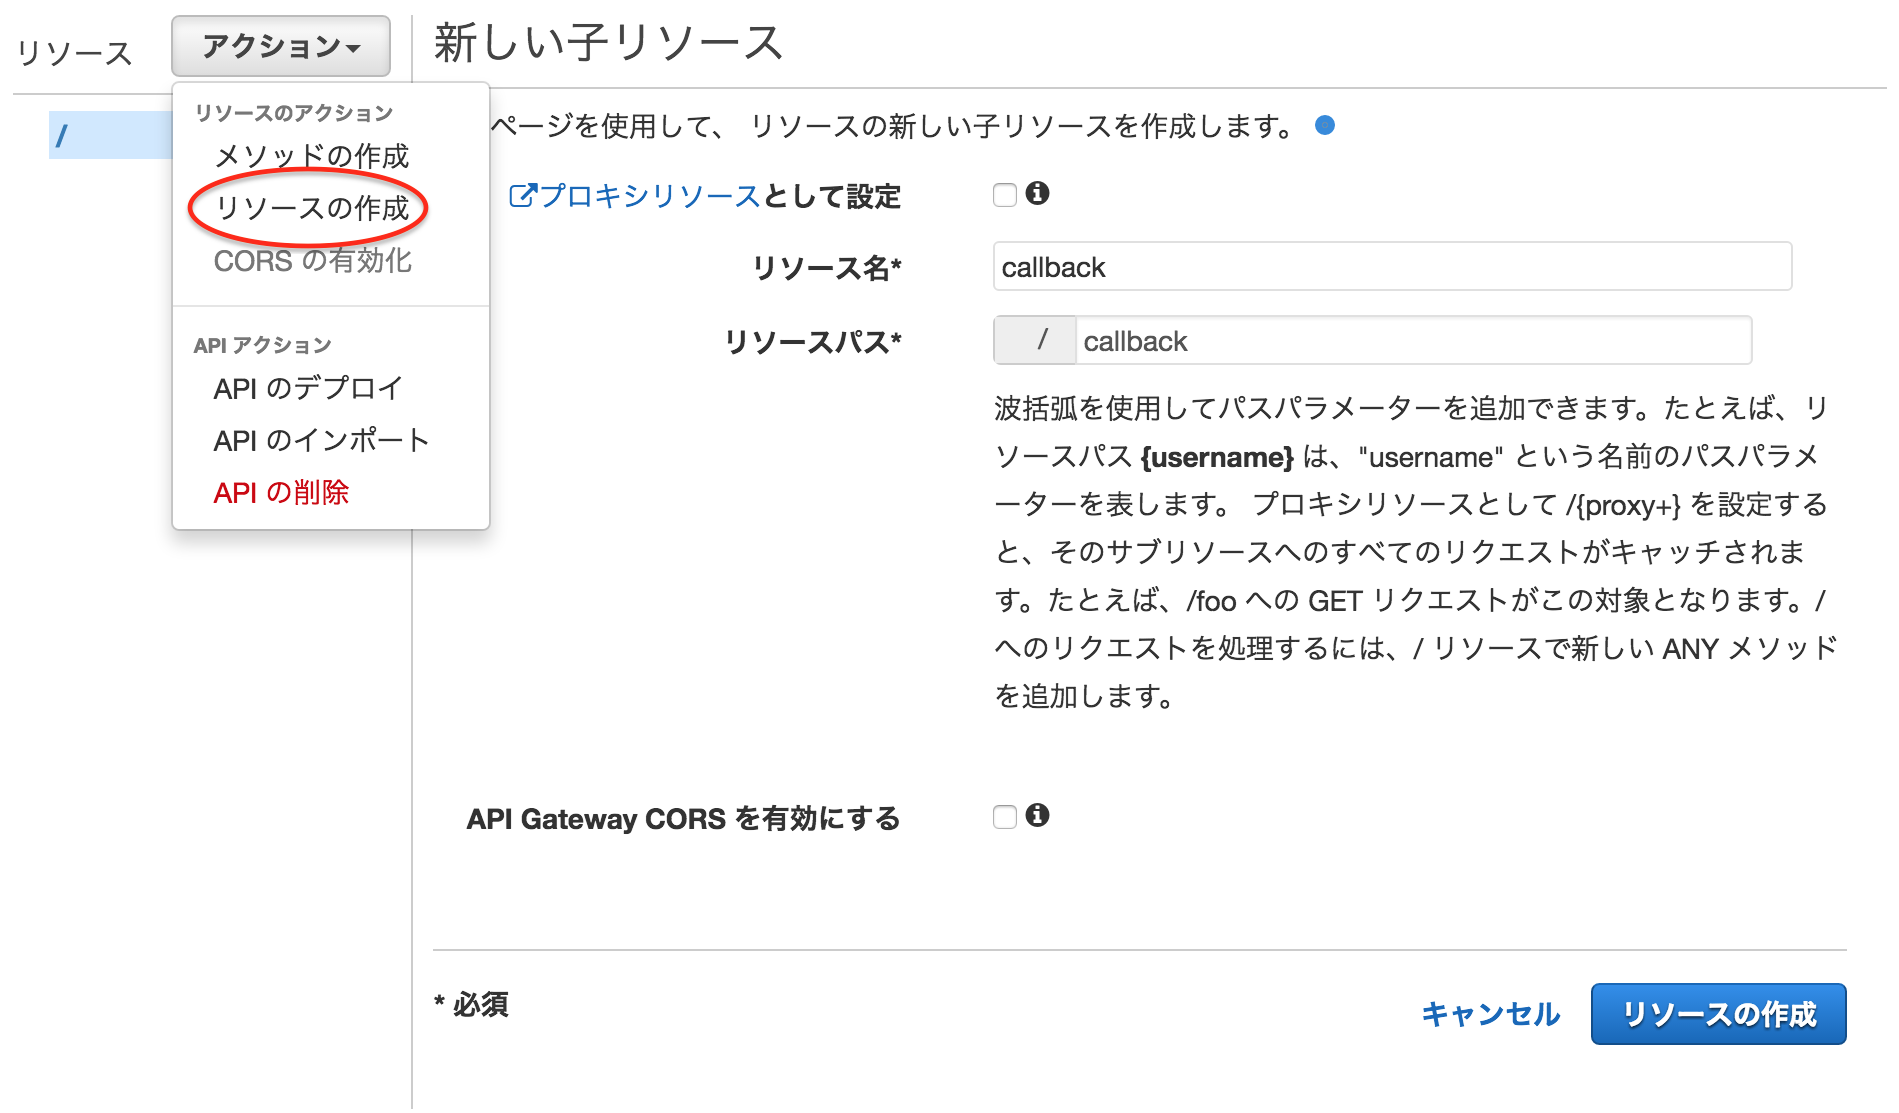
次に以下のようにメニューから"リソースの作成"を選択して"リソース名"と"リソースパス"を入力して"リソースの作成"ボタンをクリックします。
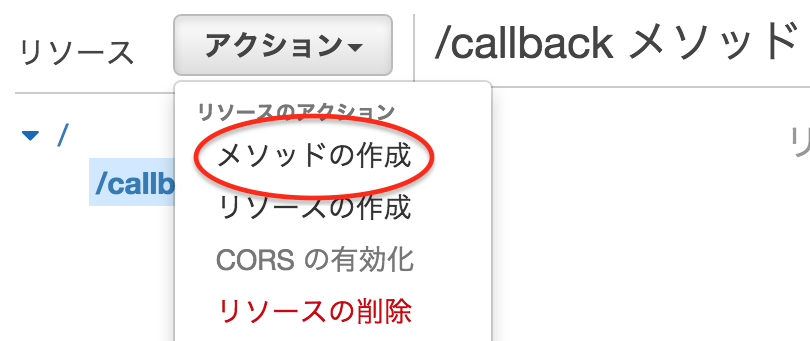
次に作成したcallbackリソースを選択した状態で以下のようにメニューから"メソッドの作成"を選択します。
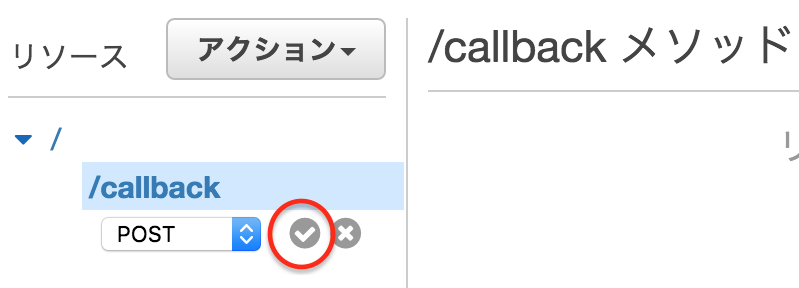
次に出現したプルダウンで"POST"メソッドを選択して赤く囲ったチェックボタンをクリックします。
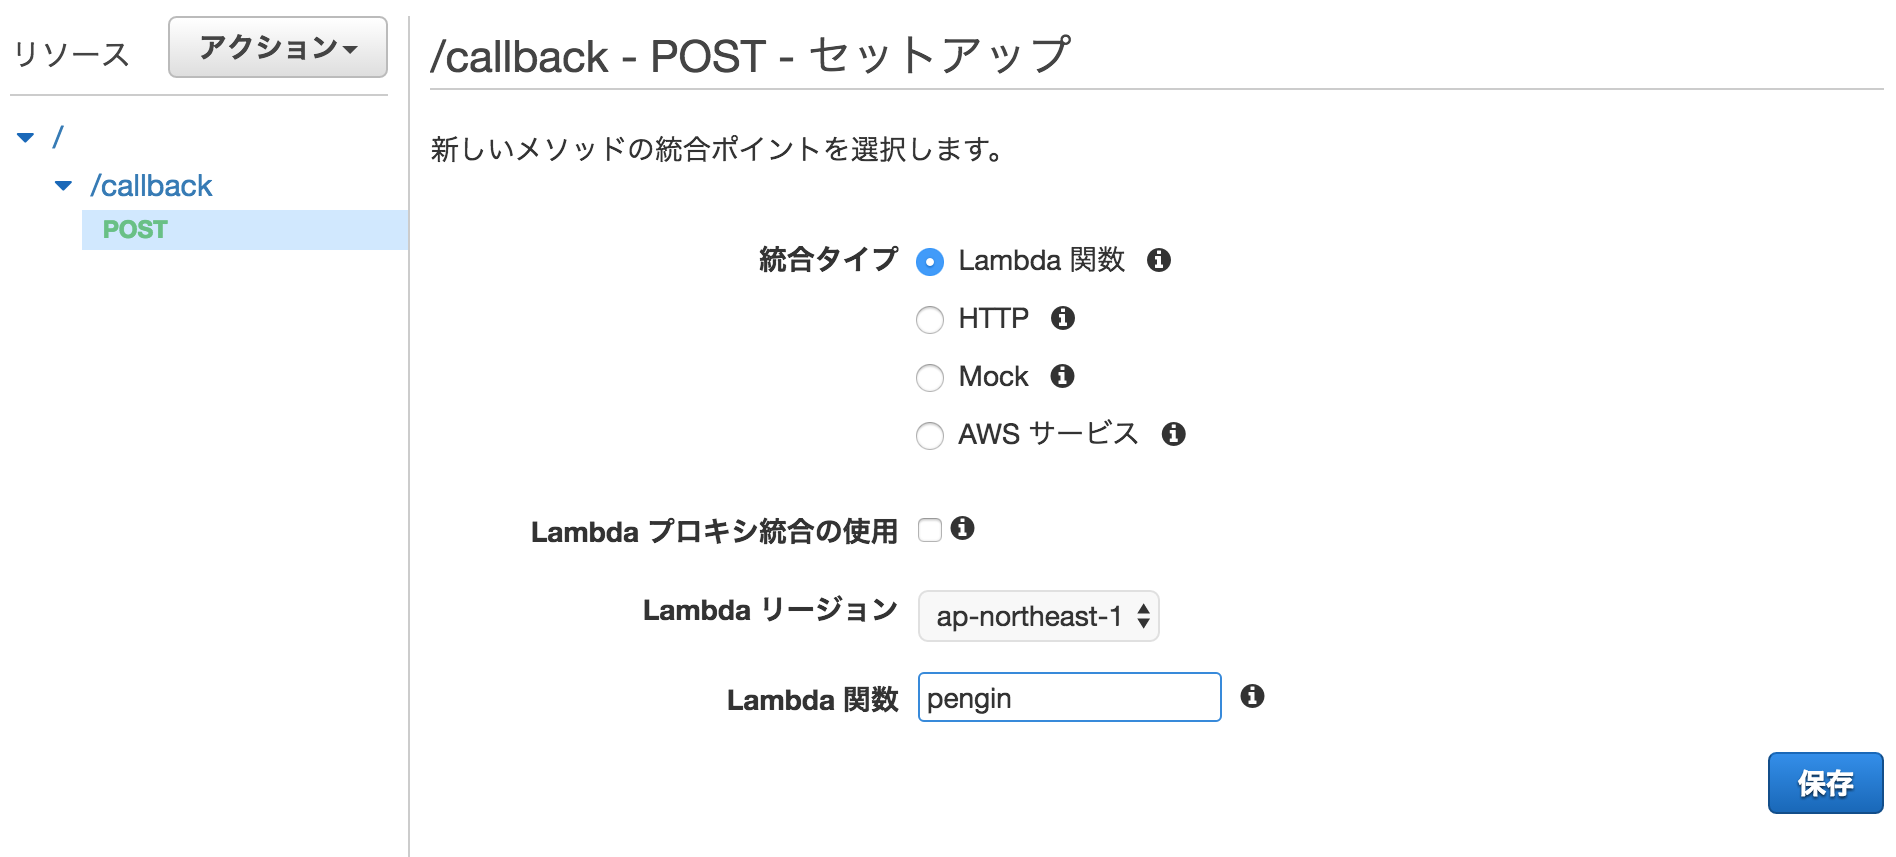
次に"統合タイプ"を"Lambda関数"のまま"Lambdaリージョン"はデプロイしたリージョンを選択し、"Lambda関数"はデプロイしたfunction名を入力して"保存"ボタンをクリックしてください。
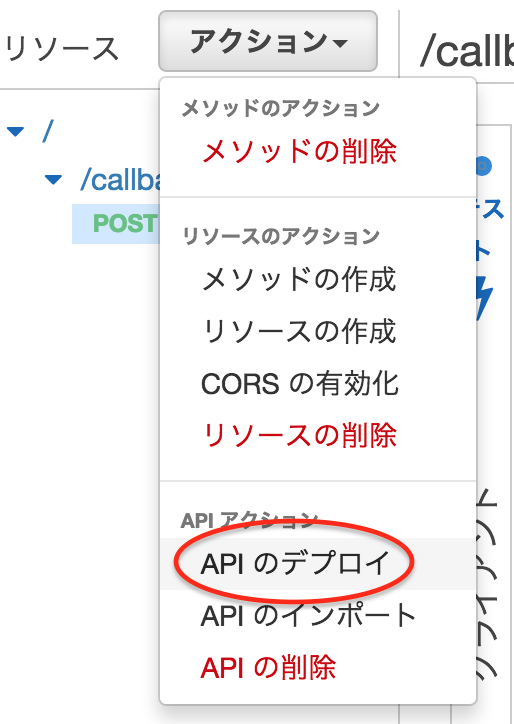
最後に"APIのデプロイ"を行います。途中の"ステージ名"などは任意で決めてください。
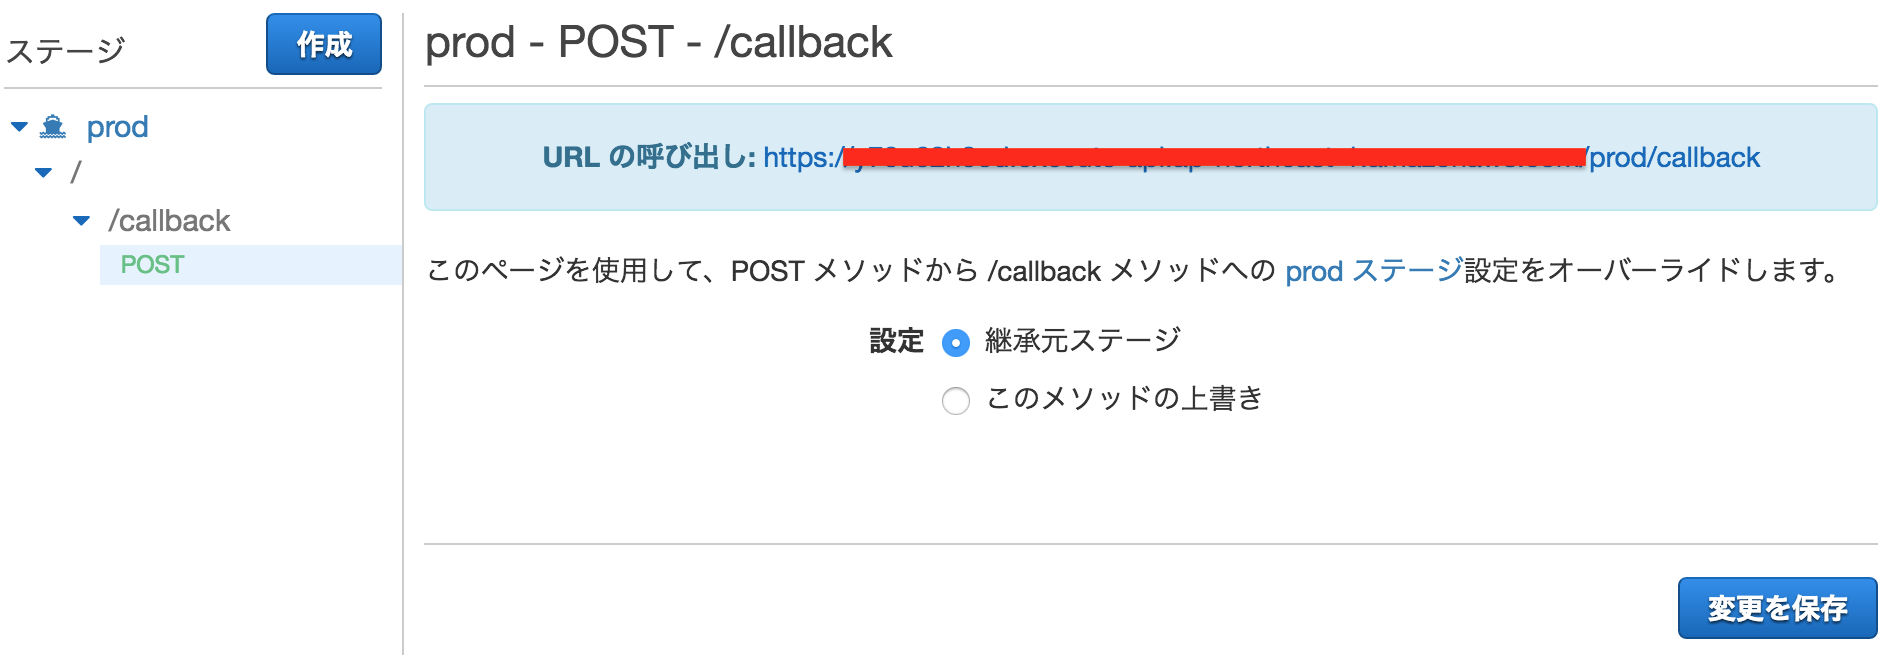
作成されたURLはメソッドを選択すると以下のように表示されます。最後にボットのChannel設定のWebhook URLをこのURLに変更してください。
まとめ
これでenebularとAWSのLambdaとAPI Gatewayを使ってLINE ChatBotを安定稼働させることができました。本格運用する際はセキュリティ面や例外処理など考慮しなければいけない点は他にもありますが基本的な開発手順は上記のように極力ノンコーディングで実現可能です。
LINE ChatBotに限らず、enebularは様々なアプリケーション開発やAWS Lambdaのようなサーバレスアーキテクチャでの運用を多くの人が利用できるようにハードルを下げてくれます。
