概要
今回はtd-agent(fluentd)のMonitoring Agentの情報をenebular INFOMOTIONで可視化します。
想定の環境としては同一ネットワーク内に2台のサーバがあり、両方ともfluentdが稼働している状況です。今回は1方のサーバにNode-REDをインストールしてMonitoring Agentの情報を定期的に取得してMilkcocoaに投げます。
Monitoring Agentの設定
対象サーバ両方のtd-agent.confに以下を追記してtd-agentを再起動するだけです。
<source>
  type monitor_agent
  bind 0.0.0.0
  port 24220
</source>
以下のようにcurlで動作確認します。
curl -s http://<対象ホスト>:24220/api/plugins.json | jq .
以下のようなJSONが帰ってくればOKです。
{
  "plugins": [
    {
      "config": {
        "port": "24220",
        "bind": "0.0.0.0",
        "type": "monitor_agent"
      },
      "retry_count": null,
      "output_plugin": false,
      "type": "monitor_agent",
      "plugin_id": "object:3fdda85f7894"
    },
    {
      "config": {
        "format": "/((?<head>[^ ]*) *(?<app_id>[^ ]*) *(?<timestamp>[^ ]*) *(?<stream>[^ ]*) *(?<action>[^ ]*) *(?<message>.*))/",
        "tag": "container",
        "pos_file": "<パス>",
        "path": "<パス>*",
        "type": "tail"
      },
      "retry_count": null,
      "output_plugin": false,
      "type": "tail",
      "plugin_id": "object:3fdda8b16d48"
    },
    {
      "config": {
        "rewriterule0": "head ^(.*)$ $1",
        "type": "rewrite_tag_filter"
      },
      "retry_count": null,
      "output_plugin": true,
      "type": "rewrite_tag_filter",
      "plugin_id": "object:3fdda8ebf0d0"
    },
    {
      "config": {
        "type": "forward"
      },
      "retry_count": 0,
      "buffer_total_queued_size": 0,
      "buffer_queue_length": 0,
      "output_plugin": true,
      "type": "forward",
      "plugin_id": "object:3fdda8ba7f00"
    }
  ]
}
Node-REDでFlowを作る
対象サーバのどちらか1方にNode-REDをインストール後、以下のFlowを作ります。
[{"id":"4b69c020.d73198","type":"http request","z":"5b2676c5.07cfb","name":"","method":"GET","ret":"txt","url":"http://<対象ホスト2>:24220/api/plugins.json","tls":"","x":382,"y":79.5,"wires":[["fa4f4574.7d551"]]},{"id":"72c141c.aa5434","type":"inject","z":"5b2676c5.07cfb","name":"","topic":"<対象ホスト2>","payload":"","payloadType":"date","repeat":"60","crontab":"","once":false,"x":138,"y":84,"wires":[["4b69c020.d73198"]]},{"id":"33db5750.8d4218","type":"debug","z":"5b2676c5.07cfb","name":"","active":true,"console":"false","complete":"false","x":515,"y":245.25,"wires":[]},{"id":"fa4f4574.7d551","type":"json","z":"5b2676c5.07cfb","name":"","x":555,"y":56.5,"wires":[["cb1eec69.15c06"]]},{"id":"cb1eec69.15c06","type":"splitter","z":"5b2676c5.07cfb","name":"","property":"payload.plugins","x":113.5,"y":137.5,"wires":[["9ed351c9.144168"]]},{"id":"9ed351c9.144168","type":"change","z":"5b2676c5.07cfb","name":"","rules":[{"t":"delete","p":"payload.config","pt":"msg"},{"t":"set","p":"payload.host","pt":"msg","to":"topic","tot":"msg"},{"t":"set","p":"topic","pt":"msg","to":"","tot":"str"}],"action":"","property":"","from":"","to":"","reg":false,"x":294.5,"y":136.5,"wires":[["3e90309d.e7ed2"]]},{"id":"df7a4bc4.a1c748","type":"inject","z":"5b2676c5.07cfb","name":"","topic":"<対象ホスト1>","payload":"","payloadType":"date","repeat":"60","crontab":"","once":false,"x":140,"y":40,"wires":[["e53db351.d3c45"]]},{"id":"e53db351.d3c45","type":"http request","z":"5b2676c5.07cfb","name":"","method":"GET","ret":"txt","url":"http://<対象ホスト1>:24220/api/plugins.json","tls":"","x":384,"y":40.5,"wires":[["fa4f4574.7d551"]]},{"id":"3e90309d.e7ed2","type":"milkcocoa out","z":"5b2676c5.07cfb","milkcocoa":"7b028185.45982","dataStore":"fluentd","operation":"send","targetId":"","name":"","x":471.5,"y":137,"wires":[["33db5750.8d4218"]]},{"id":"7b028185.45982","type":"milkcocoa","z":"5b2676c5.07cfb","appId":"<あなたのApp ID>"}]

本来は対象ホストのマスタなどを何らかのストレージに保持して対象ホストが増加した場合にスケールするFlowにする必要があります。
これで1分間隔でtd-agent(fluentd)のMonitoring Agentの情報がMilkcocoaに送信されます。
enebular INFOMOTIONで可視化
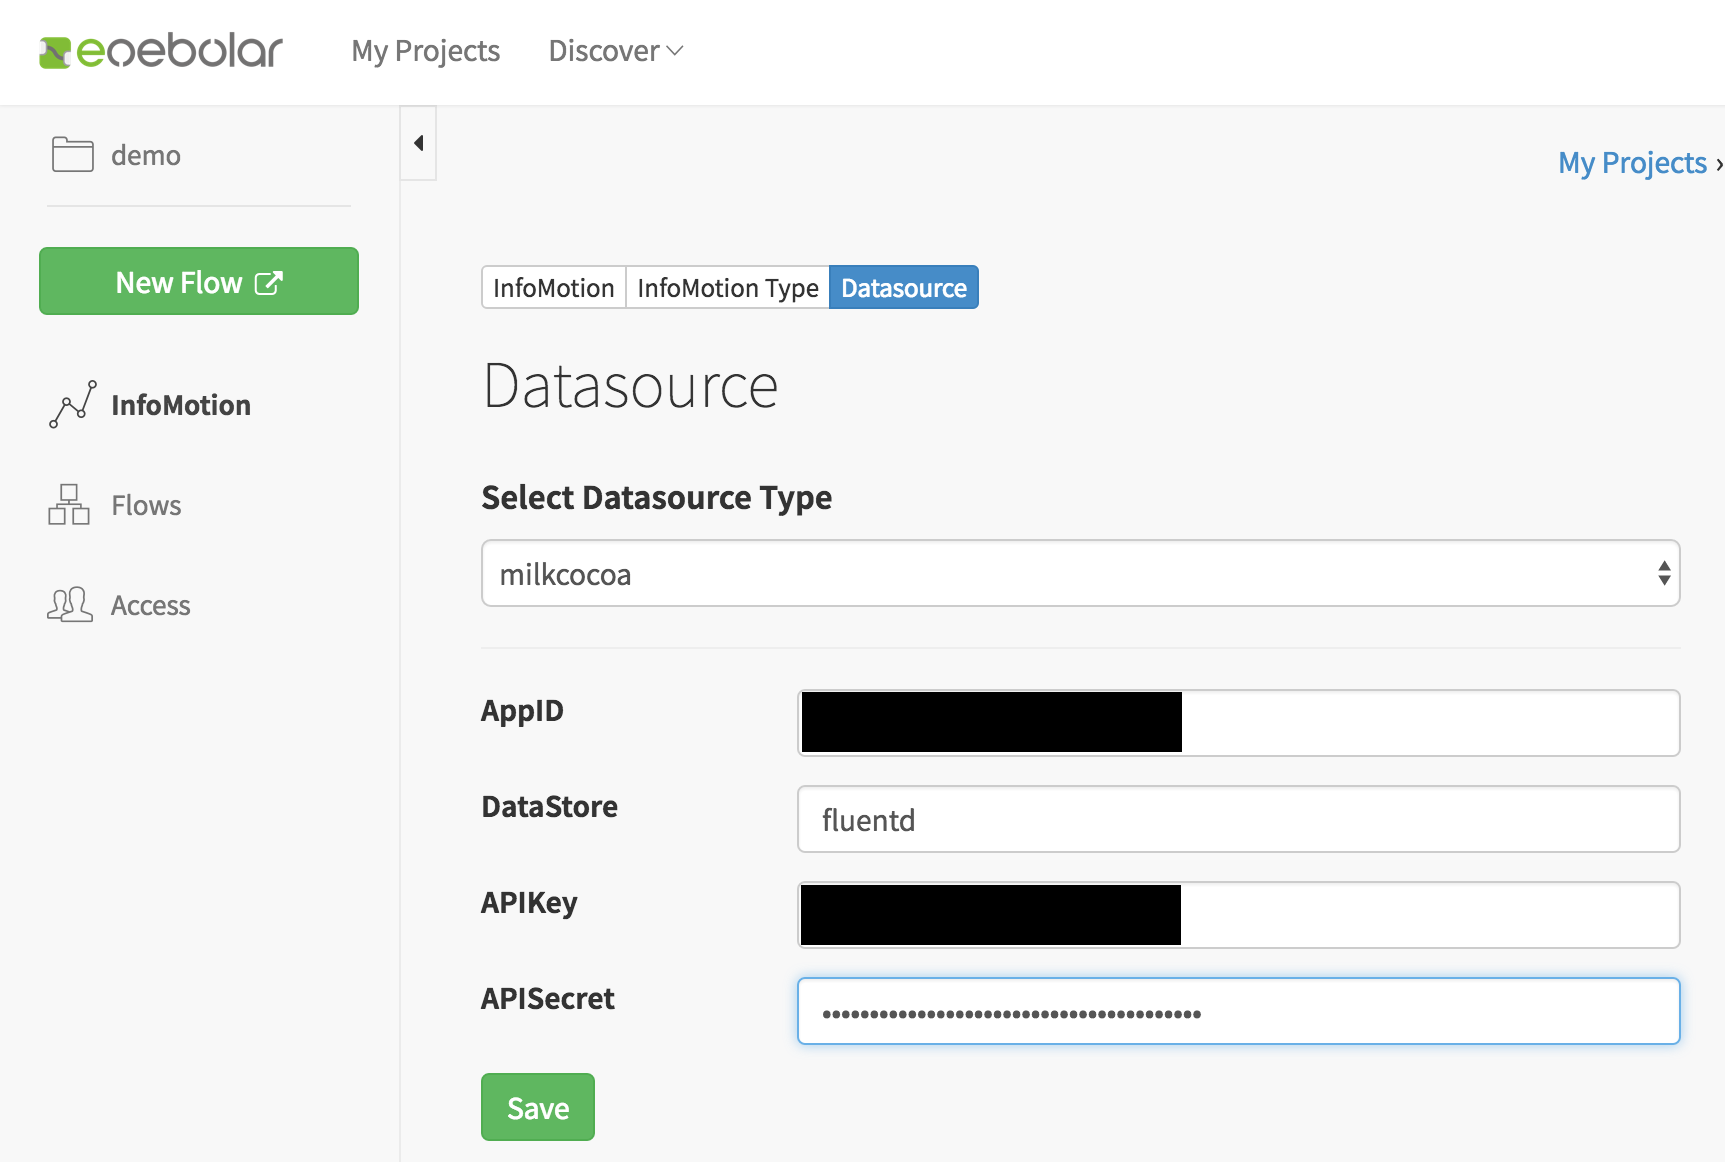
あとはenebular INFOMOTIONの設定をします。データソースの設定やINFOMOTIONの作成の詳細は各リンク先のドキュメントを参照します。
データソース設定
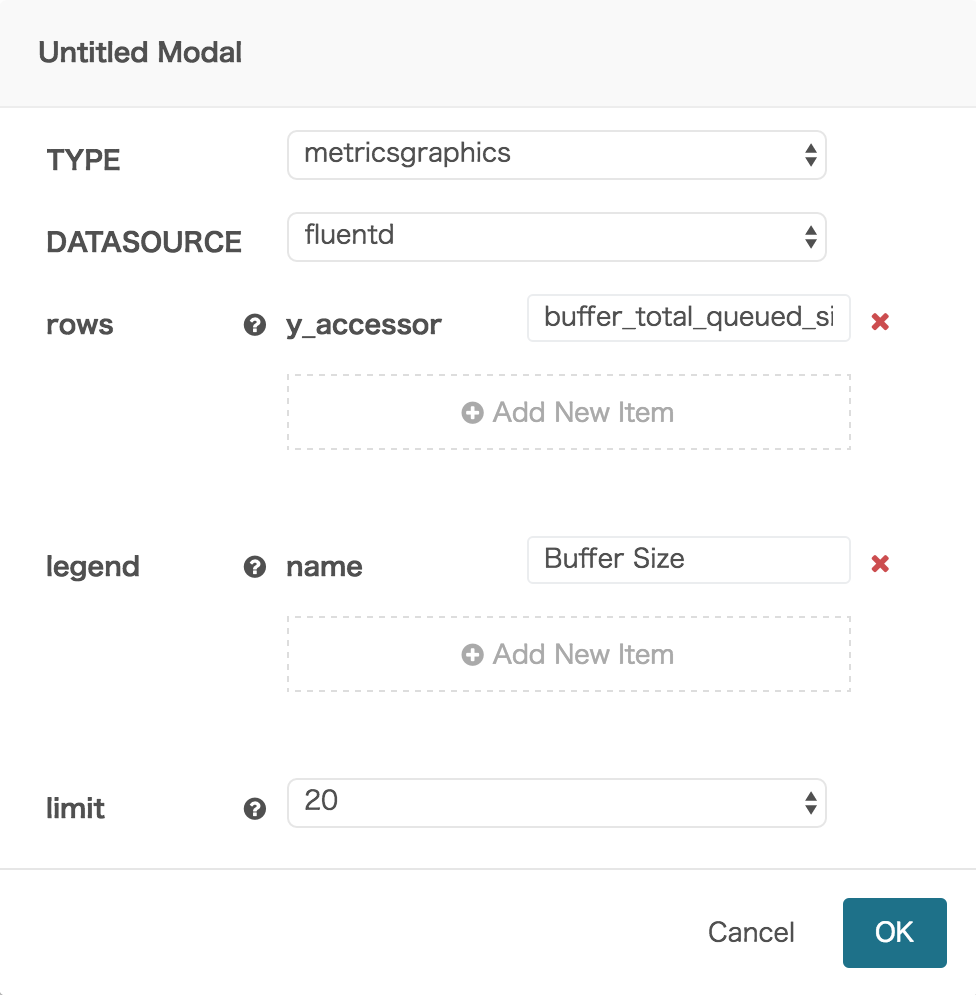
INFOMOTION設定
| 項目 | 設定する値 |
|---|---|
| TYPE | metricsgraphics |
| DATASOURCE | fluentd |
| rows y_accessor | buffer_total_queued_size |
| legend name | Buffer Size |
| limit | 20 |
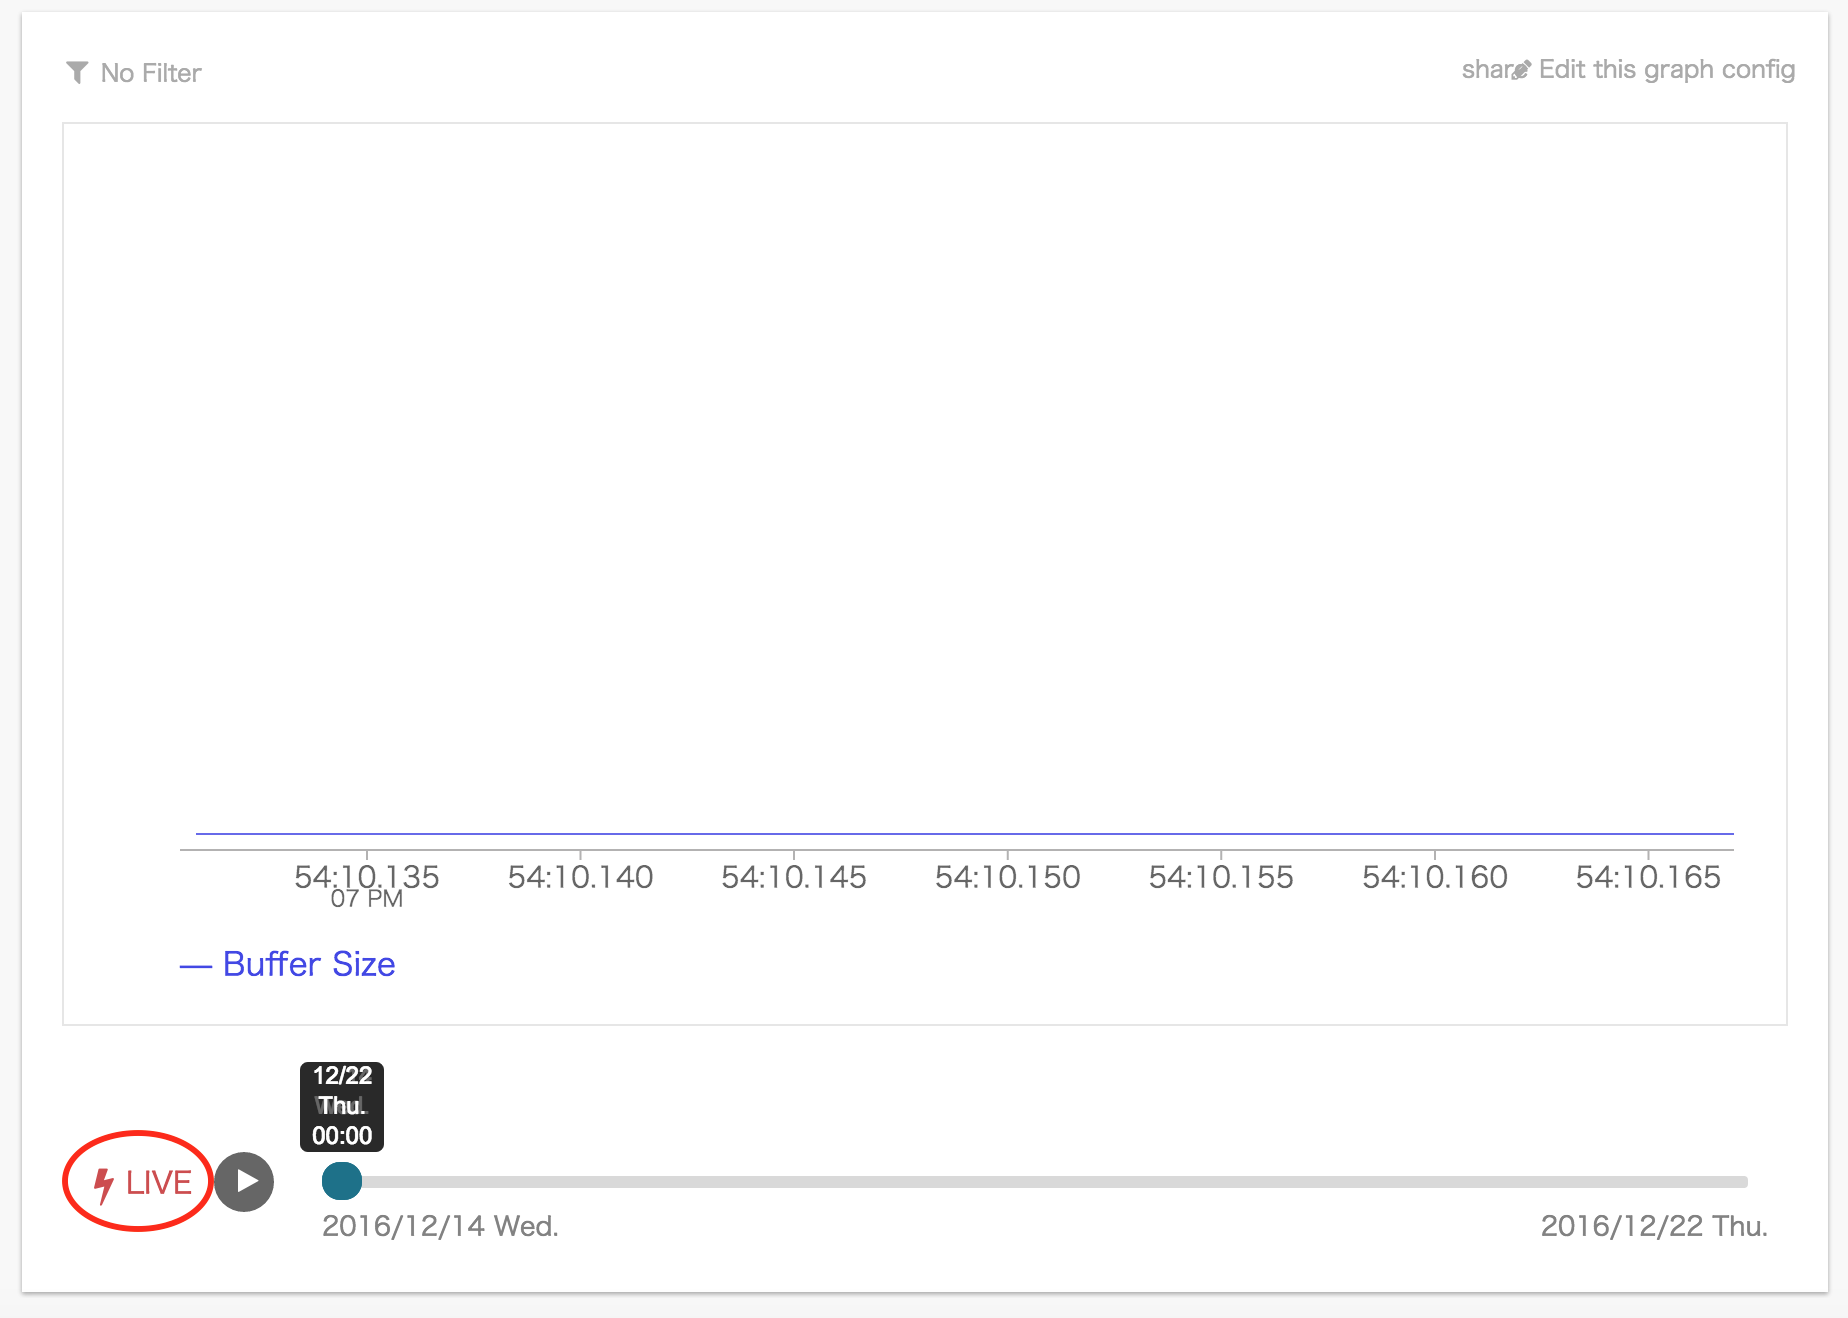
ここで一旦Liveモードにします。以下のように表示されればOKです。
フィルタ設定
グラフ左上のアイコンをクリックしてフィルタ設定を開きます。
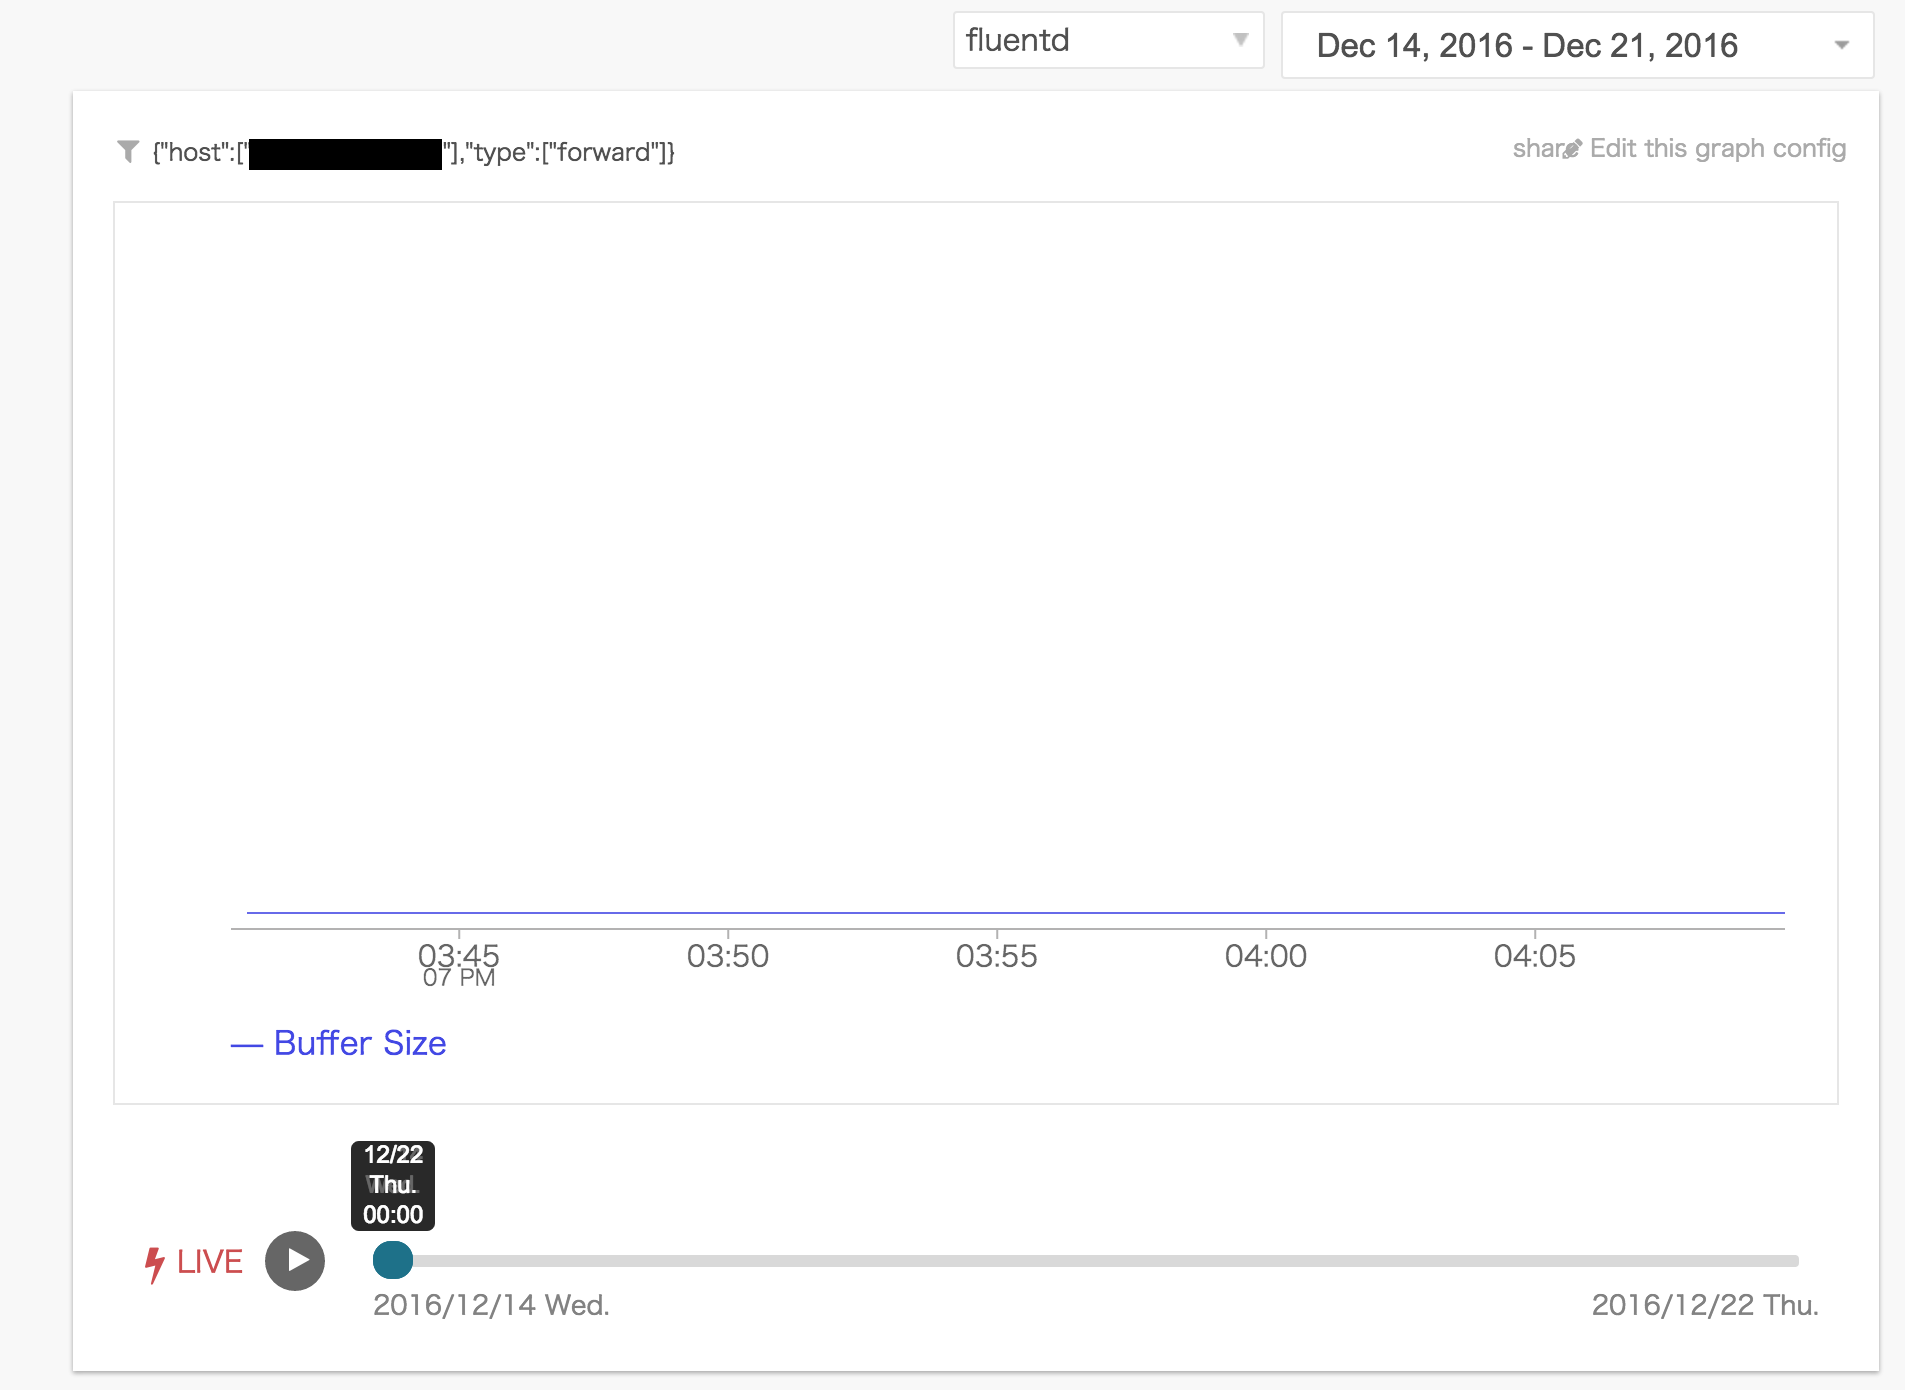
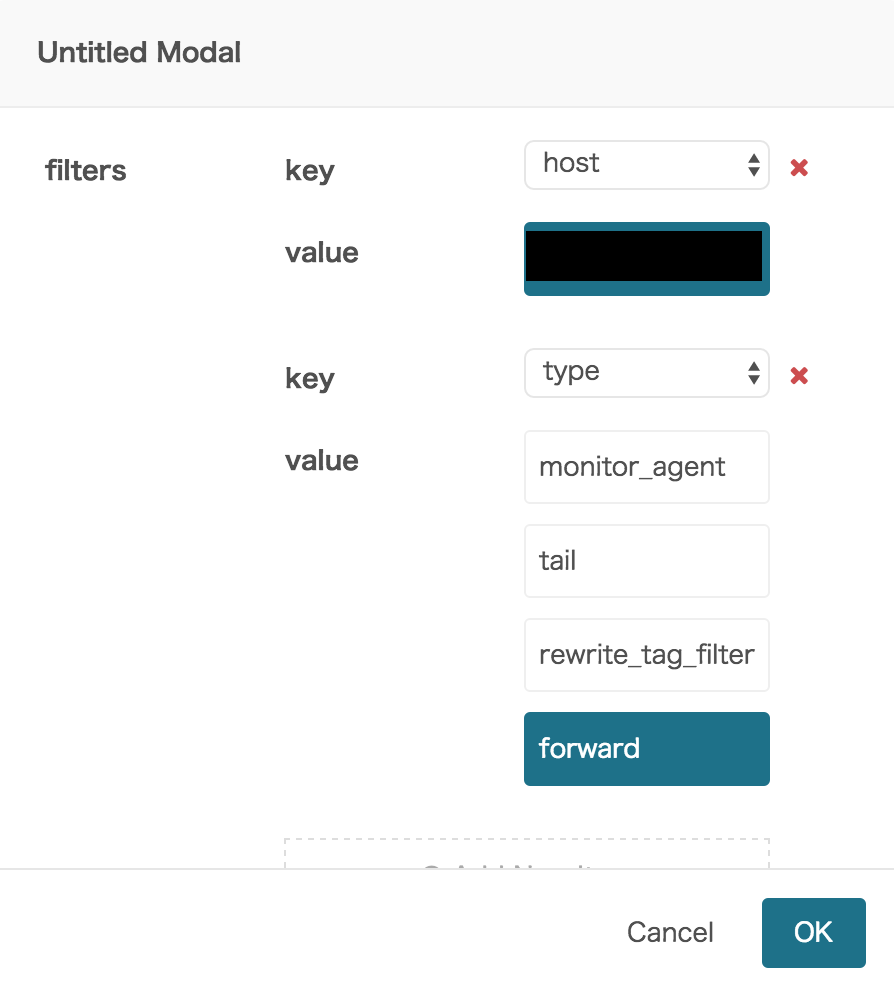
以下のように対象ホストと対象プラグインを絞り込むフィルタを設定します。
完成
ずっと0なんでつまんないですが以下のように可視化できました。