はじめに
この記事は書籍「プロを目指す人のためのRuby入門」のテストコードを、筆者自らRSpecに書き換える連載記事の第3回(最終回)です。
第1回と第2回を読んでいない方は、先にそちらを読んでからこの記事に戻ってきてください。
- 【動画付き】「プロを目指す人のためのRuby入門」のテストコードをRSpecに書き換える・その1 - Qiita
- 【動画付き】「プロを目指す人のためのRuby入門」のテストコードをRSpecに書き換える・その2 - Qiita
今回は第10章のテストコードをRSpecに書き換えていきます。
動画とソースコード
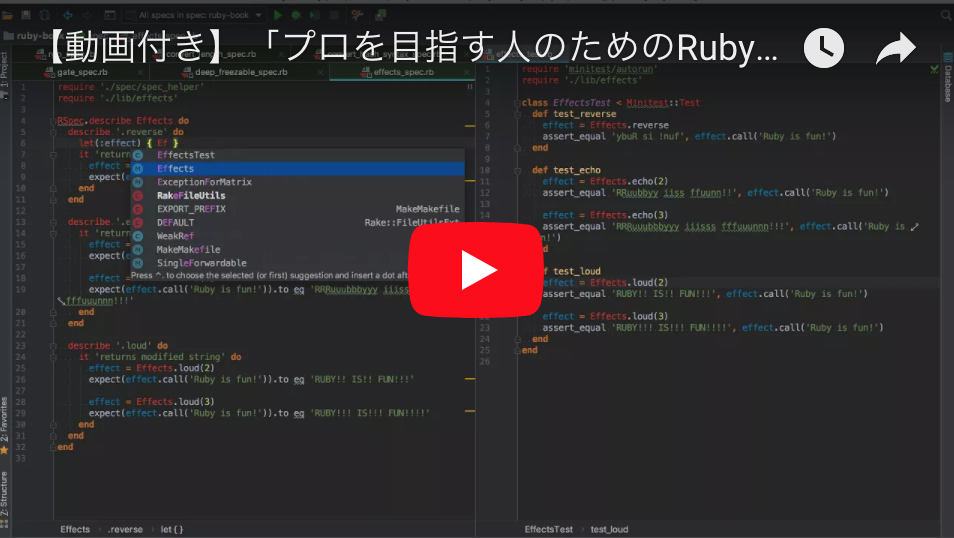
この記事の内容は動画(スクリーンキャスト)形式で解説しています。
細かい説明は口頭で話しているので、ぜひ動画もチェックしてください。
(録音状況が悪いため、ときどき大きなノイズが入ります。ごめんなさい🙏)
「プロを目指す人のためのRuby入門」のテストコードをRSpecに書き換える・その3(最終回)
また、ソースコードはこちらにアップしています。
それでは以下が本編です。
第10章 ワードシンセサイザー・Effects編
Minitest版
require 'minitest/autorun'
require './lib/effects'

class EffectsTest < Minitest::Test
  def test_reverse
    effect = Effects.reverse
    assert_equal 'ybuR si !nuf', effect.call('Ruby is fun!')
  end

  def test_echo
    effect = Effects.echo(2)
    assert_equal 'RRuubbyy iiss ffuunn!!', effect.call('Ruby is fun!')

    effect = Effects.echo(3)
    assert_equal 'RRRuuubbbyyy iiisss fffuuunnn!!!', effect.call('Ruby is fun!')
  end

  def test_loud
    effect = Effects.loud(2)
    assert_equal 'RUBY!! IS!! FUN!!!', effect.call('Ruby is fun!')

    effect = Effects.loud(3)
    assert_equal 'RUBY!!! IS!!! FUN!!!!', effect.call('Ruby is fun!')
  end
end
RSpec版(letやsubjectを使わない場合)
require './spec/spec_helper'
require './lib/effects'

RSpec.describe Effects do
  describe '.reverse' do
    it 'returns valid string' do
      effect = Effects.reverse
      expect(effect.call('Ruby is fun!')).to eq 'ybuR si !nuf'
    end
  end

  describe '.echo' do
    it 'returns valid string' do
      effect = Effects.echo(2)
      expect(effect.call('Ruby is fun!')).to eq 'RRuubbyy iiss ffuunn!!'

      effect = Effects.echo(3)
      expect(effect.call('Ruby is fun!')).to eq 'RRRuuubbbyyy iiisss fffuuunnn!!!'
    end
  end

  describe '.loud' do
    it 'returns valid string' do
      effect = Effects.loud(2)
      expect(effect.call('Ruby is fun!')).to eq 'RUBY!! IS!! FUN!!!'

      effect = Effects.loud(3)
      expect(effect.call('Ruby is fun!')).to eq 'RUBY!!! IS!!! FUN!!!!'
    end
  end
end
ポイント
- 冒頭の
RSpec.describe Effects doでは、'Effects'のような文字列ではなく、Effectsというモジュール自身を渡しています。このように、describeにはテスト対象の「クラスそのもの」や「モジュールそのもの」を渡すこともよくあります。
RSpec版(letやsubjectを使う場合)
require './spec/spec_helper'
require './lib/effects'

RSpec.describe Effects do
  subject { effect.call('Ruby is fun!') }

  describe '.reverse' do
    let(:effect) { Effects.reverse }
    it { is_expected.to eq 'ybuR si !nuf' }
  end

  describe '.echo' do
    context 'rate is 2' do
      let(:effect) { Effects.echo(2) }
      it { is_expected.to eq 'RRuubbyy iiss ffuunn!!' }
    end
    context 'rate is 3' do
      let(:effect) { Effects.echo(3) }
      it { is_expected.to eq 'RRRuuubbbyyy iiisss fffuuunnn!!!' }
    end
  end

  describe '.loud' do
    context 'level is 2' do
      let(:effect) { Effects.loud(2) }
      it { is_expected.to eq 'RUBY!! IS!! FUN!!!' }
    end
    context 'level is 3' do
      let(:effect) { Effects.loud(3) }
      it { is_expected.to eq 'RUBY!!! IS!!! FUN!!!!' }
    end
  end
end
ポイント
-
describeやcontextブロックの中で、検証したい値がどれも同じだった場合はsubjectとして切り出すことができます。 -
subjectに切り出すと、it { is_expected.to eq '...' }のように、ワンライナー形式で書くことができます。これはit { expect(subject).to eq '...' }のように書いたのと同じ意味になります。 -
letやsubjectは遅延評価されます。つまり、上から順に呼び出されるのではなく、その値が必要になったタイミングで初めて呼び出されます。 - そのため、
subject { effect.call('Ruby is fun!') }のeffectは、describeやcontext内で定義されたlet(:effect)の値に応じて、Effects.reverseになったり、Effects.echo(2)になったりします。 -
letやsubjectの遅延評価については、以下の記事でも詳しく説明しているので、よくわからない場合はこちらの記事をご覧ください。
参考:使えるRSpec入門・その1「RSpecの基本的な構文や便利な機能を理解する」 - Qiita
第10章 ワードシンセサイザー・WordSynth編
Minitest版
require 'minitest/autorun'
require './lib/word_synth'
require './lib/effects'

class WordSynthTest < Minitest::Test
  def test_play_without_effects
    synth = WordSynth.new
    assert_equal 'Ruby is fun!', synth.play('Ruby is fun!')
  end

  def test_play_with_reverse
    synth = WordSynth.new
    synth.add_effect(Effects.reverse)
    assert_equal 'ybuR si !nuf', synth.play('Ruby is fun!')
  end

  def test_play_with_many_effects
    synth = WordSynth.new
    synth.add_effect(Effects.echo(2))
    synth.add_effect(Effects.loud(3))
    synth.add_effect(Effects.reverse)
    assert_equal '!!!YYBBUURR !!!SSII !!!!!NNUUFF', synth.play('Ruby is fun!')
  end
end
RSpec版(letやsubjectを使わない場合)
require './spec/spec_helper'
require './lib/word_synth'
require './lib/effects'

RSpec.describe WordSynth do
  context 'without effects' do
    it 'returns modified string' do
      synth = WordSynth.new
      expect(synth.play('Ruby is fun!')).to eq 'Ruby is fun!'
    end
  end

  context 'with reverse' do
    it 'returns modified string' do
      synth = WordSynth.new
      synth.add_effect(Effects.reverse)
      expect(synth.play('Ruby is fun!')).to eq 'ybuR si !nuf'
    end
  end

  context 'with many effects' do
    it 'returns modified string' do
      synth = WordSynth.new
      synth.add_effect(Effects.echo(2))
      synth.add_effect(Effects.loud(3))
      synth.add_effect(Effects.reverse)
      expect(synth.play('Ruby is fun!')).to eq '!!!YYBBUURR !!!SSII !!!!!NNUUFF'
    end
  end
end
ポイント
(ここでは特に新しいトピックはありません。)
RSpec版(letやsubjectを使う場合)
require './spec/spec_helper'
require './lib/word_synth'
require './lib/effects'

RSpec.describe WordSynth do
  let(:synth) { WordSynth.new }
  subject { synth.play('Ruby is fun!') }

  context 'without effects' do
    it { is_expected.to eq 'Ruby is fun!' }
  end

  context 'with reverse' do
    before do
      synth.add_effect(Effects.reverse)
    end
    it { is_expected.to eq 'ybuR si !nuf' }
  end

  context 'with many effects' do
    before do
      synth.add_effect(Effects.echo(2))
      synth.add_effect(Effects.loud(3))
      synth.add_effect(Effects.reverse)
    end
    it { is_expected.to eq '!!!YYBBUURR !!!SSII !!!!!NNUUFF' }
  end
end
-
beforeブロックはdescribeやcontextごとに用意することもできます。 -
describeやcontextの外側にもbeforeブロックがあった場合は、beforeブロックは「外のブロック → 中のブロック」の順で呼ばれます。 - たとえば、下のようなコードがあった場合、
describe 'foo' do内に書かれたテストでは「before 1 → before 2」の順でbeforeが呼ばれ、describe 'bar' do内に書かれたテストでは「before 1 → before 3」の順でbeforeが呼ばれます。
RSpec.describe Something do
  before do
    # before 1
  end
  describe 'foo' do
    before do
      # before 2
    end
  end
  describe 'bar' do
    before do
      # before 3
    end
  end
end
議論:letやsubjectはどこまで駆使すべきか
letやsubjectを駆使すると、いわゆる「RSpecらしいテストコード」になります。
また、重複がなくなり、テストコードがDRYになります。
一方で、RSpecにある程度精通していないと、何をやっているのかよくわからないテストコードに見えてしまうデメリットもあります。
また、「letやsubjectをうまく切り出す方法」を編み出すのに、やたら工数がかかってしまうこともよくあります。
こうしたデメリットは「RSpecは難しい」「RSpecはよくわからない」と、RSpec初心者を遠ざける原因になると僕は考えています。
個人的には、無理にletやsubjectを駆使する必要はなく、「さらっと書けて、さらっと読めるテストコード」を採用しても全然構わないと考えています。
参考:サヨナラBetter Specs!? 雑で気楽なRSpecのススメ - Qiita
おまけ:第7章と第8章のテストでletやsubjectを駆使してみる
「letやsubjectを駆使する必要はない」とか言いつつ、letやsubjectを駆使したコードもそれはそれで面白いので、参考までに第7章と第8章のテストコードを書き換えてみます。
みなさんは変更前と変更後、どっちのコードが好きですか?(そして、どっちのコードが読みやすいでしょうか?)
第7章・変更前(letやsubjectを使わない場合)
require './spec/spec_helper'
require './lib/gate'
require './lib/ticket'

RSpec.describe 'Gate' do
  before do
    @umeda = Gate.new(:umeda)
    @juso = Gate.new(:juso)
    @mikuni = Gate.new(:mikuni)
  end

  describe 'Umeda to Juso' do
    it 'is OK' do
      ticket = Ticket.new(150)
      @umeda.enter(ticket)
      expect(@juso.exit(ticket)).to be_truthy
    end
  end

  describe 'Umeda to Mikuni' do
    context 'fare is not enough' do
      it 'is NG' do
        ticket = Ticket.new(150)
        @umeda.enter(ticket)
        expect(@mikuni.exit(ticket)).to be_falsey
      end
    end
    context 'fare is enough' do
      it 'is OK' do
        ticket = Ticket.new(190)
        @umeda.enter(ticket)
        expect(@mikuni.exit(ticket)).to be_truthy
      end
    end
  end

  describe 'Juso to Mikuni' do
    it 'is OK' do
      ticket = Ticket.new(150)
      @juso.enter(ticket)
      expect(@mikuni.exit(ticket)).to be_truthy
    end
  end
end
第7章・変更後(letやsubjectを駆使した場合)
require './spec/spec_helper'
require './lib/gate'
require './lib/ticket'

RSpec.describe 'Gate' do
  let(:umeda) { Gate.new(:umeda) }
  let(:juso) { Gate.new(:juso) }
  let(:mikuni) { Gate.new(:mikuni) }
  let(:ticket) { Ticket.new(fare) }
  before do
    station_from.enter(ticket)
  end
  subject { station_to.exit(ticket) }

  describe 'Umeda to Juso' do
    let(:station_from) { umeda }
    let(:station_to) { juso }
    let(:fare) { 150 }
    it { is_expected.to be_truthy }
  end

  describe 'Umeda to Mikuni' do
    let(:station_from) { umeda }
    let(:station_to) { mikuni }
    context 'fare is not enough' do
      let(:fare) { 150 }
      it { is_expected.to be_falsey }
    end
    context 'fare is enough' do
      let(:fare) { 190 }
      it { is_expected.to be_truthy }
    end
  end

  describe 'Juso to Mikuni' do
    let(:station_from) { juso }
    let(:station_to) { mikuni }
    let(:fare) { 150 }
    it { is_expected.to be_truthy }
  end
end
第8章・変更前(letやsubjectを使わない場合)
require './spec/spec_helper'
require './lib/bank'
require './lib/team'

RSpec.describe 'Deep freezable' do
  describe 'to array' do
    it 'freezes deeply' do
      expect(Team::COUNTRIES).to eq ['Japan', 'US', 'India']
      expect(Team::COUNTRIES).to be_frozen
      expect(Team::COUNTRIES.all? { |country| country.frozen? }).to be_truthy
    end
  end

  describe 'to hash' do
    it 'freezes deeply' do
      expect(Bank::CURRENCIES).to eq({ 'Japan' => 'yen', 'US' => 'dollar', 'India' => 'rupee' })
      expect(Bank::CURRENCIES).to be_frozen
      expect(Bank::CURRENCIES.all? { |key, value| key.frozen? && value.frozen? }).to be_truthy
    end
  end
end
第8章・変更後(letやsubjectを駆使した場合)
ここではletやsubjectだけでなく、allマッチャやコンポーザブルマッチャも使っています。
require './spec/spec_helper'
require './lib/bank'
require './lib/team'

RSpec.describe 'Deep freezable' do
  describe 'to array' do
    subject { Team::COUNTRIES }
    it { is_expected.to eq ['Japan', 'US', 'India'] }
    it { is_expected.to be_frozen }
    it { is_expected.to all be_frozen }
  end

  describe 'to hash' do
    subject { Bank::CURRENCIES }
    it { is_expected.to eq({ 'Japan' => 'yen', 'US' => 'dollar', 'India' => 'rupee' }) }
    it { is_expected.to be_frozen }
    it { is_expected.to all match [be_frozen, be_frozen] }
  end
end
まとめ
というわけで、この連載記事では書籍「プロを目指す人のためのRuby入門」のテストコードをMinitestからRSpecに書き換える方法を説明してみました。
「Minitestの次はRSpecをマスターしたい!」と考えている方の参考になれば幸いです😃
あわせて読みたい
RSpecの基礎
RSpecにはまだまだ多くの機能が用意されています。
実務でよく使う機能については、僕が昔に書いた以下の連載記事をご覧ください。
- 使えるRSpec入門・その1「RSpecの基本的な構文や便利な機能を理解する」 - Qiita
- 使えるRSpec入門・その2「使用頻度の高いマッチャを使いこなす」 - Qiita
- 使えるRSpec入門・その3「ゼロからわかるモック(mock)を使ったテストの書き方」 - Qiita
RSpecの公式ドキュメント
より詳細に調べたい場合は、RSpecの公式ドキュメントをご覧ください。
RailsアプリケーションをRSpecでテストする
RailsアプリケーションをRSpecでテストする場合は、僕が翻訳した電子書籍「Everyday Rails - RSpecによるRailsテスト入門」がお勧めです。
RSpecの基本はこの本から学ぶこともできます。
「Everyday Rails - RSpecによるRailsテスト入門」の内容については、以下のブログ記事をご覧ください。
