今までの内容は以下の通り
-
Twitter APIを使って自動でTweetする(1)
Request Tokenの取得 -
Twitter APIを使って自動でTweetする(2)
AWSのAPI GatewayとLambdaへのデプロイ -
Twitter APIを使って自動でTweetする(3)
Vueを使ったTwitterの認証・認可の取得 -
Twitter APIを使って自動でTweetする(4)
AWS S3のホスティングでコンテンツの公開 -
Twitter APIを使って自動でTweetする(5)
Access Tokenの取得
今回は、取得したAccess Tokenを使って定期的にTweetする仕組みを作る。まず、Access TokenをDynamoDBに保存する。そして、CloudWatch Eventを使って定期的にLambdaを実行して、DynamoDBからAccess Tokenを取得してTweetする。
DynamoDB Tableの作成
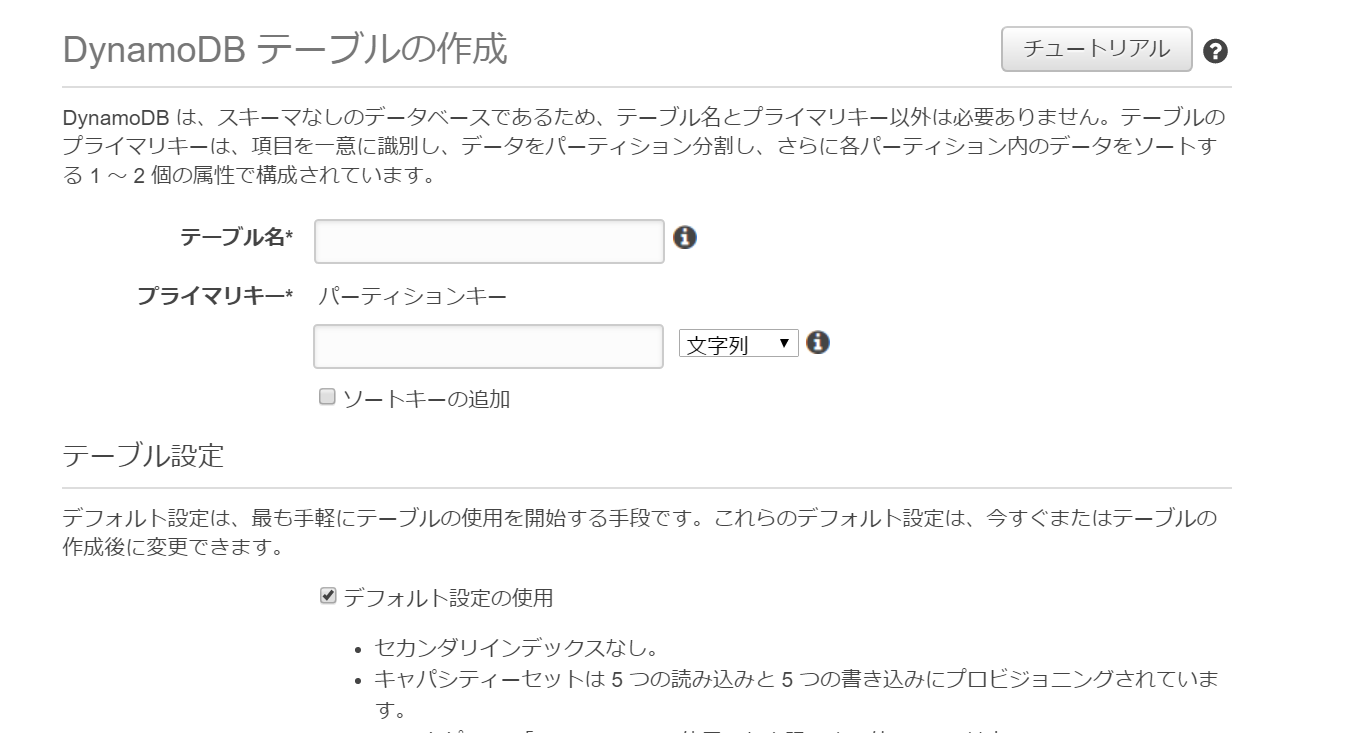
DynamoDBコンソールにアクセスし、テーブルを作成する。テーブル名は「token-table」、プライマリーキーは「id」として、「作成」をクリックする。
DynamoDBアクセス用Lambda Layerの作成
DynamoDBにtokenを保存したり、保存したtokenを取得するために、DynamoDBにアクセスする関数を作成し、Layerに登録する。Layerに登録することで複数のLambda関数からLayerを使ってDynamoDBにアクセスすることができる。以下はDynamoDBへアクセスするためのコード。Layerの使い方については「Twitter APIを使って自動でTweetする(5)」を参照してほしい。
import boto3

class TokenTable:
    parition_name = 'id'
    dynamodb = boto3.resource('dynamodb')
    table = dynamodb.Table('token-table')

    @classmethod
    def register(cls, data):
        cls.table.put_item(Item=data)

    @classmethod
    def get_item(cls, id):
        response = cls.table.get_item(
            Key={
                'id': id
            }
        )

        return response.get('Item')
また、LambdaからDynamoDBにアクセスするためにLambdaに権限を追加する必要がある。
DynamoDBにアクセスする必要のあるget_access_token関数を開き、「IAMコンソールでget_access_token-xxxxロールを表示します。」をクリックする。

「インラインポリシーの追加」をクリックする。

「JSON」タブをクリックする。
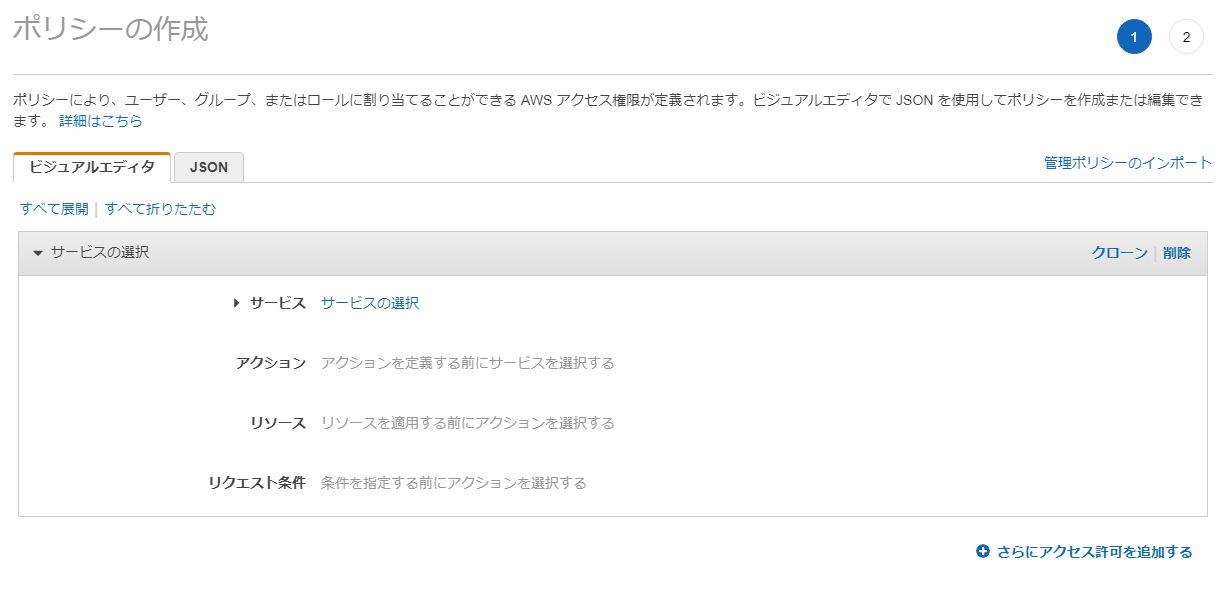
インラインポリシーをJSON形式で入力する。
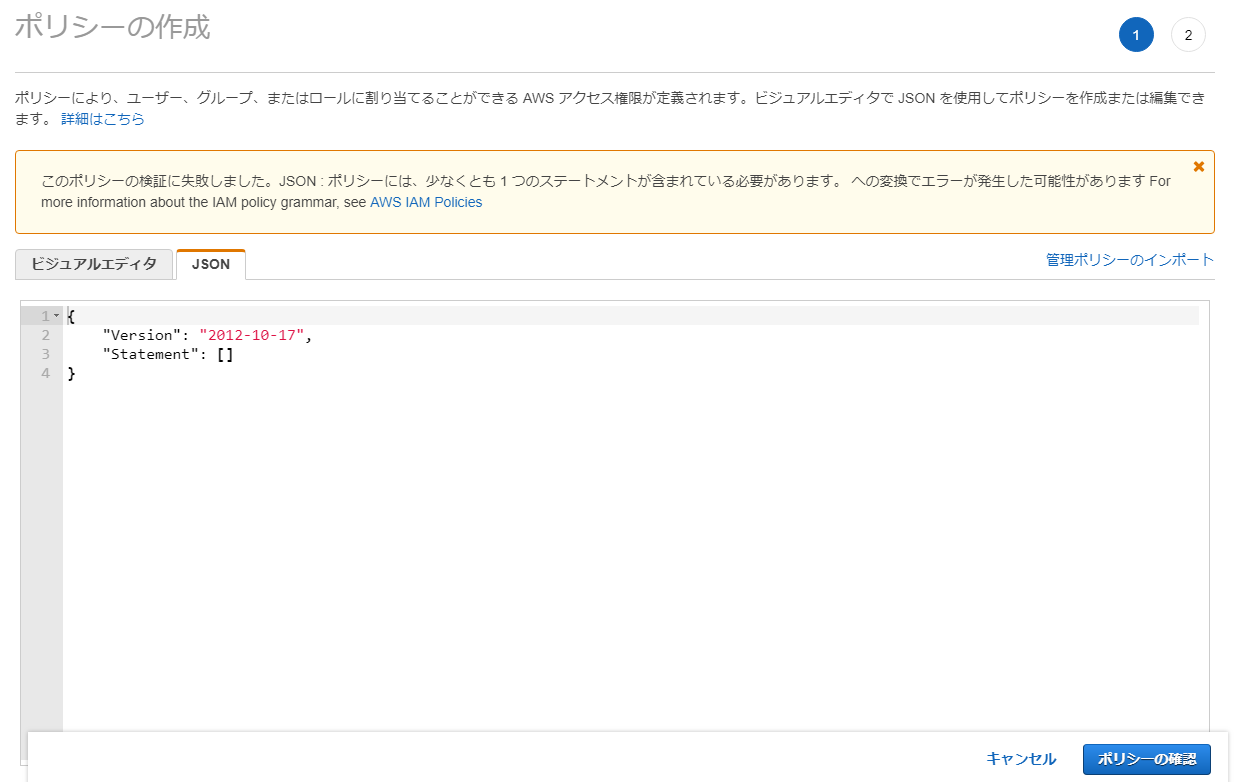
ポリシーは以下のように入力し、「ポリシーの確認」をクリックする。
{
    "Version": "2012-10-17",
    "Statement": [
        {
            "Effect": "Allow",
            "Action": "dynamodb:*",
            "Resource": "arn:aws:dynamodb:*:*:table/token-table"
        }
    ]
}
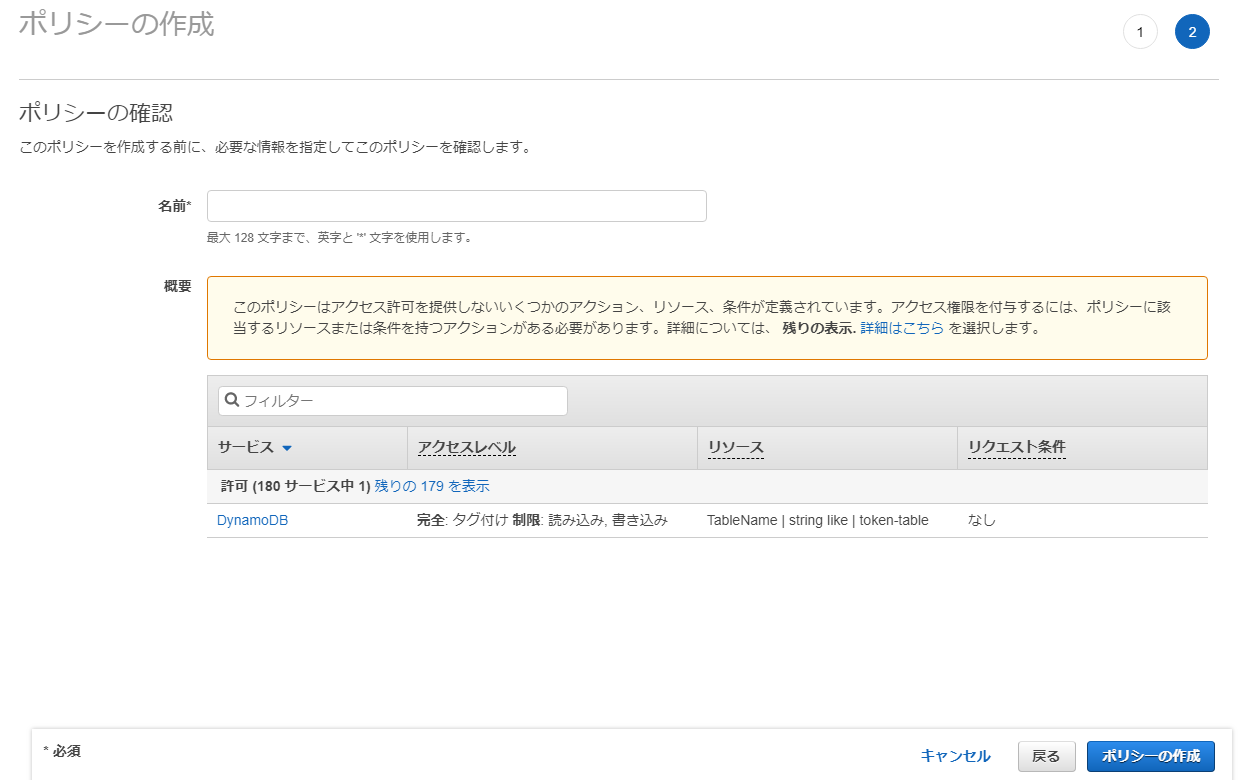
ポリシー名を入力し、「ポリシーの作成」をクリックする。
次に、get_access_token関数を以下のように修正し、取得したAccess TokenをDynamoDBのtoken-tableに保存するように変更する。
import os
import urllib.parse
import requests
import utilities
from dynamodb import TokenTable

REQUEST_URL = 'https://api.twitter.com/oauth/access_token'
REQUEST_METHOD = 'POST'
API_KEY = os.environ.get('API_KEY')
API_SECRET = os.environ.get('API_SECRET')
TOKEN_SECRET = ''
SIGNATURE_METHOD = 'HMAC-SHA1'

class GetAccessToken:

    def __init__(self, event, context):
        self.oauth_token = event.get('queryStringParameters').get('oauth_token')
        self.oauth_verifier = event.get('queryStringParameters').get('oauth_verifier')

    def _create_authorization_params(self):
        authorization_params = {}
        authorization_params['oauth_timestamp'] = utilities.create_timestamp()
        authorization_params['oauth_consumer_key'] = urllib.parse.quote(API_KEY, safe='')
        authorization_params['oauth_nonce'] = utilities.create_nonce()
        authorization_params['oauth_signature_method'] = SIGNATURE_METHOD
        authorization_params['oauth_version'] = '1.0'
        authorization_params['oauth_token'] = self.oauth_token
        authorization_params['oauth_verifier'] = self.oauth_verifier
        authorization_params['oauth_signature'] = utilities.create_signature(utilities.create_base_string(authorization_params), REQUEST_METHOD, REQUEST_URL, API_SECRET, TOKEN_SECRET)

        return authorization_params

    def _create_authorization_header(self):
        authorization_header_val = 'OAuth '
        params = self._create_authorization_params()
        authorization_header_val += utilities.convert_dict(params)

        return {'Authorization': authorization_header_val}

    def _parse_response(self, response):
        response_dict = {
            (response.text.split('&')[0]).split('=')[0]: (response.text.split('&')[0]).split('=')[1],
            (response.text.split('&')[1]).split('=')[0]: (response.text.split('&')[1]).split('=')[1],
            (response.text.split('&')[2]).split('=')[0]: (response.text.split('&')[2]).split('=')[1],
            (response.text.split('&')[3]).split('=')[0]: (response.text.split('&')[3]).split('=')[1]
        }
        data = {
            'id': response_dict['user_id'],
            'token': response_dict['oauth_token'],
            'secret': response_dict['oauth_token_secret'],
            'name': response_dict['screen_name']
        }
        return data

    def _register_id(self, data):
        token_table = TokenTable()
        token_table.register(data)

    def _execute(self):
        headers = self._create_authorization_header()
        response = requests.post(REQUEST_URL, headers=headers)
        data = self._parse_response(response)
        self._register_id(data)

def lambda_handler(event, context):

    get_access_token = GetAccessToken(event, context)
    get_access_token._execute()

    return {
        'statusCode': 200,
        'headers': {'Access-Control-Allow-Origin': '*'},
        'body': 'Registration Success!'
    }
これで、Access TokenをDynamoDBに保存されるようになった。あとは、このAccess Tokenを使ってTweetする関数を作成し、CloudWatch Eventを使って定期的にそのLambdaを実行すれば自動でTweetすることができる。
Tweetする関数のコードは以下のように作成した。環境変数、ロール、レイヤーはget_access_tokenの関数と同様に設定している。
また、token-tableにアクセスする際のパーティションキーであるidの値を今回は決め打ちで設定している。この値は自身のtoken-tableを確認し、保存されているidに書き換えて使う必要がある。
import os
import urllib.parse
import requests
import utilities
from dynamodb import TokenTable

REQUEST_METHOD = 'POST'
API_KEY = os.environ.get('API_KEY')
API_SECRET = os.environ.get('API_SECRET')
SIGNATURE_METHOD = 'HMAC-SHA1'

TWEET_URL = 'https://api.twitter.com/1.1/statuses/update.json'

class AutoTweet:

    def __init__(self, event, context):
        pass

    def get_token(self, id):
        token_table = TokenTable()
        res = TokenTable.get_item(id)
        return {'token': res.get('token'), 'secret': res.get('secret')}

    def _create_authorization_params_for_tweet(self, token, token_secret, message):
        signature_params = {}
        signature_params['status'] = urllib.parse.quote(message, safe='')

        authorization_params = {}
        authorization_params['status'] = urllib.parse.quote(message, safe='')
        authorization_params['oauth_timestamp'] = utilities.create_timestamp()
        authorization_params['oauth_consumer_key'] = urllib.parse.quote(API_KEY, safe='')
        authorization_params['oauth_nonce'] = utilities.create_nonce()
        authorization_params['oauth_version'] = '1.0'
        authorization_params['oauth_signature_method'] = SIGNATURE_METHOD
        authorization_params['oauth_token'] = token

        signature_params.update(authorization_params)

        authorization_params['oauth_signature'] = utilities.create_signature(utilities.create_base_string(signature_params), REQUEST_METHOD, TWEET_URL, API_SECRET, token_secret)

        return authorization_params

    def _create_authorization_header_for_tweet(self, token, token_secret, message):
        authorization_header_val = 'OAuth '
        params = self._create_authorization_params_for_tweet(token, token_secret, message)
        authorization_header_val += utilities.convert_dict(params)

        return {'Authorization': authorization_header_val}

    def _tweet(self, token, token_secret, message):
        ENDPOINT = TWEET_URL + '?status=' + urllib.parse.quote(message, safe='')
        headers = self._create_authorization_header_for_tweet(token, token_secret, message)
        return requests.post(ENDPOINT, headers=headers)

    def _execute(self):
        id = '1132669739304513536'
        token_info = self.get_token(id)

        return self._tweet(token_info['token'], token_info['secret'], 'Hello,  this is auto tweet test:' + utilities.create_timestamp())

def lambda_handler(event, context):

    auto_tweet = AutoTweet(event, context)
    try:
        auto_tweet._execute()

    except Exception as e:

        raise e

    return {
        'statusCode': 200,
        'headers': {'Access-Control-Allow-Origin': '*'},
        'body': 'success!'
    }
最後に、CloudWatch Eventの設定をする。
まず、CloudWatchコンソールにアクセスし、イベントのルールからルール作成をクリックする。

イベントソースでスケジュールを選択し、適当な値を設定してターゲットで作成したLambda関数を選択して、「設定の詳細」をクリックする。
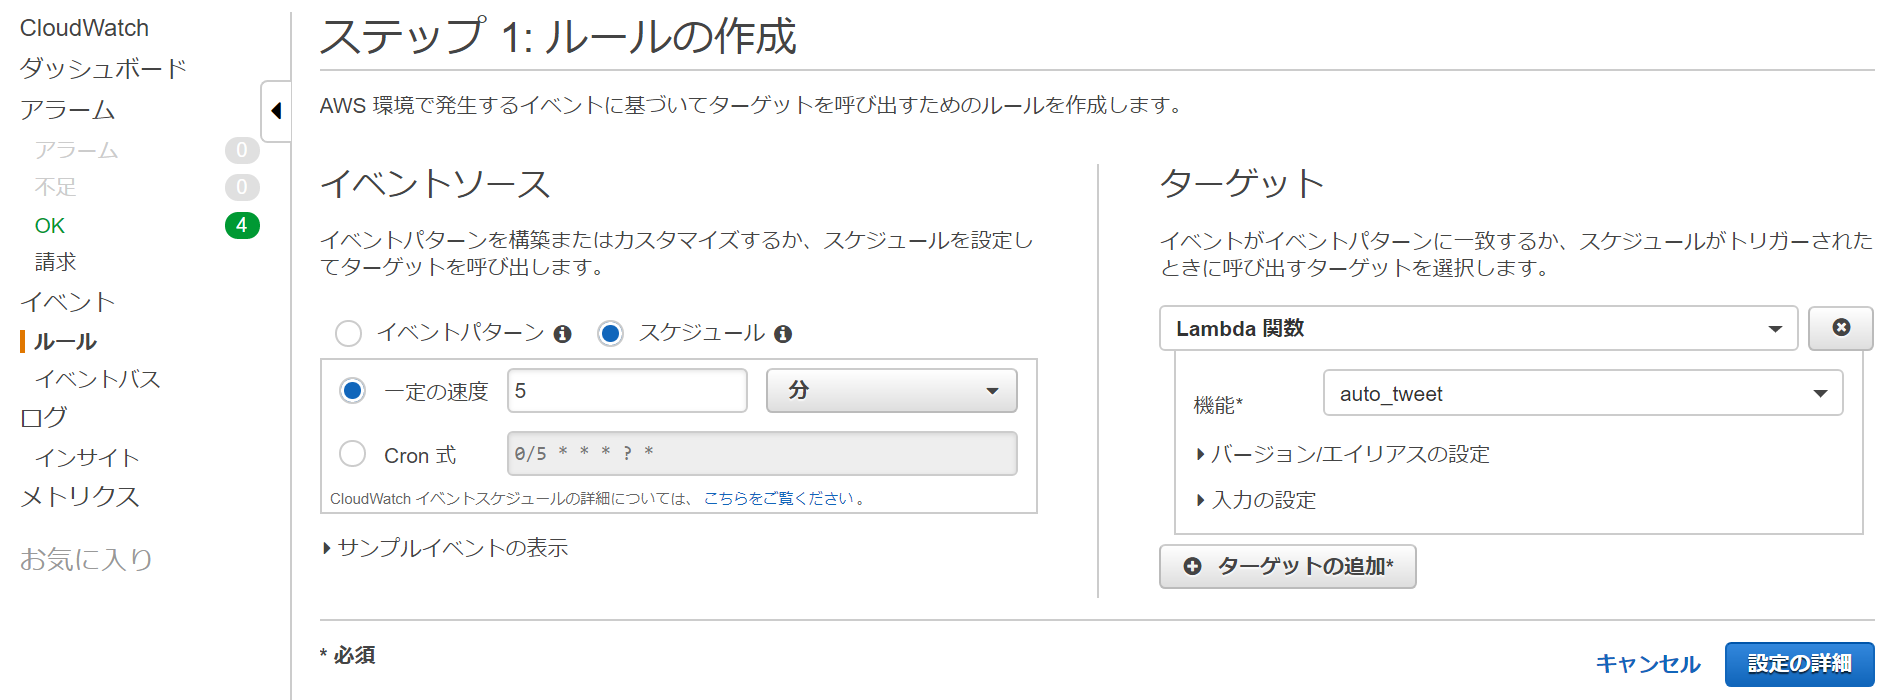
名前を入力し、状態を「有効」にして「ルールの作成」をクリックする。

これで、「Twitter APIを使って自動でTweetする(3)」で作成したVueアプリからログインをすると、そのログインしたTwitterのアカウント(実際は、上記で指定したidに紐づくアカウント)で定期的にTweetされるようになる。
次回はフロントエンドを追加して、汎用的に使えるようにする予定。
前回までの投稿は以下
Twitter APIを使って自動でTweetする(1)
Twitter APIを使って自動でTweetする(2)
Twitter APIを使って自動でTweetする(3)
Twitter APIを使って自動でTweetする(4)
Twitter APIを使って自動でTweetする(5)