ちょっとレトロな感じもするUSB接続の7セグメントLEDのディスプレイ Nanapoがビット・トレード・ワンから販売されていたので、使ってみました。
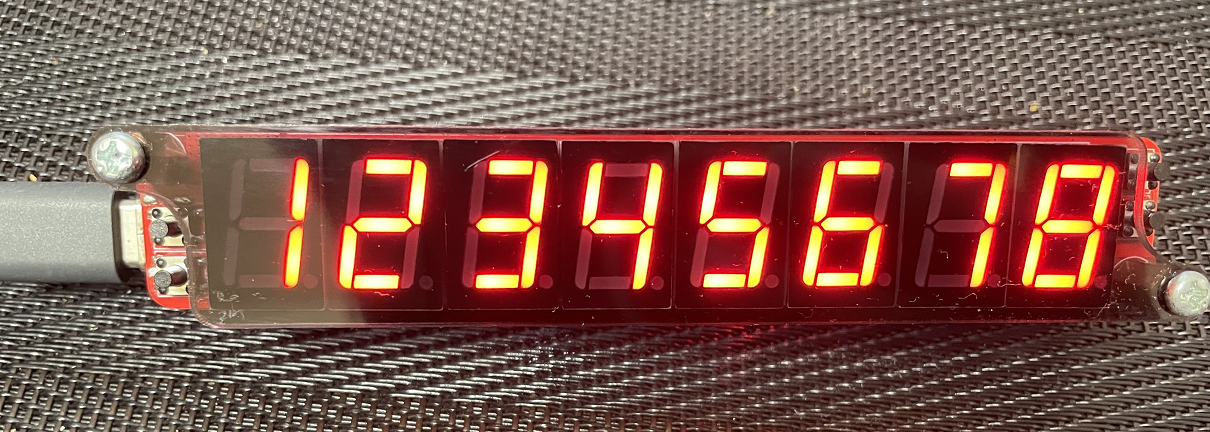
USB Type-CでPCと接続するとWebブラウザやプログラムから8桁の数値や7セグで表現された文字などを表示することができます。
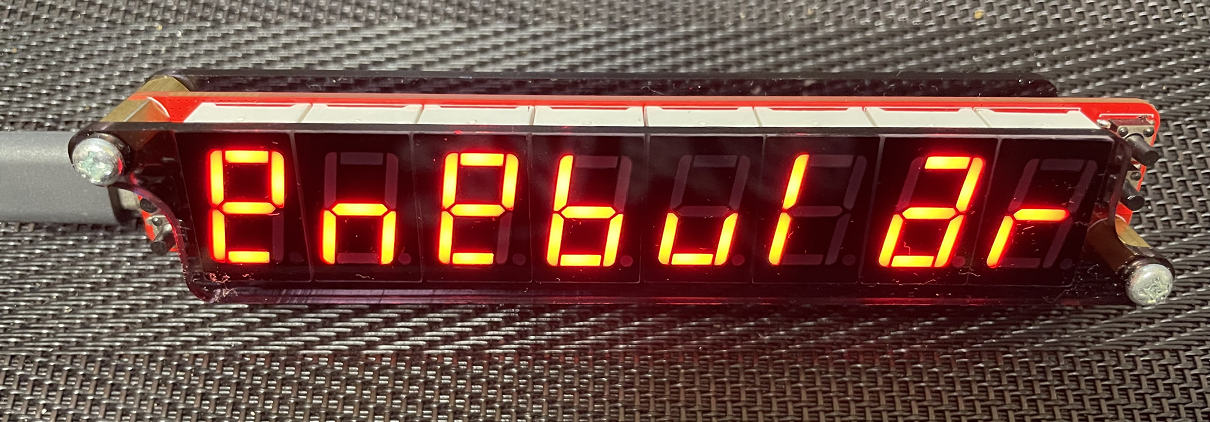
(enebularと表示)
ノードを作りました
オフィシャルのサポートページでは、WebアプリやPythonコードなどが公開されているが、enebular(Node-RED)から簡単に制御できるようにノードを作ってみました。
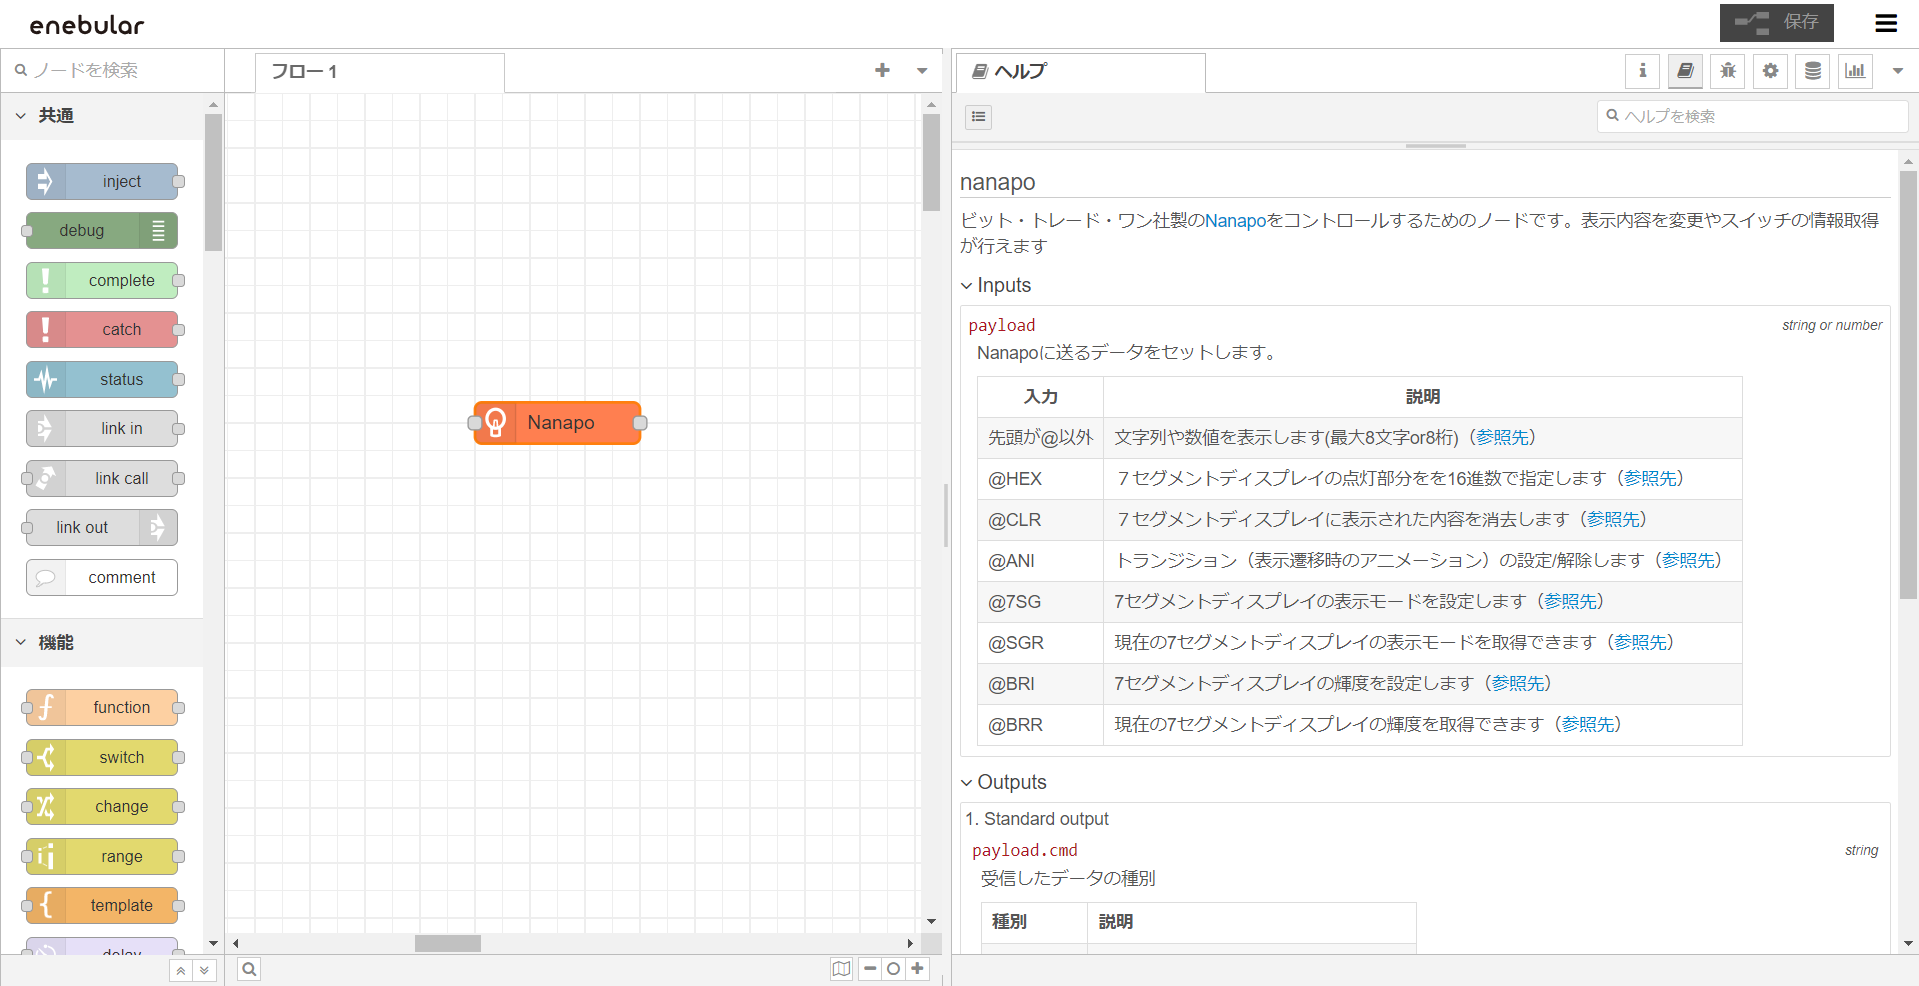
Node-REDで公開しているので、パレットの管理 ⇒ ノードを追加から「nanapo」で検索すれば出てきますので、ノードを追加すれば利用できます。
(エラー処理など手を抜いてる部分があるので、順次更新予定)

(画像は、enebular editorを使ってますが、普通のNode-REDでも使用できます)
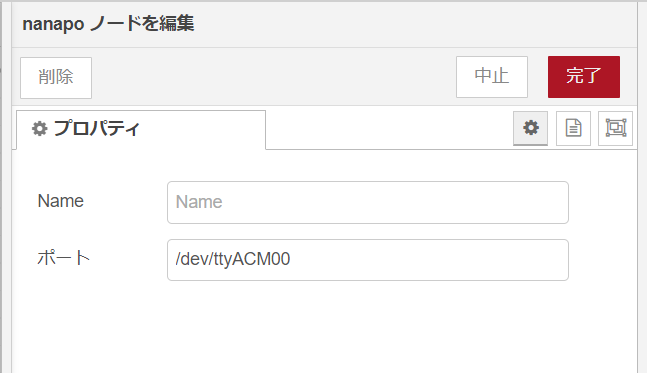
設定は、Nanapoが接続されているシリアルポート番号を指定するだけです。
Raspberry Piの例(Windowsの場合は、COM3などを書けばOKです)
サンプルフロー
こんな感じのフローで、数値や文字の表示、輝度変更やアニメーション設定ができます。
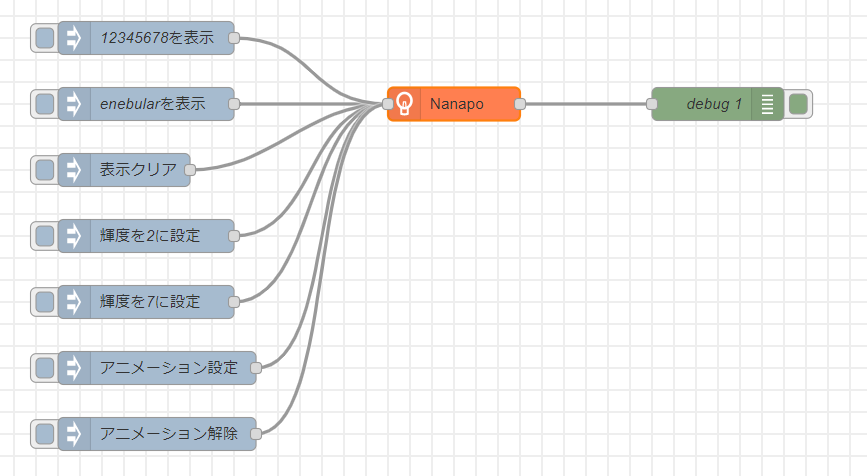
フローのJSON(これをコピーして、読み込めば使えます)
[{"id":"8c6e6c8b714184ea","type":"nanapo","z":"8ab8e8739a825a6f","name":"","port":"","x":460,"y":680,"wires":[["6203e616d07b4b6d"]]},{"id":"50060c04e5853d00","type":"inject","z":"8ab8e8739a825a6f","name":"enebularを表示","props":[{"p":"payload"}],"repeat":"","crontab":"","once":false,"onceDelay":0.1,"topic":"","payload":"enebular","payloadType":"str","x":180,"y":680,"wires":[["8c6e6c8b714184ea"]]},{"id":"401d35f69c8881d2","type":"inject","z":"8ab8e8739a825a6f","name":"表示クリア","props":[{"p":"payload"}],"repeat":"","crontab":"","once":false,"onceDelay":0.1,"topic":"","payload":"@CLR","payloadType":"str","x":160,"y":740,"wires":[["8c6e6c8b714184ea"]]},{"id":"6203e616d07b4b6d","type":"debug","z":"8ab8e8739a825a6f","name":"debug 1","active":true,"tosidebar":true,"console":false,"tostatus":false,"complete":"false","statusVal":"","statusType":"auto","x":700,"y":680,"wires":[]},{"id":"85689f3787169ce6","type":"inject","z":"8ab8e8739a825a6f","name":"輝度を2に設定","props":[{"p":"payload"}],"repeat":"","crontab":"","once":false,"onceDelay":0.1,"topic":"","payload":"@BRI2","payloadType":"str","x":180,"y":800,"wires":[["8c6e6c8b714184ea"]]},{"id":"18780134ec1e6723","type":"inject","z":"8ab8e8739a825a6f","name":"輝度を7に設定","props":[{"p":"payload"}],"repeat":"","crontab":"","once":false,"onceDelay":0.1,"topic":"","payload":"@BRI7","payloadType":"str","x":180,"y":860,"wires":[["8c6e6c8b714184ea"]]},{"id":"c6278896040371c1","type":"inject","z":"8ab8e8739a825a6f","name":"アニメーション設定","props":[{"p":"payload"}],"repeat":"","crontab":"","once":false,"onceDelay":0.1,"topic":"","payload":"@ANI1","payloadType":"str","x":190,"y":920,"wires":[["8c6e6c8b714184ea"]]},{"id":"9675bfaff09aacab","type":"inject","z":"8ab8e8739a825a6f","name":"12345678を表示","props":[{"p":"payload"}],"repeat":"","crontab":"","once":false,"onceDelay":0.1,"topic":"","payload":"12345678","payloadType":"str","x":180,"y":620,"wires":[["8c6e6c8b714184ea"]]},{"id":"adee3f2054e2feda","type":"inject","z":"8ab8e8739a825a6f","name":"アニメーション解除","props":[{"p":"payload"}],"repeat":"","crontab":"","once":false,"onceDelay":0.1,"topic":"","payload":"@ANI0","payloadType":"str","x":190,"y":980,"wires":[["8c6e6c8b714184ea"]]}]
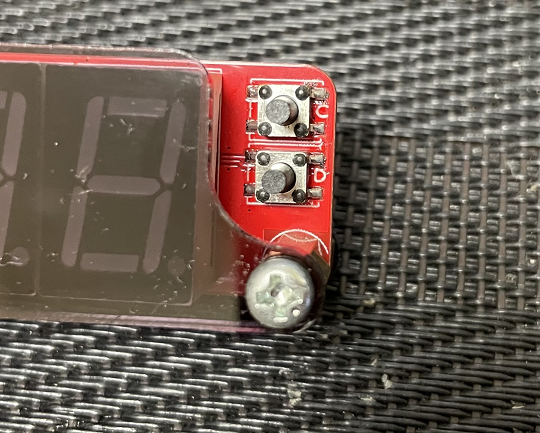
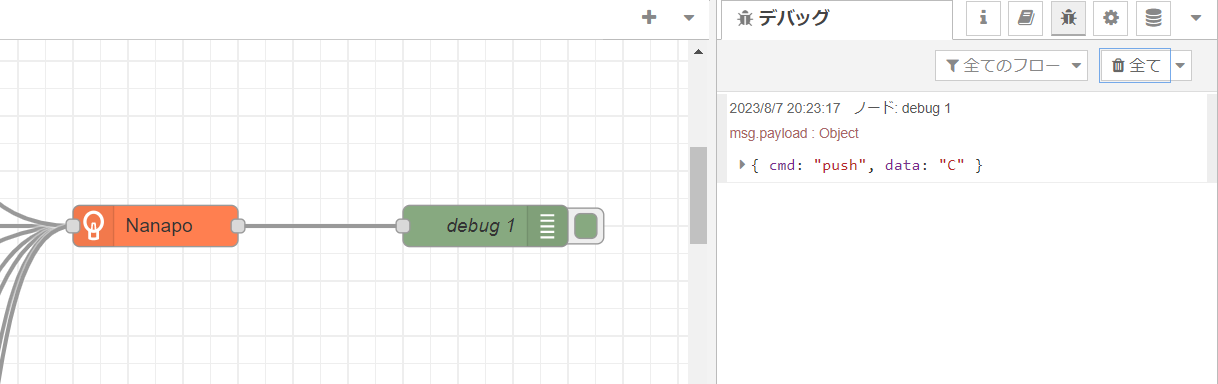
Nanapoには、タクトスイッチが取り付けられています。作ったノードでは、このボタンを押したタイミングで、取得できるようになってます。
使用例
USB接続なので、Raspberry Piでも使用できます。数値の表示やボタン入力が手軽にできると思います。
Raspberry Piには、enebularのエージェント実行環境をインストールしてフローをデプロイしています。
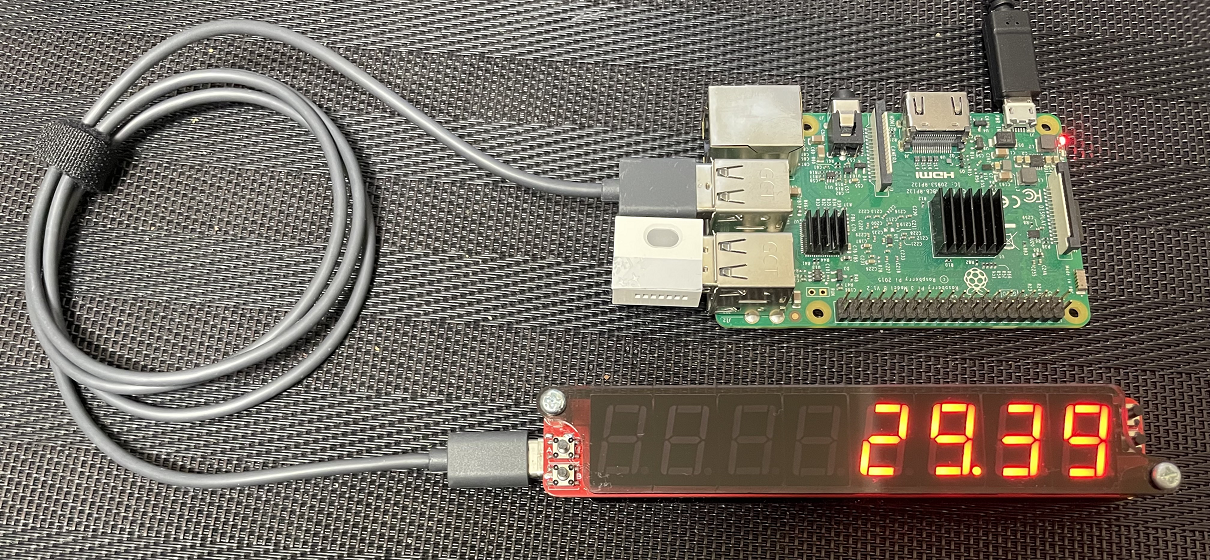
オムロンの環境センサ2JCIE-BUを使用して、温度の表示とボタンを押すことで、湿度や気圧をNanapoで表示するフローを作ってみました。
※@uhuru/node-red-contrib-omron-2jcie-bu ノードをパレット管理から追加し、シリアルポートの設定が必要になります。(設定方法は、こちら参照)
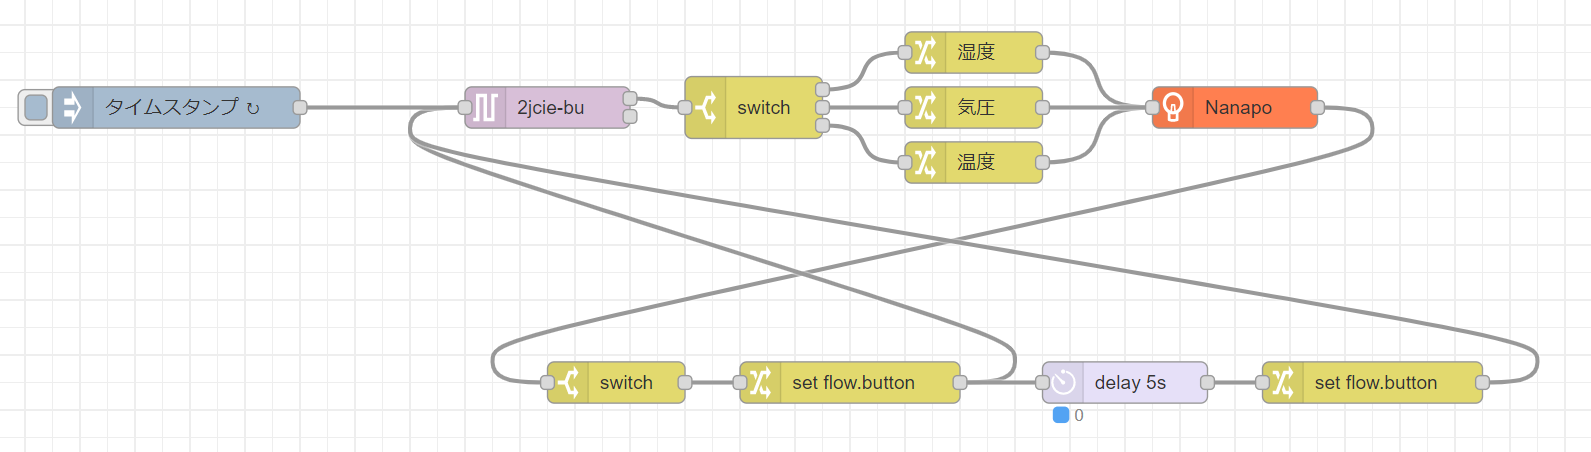
フローのJSON
[{"id":"b93cc9e91521db1e","type":"nanapo","z":"8ab8e8739a825a6f","name":"","port":"/dev/ttyACM0","x":920,"y":180,"wires":[["d08e0b0e20dec4ba"]]},{"id":"e7ad568d16c77ccd","type":"2jcie-bu","z":"8ab8e8739a825a6f","name":"","port":"/dev/ttyUSB0","event_target":0,"event_type":"0x0001","event_upper":0,"event_lower":0,"event_count":0,"event2_target":0,"event2_type":"0x0001","event2_upper":0,"event2_lower":0,"event2_count":0,"event3_target":0,"event3_type":"0x0001","event3_upper":0,"event3_lower":0,"event3_count":0,"led_event_rule":"0x0001","led_event_red":0,"led_event_green":0,"led_event_blue":0,"led_normal_rule":0,"led_normal_red":0,"led_normal_green":0,"led_normal_blue":0,"x":420,"y":180,"wires":[["c9dfb68f37e5dbbd"],[]]},{"id":"6f6ede49050381df","type":"change","z":"8ab8e8739a825a6f","name":"温度","rules":[{"t":"set","p":"payload","pt":"msg","to":"payload.temperature","tot":"msg"}],"action":"","property":"","from":"","to":"","reg":false,"x":730,"y":220,"wires":[["b93cc9e91521db1e"]]},{"id":"c9dfb68f37e5dbbd","type":"switch","z":"8ab8e8739a825a6f","name":"","property":"button","propertyType":"flow","rules":[{"t":"eq","v":"C","vt":"str"},{"t":"eq","v":"D","vt":"str"},{"t":"else"}],"checkall":"true","repair":false,"outputs":3,"x":570,"y":180,"wires":[["16b8a7204db95de9"],["32369fcff0a953b1"],["6f6ede49050381df"]]},{"id":"d08e0b0e20dec4ba","type":"switch","z":"8ab8e8739a825a6f","name":"","property":"payload.cmd","propertyType":"msg","rules":[{"t":"eq","v":"push","vt":"str"}],"checkall":"true","repair":false,"outputs":1,"x":470,"y":380,"wires":[["05f5800a8ee54b65"]]},{"id":"05f5800a8ee54b65","type":"change","z":"8ab8e8739a825a6f","name":"","rules":[{"t":"set","p":"button","pt":"flow","to":"payload.data","tot":"msg"}],"action":"","property":"","from":"","to":"","reg":false,"x":640,"y":380,"wires":[["e7ad568d16c77ccd","c5cd2fc58172a692"]]},{"id":"16b8a7204db95de9","type":"change","z":"8ab8e8739a825a6f","name":"湿度","rules":[{"t":"set","p":"payload","pt":"msg","to":"payload.relativeHumidity","tot":"msg"}],"action":"","property":"","from":"","to":"","reg":false,"x":730,"y":140,"wires":[["b93cc9e91521db1e"]]},{"id":"32369fcff0a953b1","type":"change","z":"8ab8e8739a825a6f","name":"気圧","rules":[{"t":"set","p":"payload","pt":"msg","to":"payload.barometricPressure","tot":"msg"}],"action":"","property":"","from":"","to":"","reg":false,"x":730,"y":180,"wires":[["b93cc9e91521db1e"]]},{"id":"0c81f0c5852c2843","type":"change","z":"8ab8e8739a825a6f","name":"","rules":[{"t":"set","p":"button","pt":"flow","to":"","tot":"str"}],"action":"","property":"","from":"","to":"","reg":false,"x":1020,"y":380,"wires":[["e7ad568d16c77ccd"]]},{"id":"c5cd2fc58172a692","type":"delay","z":"8ab8e8739a825a6f","name":"","pauseType":"delay","timeout":"5","timeoutUnits":"seconds","rate":"1","nbRateUnits":"1","rateUnits":"second","randomFirst":"1","randomLast":"5","randomUnits":"seconds","drop":false,"allowrate":false,"outputs":1,"x":840,"y":380,"wires":[["0c81f0c5852c2843"]]},{"id":"ddbc6c471c54af16","type":"inject","z":"8ab8e8739a825a6f","name":"","props":[{"p":"payload"},{"p":"topic","vt":"str"}],"repeat":"600","crontab":"","once":true,"onceDelay":0.1,"topic":"","payload":"","payloadType":"date","x":150,"y":180,"wires":[["e7ad568d16c77ccd"]]}]
10分ごとにセンサから取得した温度を表示します。Cボタンを押すと湿度、Dボタンを押すと気圧を5秒表示し、温度に戻ります。

Nanapoを使ってみて
Raspberry PiやPCから数値の表現をするのに良いですね。センサーやWebから取得できる数値と連動させても良いですし、アニメーションの表現ができるので、ちょっとしたゲームなどにも利用できるのではないでしょうか。
コマンド次第で、1セグごとに点灯を制御できるので、工夫次第でいろいろな表現ができますね。
もっと大きな7セグLEDを使ったものもあったら面白そう。