2023/3/27にとうとう日本でもRaspberry Pi Pico Wが販売開始されました。
今までも海外の通販サイトからは購入可能でしたが、技適マークが付いていなかったため、個別に実験用の届出が必要でしたが、これで手軽に扱えるようになりました。
Raspberry Pi Pico WはWi-Fi、Bluetoothが利用できます。
簡単ですが、以前Arduino IDEでWi-Fiを試したので、同じくArduino IDE Buletoothを試したいと思います。
構成
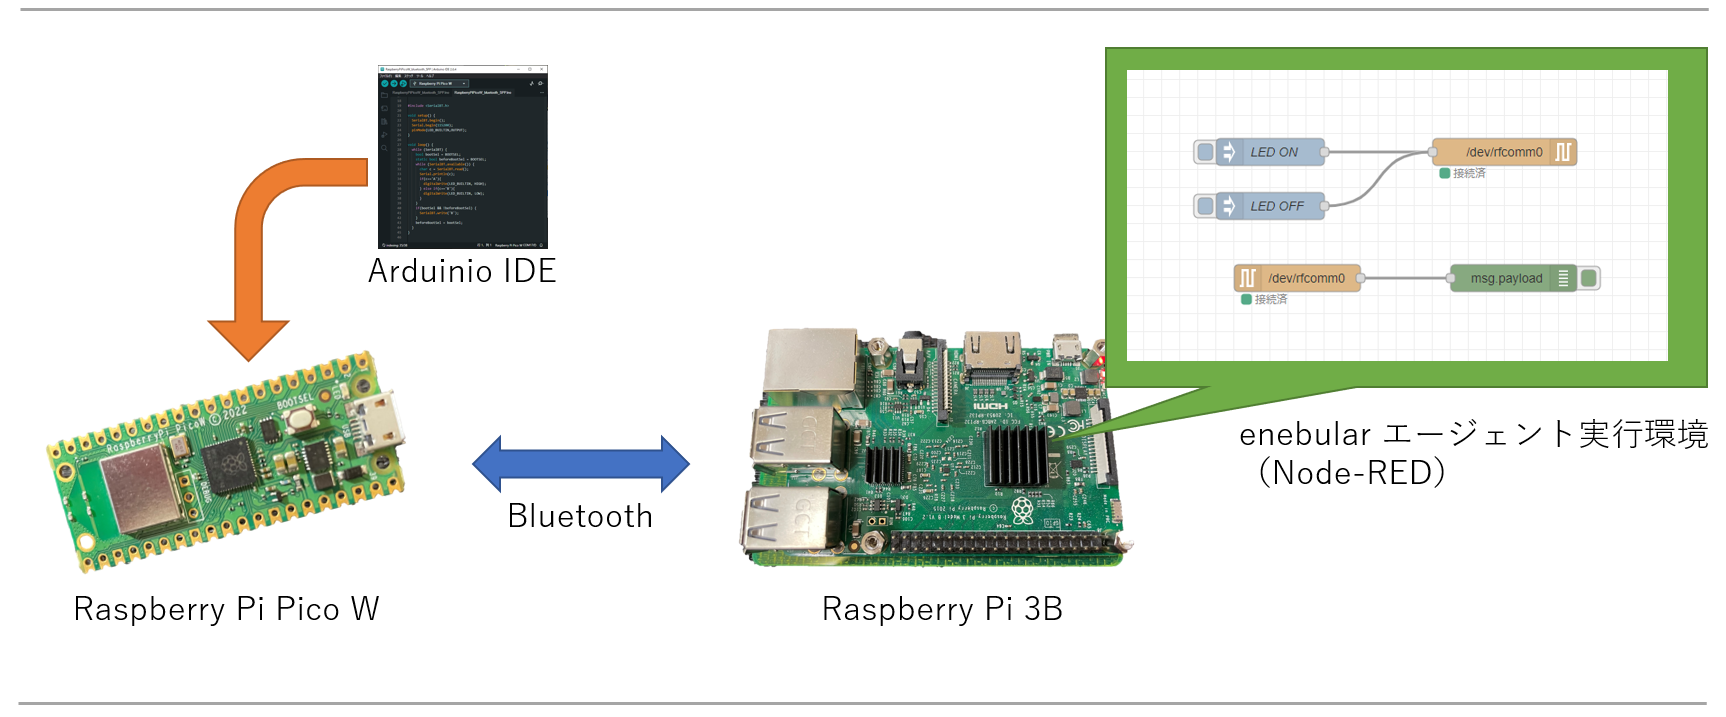
Raspberry Pi Pico WをRaspberry PiとBluetoothでつなげて、双方向の通信を試します。
Bluetoothは仮想シリアルであるSPPを使用します。Raspberry Piとしては、シリアルポートとして認識します。
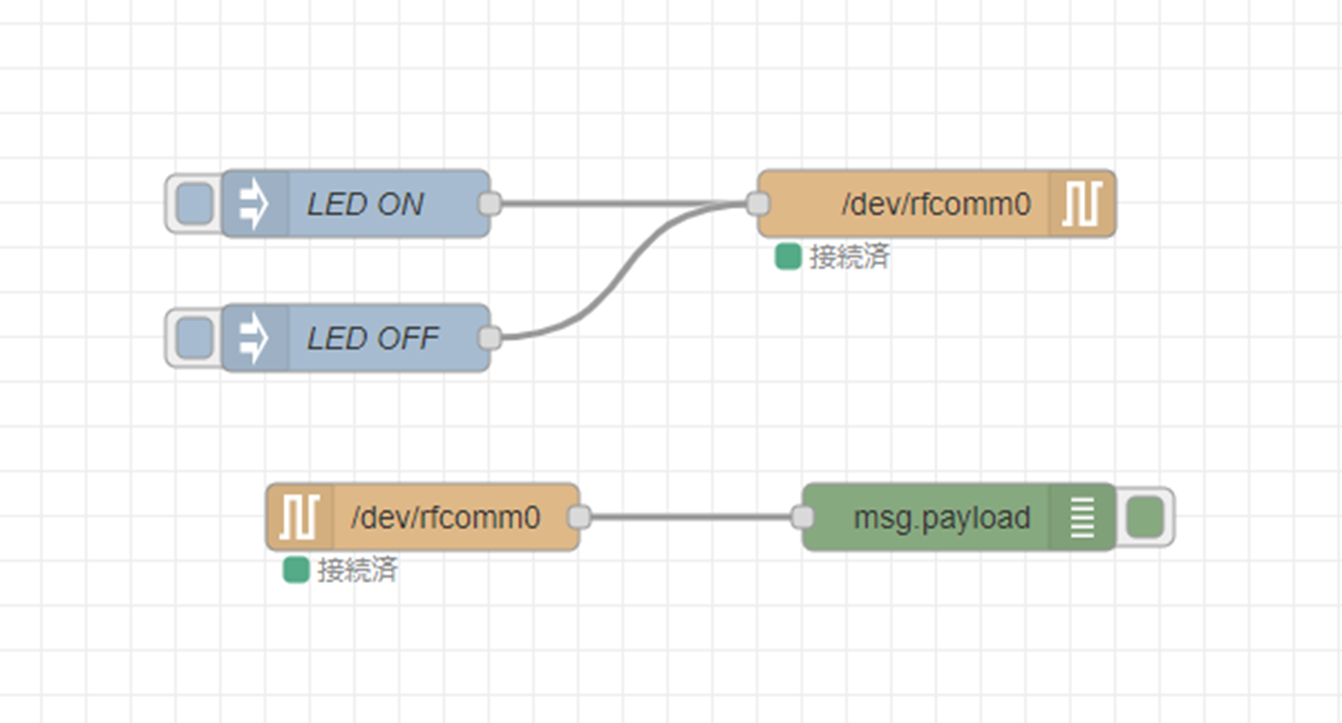
Raspberry Pi側は、Node-REDを使ってシリアルポートの通信を受け取って、デバッグメッセージを出したりしています。
Raspberry Pi Pico W側のスケッチ
ボード定義は、arduino-picoを使用してます。
Raspberry Pi Pico W上のBOOTSELボタンを押すとBluetooth SPPで、Bという文字を送ります。
Aという文字をBluetooth SPPで受け取るとRaspberry Pi Pico W上のLEDをON、Bを受け取るとLEDをOFFにするスケッチです。
サンプルを元に作ったスケッチが以下になります。
#include <SerialBT.h>

void setup() {
  SerialBT.begin();
  Serial.begin(115200);
  pinMode(LED_BUILTIN,OUTPUT);
}

void loop() {
  while (SerialBT) {
    bool bootSel = BOOTSEL;
    static bool beforeBootSel = BOOTSEL;
    while (SerialBT.available()) {
      char c = SerialBT.read();
      Serial.println(c);
      if(c=='A'){
        digitalWrite(LED_BUILTIN, HIGH);
      } else if(c=='B'){
        digitalWrite(LED_BUILTIN, LOW);
      }
    }
    if(bootSel && !beforeBootSel) {
      SerialBT.write('B');
    }
    beforeBootSel = bootSel;
  }
}
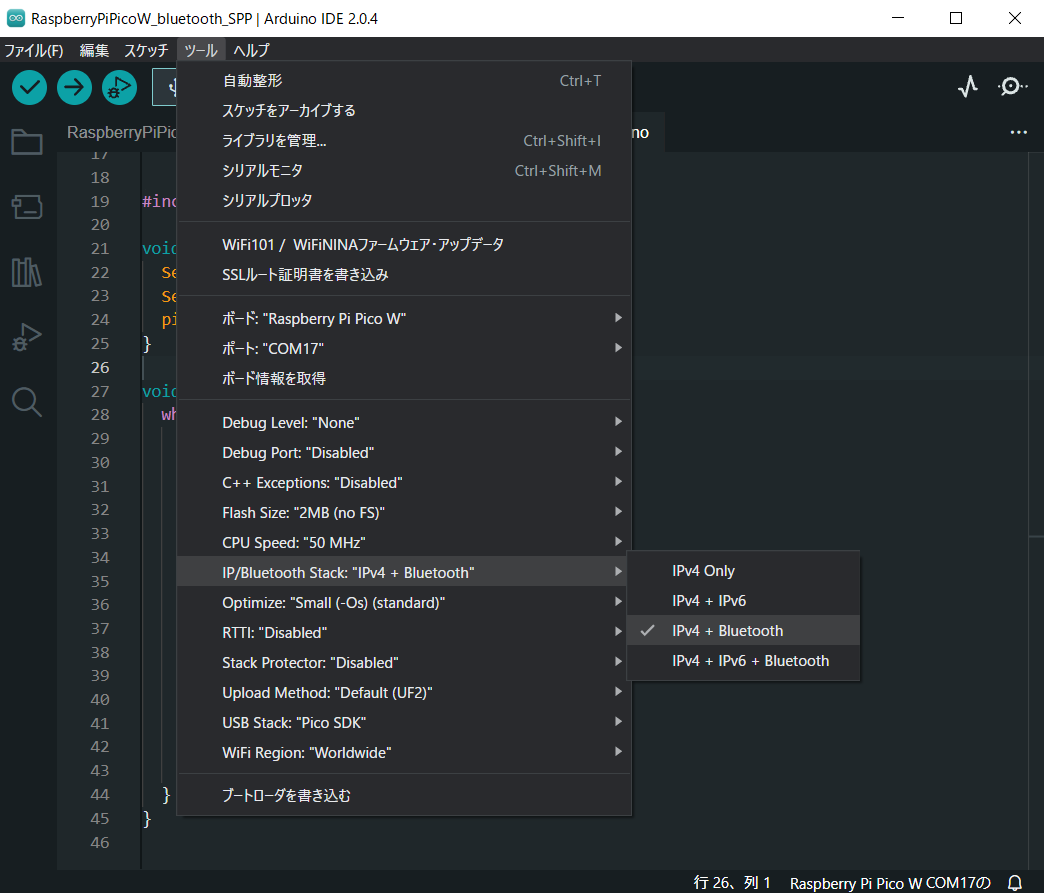
※Bluetoothを使用する場合は、以下の設定を変更する必要があります。
Raspberry Piとの接続
Raspberry Pi Pico Wにスケッチを書き込んで、動作させたらRaspberry Piとペアリングさせて、仮想シリアルポートとして、認識させます。
Raspberry Piのコンソールで、以下のコマンドを実行し、Bluetoothの制御モードに入ります。
pi@raspberrypi:~ $ sudo bluetoothctl
Agent registered
[bluetooth]#
以下のコマンドで、スキャンするとPicoW Serialというのが見つかればOKです。ここで表示されるMacアドレスを使用します。(以下は伏せ字にしていますが、xx:xx:xx:xx:xx:xxの部分です。)
[bluetooth]# scan on
[NEW] Device xx:xx:xx:xx:xx:xx PicoW Serial
以下のコマンドで、調べたMacアドレスをペアリングします。
[bluetooth]# pair xx:xx:xx:xx:xx:xx
exitでBluetoothの制御モードを抜けて、仮想シリアルポートとして、認識させます。
[bluetooth]# exit
pi@raspberrypi:~ $ sudo rfcomm -r -M -L 0 bind 0 xx:xx:xx:xx:xx:xx
これで、シリアルポートとして、/dev/rfcommを指定すれば、Raspberry Pi Pico Wと通信が可能です。
Raspberry Piのフロー
標準以外のノードで、node-red-node-serialportを使用しているので追加します。
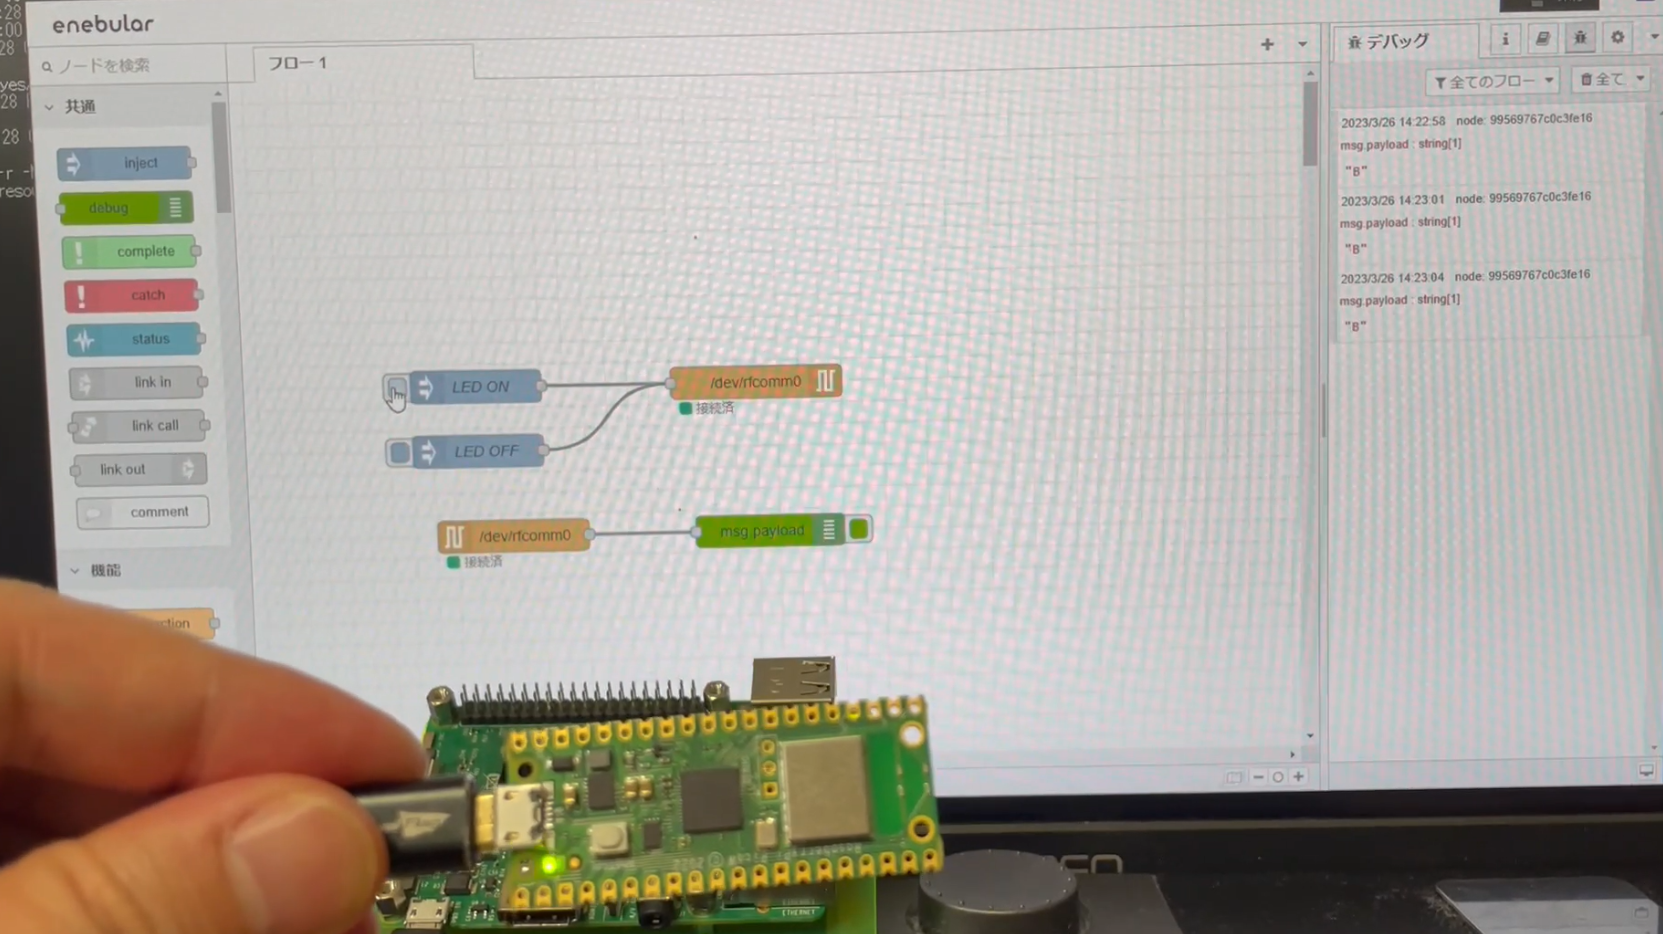
フローは以下になります。
[{"id":"96f17b2b1df90c4f","type":"tab","label":"フロー1","disabled":false,"info":"","env":[]},{"id":"65ef48c720800e76","type":"serial-port","serialport":"/dev/rfcomm0","serialbaud":"115200","databits":"8","parity":"none","stopbits":"1","waitfor":"","dtr":"none","rts":"none","cts":"none","dsr":"none","newline":"100","bin":"false","out":"time","addchar":"","responsetimeout":"10000"},{"id":"aa04af3218aa6097","type":"serialout","z":"96f17b2b1df90c4f","name":"","serial":"65ef48c720800e76","x":800,"y":280,"wires":[]},{"id":"a629b346ae079ec6","type":"serialin","z":"96f17b2b1df90c4f","name":"","serial":"65ef48c720800e76","x":570,"y":420,"wires":[["99569767c0c3fe16"]]},{"id":"99569767c0c3fe16","type":"debug","z":"96f17b2b1df90c4f","name":"","active":true,"tosidebar":true,"console":false,"tostatus":false,"complete":"payload","targetType":"msg","statusVal":"","statusType":"auto","x":810,"y":420,"wires":[]},{"id":"3217cc134d81db14","type":"inject","z":"96f17b2b1df90c4f","name":"LEDON","props":[{"p":"payload"},{"p":"topic","vt":"str"}],"repeat":"","crontab":"","once":false,"onceDelay":0.1,"topic":"","payload":"A","payloadType":"str","x":540,"y":280,"wires":[["aa04af3218aa6097"]]},{"id":"f6fb6e948700cf0a","type":"inject","z":"96f17b2b1df90c4f","name":"LEDOFF","props":[{"p":"payload"},{"p":"topic","vt":"str"}],"repeat":"","crontab":"","once":false,"onceDelay":0.1,"topic":"","payload":"B","payloadType":"str","x":540,"y":340,"wires":[["aa04af3218aa6097"]]}]
動作確認
Raspberry Pi Pico W ⇒ Raspberry Pi
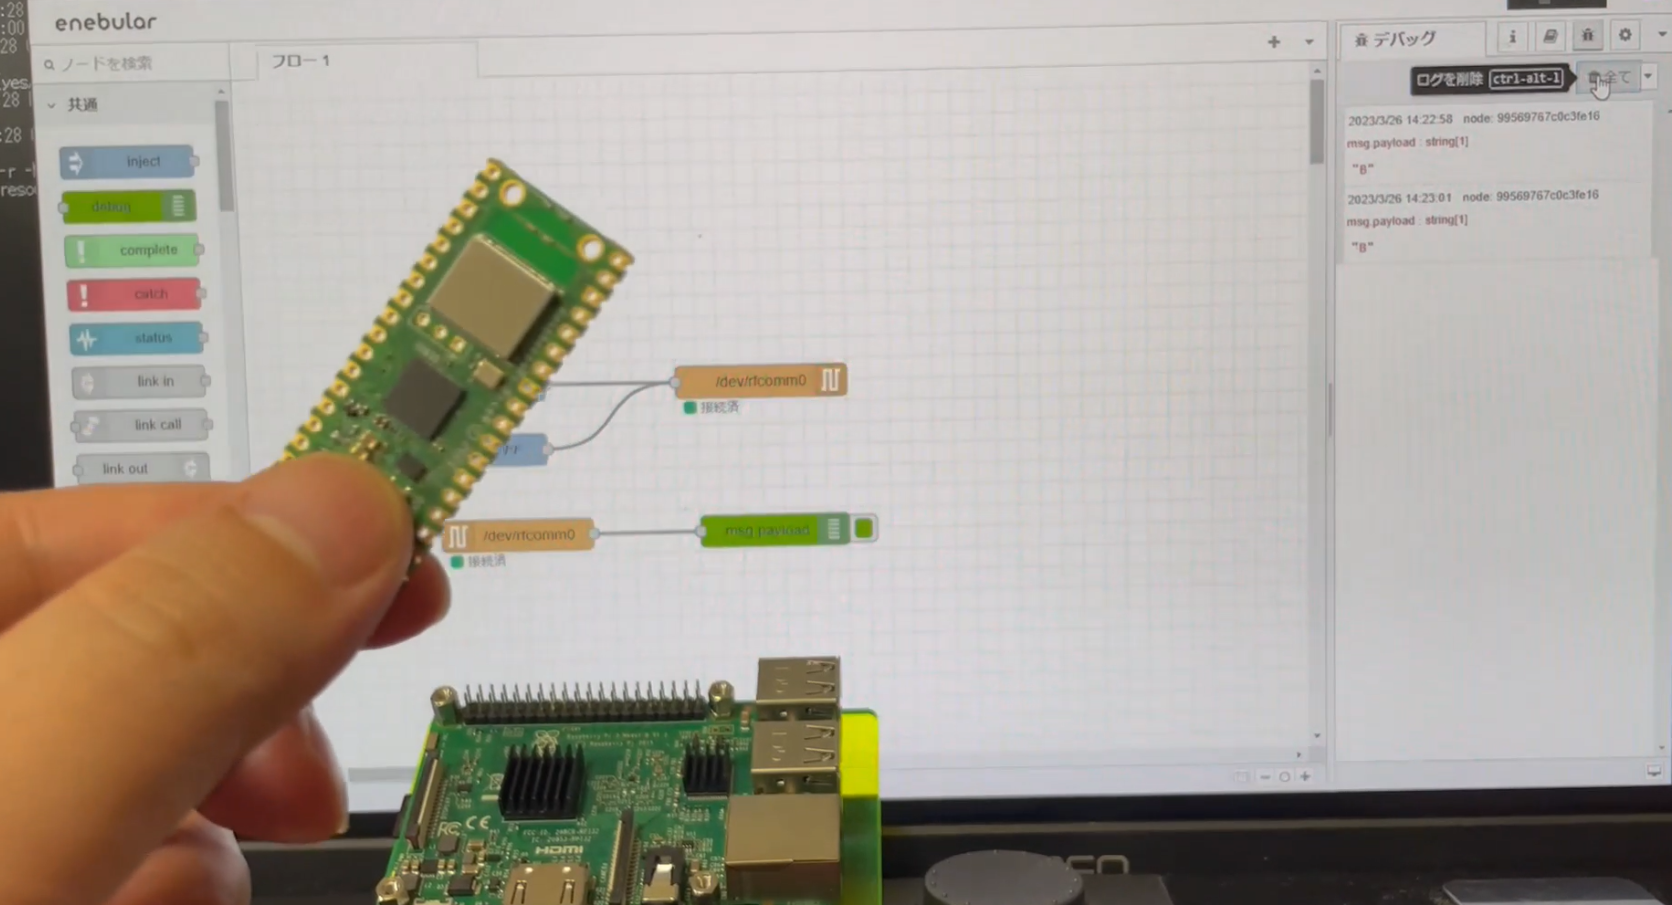
BOOTSELを押すごとにDebugノードから受け取った文字が表示されました。
Raspberry Pi ⇒ Raspberry Pi Pico W
フローのLED ONをクリックするとRaspberry Pi Pico WのLEDが点灯し、LED OFFをクリックするとLEDが消灯することが確認できました。
最後に
Raspberry Pi Pico WをArduino IDE扱うための書籍も執筆中です。
こちらは、しばしお待ち下さい!
⇒ 出版しました!
