Raspberry Pi Zero WはRaspberry Pi 4Bよりだいぶスペックは劣りますが、小型で消費電力が少ないRaspberry PiシリーズのLinuxコンピュータです。また、性能が5倍ほどになったRaspberry Pi Zero 2 Wも近日中に販売が予定されています。
以下の写真はRaspberry Pi Zero Wを初期セットアップするため、キーボードとディスプレイを繋いでいる様子です。Raspberry Piシリーズの初期設定にはHDMIキャプチャが便利です。ディスプレイを別途用意する必要なく、Windowsであればカメラアプリ上でRaspberry Piの画面を表示することができます。Amazonで2000円ほどです。
(写真のRaspberry Pi Zero Wはピンヘッダを実装していますが、これは自前ではんだ付けしたものです。ピンヘッダ実装済みのRaspberry Pi Zero WHというものもあります。)

Raspberry Pi Zero Wにenebular-agentをインストール
enebular-agentは、公式にはRaspberry Pi Zero Wに対応していません。普通にインストールしようとしてもエラーになります。しかし、ちょっとしたセンサーを扱う場合など、Raspberry Pi Zero Wが便利なこともあるので非公式ながらRaspberry Pi Zero Wにenebular-agentをインストールする手順を説明します。
Raspberry Pi Zero Wの初期セットアップ
OSイメージをSDカードに書き込んで、Raspberry Pi Zero Wにキーボードとディスプレイを接続します。まずはOSイメージの準備しかたから説明します。
Raspberry Pi OSイメージの準備
Raspberry Pi OSのイメージは、公式のイメージャーを使うと便利です。ダウンロードして、インストールすれば使えます。
起動するとこの様な画面が表示されます。microSDカードをPCに差し込み、OSイメージとストレージを選ぶだけです。

Raspberry Pi Zero Wはメモリも少ないため、今回はCUIのみのイメージであるRaspberry Pi OS Liteを使用します。また、最新のRaspberry Pi OSはDebian Bullseyeベースとなっていますが、enebular-agentはまだ対応していないため、Debian Busterベースのものを使用します。
OSイメージの選択画面では、Raspberry Pi OS(other)を選び、Raspberry Pi OS Lite(Legacy)を選択して下さい。

OSイメージとストレージの選択が終わったら、WRITEをクリックします。書き込みが完了したらmicroSDカードをRaspberry Pi Zero Wに差し込みます。
初期設定
起動してしばらく経つとraspberrypi login:と表示されるので、ユーザー名とパスワードを入力します。初期のユーザー名はpi、パスワードはraspberryです。
次にWi-Fiやインターフェース等の設定をします。Wi-Fiとsshの設定をしてしまえば、PCからSSHで操作できるので、細かい設定は後回しでもOKです。
Raspberry Pi OSに用意されている設定ツールを使えば簡単です。以下のコマンドで起動します。
$ sudo raspi-config
Wi-Fiは、1 System Options ⇒ S1 Wireless LANから設定を行います。方向キーでメニューを選びenterで選択です。


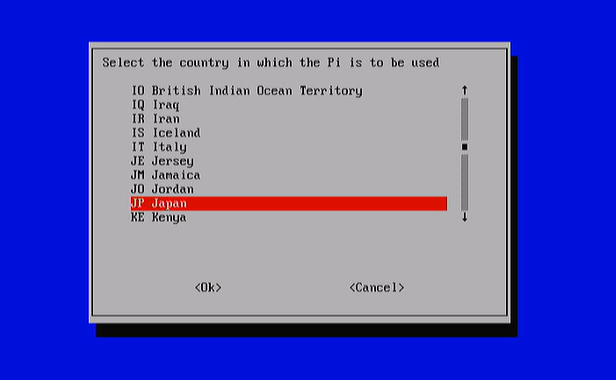
最初に使用する国を選びます。
接続するWi-FiのSSIDをキーボードから入力し、enterを押します。

Wi-Fiのパスフレーズを入力し、enterを押します。

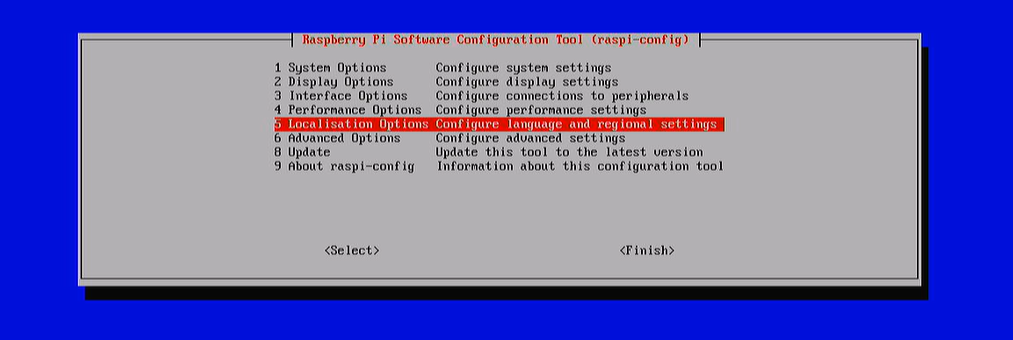
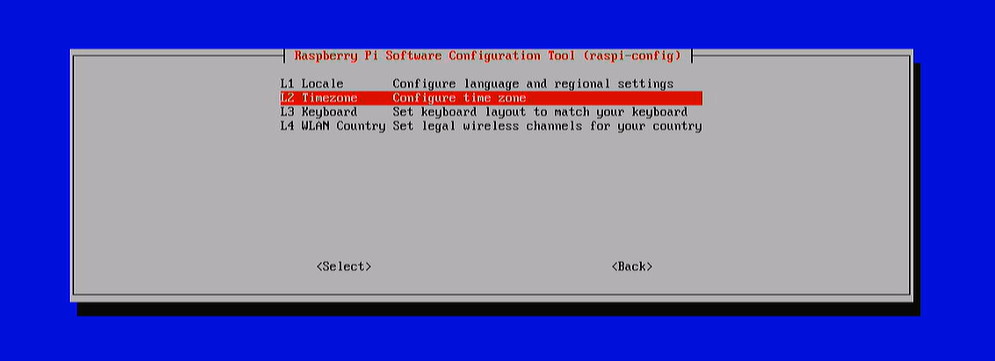
次にタイムゾーンを設定します。使用する国に合わせて下さい。5 Localisation Options⇒L2 Timezoneです。


次に一通り、使いそうなインターフェースをenableにしていきます。(ssh以外の設定はあとからでも良いです。)

私は、VNC以外をenableにしました。

設定が終わったら、Finishを選びenterを押します。
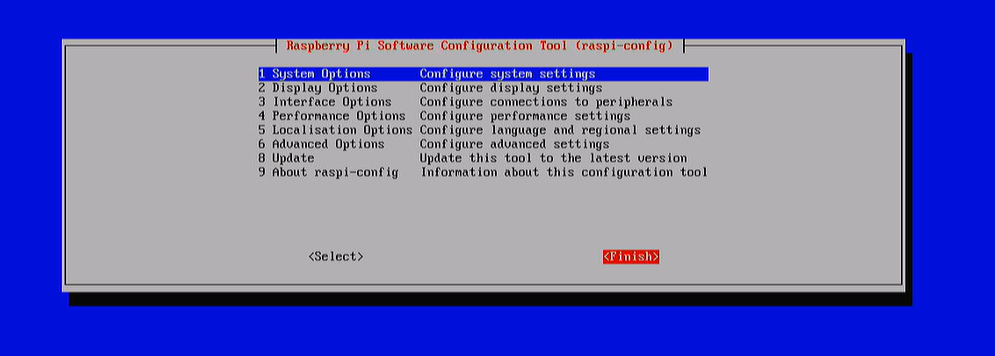
リブートするかを聞かれるので、リブートします。
リブートしたら、Wi-Fiの設定に問題がなければ、Wi-Fiに接続されるはずです。以下のコマンドでIPアドレスを確認します。
$ ifconfig
enebular-agentのインストール
Wi-Fiの設定が終わってしまえば、PCからssh接続で操作できるので、PCのコマンドプロンプトから調べたRaspberry Pi Zero WのIPアドレスにssh接続します。
> ssh pi@[piアドレス]
ssh接続が完了したらとりあえず、以下を実施しておきます。
$ sudo apt update
enebular-agentはインストーラーで自動的にインストールできますが、Raspberry Pi Zeroではエラーになるます。インストーラーでインストールされるNodejsはv12.22.5(2021/12/5時点の最新バージョンenebular-agent v2.15.5の場合)ですが、Raspberry Pi Zeroに搭載されているCPUがARMv6系となっており、Nodejsはv10までしか対応していないためNodejs v12.22.5のインストールでエラーになるためです。
これに関しては、別の方法でNodejs v12.22.5を入れて、enebular-agentを手動でインストールする方法があるので、その手順を説明します。
enebular-agentに必要なパッケージのインストール
まず、Nodejsとenebular-agentのインストールに必要なパッケージを以下のコマンドでインストールします。
$ sudo apt install -y git
$ sudo apt install -y cmake
$ sudo apt install -y python-pip
Nodejsのインストール
Nodejsで未サポートのARMv6系パッケージを試験的に公開しているサイトがあるので、そこからインストールします。Nodejsのパッケージ管理ツールであるnを使えば簡単にできるので以下を実施して下さい。
$ curl -L https://git.io/n-install | bash
$ sudo N_NODE_MIRROR=https://unofficial-builds.nodejs.org/download/release/ ./n/bin/n 12.22.5
$ node -v
v12.22.5
enebular-agentの手動インストール
githubからenebular-agentをクローンします。
$ git clone https://github.com/enebular/enebular-runtime-agent.git
Raspberry Pi Zero WだとRaspberryPi3や4にくらべ処理が遅いため、enebular-agentのタイムアウト時間に引っかかってしまいます。タイムアウト時間を変更したものをブランチに用意しましたので、以下のコマンドでブランチを切り替えて下さい。
$ cd enebular-runtime-agent
$ git checkout RaspberryPiZero
enebular-runtime-agent内の各パッケージをインストールしていきます。
$ cd agent
$ npm ci && npm run build
$ cd ..
$ cd node-red
$ npm ci
$ cd ..
$ cd port/awsiot
$ npm ci && npm run build
AWSIoTの環境をセットアップする
enebular-agentとenebularを繋ぐためにAWSIoT環境の作成及びセットアップを行い、enebularの設定が必要になります。詳細な説明は以下の記事を参照下さい。enebular-agentインストールの手前まで終わっていれば大丈夫です。AWSIoTとenebularの設定が完了していれば飛ばして下さい。
ポリシーの作成
通常、enebular-agentのインストーラでは自動的に作成されますが、今回は手動でインストールするため、以下の手順でAWSIoTの環境にポリシーを作成します。
※この設定は、AWSIoTの環境につき一回行えばOKです。
enebularで設定したリージョンと同じリージョンでポリシー⇒作成です。

ポリシーの名前は何でも良いですが、ここではenebular-policyとしています。アクションをiot:*、リソースARNは*、効果は許可としています。入力が終わったら、作成をクリックします。

モノの作成
enebularで設定したリージョンと同じリージョンでモノ⇒モノを作成です。

デバイス証明書は新しい証明書を自動作成を選び、次へをクリックします。

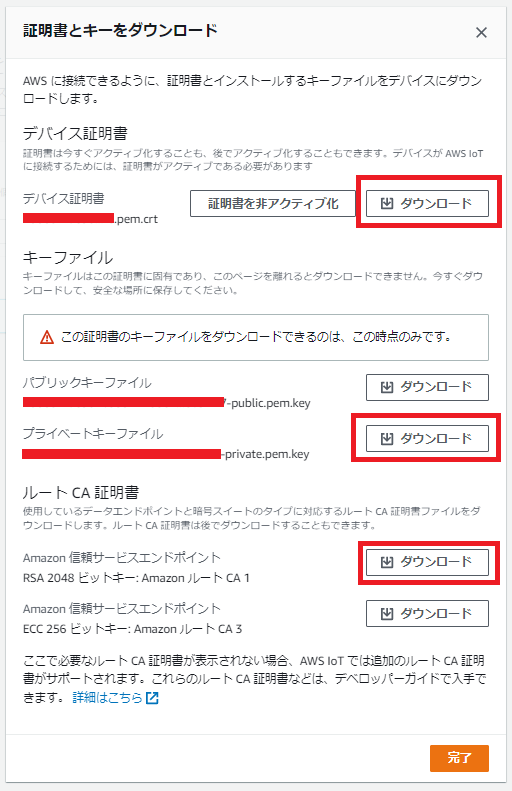
証明書とキーファイルをダウンロードします。enebular-agentがAWSIoTとの接続に必要なのは赤枠を付けているものだけですが、ここでしかダウンロードできないものもあるので、必要に応じてダウンロードして下さい。
enebular-agentとAWSIoTの接続設定
AWSIoTの設定とダウンロードした証明書とキーファイルをenebular-agentと紐付けるためのconfig.jsonという名前の設定ファイルを用意します。ファイルを作り、テキストエディタで以下のように編集して下さい。
{
    "host": "xxxxxxxxxxxxxx.iot.eu-central-1.amazonaws.com",
    "port": 8883,
    "clientId": "raspberrypi-zero-agent",
    "thingName": "raspberrypi-zero-agent",
    "caCert": "./AmazonRootCA1.pem",
    "clientCert": "./xxxxxxxxxxxxxxxxxxxxxxxxxxxxxxxxxxxx-certificate.pem.crt",
    "privateKey": "./xxxxxxxxxxxxxxxxxxxxxxxxxxxxxxxxxxxx-private.pem.key",
    "topic": "aws/things/raspberrypi-zero-agent/shadow/update"
}
hostはAWS IoT EndpointのURL。enebularに設定したものと同じです。
portは8883固定
clientIdはモノの名前
thingNameはモノの名前
caCertはダウンロードしたルートCA証明書のパス(上記例はconfig.jsonと同じフォルダに置く場合です)
clientCertはダウンロードしたデバイス証明書のパス(上記例はconfig.jsonと同じフォルダに置く場合です)
privateKeyはダウンロードしたプライベートキーファイルのパス(上記例はconfig.jsonと同じフォルダに置く場合です)
topicはaws/things/(モノの名前)/shadow/update
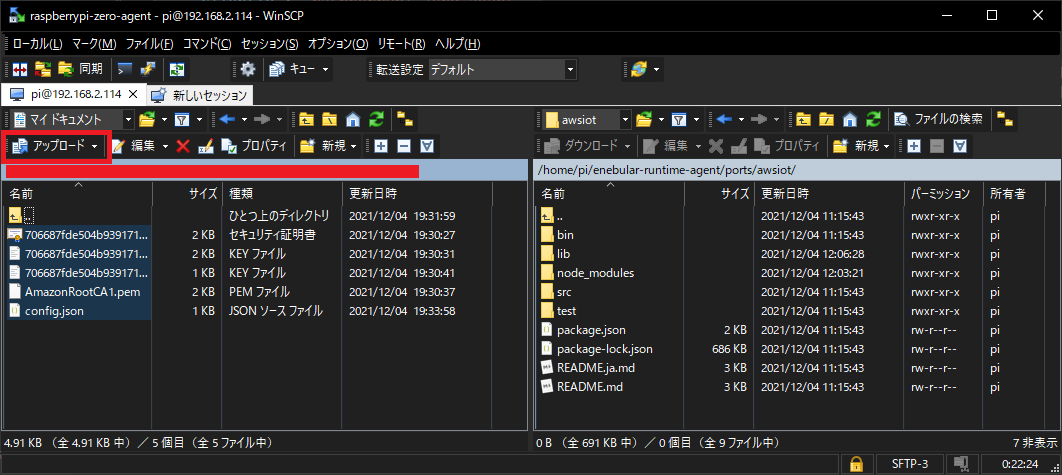
設定ファイルと証明書、キーファイルを用意したらRaspberry Pi Zero W上のenebular-runtime-agent下の以下のパスにコピーします。
./enebular-runtime-agent/ports/awsiot/
ファイルをコピーする方法はいくつかありますが、ssh接続しているのでscpを使います。WindowsPCであれば、WinSCPを使うのが楽だと思います。以下からダウンロードできます。
ssh接続と同じ情報で、設定します。

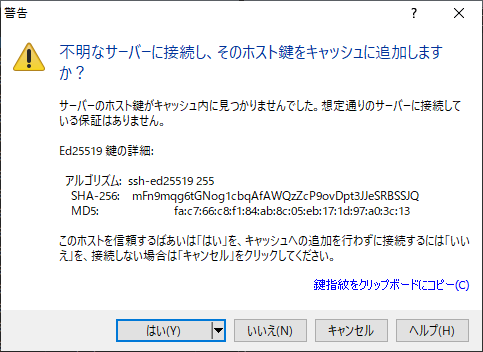
以下が表示されたら「はい」をクリックします。
コピー元のファイルとコピー先のフォルダを選んで「アップロード」をクリックします。
これでenebular-agentのインストールは完了です。
enebular-agentの起動と動作確認
enebular-agentは、./enebular-runtime-agent/ports/awsiot/のパスの上で、以下のコマンドで起動します。
$ DEBUG=info npm run start
起動したら以下のようにログが表示され、internal: aws-iot: Connected to AWS IoTと表示されればOKです。
$ DEBUG=info npm run start

> enebular-awsiot-agent@2.15.5 start /home/pi/enebular-runtime-agent/ports/awsiot
> node lib/index.js

internal: enebular-agent version: 2.15.5
internal: Node-RED dir: /home/pi/enebular-runtime-agent/node-red
internal: Node-RED data dir: /home/pi/enebular-runtime-agent/node-red/.node-red-config
internal: Node-RED command: ./node_modules/.bin/node-red -s .node-red-config/settings.js
internal: Enebular config file: /home/pi/enebular-runtime-agent/ports/awsiot/.enebular-config.json
internal: Agent state change: init => unregistered
internal: ai-model-man: Starting models...
internal: node-red: Processing flow enable change
internal: node-red: Enabling flow
internal: node-red: Starting service...
internal: remote-login: ssh status:{
  "active": false
}
service.node-red: 4 Dec 19:44:43 - [info]

Welcome to Node-RED
===================
service.node-red: 4 Dec 19:44:43 - [info] Node-RED version: v1.0.5-alpha.16
service.node-red: 4 Dec 19:44:43 - [info] Node.js  version: v12.22.5
4 Dec 19:44:43 - [info] Linux 5.10.17+ arm LE
service.node-red: 4 Dec 19:44:49 - [info] Loading palette nodes
service.node-red: [DEBUG] getModuleInfo():
service.node-red: [DEBUG] moduleNodes: {}
service.node-red: [DEBUG] getModuleInfo():
service.node-red: [DEBUG] moduleNodes: {}
[DEBUG] getModuleInfo():
[DEBUG] moduleNodes: {}
service.node-red: [DEBUG] getModuleInfo():
[DEBUG] moduleNodes: {}
service.node-red: [DEBUG] getModuleInfo():
service.node-red: [DEBUG] moduleNodes: {}
[DEBUG] getModuleInfo():
[DEBUG] moduleNodes: {}
[DEBUG] getModuleInfo():
[DEBUG] moduleNodes: {}
[DEBUG] getModuleInfo():
[DEBUG] moduleNodes: {}
service.node-red: 4 Dec 19:45:32 - [info] Dashboard version 2.30.0 started at /ui
internal: node-red: Enable flow failed, Node-RED failed to start: Flow start timed out
internal: aws-iot: AWS IoT config file: /home/pi/enebular-runtime-agent/ports/awsiot/config.json
internal: No activation. Connecting connector to wait for registration...
internal: aws-iot: Agent started
service.node-red: 4 Dec 19:45:36 - [info] Settings file  : /home/pi/enebular-runtime-agent/node-red/.node-red-config/settings.js
4 Dec 19:45:36 - [info] Context store  : 'default' [module=memory]
4 Dec 19:45:36 - [info] User directory : /home/pi/enebular-runtime-agent/node-red/.node-red-config
4 Dec 19:45:36 - [warn] Projects disabled : set editorTheme.projects.enabled=true to enable
4 Dec 19:45:36 - [info] Flows file     : /home/pi/enebular-runtime-agent/node-red/.node-red-config/flows.json
4 Dec 19:45:36 - [info] Admin UI disabled
4 Dec 19:45:36 - [info] Server now running at http://127.0.0.1:1880
4 Dec 19:45:36 - [info] Creating new flow file
4 Dec 19:45:36 - [warn]

---------------------------------------------------------------------
Your flow credentials file is encrypted using a system-generated key.

If the system-generated key is lost for any reason, your credentials
file will not be recoverable, you will have to delete it and re-enter
your credentials.

You should set your own key using the 'credentialSecret' option in
your settings file. Node-RED will then re-encrypt your credentials
file using your chosen key the next time you deploy a change.
---------------------------------------------------------------------

4 Dec 19:45:36 - [info] Starting flows
4 Dec 19:45:36 - [info] Started flows
internal: aws-iot: Connected to AWS IoT
internal: aws-iot: Thing shadow registered
internal: aws-iot: Shadow update result, timeout:false state:accepted
internal: aws-iot: Shadow update result, timeout:false state:accepted
フローのデプロイ
enebular-agentとAWSIoTの接続が確認できたらenebularからフローをデプロイしてみます。
単純に定期的にタイムスタンプをシステムコンソールに出力するフローで試してみます。
[{"id":"8d1c963e.8c0098","type":"tab","label":"フロー 1","disabled":false,"info":""},{"id":"96bb7ee4.58f1","type":"inject","z":"8d1c963e.8c0098","name":"","topic":"","payload":"","payloadType":"date","repeat":"1","crontab":"","once":false,"onceDelay":0.1,"x":330,"y":200,"wires":[["4ffd440a.eefd8c"]]},{"id":"4ffd440a.eefd8c","type":"debug","z":"8d1c963e.8c0098","name":"","active":true,"tosidebar":true,"console":true,"tostatus":false,"complete":"payload","targetType":"msg","x":680,"y":200,"wires":[]}]
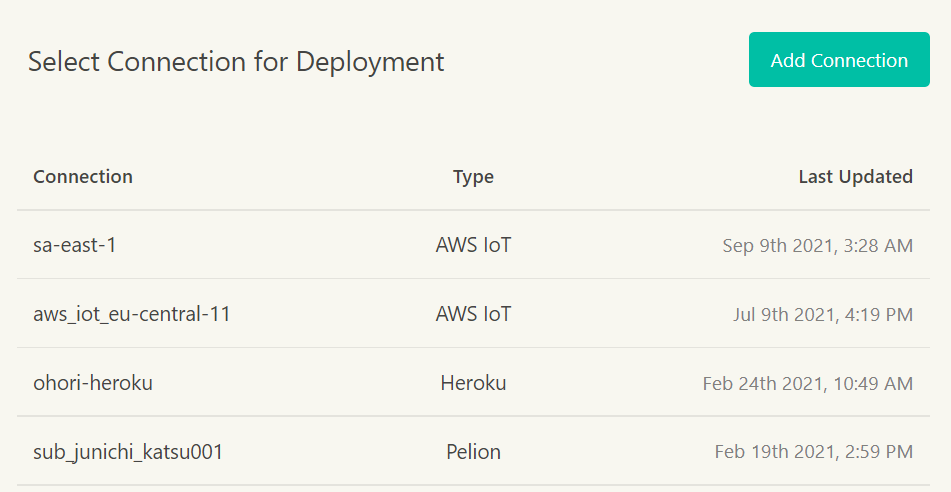
フローのOverview画面からデプロイをクリックしてConnection、Targetを選びデプロイします。(ライセンス付与しないとStatus欄はハイフンのままですが、デプロイ自体は問題ないです)
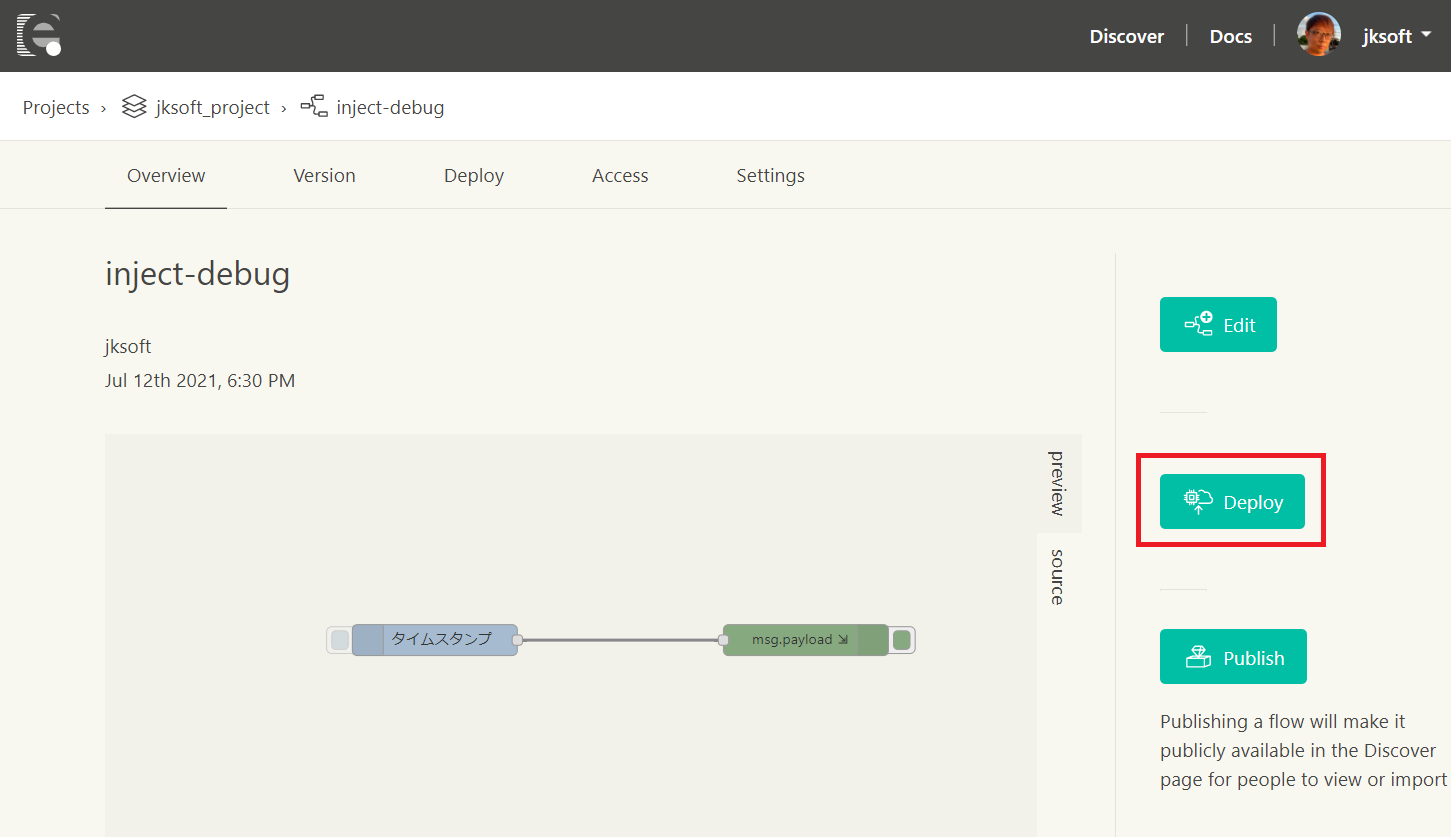

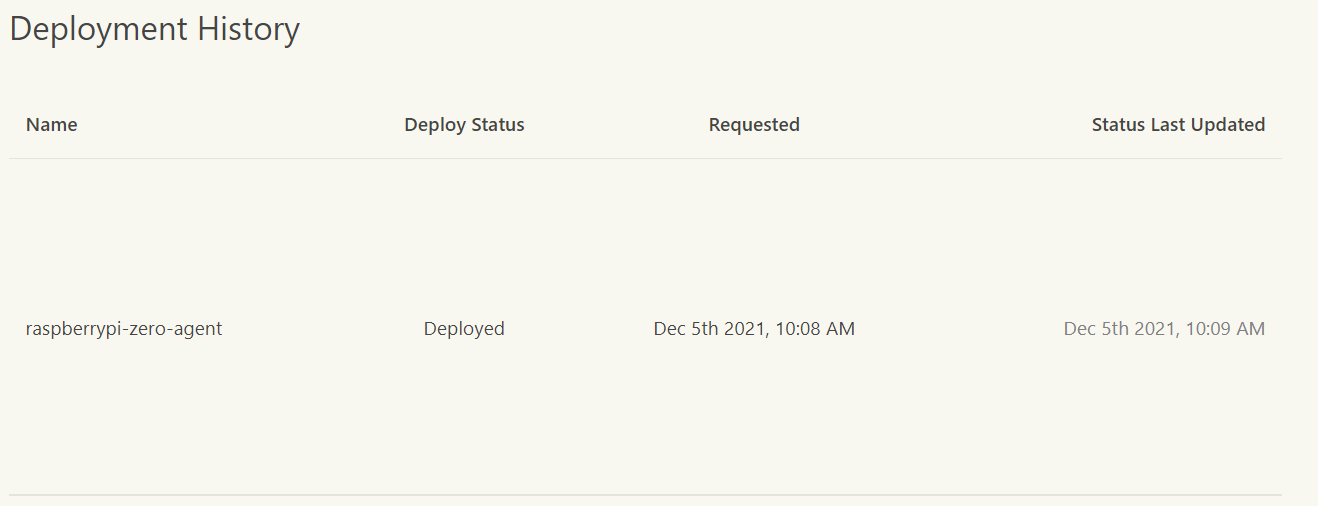
ちょっと時間はかかりますが、Deploy StatusがDeployingからDeployedになれば完了です。
動作確認
フローデプロイ後、以下のようにタイムスタンプが表示されればフローが動作しています。
service.node-red: 5 Dec 10:09:37 - [info] [debug:4ffd440a.eefd8c] 1638666577362
service.node-red: 5 Dec 10:09:38 - [info] [debug:4ffd440a.eefd8c] 1638666578346
service.node-red: 5 Dec 10:09:39 - [info] [debug:4ffd440a.eefd8c] 1638666579349
service.node-red: 5 Dec 10:09:40 - [info] [debug:4ffd440a.eefd8c] 1638666580350
service.node-red: 5 Dec 10:09:41 - [info] [debug:4ffd440a.eefd8c] 1638666581352
service.node-red: 5 Dec 10:09:42 - [info] [debug:4ffd440a.eefd8c] 1638666582353
最後に
とりあえず、enebular-agentが動作することが確認できたので、センサーなどをとりつけていろいろ試してみたいと思います。
従来のRaspberry Pi Zero Wにenebular-agentをインストールしてみましたが、Raspberry Pi Zero 2 Wももう少しで販売開始すると思いますので、手に入れたらこちらでも試してみたいと思います。
※本記事は、enebular公式に動作を保証するものではありません。


