まえがき
- Nimでターミナルで動くテトリス作りました
- インストール方法と起動方法を説明します
- 実装どうやったか部分的に見ます
動作
以下のデモの通りです。
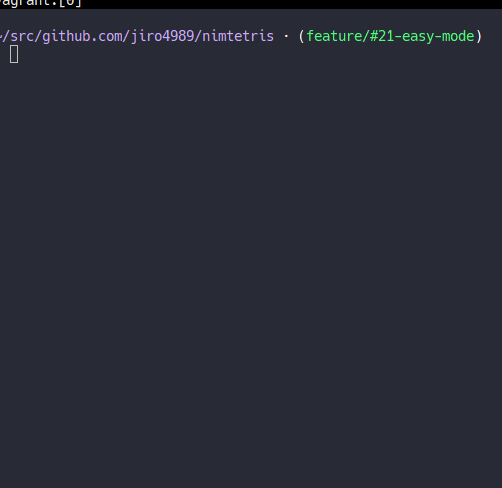
以下はLinuxでの動作。
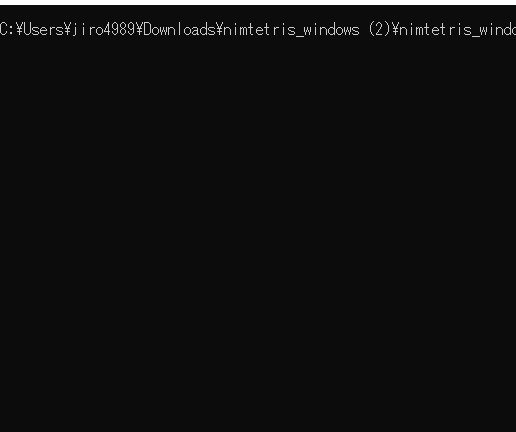
こちらはWindowsのコマンドプロンプトでの動作。
ソースコード
以下にすべてを置いてきた。
https://github.com/jiro4989/nimtetris
インストール
nimble packageに登録したので、以下のコマンドでインストールできます。
nimble install -Y nimtetris
あるいはReleasesから実行可能ファイルを落としてきてPATHを通します。
各プラットフォーム向けの実行可能ファイルを配布しているので、ランタイムなどは不要です。
https://github.com/jiro4989/nimtetris/releases
起動方法
特にオプションは設けていません。
端末上でコマンドを実行するだけです。
nimtetris
操作方法は画面に表示されているとおりです。
実装
UI
illwillというターミナルUIライブラリを使いました。
このライブラリはクロスプラットフォームサポートなので、WindowsでもキレイにUIを描画してくれるスグレモノです。
例えば以下のような簡単なコードでターミナルにUIを表現できます
import os
from terminal import eraseScreen
import illwill

const
  board = @[
    @[0, 0, 0, 0, 0, 0, 0, 0, 0, 0],
    @[0, 1, 1, 1, 1, 1, 1, 1, 1, 0],
    @[0, 1, 1, 1, 1, 1, 1, 1, 1, 0],
    @[0, 1, 1, 1, 1, 1, 1, 1, 1, 0],
    @[0, 1, 1, 1, 1, 1, 1, 1, 1, 0],
    @[0, 1, 1, 1, 1, 1, 1, 1, 1, 0],
    @[0, 1, 1, 1, 1, 1, 1, 1, 1, 0],
    @[0, 1, 1, 1, 1, 1, 1, 1, 1, 0],
    @[0, 1, 1, 1, 1, 1, 1, 1, 1, 0],
    @[0, 0, 0, 0, 0, 0, 0, 0, 0, 0],
  ]

illwillInit(fullscreen=true)

var terminalBuffer = newTerminalBuffer(terminalWidth(), terminalHeight())
for y, row in board:
  for x, cell in row:
    let color =
      case cell
      of 0: bgBlack
      of 1: bgWhite
      else: bgBlack
    terminalBuffer.setBackgroundColor(color)
    terminalBuffer.write(x*2, y, "--")
    terminalBuffer.resetAttributes()
    terminalBuffer.display()

sleep(4000)
illwillDeinit()
showCursor()
eraseScreen()
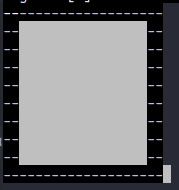
UIが表現できればあとはループで更新してあげればアニメーションになります。
先程のボード描画処理をさらに10回ループして、1ループごとにハイライトする位置をインクリメントするようにした実装が以下。
import os
from terminal import eraseScreen
import illwill

const
  board = @[
    @[0, 0, 0, 0, 0, 0, 0, 0, 0, 0],
    @[0, 1, 1, 1, 1, 1, 1, 1, 1, 0],
    @[0, 1, 1, 1, 1, 1, 1, 1, 1, 0],
    @[0, 1, 1, 1, 1, 1, 1, 1, 1, 0],
    @[0, 1, 1, 1, 1, 1, 1, 1, 1, 0],
    @[0, 1, 1, 1, 1, 1, 1, 1, 1, 0],
    @[0, 1, 1, 1, 1, 1, 1, 1, 1, 0],
    @[0, 1, 1, 1, 1, 1, 1, 1, 1, 0],
    @[0, 1, 1, 1, 1, 1, 1, 1, 1, 0],
    @[0, 0, 0, 0, 0, 0, 0, 0, 0, 0],
  ]

illwillInit(fullscreen=true)

var terminalBuffer = newTerminalBuffer(terminalWidth(), terminalHeight())
var highlightLineNo: int
for i in 0..10:
  for y, row in board:
    for x, cell in row:
      let color =
        case cell
        of 0: bgBlack
        of 1: bgWhite
        else: bgBlack
      if highlightLineNo != y:
        terminalBuffer.setBackgroundColor(color)
      else:
        terminalBuffer.setBackgroundColor(bgGreen)
      terminalBuffer.write(x*2, y, "--")
      terminalBuffer.resetAttributes()
      terminalBuffer.display()
  inc highlightLineNo
  sleep(1000)

sleep(4000)
illwillDeinit()
showCursor()
eraseScreen()
実行すると以下のようにアニメーションします。
こんな具合に、二次元配列でゲーム板を表現して、ループで再描画を繰り返すことで、ゲームのUIを表現します。
詳細はソースコード。
キー入力とスレッド
テトリスで一番むずかしいと思っているのは並列処理です。
画面再描画と、キー入力と、テトリミノが降下してくるという3つの処理が同時に進行するのをプログラムでどう表現するかです。
Nimではthreadpoolとlocksモジュールを使用して複数スレッド起動することで実現できます。
以下が複数スレッドで処理している部分の抜粋です。
import os, threadpool, locks
from terminal import eraseScreen
from strformat import `&`

# 外部ライブラリ
import illwill

# 自前のモジュール。今回は省略
import nimtetrispkg/game

var
  thr: array[2, Thread[int]]
  L: Lock

# 自前。ゲーム全体の状態を管理
var gameobj = Game()
gameobj = newGame()

proc exitProc() {.noconv.} =
  ## 終了処理
  illwillDeinit()
  showCursor()
  eraseScreen()

proc waitKeyInput(n: int) {.thread.} =
  # キー入力待ち用のプロシージャ
  while true:
    acquire(L)
    {.gcsafe.}:
      # テトリミノが画面上部に到達した場合はこっちのブロックで処理が終了
      if gameobj.isStopped:
        release(L)
        break

      # illwillのプロシージャ。キー入力を得る
      var key = getKey()
      case key
      of Key.None: discard
      of Key.Escape:
        # Escでゲームを終了する
        gameobj.stop()
        release(L)
        break
      of Key.U, Key.Q:
        gameobj.rotateLeft()
      of Key.O, Key.E:
        gameobj.rotateRight()
      of Key.J, Key.S:
        gameobj.moveDown()
      of Key.H, Key.A:
        gameobj.moveLeft()
      of Key.L, Key.D:
        gameobj.moveRight()
      of Key.Space, Key.Enter:
        gameobj.moveDownToBottom()
      else: discard
    release(L)
    sleep 10

proc startMinoDownClock(n: int) {.thread.} =
  # 時間経過でテトリミノが降下する処理
  while true:
    acquire(L)
    {.gcsafe.}:
      if gameobj.isStopped:
        release(L)
        break
      if gameobj.canMoveDown():
        gameobj.moveDown()
      else:
        gameobj.setCurrentMino()
        gameobj.setRandomMino()
      gameobj.deleteFilledRows()
    release(L)
    sleep sleepTime

proc main(): int =
  initLock(L)
  createThread(thr[0], waitKeyInput, 0)
  createThread(thr[1], startMinoDownClock, 0)
  while not gameobj.isStopped:
    gameobj.redraw() # ゲームUIの再描画 (自前)
    sleep(100)
  joinThreads(thr)
  sync()
  exitProc()

when isMainModule and not defined modeTest:
  quit main()
main処理が始まった時にLockを初期化します。
次にスレッドを2つ起動します。
それぞれキー入力用のスレッド、テトリミノの降下用のスレッドです。
その後メインスレッドでは画面再描画の無限ループが処理され、
メインスレッドが終了しないようにします。
別スレッドで呼び出すプロシージャを定義する際の注意点は3つあります。
- プロシージャ定義に
{.thread.}プラグマを指定する - プロシージャ外の変数(グローバル変数)にアクセスする際は
{.gcsafe.}プラグマブロックを指定する -
{.gcsafe.}の直前にacquireでLockし、別スレッド処理が割り込まないようにする。処理が完了したらreleaseでLockを開放する
という感じです。
詳細はソースコードを参照。
まとめ
- Nimで作ったテトリスを紹介した
- 実装の結果得られた知見を共有した
- ターミナルでUIを表現する方法、ライブラリ
- 並列処理、スレッド処理のNimでの実装方法
テトリスは並列処理を学ぶのにとても良い題材だと思うので、
並列処理を勉強したいときはテトリスを実装してみるのが良いと思います。
過去にGoでもテトリスを実装しました。
https://github.com/jiro4989/tetris
以上です。