はじめに
生成AIにおいて、最近話題になっているGoogle Gemini Proですが、2024年始めに予定されている一般公開までは試用期間として無料利用できるようです。
※1分あたり60リクエストまでという制限は付いております。
有料化される前に、APIを叩いて遊んでみようということで、今回はReactで簡単なチャットBOTを作成していこうと思います。
アプリ概要
- ユーザーの文字入力に対して、Gemini ProのAPIから応答を得て、回答を表示する
- 会話の履歴が画面上に残る(※会話の履歴はAIに記憶させておりません)
実装方針
-
TypeScriptを利用する - レイアウトの装飾は
emotionによって行う - APIと通信するために
axiosを使用する - 回答をマークダウン形式で表示させるために
react-markdownを使用する- Gemini Proの出力はマークダウン形式で返ってくるため、変換処理を入れないと表示がおかしくなる場合がある(例:
**が太字表示ではなく、そのまま文字として表示される)
- Gemini Proの出力はマークダウン形式で返ってくるため、変換処理を入れないと表示がおかしくなる場合がある(例:
プロジェクト作成
npx create-react-app ai-chat-app --template typescript
でプロジェクトを作成し、必要なライブラリをインストールしていきます。
npm install axios
npm install @emotion/css
npm install react-markdown
API keyの取得
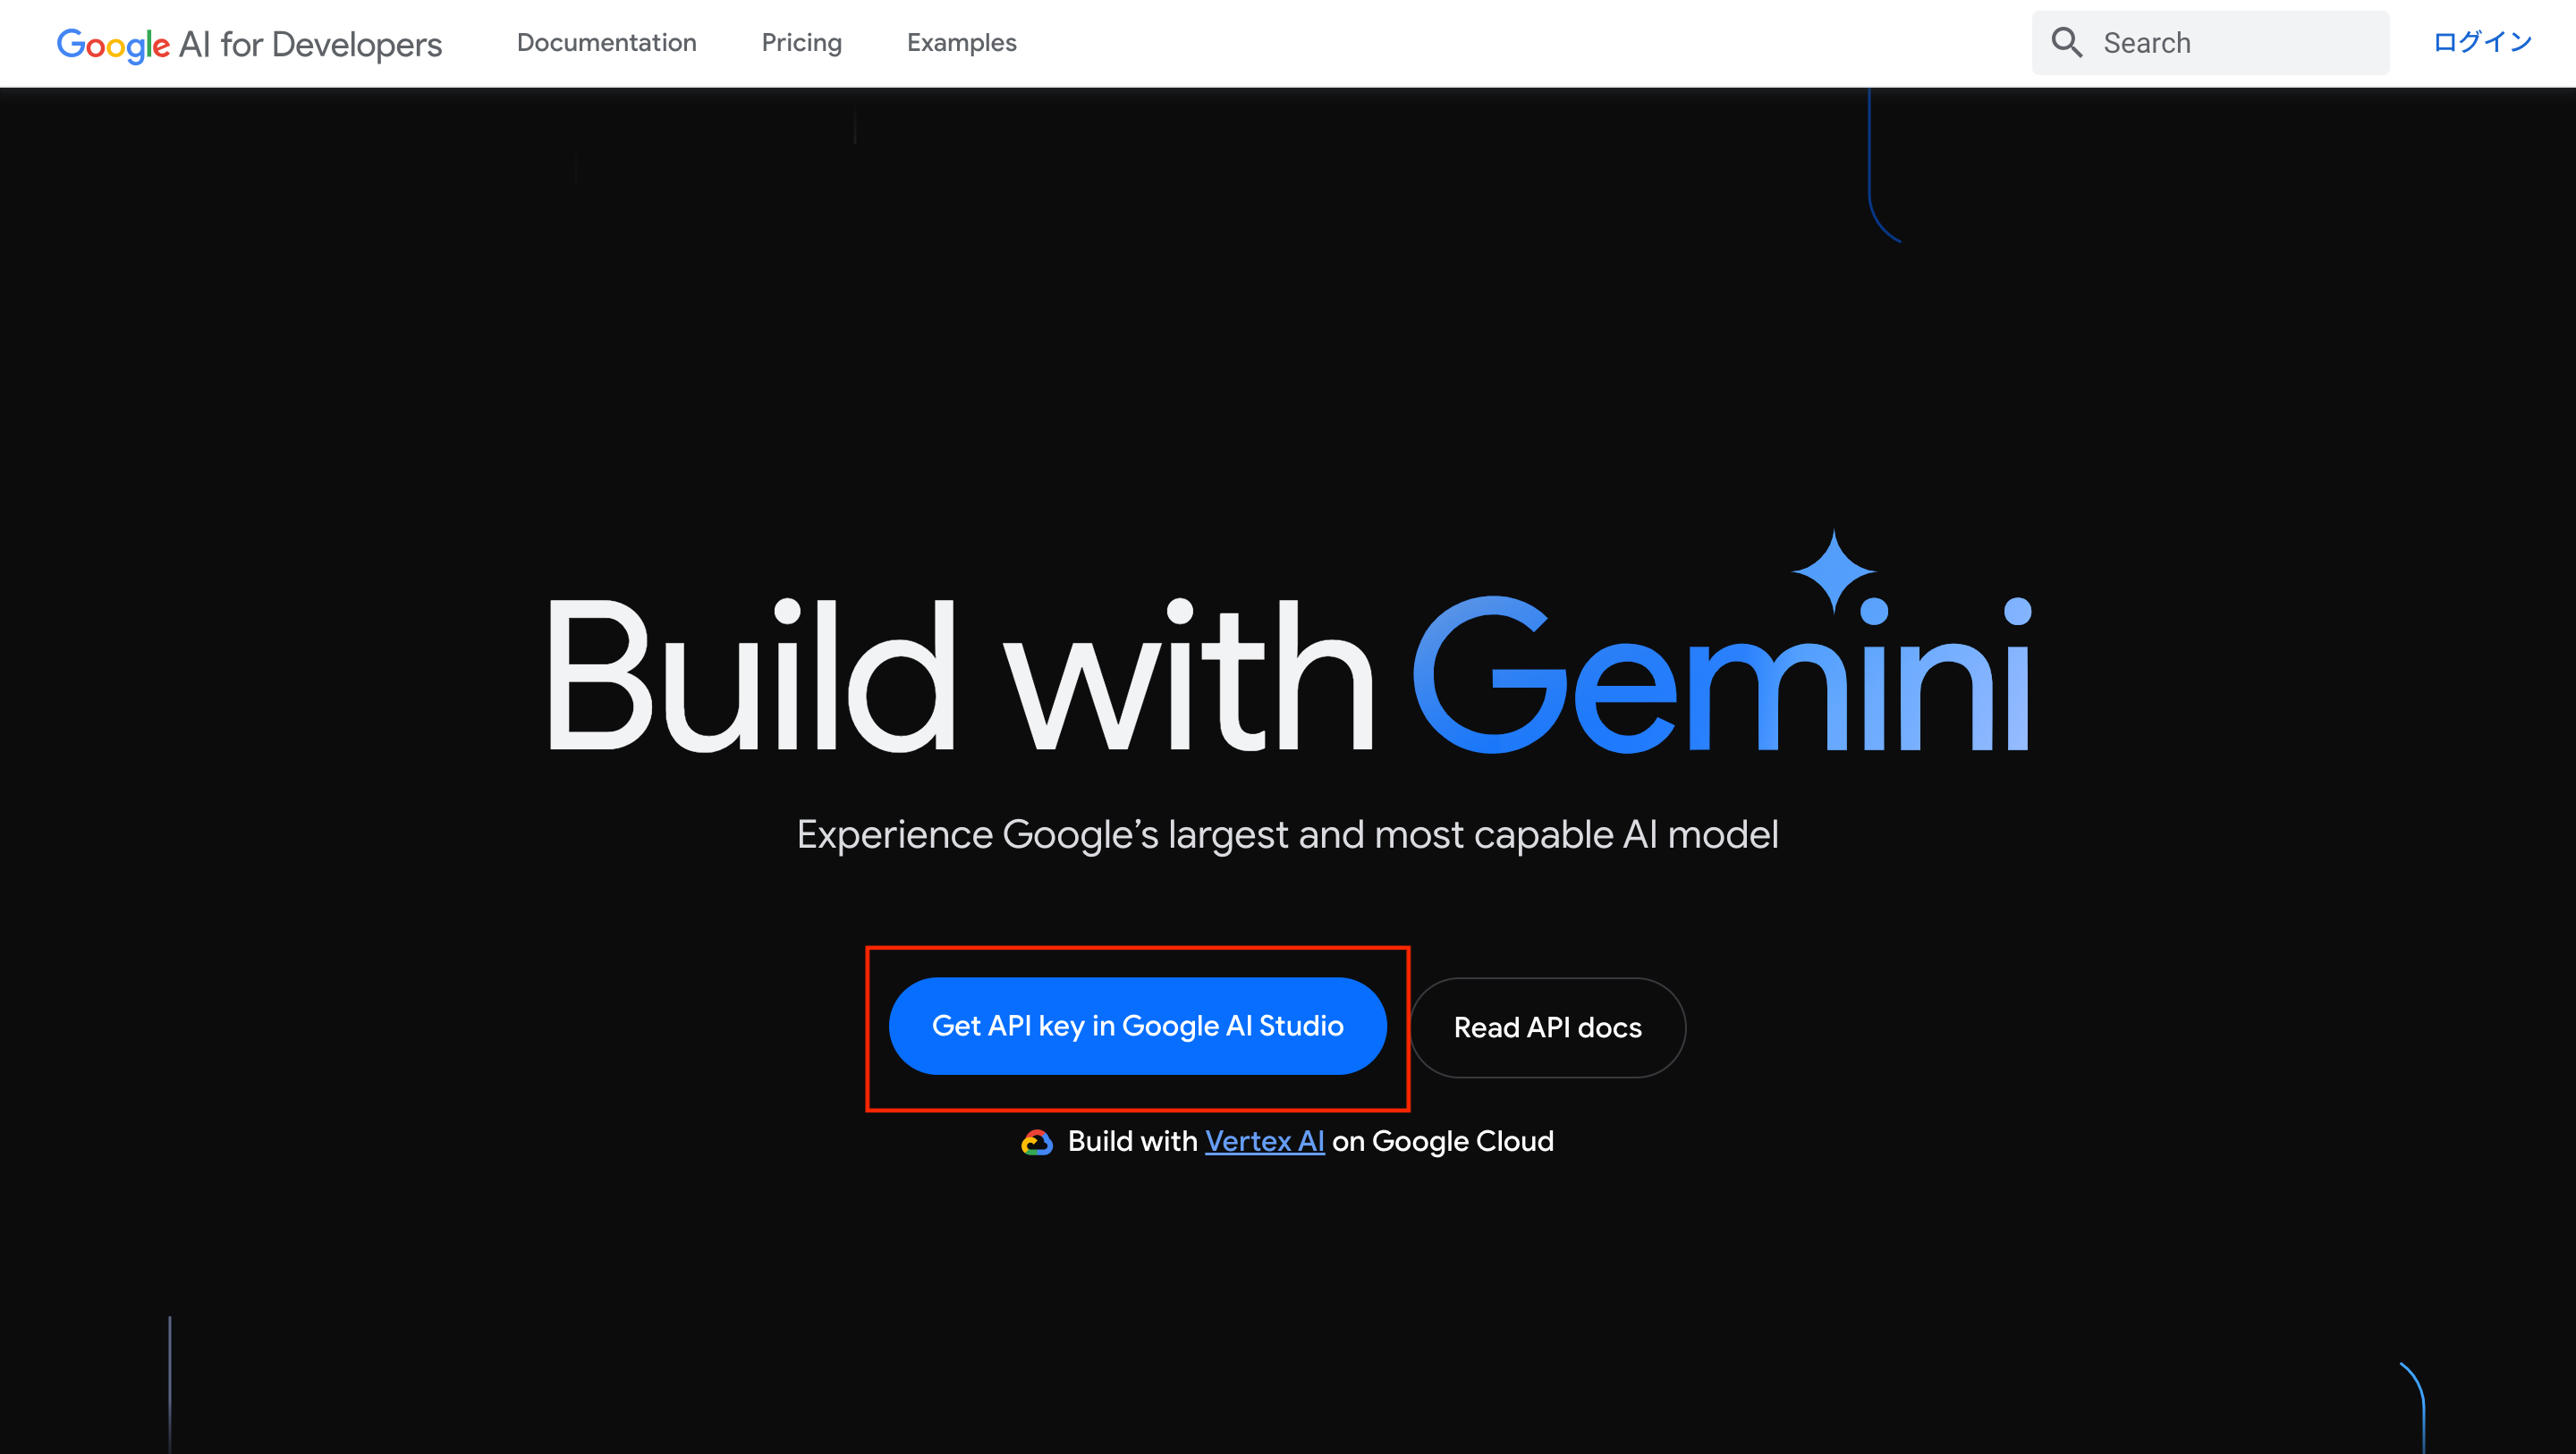
Gemini ProのAPIを実行するには、Google AI Studio上でAPI keyを取得する必要があります。まずは
へアクセスし、Get API key in Google Studioを押下します。
Google AI Studioの画面が開くので、 Get API keyから発行することができます。
キーは一度のみ表示されるので、きちんとコピーしておきましょう。
ソースコード
まず、API keyはGit管理したくないので、.envと.gitignoreを作成し、ローカルで環境変数として管理します。
keyが漏洩すると悪用されうるので注意しましょう。
REACT_APP_GOOGLE_API_KEYには、自分で取得した正しい値を入れて下さい。
REACT_APP_GOOGLE_API_KEY=XXXXX
.env
ここまで準備ができたら、あとはアプリ概要に沿った実装を行っていきます。
今回は、以下のようにChat.tsxとApp.tsxを実装してみました。
src/Chat.tsx
import { useState } from "react";
import { css } from "@emotion/css";
import axios from "axios";
import ReactMarkdown from "react-markdown";

interface ChatMessage {
  role: string;
  content: string;
}

interface Part {
  text: string;
}

const chatContainerStyle = css`
  display: flex;
  flex-direction: column;
  height: 100vh;
  background-color: #f5f5f5;
`;

const chatHistoryStyle = css`
  overflow-y: auto;
  flex-grow: 1;
  padding: 20px;
  margin-bottom: 60px;
`;

const userMessageStyle = css`
  margin-bottom: 10px;
  padding: 10px;
  background-color: #e1f5fe;
  border-radius: 10px;
  max-width: 70%;
  align-self: flex-end;
`;

const botMessageStyle = css`
  margin-bottom: 10px;
  padding: 10px;
  background-color: #ede7f6;
  border-radius: 10px;
  max-width: 70%;
  align-self: flex-start;
`;

const inputStyle = css`
  flex: 1;
  padding: 10px 15px;
  font-size: 16px;
  border: 2px solid #dedede;
  border-radius: 4px;
  margin-right: 10px;
`;

const buttonStyle = css`
  padding: 10px 20px;
  background-color: #5c6bc0;
  color: white;
  font-size: 16px;
  border: none;
  border-radius: 4px;
  cursor: pointer;
  &:hover {
    background-color: #3949ab;
  }
`;

const inputAreaStyle = css`
  display: flex;
  justify-content: space-between;
  padding: 10px;
  background-color: #fafafa;
  position: fixed;
  bottom: 0;
  left: 0;
  right: 0;
  box-shadow: 0 -1px 10px rgba(0, 0, 0, 0.1);
`;

const Chat = () => {
  const [input, setInput] = useState<string>("");
  const [chatHistory, setChatHistory] = useState<ChatMessage[]>([]);

  const sendMessage = async () => {
    const userMessage: ChatMessage = { role: "user", content: input };
    // 画面上の会話履歴を更新
    const updatedChatHistory = [...chatHistory, userMessage];

    try {
      const response = await axios.post(
        `https://generativelanguage.googleapis.com/v1beta/models/gemini-pro:generateContent?key=${process.env.REACT_APP_GOOGLE_API_KEY}`,
        {
          contents: [{ parts: [{ text: input }] }], // 現在のメッセージのみを送信
        },
        {
          headers: {
            "Content-Type": "application/json",
          },
        }
      );

      // APIからの応答を処理
      const botResponse = response.data;
      let botMessageContent = "";

      if (
        botResponse &&
        botResponse.candidates &&
        botResponse.candidates.length > 0
      ) {
        const firstCandidate = botResponse.candidates[0].content;
        if (
          firstCandidate &&
          firstCandidate.parts &&
          firstCandidate.parts.length > 0
        ) {
          botMessageContent = firstCandidate.parts
            .map((part: Part) => part.text)
            .join("\n");
        }
      }

      const botMessage: ChatMessage = {
        role: "system",
        content: botMessageContent,
      };

      // 会話履歴を更新(ユーザーとボットのメッセージを含む)
      setChatHistory([...updatedChatHistory, botMessage]);
    } catch (error) {
      console.error("Google API error:", error);
    }

    setInput("");
  };

  const renderChatMessage = (message: ChatMessage) => {
    if (message.role === "system") {
      // マークダウン形式のメッセージをHTMLに変換して表示
      return <ReactMarkdown>{message.content}</ReactMarkdown>;
    }
    return <div>{message.content}</div>; // 通常のテキストメッセージ
  };

  return (
    <div className={chatContainerStyle}>
      <div className={chatHistoryStyle}>
        {chatHistory.map((chat, index) => (
          <div
            key={index}
            className={
              chat.role === "user" ? userMessageStyle : botMessageStyle
            }
          >
            {renderChatMessage(chat)}
          </div>
        ))}
      </div>
      <div className={inputAreaStyle}>
        <input
          type="text"
          value={input}
          onChange={(e) => setInput(e.target.value)}
          className={inputStyle}
        />
        <button onClick={sendMessage} className={buttonStyle}>
          Send
        </button>
      </div>
    </div>
  );
};

export default Chat;
src/App.tsx
import { css } from "@emotion/css";
import Chat from "./Chat";

const headerStyle = css`
  padding: 15px;
  background-color: #5c6bc0;
  color: white;
  text-align: center;
  font-size: 24px;
  font-weight: bold;
  box-shadow: 0 2px 4px rgba(0, 0, 0, 0.2);
`;

const App = () => {
  return (
    <div>
      <header className={headerStyle}>Gemini Chatbot</header>
      <Chat />
    </div>
  );
};

export default App;
実装は以下の公式ドキュメントを参考にしております。
補足
Reactで環境変数を追加する際には、先頭にREACT_APP_を付けないと値を取得できません。
例えば、.envで
GOOGLE_API_KEY=xxx
として、
console.log(process.env.GOOGLE_API_KEY);
を確認すると、値はundefinedとなってしまいます。環境変数名にはREACT_APP_のプレフィックスを忘れずに付けましょう。
完成
npm start
で画面を確認します。
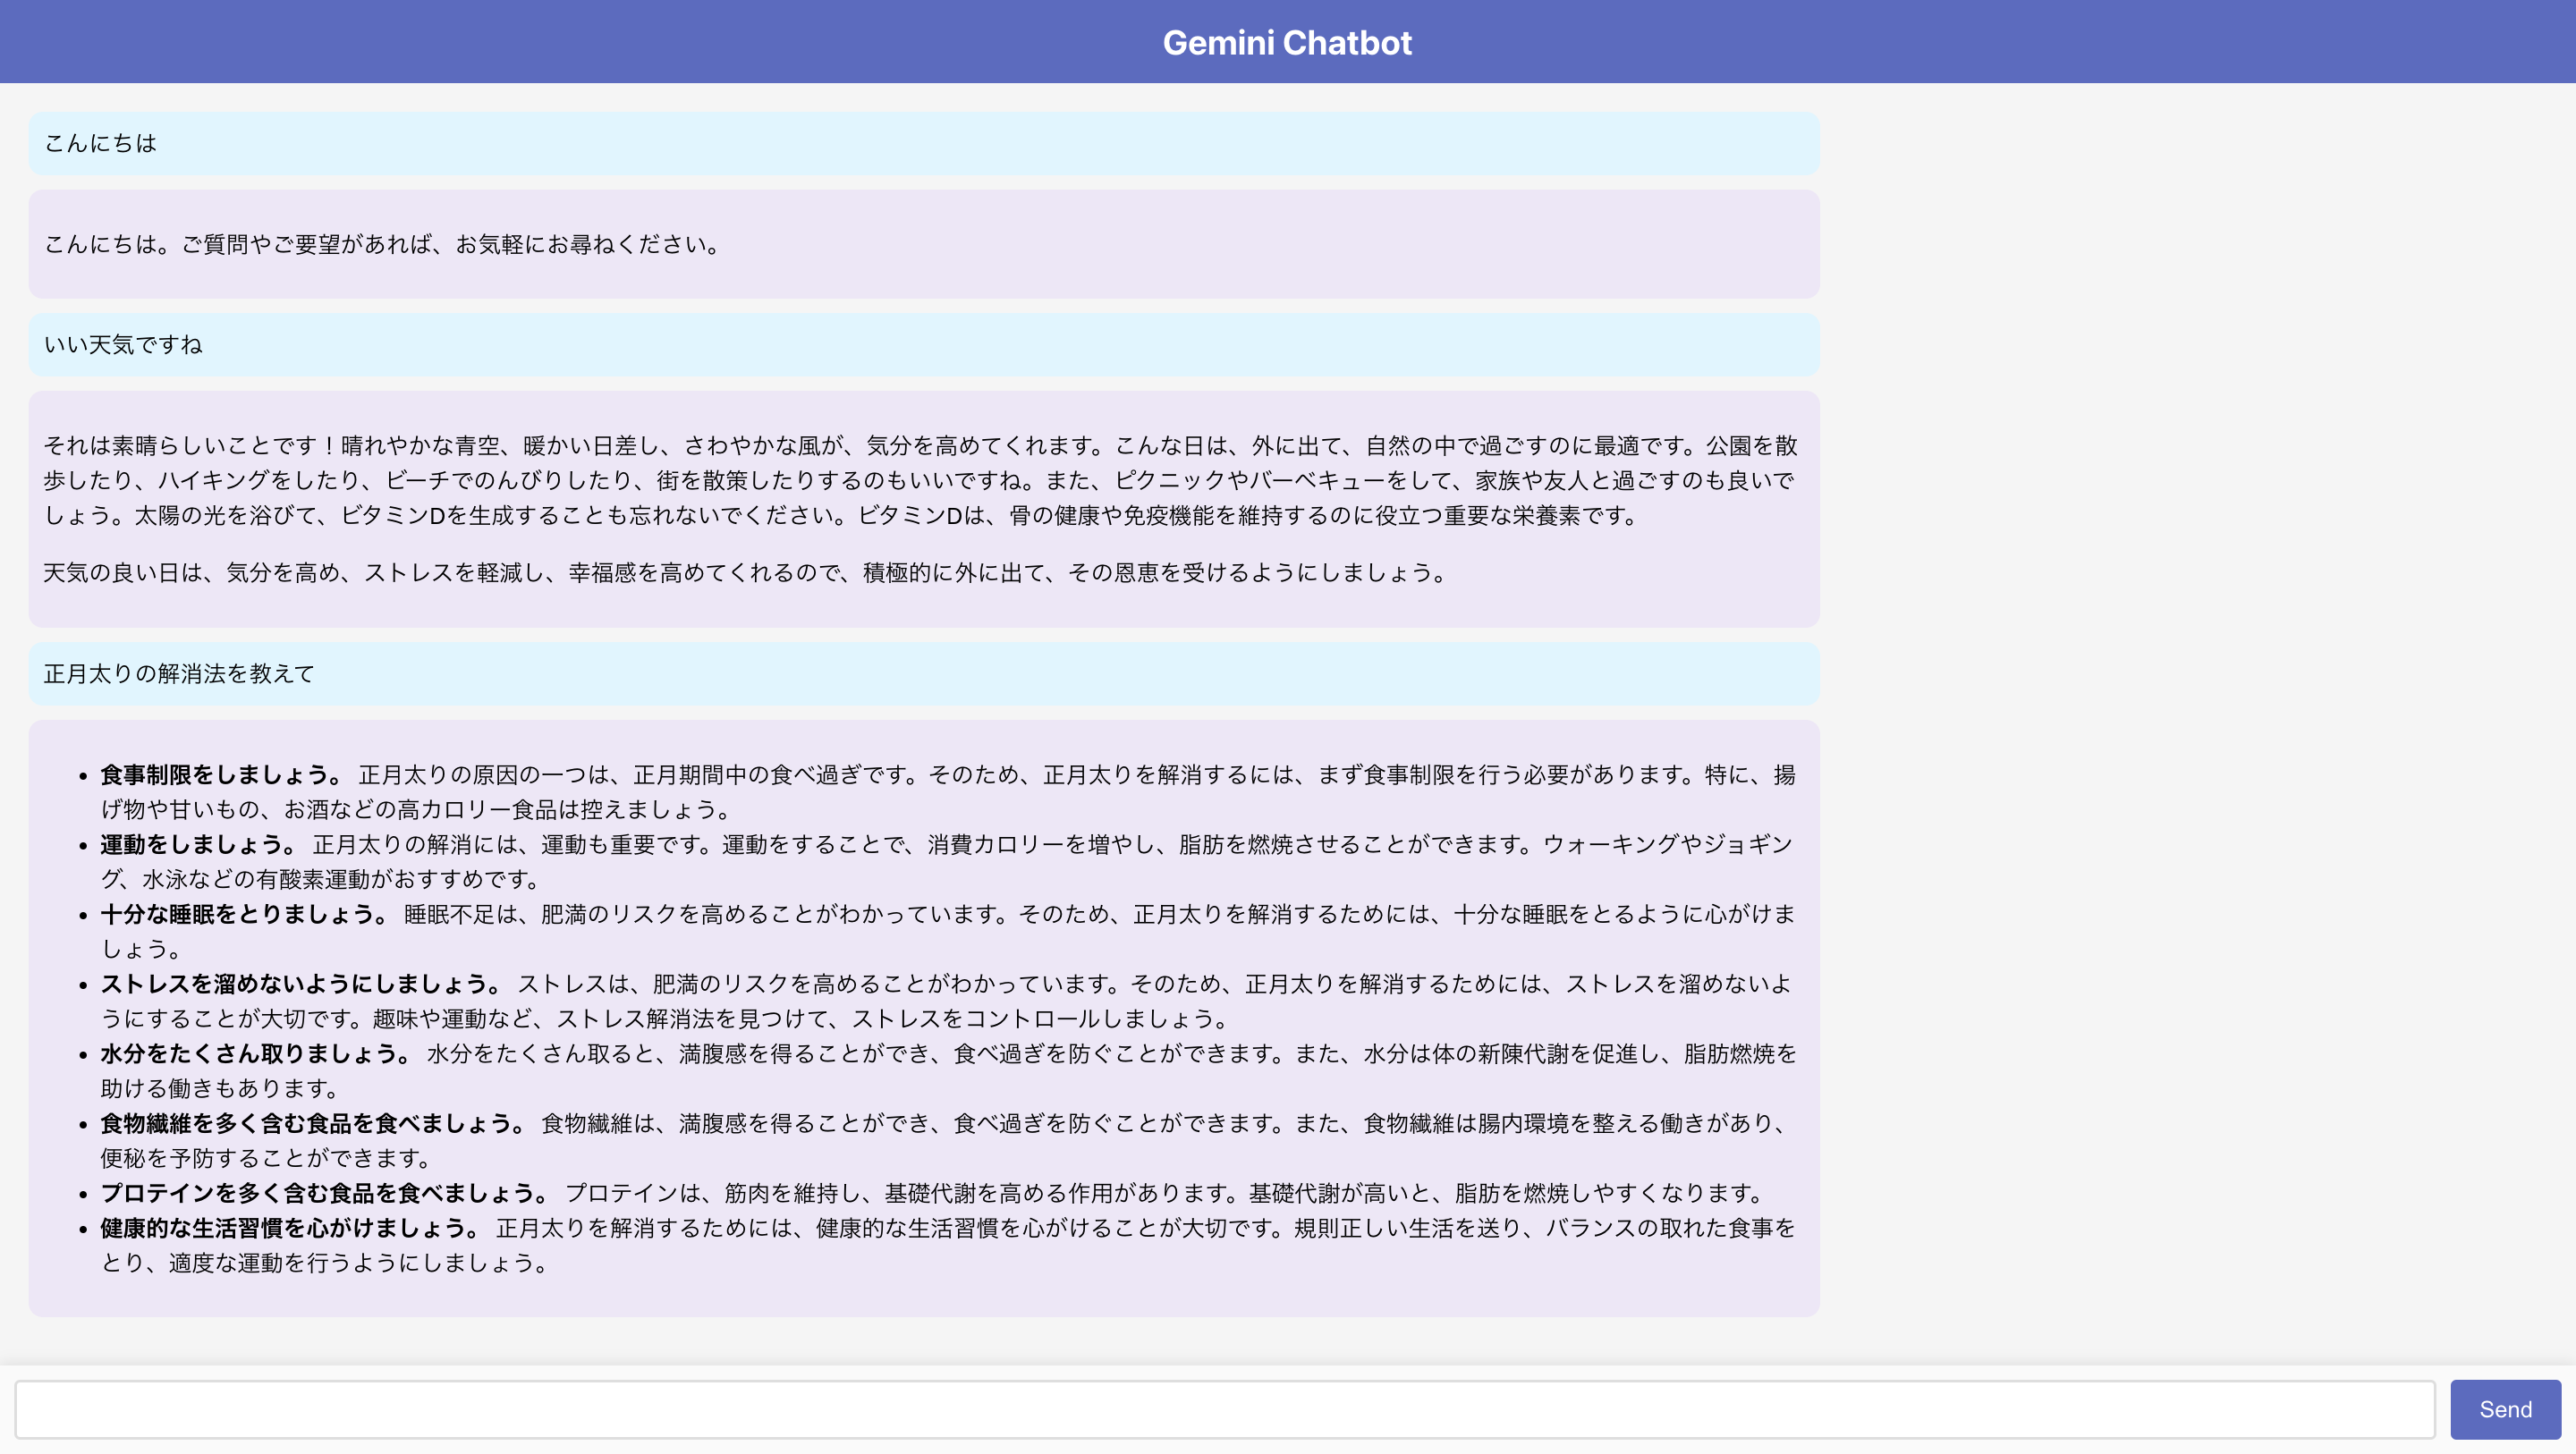
完成形は以下のようになりました。
おまけ
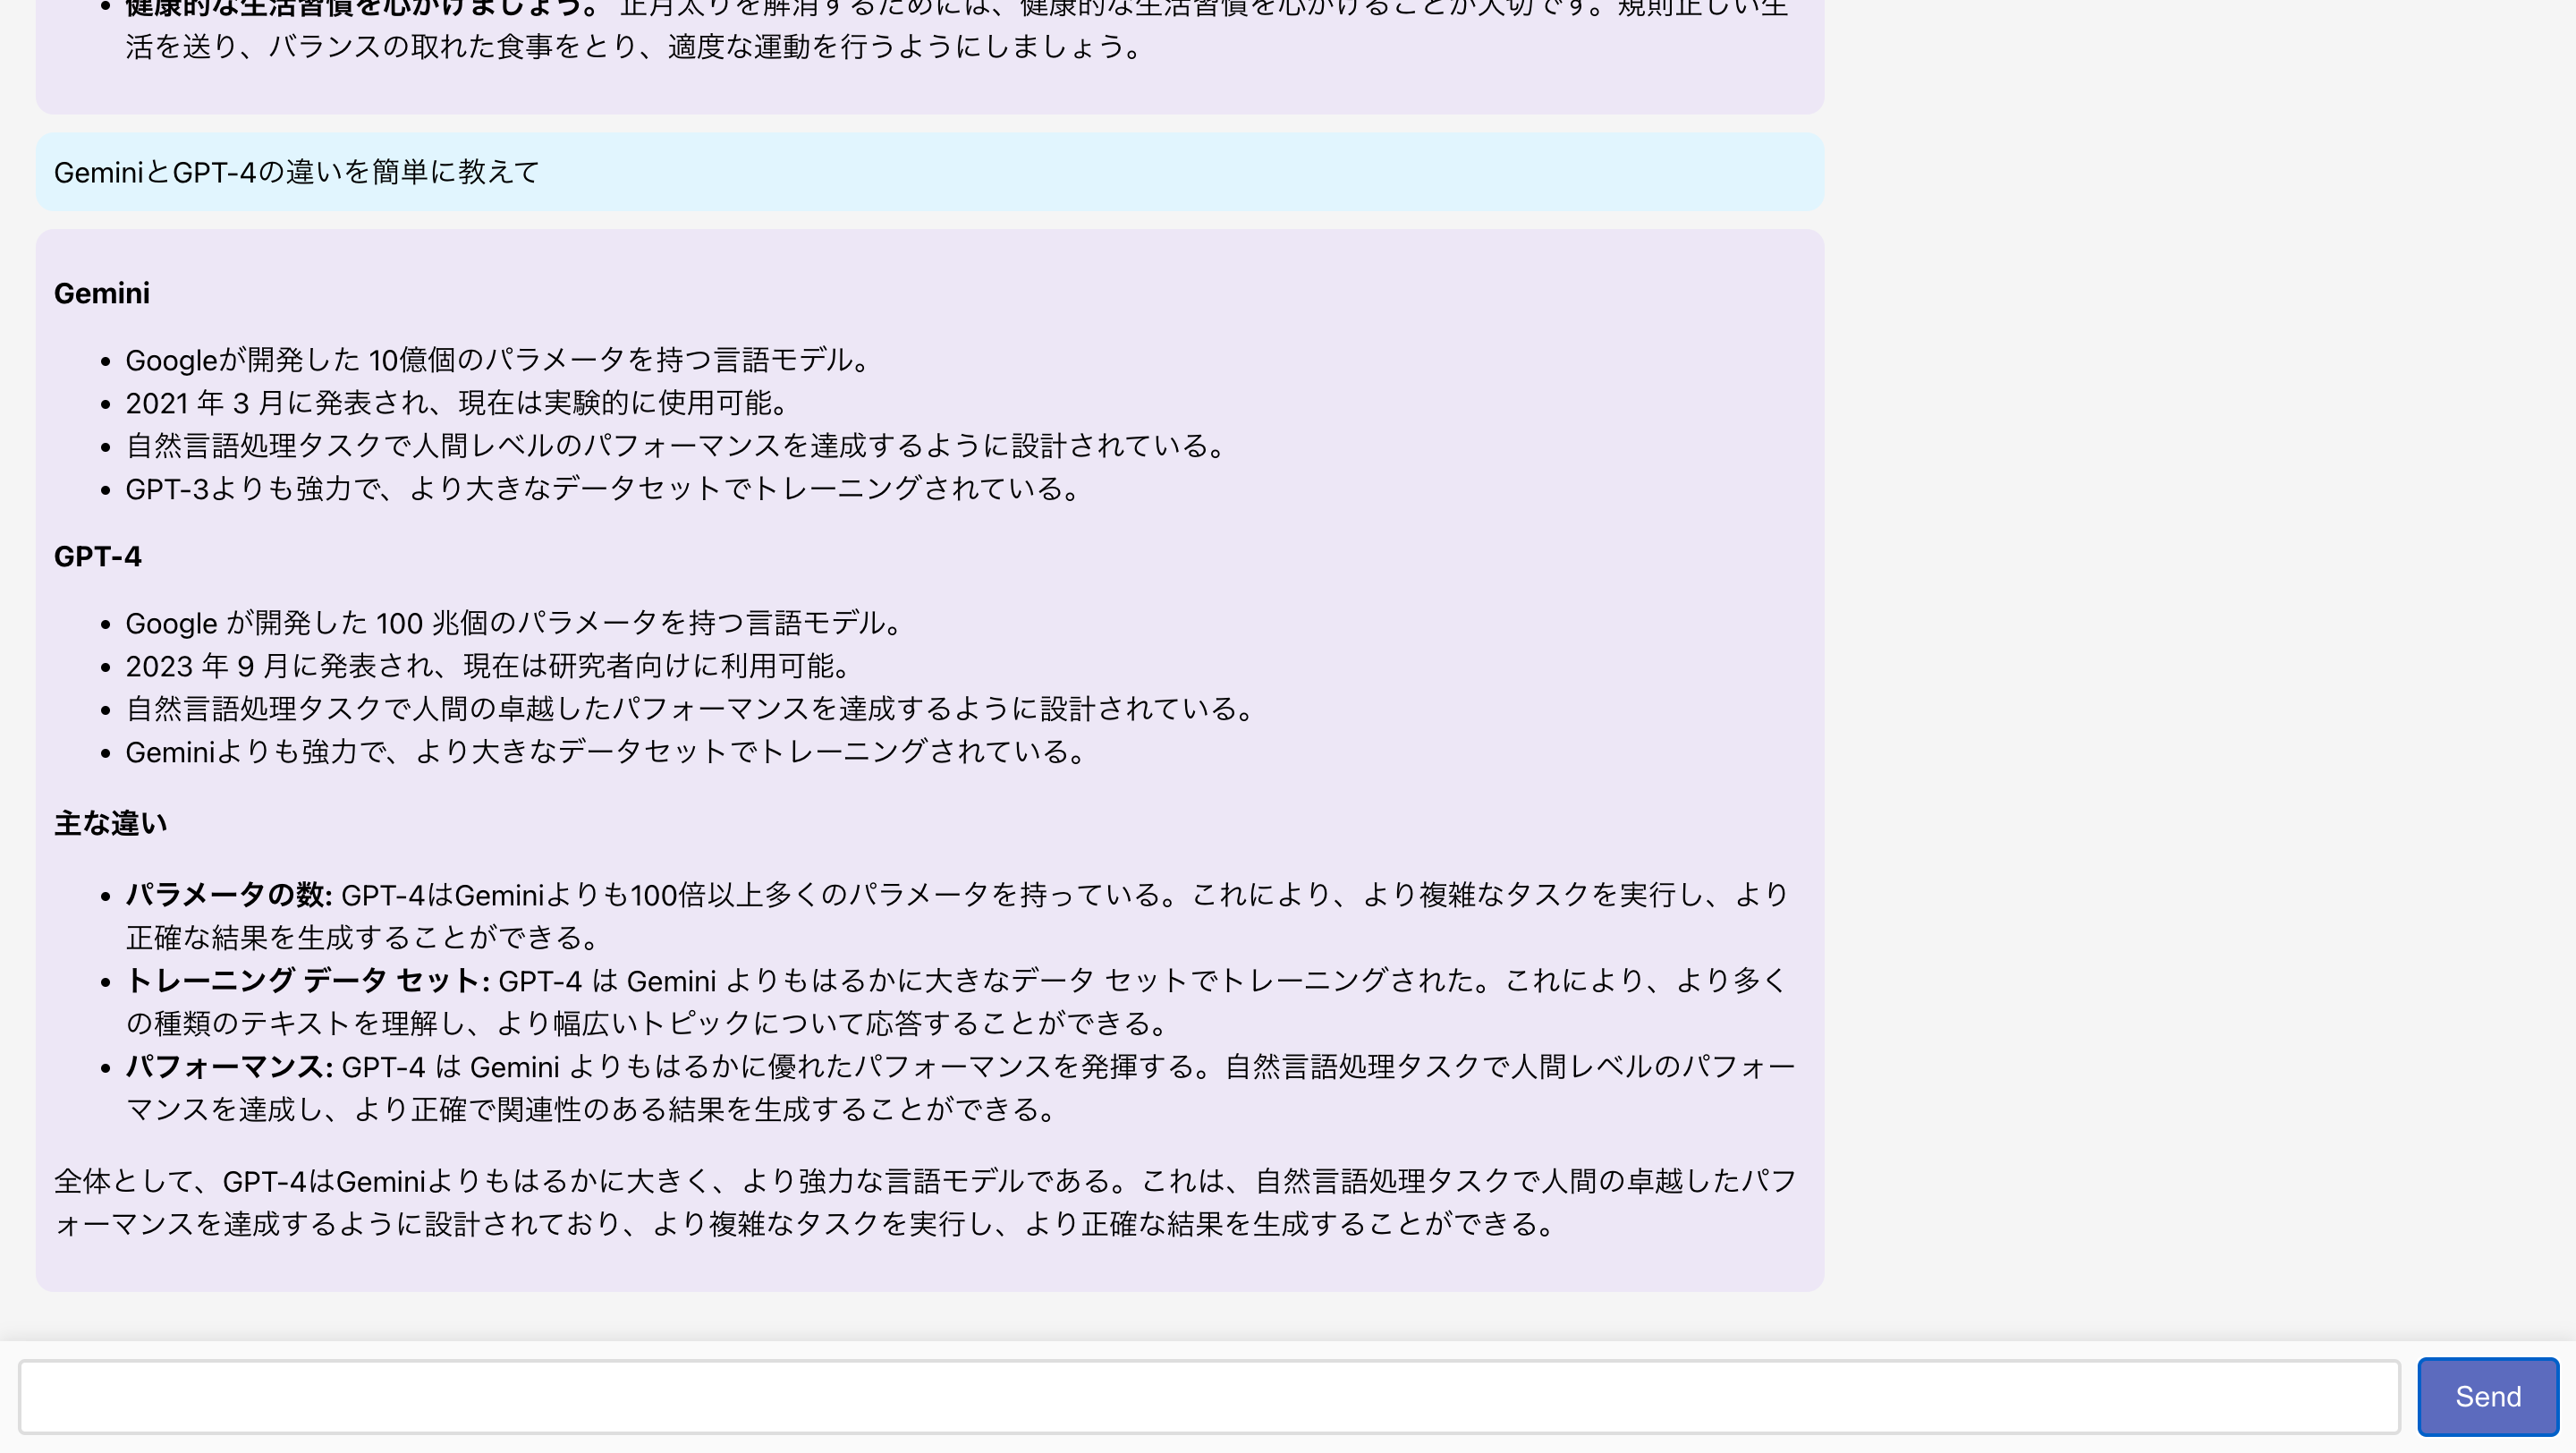
GeminiとGPT-4の違いを尋ねてみました。
「GPT-4 は Gemini よりもはるかに優れたパフォーマンスを発揮する」との回答で、GeminiはGPT-4をヨイショしてました。
最後に
今回はGemini Pro APIを使って、テキスト入力による簡単なチャットBOTを作成してみました。
Gemini Proはそろそろ有料化されると思うので、皆さんも無料利用が可能な今のうちに触っておくと良いかと思います。
本記事がどなたかの参考になれば幸いです。
以上


