Flutterのボタン大集合!使い分けマスターガイド 🎨
はじめに 👋
アプリには色々なボタンが必要ですよね:
- 普通のボタン
- 浮き出たボタン
- アイコンボタン
- メニューボタン
Flutterには様々な種類のボタンが用意されています。
それぞれの特徴を見ていきましょう!
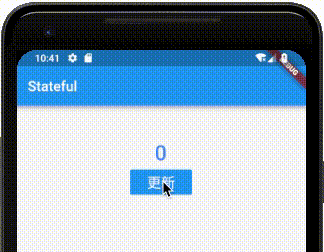
1. シンプルなボタン(FlatButton) 🔲
FlatButton(
  onPressed: () {
    print('押されました!');
  },
  color: Colors.blue,
  child: Text(
    '更新',
    style: TextStyle(
      color: Colors.white,
      fontSize: 20.0
    ),
  ),
)
カスタマイズ例(角丸ボタン):
FlatButton(
  onPressed: () {},
  color: Colors.blue,
  shape: RoundedRectangleBorder(
    borderRadius: BorderRadius.circular(20.0)
  ),
  child: Text('更新'),
)
2. 立体的なボタン(RaisedButton) 🔳
RaisedButton(
  onPressed: () {
    print('押されました!');
  },
  color: Colors.blue,
  child: Text(
    'クリック',
    style: TextStyle(
      color: Colors.white,
      fontSize: 20.0
    ),
  ),
)
3. 枠線のボタン(OutlineButton) ⬜️
OutlineButton(
  onPressed: () {},
  borderSide: BorderSide(color: Colors.blue),
  child: Text(
    'クリック',
    style: TextStyle(
      color: Colors.blue,
      fontSize: 20.0
    ),
  ),
)
4. アイコンボタン(IconButton) 🔘
IconButton(
  icon: Icon(Icons.add_circle),
  iconSize: 50,
  color: Colors.blue,
  onPressed: () {
    print('アイコンが押されました');
  },
)
5. 浮き出るボタン(FloatingActionButton) 💫
FloatingActionButton(
  onPressed: () {},
  backgroundColor: Colors.blue,
  child: Icon(Icons.add)
)
横長バージョン:
FloatingActionButton.extended(
  onPressed: () {},
  backgroundColor: Colors.blue,
  icon: Icon(Icons.add),
  label: Text('新規作成')
)
6. メニューボタン(PopupMenuButton) 📋
PopupMenuButton<String>(
  onSelected: (String value) {
    print('選択された値: $value');
  },
  itemBuilder: (BuildContext context) => [
    PopupMenuItem(
      value: "1",
      child: Text('メニュー1'),
    ),
    PopupMenuItem(
      value: "2",
      child: Text('メニュー2'),
    ),
  ],
)
7. ドロップダウンボタン(DropdownButton) 📝
String _selectedValue = 'りんご';
List<String> _items = ['りんご', 'バナナ', 'オレンジ'];

DropdownButton<String>(
  value: _selectedValue,
  onChanged: (String? newValue) {
    setState(() {
      _selectedValue = newValue!;
    });
  },
  items: _items.map<DropdownMenuItem<String>>((String value) {
    return DropdownMenuItem<String>(
      value: value,
      child: Text(value),
    );
  }).toList(),
)
やってみよう! 💪
- カウンターアプリを作る
int _count = 0;

Column(
  children: [
    Text('$_count', style: TextStyle(fontSize: 40)),
    RaisedButton(
      onPressed: () {
        setState(() {
          _count++;
        });
      },
      child: Text('カウントアップ'),
    )
  ],
)
- いいねボタンを作る
IconButton(
  icon: Icon(
    _isLiked ? Icons.favorite : Icons.favorite_border,
    color: _isLiked ? Colors.red : Colors.grey,
  ),
  onPressed: () {
    setState(() {
      _isLiked = !_isLiked;
    });
  },
)
困ったときは? 🆘
- ボタンが押せない
→ onPressedがnullになっていないか確認 - 色が変わらない
→ colorプロパティを確認 - テキストが見えない
→ TextStyleの色を確認
ボタンの選び方 🎯
- 普通のボタン → FlatButton
- 目立たせたい → RaisedButton
- シンプルに枠だけ → OutlineButton
- アイコンだけ欲しい → IconButton
- 右下に浮かせたい → FloatingActionButton
- メニューが欲しい → PopupMenuButton
- 選択肢から選ぶ → DropdownButton

