はじめに
CloudFormationはAWSサービスの外側を作るものですが、
最初からテーブルの入ったRDSを作れないかと考え以下の方法で作成しました。
① CloudFormationでRDSの作成
② CloudFormationからLambdaの実行
③ LambdaでRDSにテーブル情報の投入

CloudFormation用yamlファイルの中身と解説
まず、CloudFormationで実行されるyamlファイルについてですが、
ファイルの中身は以下のようになっております。
Resources:
  DBInstance:
    Type: AWS::RDS::DBInstance
    Properties:
      DBInstanceIdentifier: "RDSName" #この名前を使ってLambdaはエンドポイント名を取得します
      DBName: jimbot3rds
      Engine: MySQL
      MasterUsername: jimbot3
      DBInstanceClass: db.t2.micro
      AllocatedStorage: '20'
      MasterUserPassword: xxxxxxxx
      VPCSecurityGroups:
      - !GetAtt DBSecurityGroup.GroupId

  Mylambda:
    Type: "Custom::ExcuteLambda"
    Version: "1.0"
    Properties:
      ServiceToken: "arn:aws:lambda:ap-northeast-1:XXXX~~~~" #ここにLambdaのARNを入力します
      RequestType: Create
    DependsOn: DBInstance

  WebServerSecurityGroup:
    Type: AWS::EC2::SecurityGroup
    Properties:
      GroupDescription: 22only
      SecurityGroupIngress:
      - IpProtocol: tcp
        FromPort: '22'
        ToPort: '22'
        CidrIp: "0.0.0.0/0"

  DBSecurityGroup:
    Type: AWS::EC2::SecurityGroup
    Properties:
      GroupDescription: Open database for access
      SecurityGroupIngress:
      - IpProtocol: tcp
        FromPort: '3306'
        ToPort: '3306'
        CidrIp: 0.0.0.0/0
解説1
DBInstanceIdentifier:の箇所で作成するRDSの名前を決めます。
この名前から後に記載しているLambdaでRDSのエンドポイントを拾います。
解説2
Mylambda: ~の箇所がカスタムリソースの定義で、Lambdaの実行を定義しています。
また、RDSが作成された後にLambdaを実行する必要があるためDependsOn: DBInstanceとしました。
※ファイルはこちらのAmazon RDS テンプレートスニペットを参考にしています。
Lambdaの事前準備
今回のLambdaは、pymysqlがインストール状態である環境でなければ実行できないため、
以下の手順でCloud9上でpymysqlをインストールし、そこからLambdaのコンソールに環境をデプロイしました。
※インストールをしていないデフォルトのLmbdaではpymysqlが利用できないエラーが以下のように出力されます。
"errorMessage": "Unable to import module 'lambda_function': No module named 'pymysql'",
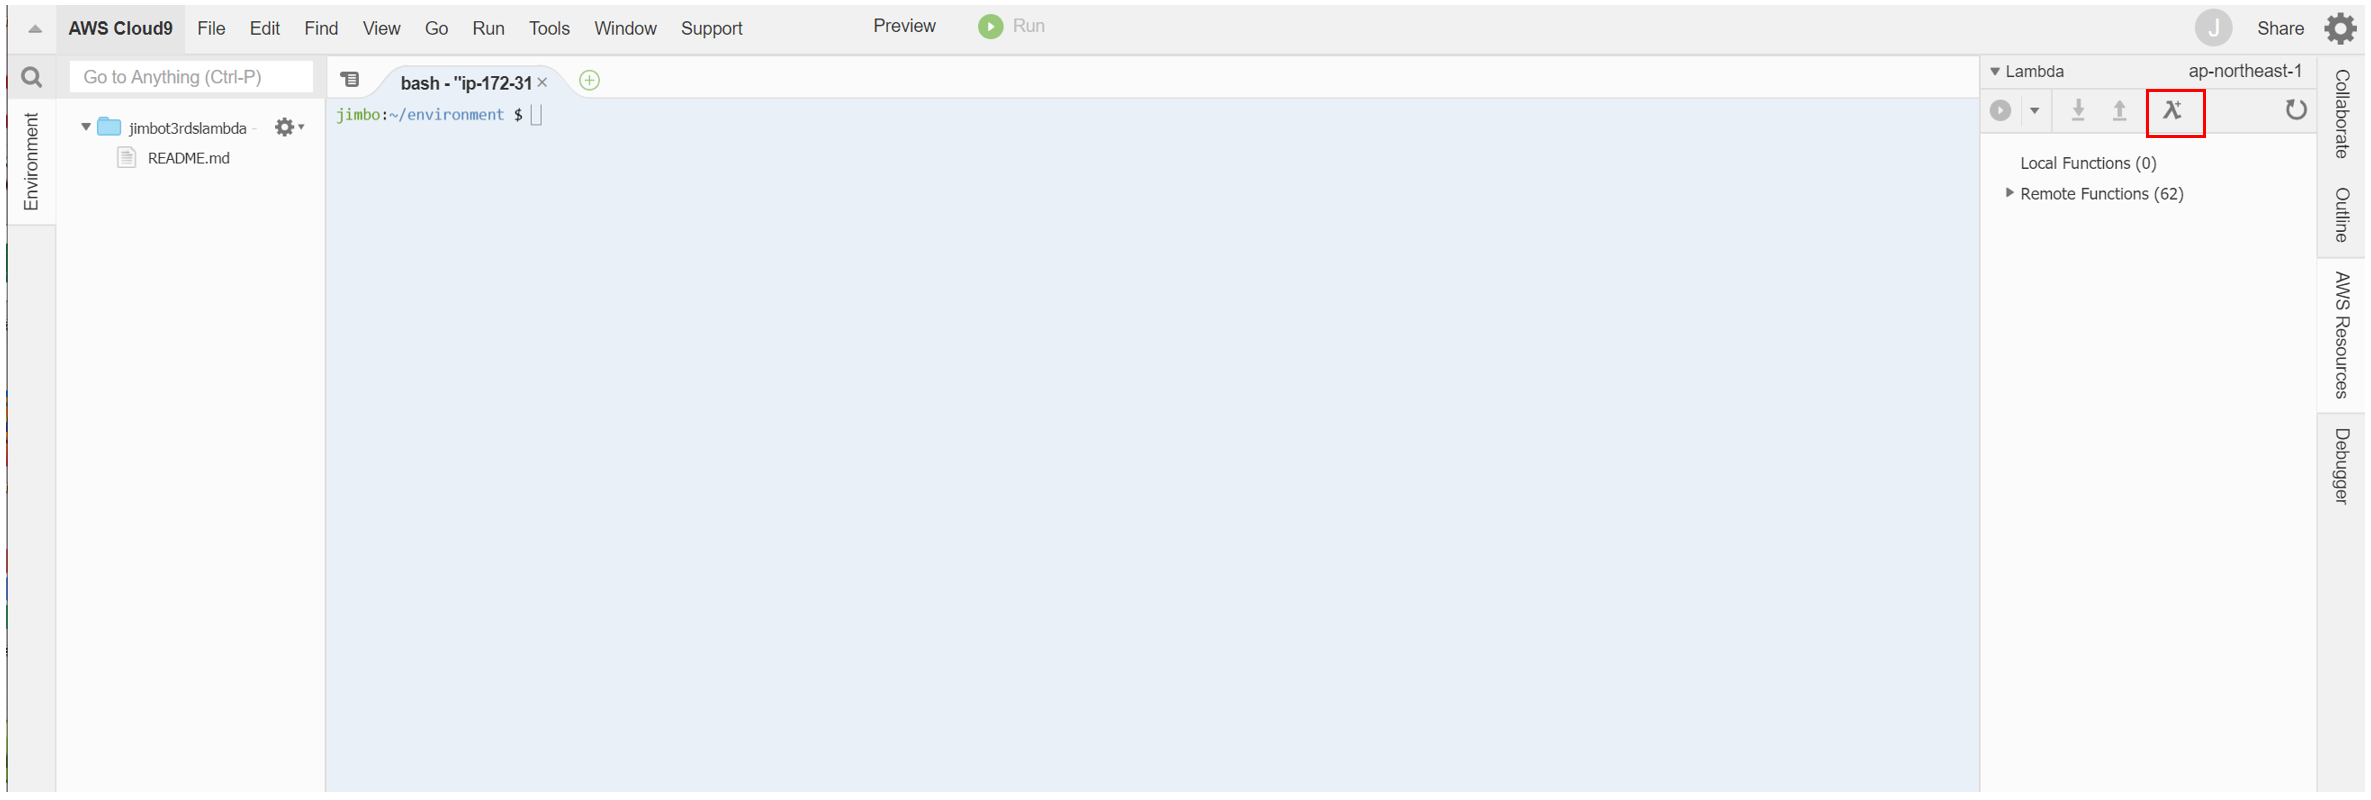
- Cloud9で「λ」のボタンを押下

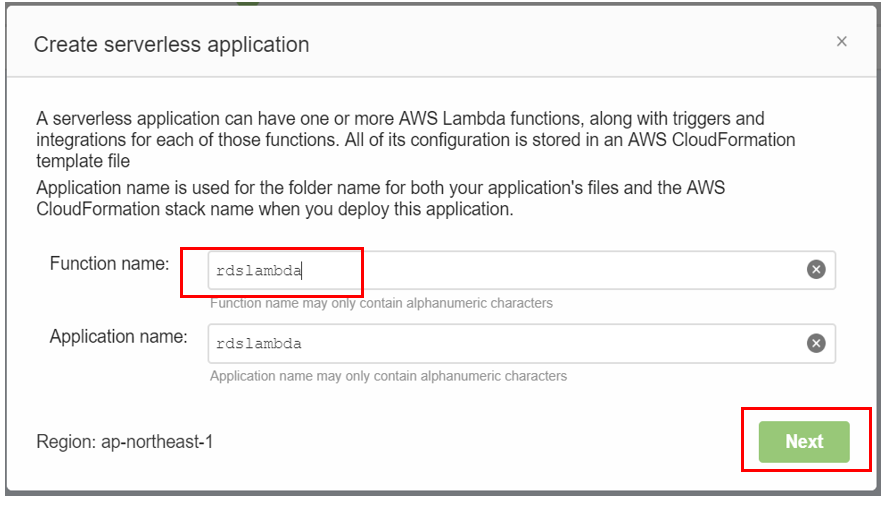
- Lambda名を入力しNext

3.runtimeでPython3.6とテンプレート無しのemptyを選択しNext

5.以下のコマンドを入力しpymysqlのインストール
$ cd rdslambda
$ pip install pymysql -t ./
8.Lambdaコンソールに同じディレクトリ構成でデプロイされたことを確認
これでLambdaからRDSに繋ぐための"pymysql.connect~"などが使えます

Lambdaの中身と解説
↑で準備したLambdaに以下のソースを記載します。
import boto3
import pymysql.cursors
from botocore.vendored import requests
import json

SUCCESS = "SUCCESS"
FAILED = "FAILED"

def send(event, context, responseStatus, responseData, physicalResourceId=None, noEcho=False):
    responseUrl = event['ResponseURL']

    print(responseUrl)

    responseBody = {}
    responseBody['Status'] = responseStatus
    responseBody['Reason'] = 'See the details in CloudWatch Log Stream: ' + context.log_stream_name
    responseBody['PhysicalResourceId'] = physicalResourceId or context.log_stream_name
    responseBody['StackId'] = event['StackId']
    responseBody['RequestId'] = event['RequestId']
    responseBody['LogicalResourceId'] = event['LogicalResourceId']
    responseBody['NoEcho'] = noEcho
    responseBody['Data'] = responseData

    json_responseBody = json.dumps(responseBody)

    print("Response body:\n" + json_responseBody)

    headers = {
        'content-type' : '',
        'content-length' : str(len(json_responseBody))
    }

    try:
        response = requests.put(responseUrl,
                                data=json_responseBody,
                                headers=headers)
        print("Status code: " + response.reason)
    except Exception as e:
        print("send(..) failed executing requests.put(..): " + str(e))


def lambda_handler(event, context):
    dbinstance = 'RDSName' #↑のCloudFormation用のyamlファイルに記載したDBInstanceIdentifierを入力
    rds = boto3.client('rds')
    myendpoint = rds.describe_db_instances(DBInstanceIdentifier=dbinstance)

    rds_host  = myendpoint['DBInstances'][0]['Endpoint']['Address']
    db_user = "jimbot3"
    password = "xxxxxxxx"
    db_name = "jimbot3rds"

    conn = pymysql.connect(host=rds_host, user=db_user, passwd=password, db=db_name, connect_timeout=5)
    with conn.cursor() as cur:
        cur.execute("create table jimbots (id int, name varchar(10),PRIMARY KEY (id))")
        cur.execute('insert into jimbots (id, name) values(1, "jimbot1")')
        cur.execute('insert into jimbots (id, name) values(2, "jimbot2")')
        conn.commit()
        cur.execute("select * from jimbots")
        for row in cur:
            print(row)
    send(event, context, SUCCESS, {})
解説1
from botocore.vendored import requests から print("send(..) failed executing requests.put(..): " + str(e)) までと、
1番最後にある send(event, context, SUCCESS, {}) は、CloudFormationからLambdaがたたかれた場合に、
CloudFormationにLambdaからレスポンスを返すためのcfn-responseモジュールのソースコードです。
これが無ければCloudFormationにレスポンスが返されないためCloudFormationのスタックの作成が終わりません。
cfn-responseモジュールはLambdaのコンソール画面上に"import cfnresponse"と記載しても使えないためソースコードの記載です。
※cfn-responseモジュールのソースコードはこちら
解説2
myendpoint = rds.describe_db_instances(DBInstanceIdentifier=dbinstance)
はRDSのエンドポイントの取得を行っています。
CloudFormationでRDSを作るときにRDSの名前は指定できますがRDSのエンドポイントは指定できないため、
こちらで指定した名前からエンドポイントを取得し、そのまま、そのエンドポイントを使用してRDSに繋ぎに行けるようにしています。
その他
・LambdaにはRDSFullAccessのロールが必要です。
・selectとprint(row)はデータが投入されたことの確認用で本来は不要です。
実行結果
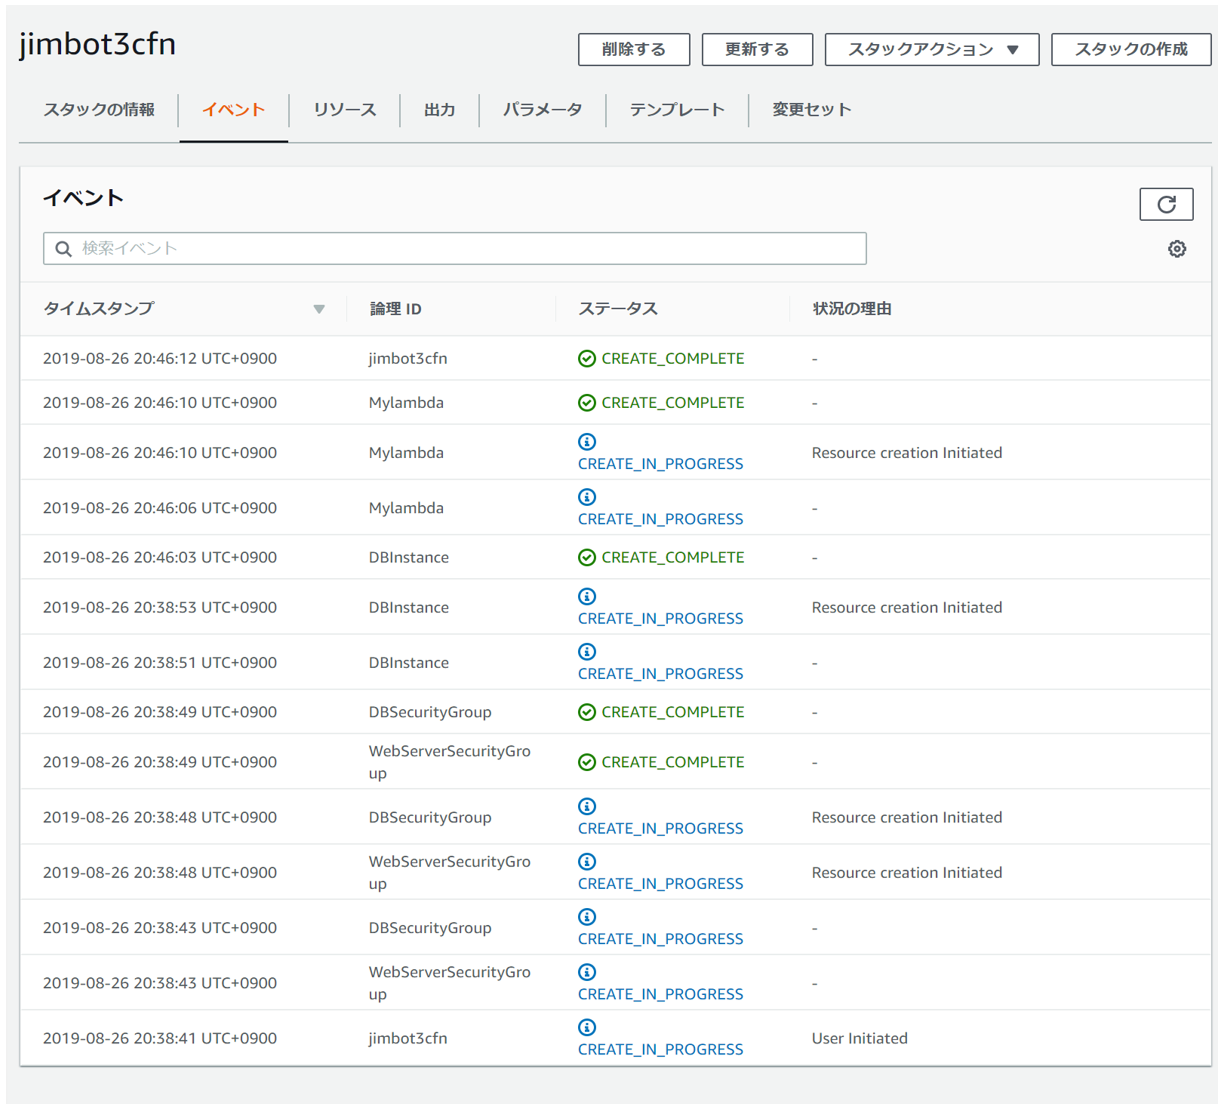
① CloudFormationの実行ログです。すべて成功しているし、ちゃんとRDSができた後にLambdaが実行されています。

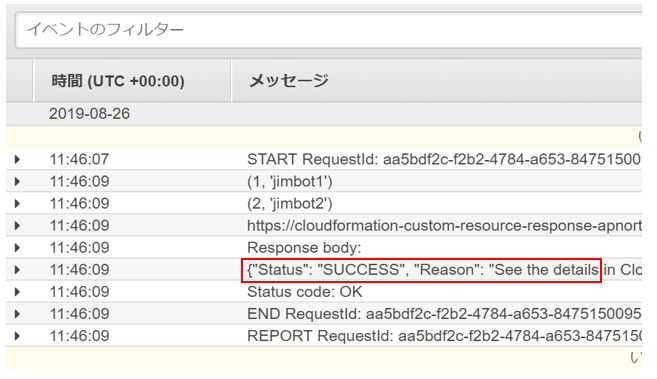
② Lambdaの実行結果のログです。(こっちは+09:00が日本時間です)
赤枠の"Status": "SUCCESS"の箇所がLambdaが成功したことをCloudFormationに返しています。

③ RDSに繋ぎ中にデータが入っていることの確認です。
ちゃんとJimbotsテーブルがあります。

終わりに
LambdaにSQL文書いてるし結局、自動化っていうよりコード化というのかなぁという感じ。。。
残念ながらあまり利用できるケースが思い浮かばないので、普通に作成してデータ入れたほうが良いと思う。←
良かった点は「どうやったらできるんだろう?」と考えるのが楽しかったところくらいかな。


