SafeAreaとは?
スクリーンで言うとこの部分です。
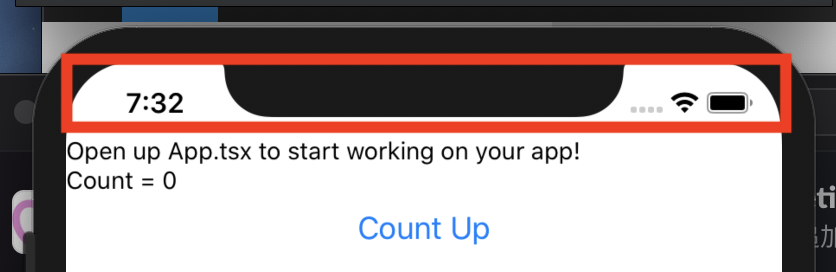

上の画像は既にSafeAreaの余白を設定したあとのスクリーンショットなのですが、Viewだけで構成すると、ステータスバーにコンテンツが重なってしまいます。
対策
- SafeAreaViewを使う (iOS)
- StatusBar.currentHeightをpaddingTopに設定する (Android)
SafeAreaView
SafeAreaViewはiOSのノッチの部分の余白を取ってくれる、react-nativeが提供するコンポーネントです。このコンポーネントを使えば、iOSでノッチやステータスバーとコンテンツがかぶることはありませんが、Androidのステータスバーの余白は設定されないため、以下のように別途対応が必要になります。
StatusBar.currentHeight
StatusBarは、react-nativeが提供するコンポーネントで、StatusBar.currentHeightでステータスバーの高さを取ることができるので、paddingTop: Platform.OS === "android" ? StatusBar.currentHeight : 0のようにして、Androidの場合にpaddingTopで余白を取るようにすれば良いです。
最終的には、以下のようなコードになりました。
App.tsx
import { StatusBar as ExpoStatusBar } from "expo-status-bar";
import React, { useState, useCallback } from "react";
import {
  StyleSheet,
  Platform,
  StatusBar,
  Text,
  View,
  Button,

 SafeAreaView,
} from "react-native";

export default function App() {
  const [count, setCount] = useState(0);
  const increment = useCallback(() => setCount(count + 1), [count]);

  return (
    <SafeAreaView style={styles.container}>
      <ExpoStatusBar style="auto" />
      <View>
        <Text>Open up App.tsx to start working on your app!</Text>
        <Text>Count = {count}</Text>
        <Button title="Count Up" onPress={increment} />
      </View>
    </SafeAreaView>
  );
}

const styles = StyleSheet.create({
  container: {
    backgroundColor: "#fff",
    paddingTop: Platform.OS === "android" ? StatusBar.currentHeight : 0,
  },
});