keras-yolo3 で物体検出する方法
筆者は超初心者です
個人のメモに近いです
① プロジェクトのクローン
あらかじめ、クローンしたいディレクトリに移動してから、以下を実行
② keras-yolo3 用のconda環境構築
環境確認
conda info -e
新しい環境作る(環境名とPythonのverを指定)
Pythonのバージョンは3.5.2が良い
conda create -n yolo_v3 python=3.5.2 pip
作った環境下に入る
source activate yolo_v3
必要なモジュールをインストールする(バージョンが違うと後々動かないので注意)
pip install モジュール名
必要なモジュール一覧
absl-py==0.7.1
astor==0.8.0
bleach==1.5.0
cycler==0.10.0
gast==0.2.2
grpcio==1.21.1
h5py==2.9.0
html5lib==0.9999999
Keras==2.1.5
kiwisolver==1.1.0
Markdown==3.1.1
matplotlib==3.0.3
numpy==1.16.4
Pillow==6.0.0
protobuf==3.8.0
pyparsing==2.4.0
python-dateutil==2.8.0
PyYAML==5.1.1
scipy==1.3.0
six==1.12.0
tensorboard==1.6.0
tensorflow==1.6.0
termcolor==1.1.0
Werkzeug==0.15.4
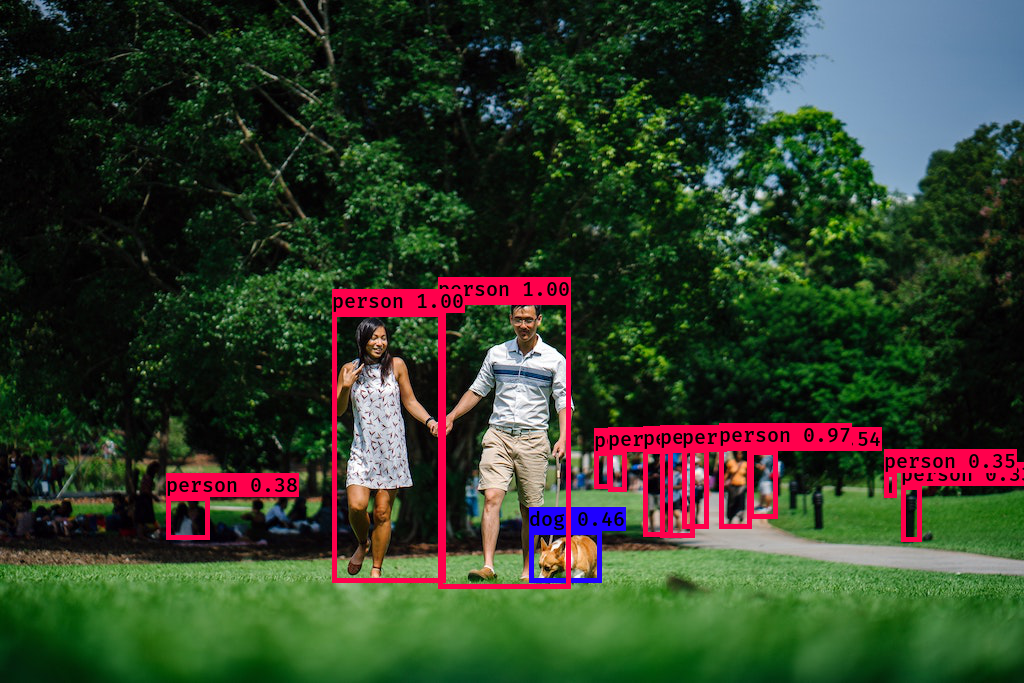
③ やっと物体検出
下記のコードを実行
python yolo_video.py --image
以下が表示されたら、拡張子まで正確にファイル名を入力
”Input image filename:”