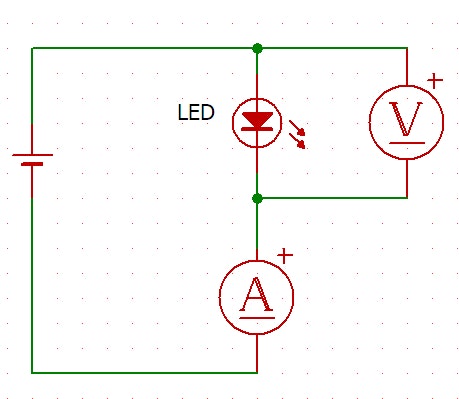
小信号用のLEDの特性を測ります。
測定器のセット
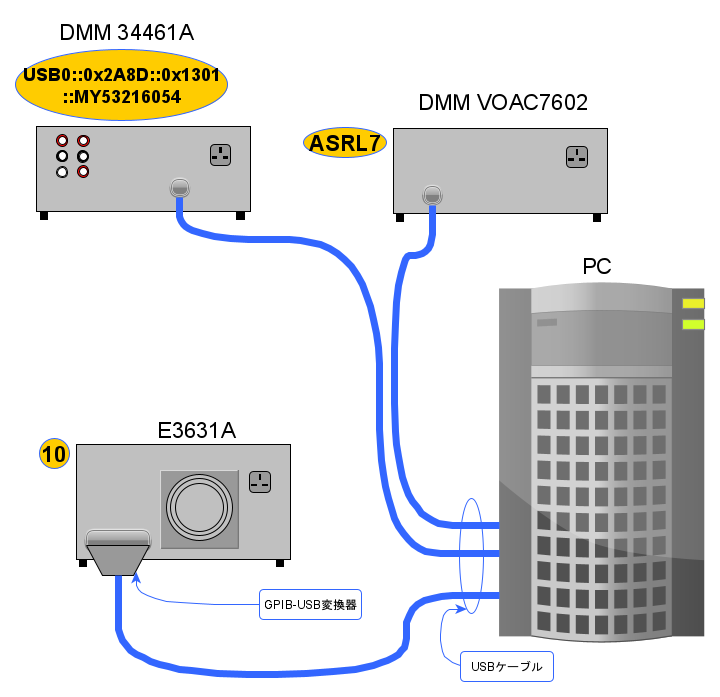
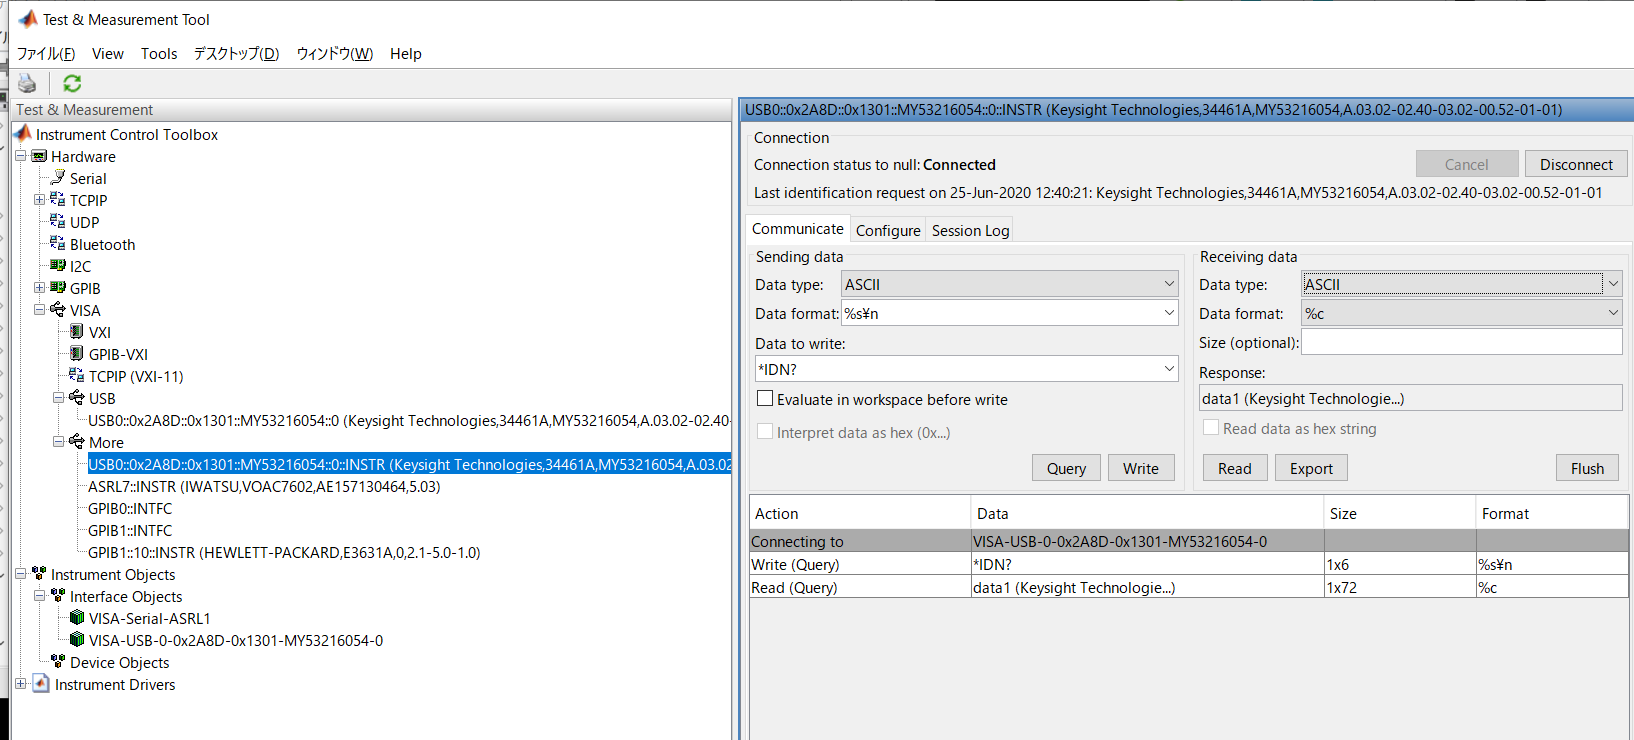
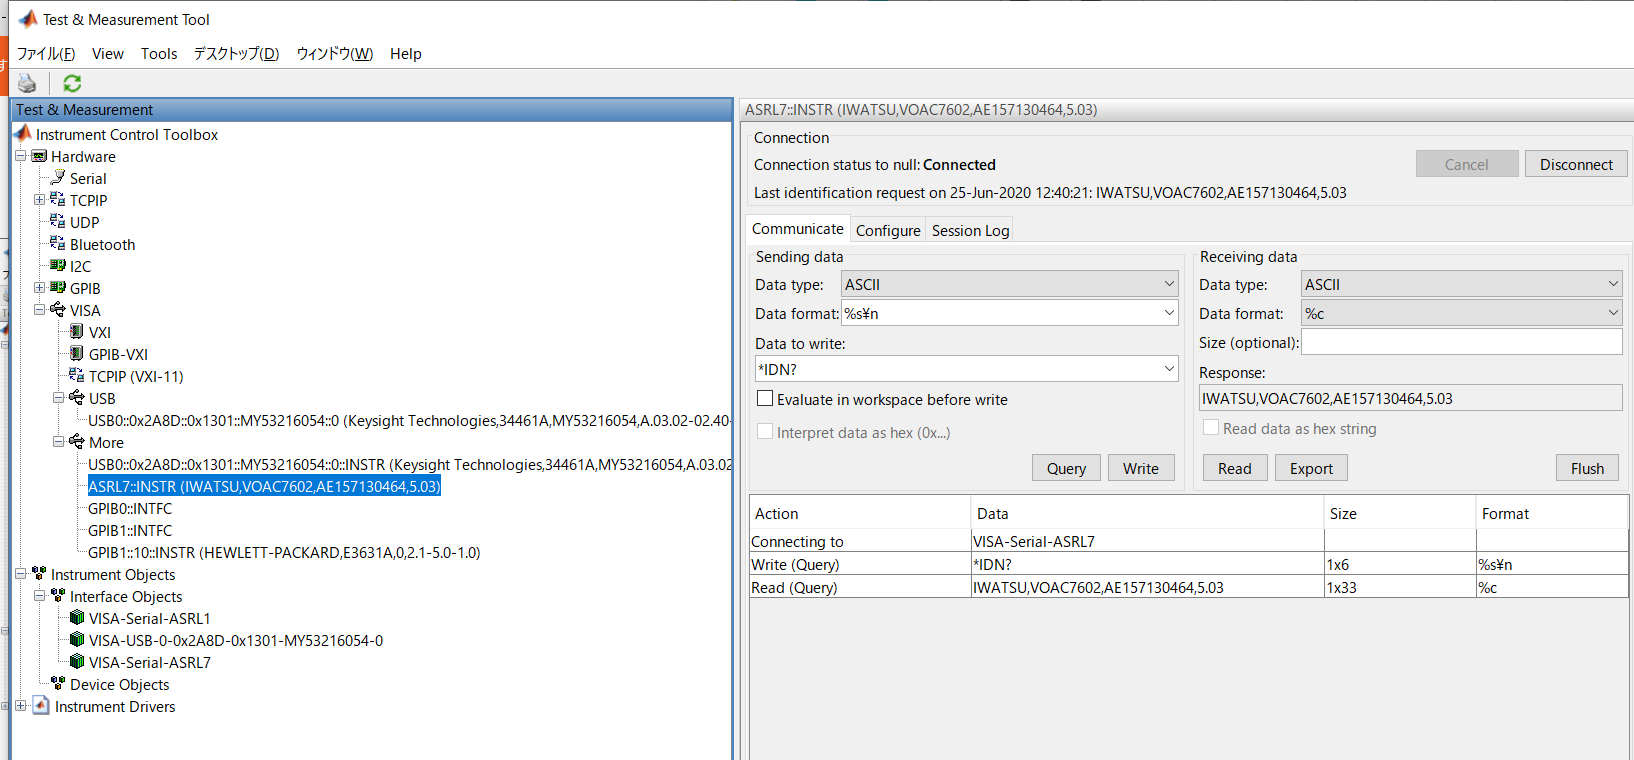
電流計は、Keysight 34461Aを使います。PCとはUSBケーブルでUSB2.0 のコネクタにつなぎます。Instrument Control Toolboxを立ち上げます。scanをすると、VISAのところに見つけてきました。connectし、*IDN?コマンドを送ります。レスポンスがありました。
電圧計は、IWATSU VOAC7602を使います。PCとはUSBケーブルでUSB2.0 のコネクタにつなぎます。Iwatsu Test Instruments Tools Ver 1.9をダウンロードし、USBドライバをインストールします。Instrument Control Toolboxを立ち上げます。scanをすると、VISAのところに見つけてきました。connectし、*IDN?コマンドを送ります。レスポンスがありました。
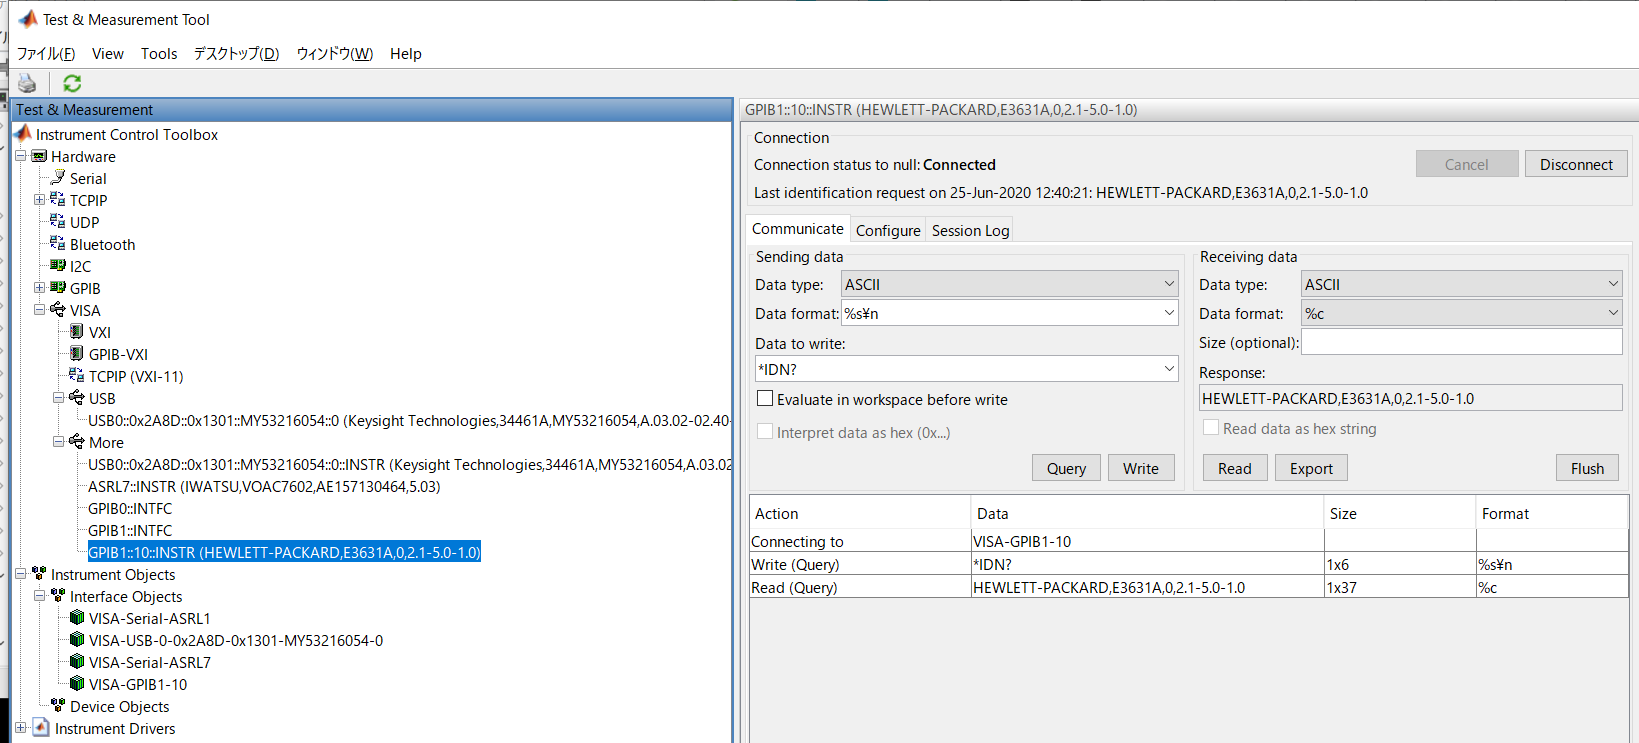
実験用電源は、HEWLETT-PACKARD E3631Aを使います。PCと測定器はGPIB-USB変換ケーブル(Agilentの82357B)でUSB2.0 のコネクタにつなぎます。Instrument Control Toolboxを立ち上げます。scanをすると、VISAのところに見つけてきました。connectし、*IDN?コマンドを送ります。レスポンスがありました。
初期化
Instrument Control Toolboxで*IDN?を実行した後、Session logのタブを開きます。この中身をコピーします。
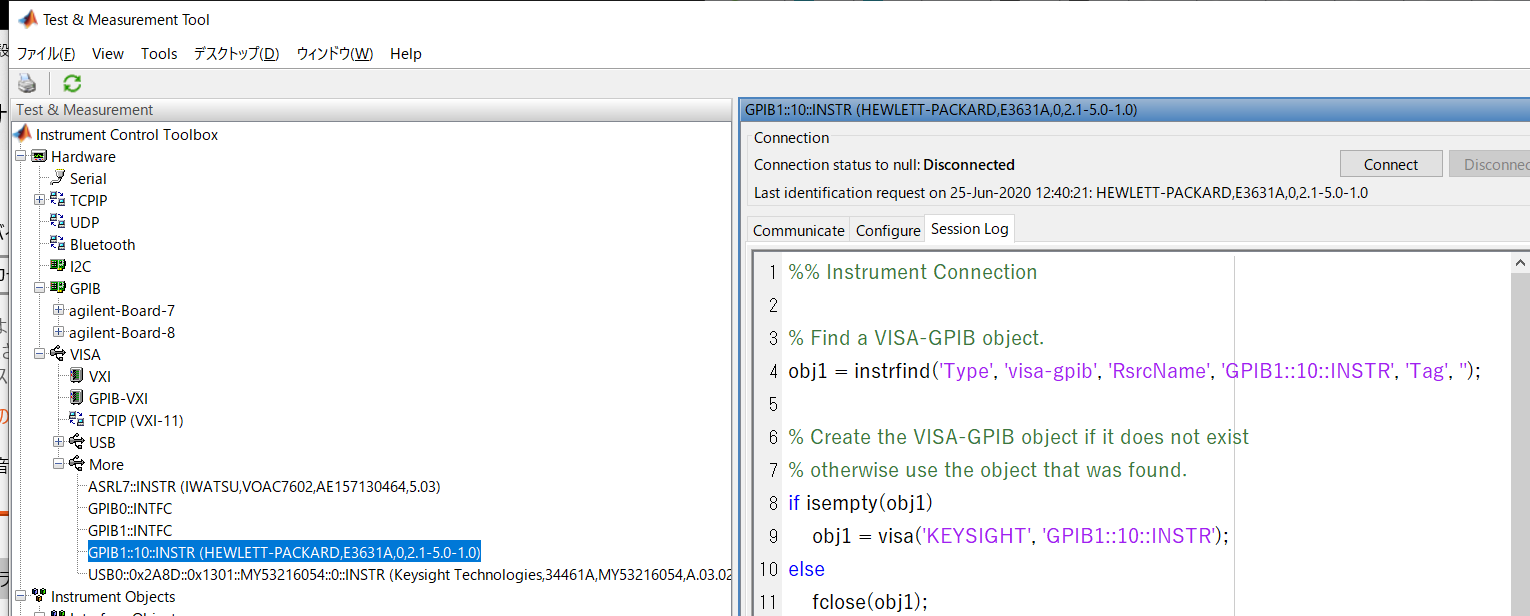
三つの測定器ごとにコピーをし、obj1になっているところを、obj_current、obj_voltage 、obj_power と測定器の機能がわかる名前に変更します。
Instrument Connection
clear
% Find a VISA-USB object.
obj_current =  instrfind('Type', 'visa-usb', 'RsrcName', 'USB0::0x2A8D::0x1301::MY53216054::0::INSTR', 'Tag', '');
obj_voltage =  instrfind('Type', 'visa-serial', 'RsrcName', 'ASRL7::INSTR', 'Tag', '');
obj_power   =  instrfind('Type', 'visa-gpib', 'RsrcName', 'GPIB1::10::INSTR', 'Tag', '');

if isempty(obj_current)
    obj_current = visa('KEYSIGHT', 'USB0::0x2A8D::0x1301::MY53216054::0::INSTR');
else
    fclose(obj_current);
    obj_current = obj_current(1);
end
if isempty(obj_voltage)
    obj_voltage = visa('KEYSIGHT', 'ASRL7::INSTR');
else
    fclose(obj_voltage);
    obj_voltage = obj_voltage(1);
end
if isempty(obj_power)
    obj_power = visa('KEYSIGHT', 'GPIB1::10::INSTR');
else
    fclose(obj_power);
    obj_power = obj_power(1);
end

% Connect to instrument object.
obj_current.InputBufferSize = 100000;
obj_voltage.InputBufferSize = 100000;
fopen(obj_current);
fopen(obj_voltage);
fopen(obj_power);
このあと、測定器ごとに初期設定をします。
Instrument Configuration and Control
% Communicating with instrument object.
fprintf(obj_current, '*RST;*CLS');
fprintf(obj_voltage, '*RST;*CLS');
fprintf(obj_power,   '*RST;*CLS');

% Communicating with instrument object.
fprintf(obj_current, ':CONF:CURR; DC:RANG .1');  % 34461Aは電流測定モード
fprintf(obj_current, ':INIT');
pause(1)
fprintf(obj_voltage, ':CONF:VOLT:DC:RANG 10');   % VOAC7602は電圧測定モード
fprintf(obj_voltage, ':INIT');
fprintf(obj_power, ':INST:SEL P25V');     % +25V出力を使う
fprintf(obj_power, ':TRIG:SOUR IMM');
fprintf(obj_power, ':VOLTage:TRIG 1.0');  % 初期電圧1V
fprintf(obj_power, ':CURR:TRIG 0.03');    % 最大値30mA
fprintf(obj_power, ':OUTPut ON');
fprintf(obj_power, ':INIT');
pause(1)
終了処理部分です。
Disconnect and Clean Up
% The following code has been automatically generated to ensure that any
% object manipulated in TMTOOL has been properly disposed when executed
% as part of a function or script.

% Disconnect all objects.
fclose(obj_current);
fclose(obj_voltage);
fclose(obj_power);

% Clean up all objects.
delete(obj_current);
delete(obj_voltage);
delete(obj_power);
clear obj_current;
clear obj_voltage;
clear obj_power;
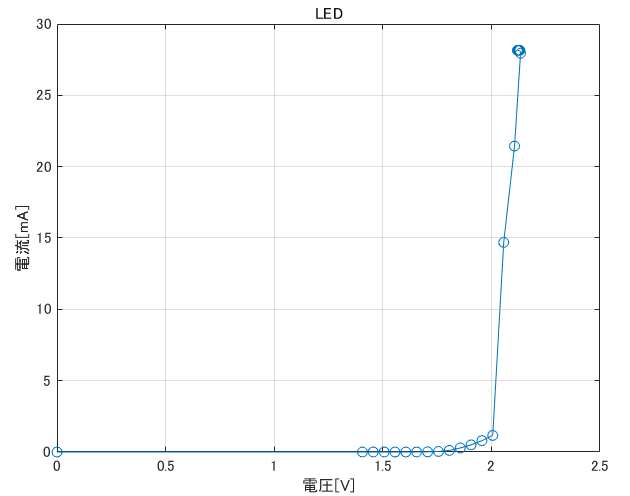
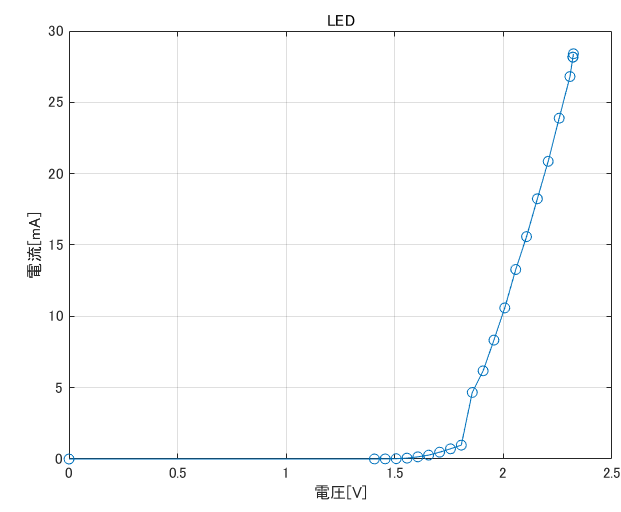
測定は、電圧を上げていく
10ステップでは間隔があきすぎたので、20ステップで計測しました。LEDは小信号用赤色です。
% Start
V = [];
A = [];
step = 28:50 % 14:25
for voltage = step
   message = ":VOLTage:TRIG " + voltage/20 ;
   fprintf(obj_power, message);
   fprintf(obj_power, ':INIT');
   pause(0.03)
   ic = query(obj_current, 'READ?')
   fprintf(obj_voltage, ':INIT');
   ec = query(obj_voltage, ':FETCh?')
   A(voltage) = str2num(ic) * 1000;
   V(voltage) = str2num(ec);
end

fprintf(obj_power, ":VOLTage:TRIG 0");
fprintf(obj_power, ':INIT');
図を描きます。
figure
plot(V, A,'-o');
xlabel('電圧[V]');
ylabel('電流[mA]');
grid on;
title('LED')
グラフです。
緑色のLEDです。