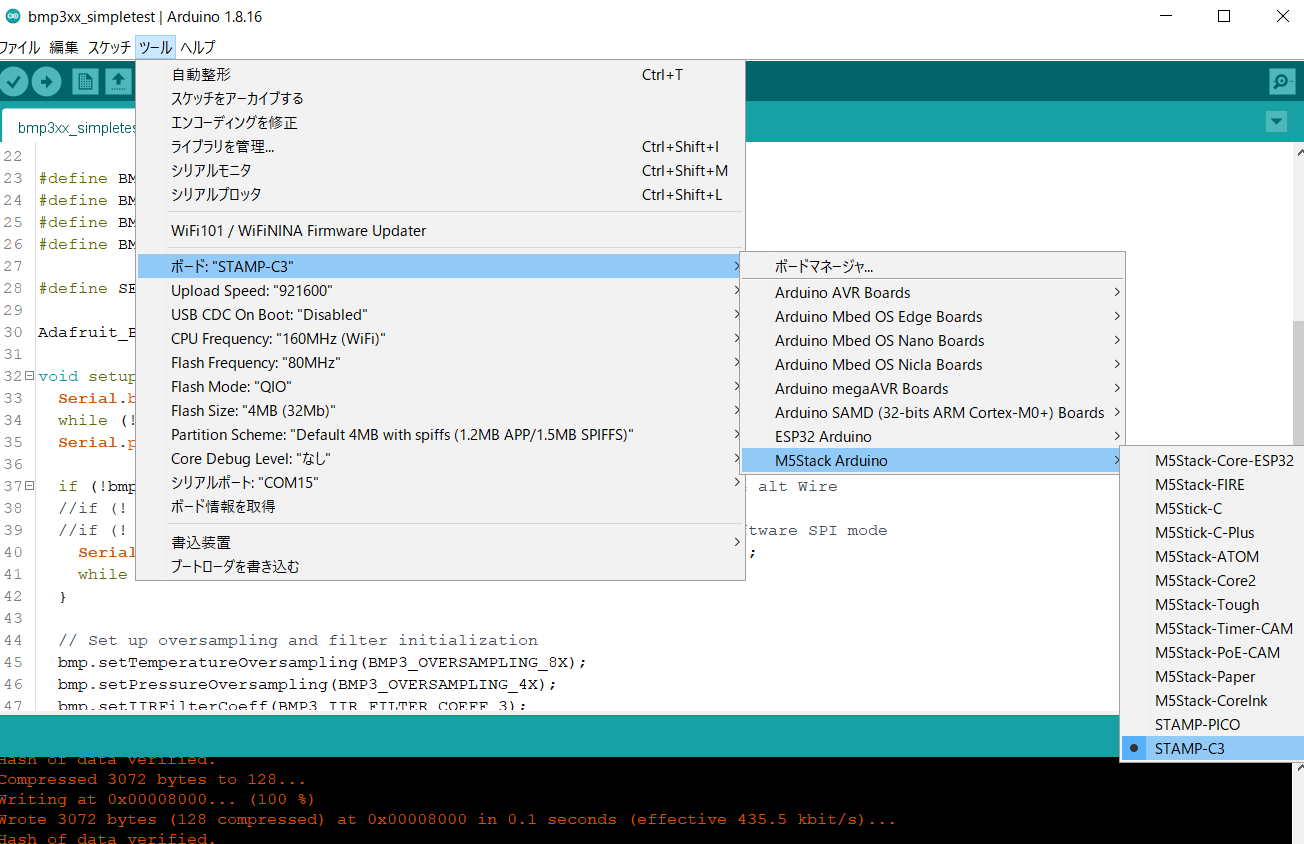
2021年10月21日にスイッチサイエンスから Espressif ESP32-C3を搭載のM5Stamp C3 5個セットが発売になりました。11月1日にはArduino IDEのボードにM5Stamp C3が追加されました。M5Stamp C3はRISC-VのCPUを積んでおり、ESP8266の後継機種に当たります。発売当初は、ESP32 ArduinoのESP32C3 Dev Boardを選択してコンパイルが行えていました。今回は、M5Stack ArduinoのSTAMP-C3でコンパイルが行えるようになりました。
ESP32 ArduinoおよびM5Stack Arduinoを使うための手順は省略します。
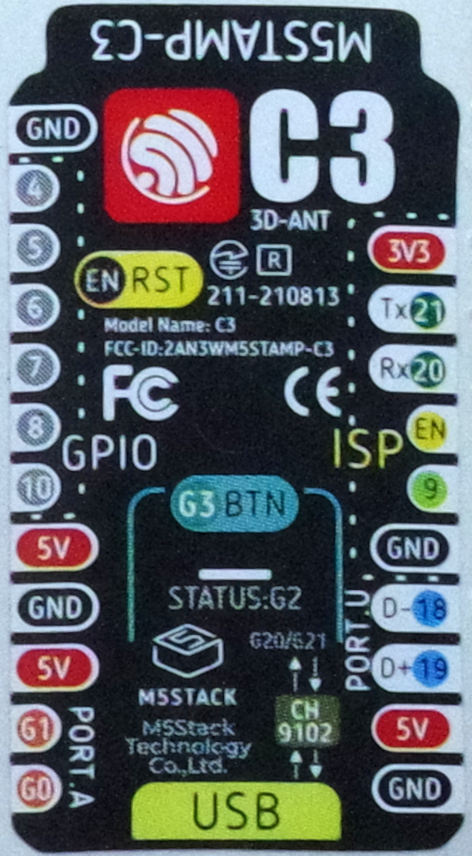
シールです。
C:\Users\ユーザ名\AppData\Local\Arduino15\packages\m5stack\hardware\esp32\2.0.0\variants\m5stack_stamp_c3
に入っているpins_arduino.hに、ピン配置が書かれています。
static const uint8_t TX = 21;
static const uint8_t RX = 20;

static const uint8_t SDA = 8;
static const uint8_t SCL = 9;

static const uint8_t SS    = 7;
static const uint8_t MOSI  = 6;
static const uint8_t MISO  = 5;
static const uint8_t SCK   = 4;

static const uint8_t A0 = 0;
static const uint8_t A1 = 1;
static const uint8_t A2 = 2;
static const uint8_t A3 = 3;
static const uint8_t A4 = 4;
static const uint8_t A5 = 5;
この情報から、I2Cが使えるようになりました。
気圧センサBMP390を使う
AdafruitのSTEMMAボードを入手しました。1mmピッチ4ピンのJSTコネクタがついています。SCL/SDAをそれぞれつなぎ、3V3をVin、GNDをGNDにつなぎます。
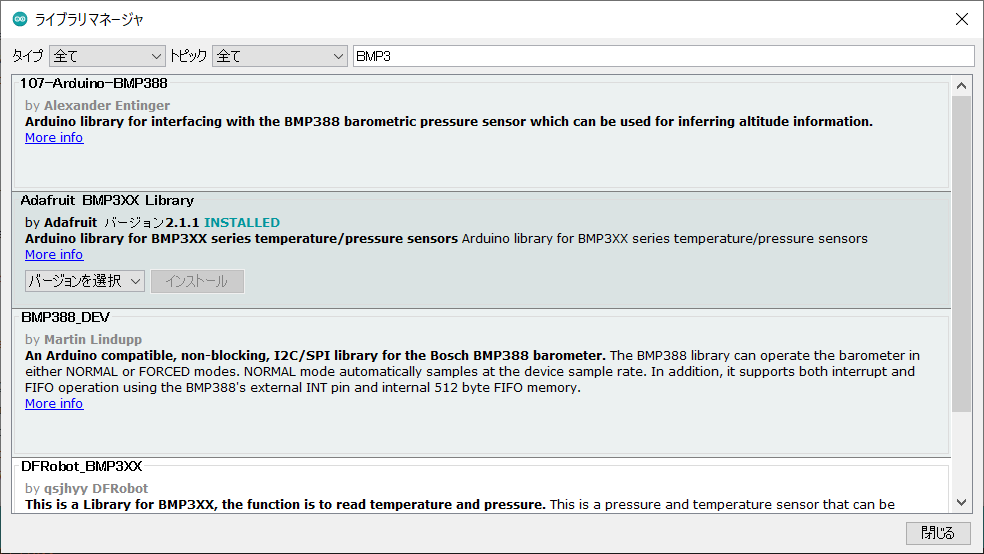
ライブラリを導入します。Adadruit BMP3XX Libraryです。
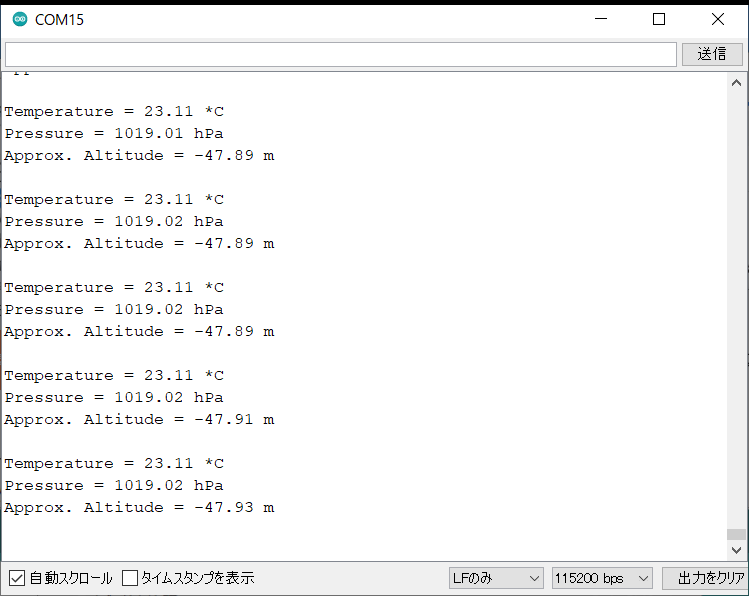
サンプルbmp3xx_simpletestの実行結果です。
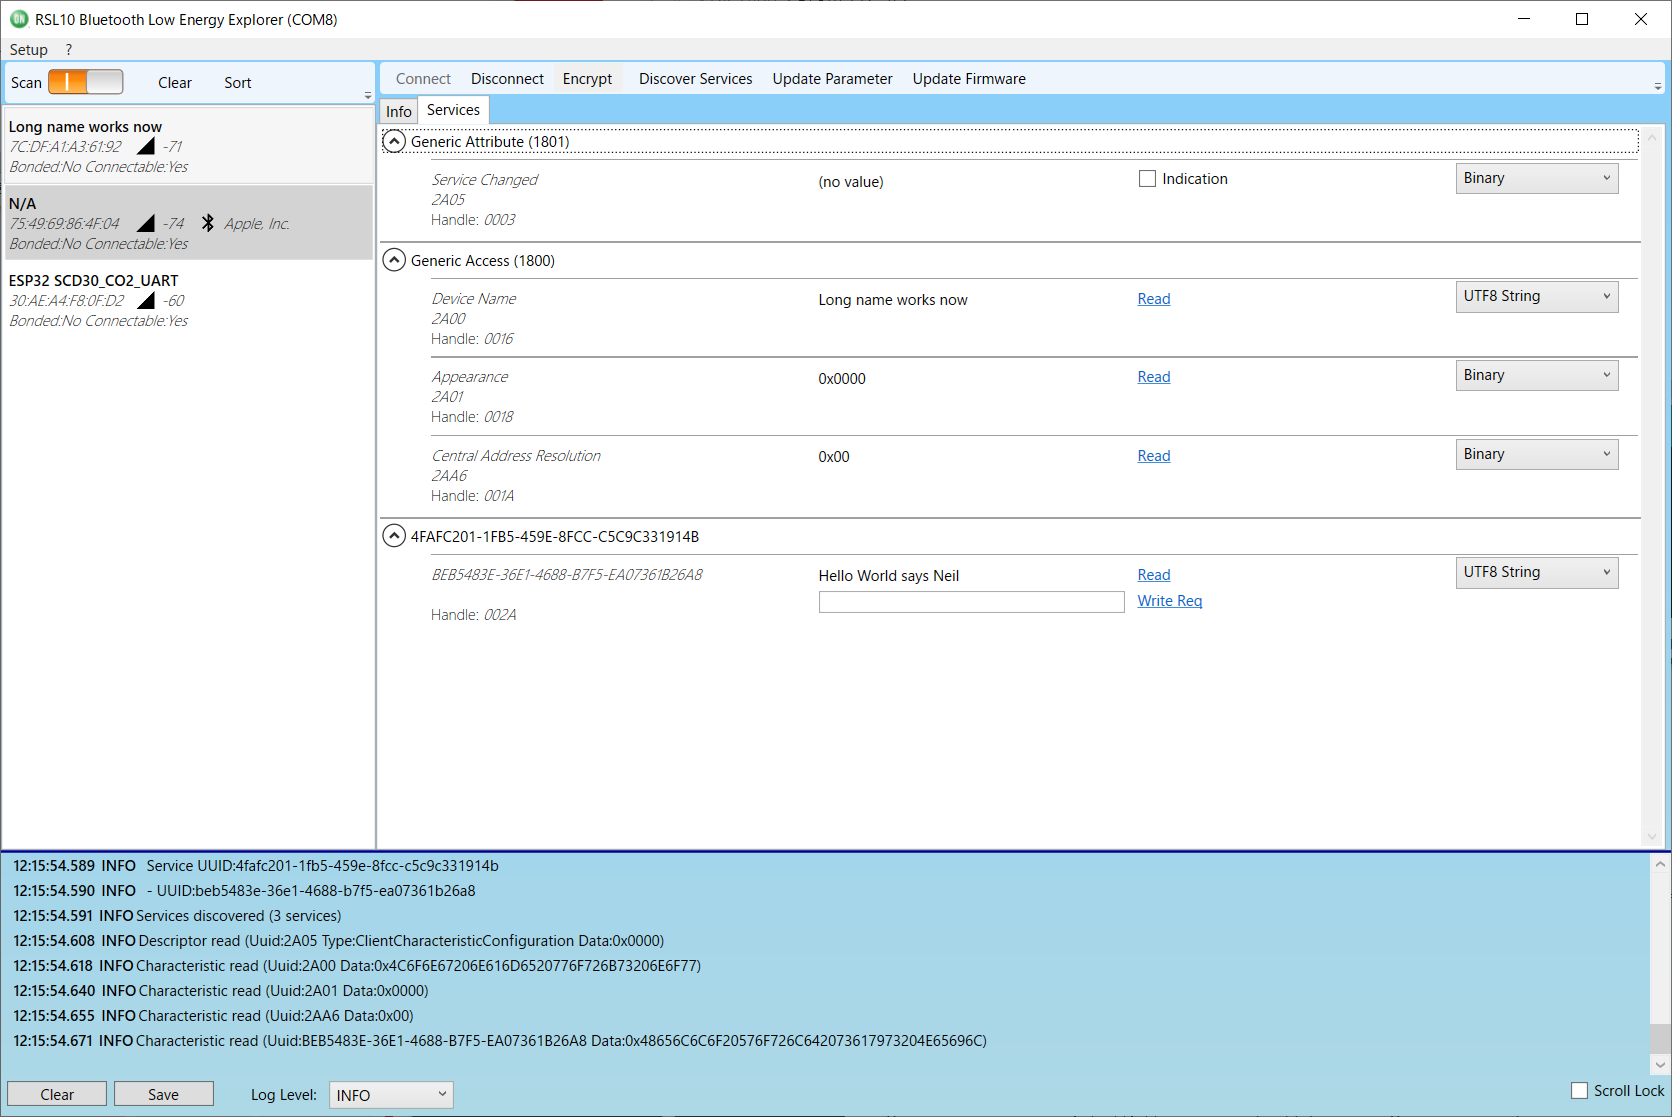
BLE
bmp3xx_simpletestをベースにBLEの記述を追加します。
ESP32 Arduinoをインストールしたら、ESP32C3 Dev Boardサンプルに、ESP32 BLE Arduino -> BLE_Serverが入っているので読み込んで動かします。
RSL10エクスプローラ(セントラル)でつなぎにいきます。問題なく動作しています。
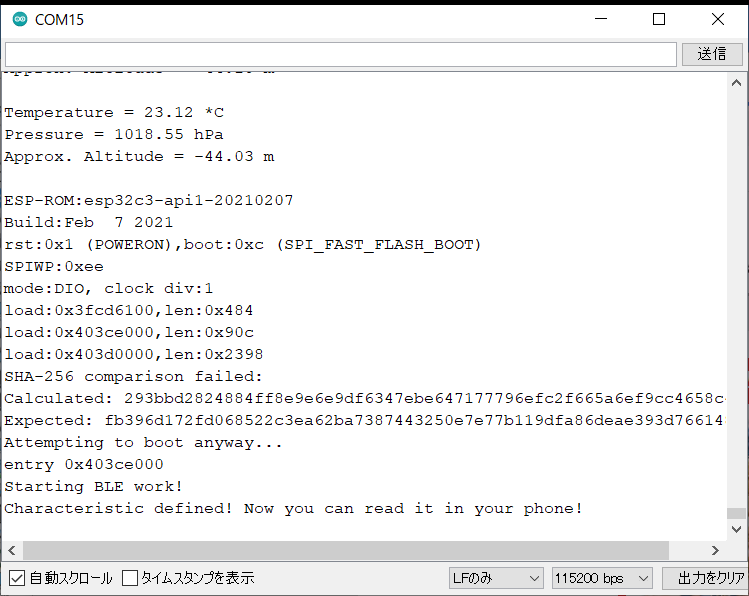
温度と気圧をBLEで送る
10分ぐらいでエラーを吐いたり、ウォッチドッグ・タイマが働いたり、簡単に動いてくれません。BLEのプログラム化BMP390のライブラリのどちらか、もしくは両方がメモリリークなど起こしているのかもしれません。理由はわかりませんが、下記のスケッチで12時間ほど動いています。
このスケッチでも、"Failed to perform reading :("のエラーが出るようです。
定数定義などのグローバル・エリヤ、setup()内の記述は、BLEが優先した記述です。
/***************************************************************************
This is a library for the BMP3XX temperature & pressure sensor
Written by Limor Fried & Kevin Townsend for Adafruit Industries.
Based on Neil Kolban example for IDF: https://github.com/nkolban/esp32-snippets/blob/master/cpp_utils/tests/BLE%20Tests/SampleServer.cpp
Ported to Arduino ESP32 by Evandro Copercini
updates by chegewara
***************************************************************************/
# include <BLEDevice.h>
# include <BLEUtils.h>
# include <BLEServer.h>
# include <Wire.h>
# include <Adafruit_Sensor.h>
# include "Adafruit_BMP3XX.h"
# define SEALEVELPRESSURE_HPA (1013.25)
Adafruit_BMP3XX bmp;
# define SERVICE_UUID "4fafc201-1fb5-459e-8fcc-c5c9c331914b"
# define Temp_CHARACTERISTIC_UUID "beb5483e-36e1-4688-b7f5-ea07361b26a8"
# define Press_CHARACTERISTIC_UUID "beb5483f-36e1-4688-b7f5-ea07361b26a8"
BLECharacteristic *tCharacteristic;
BLECharacteristic *pCharacteristic;
void setup() {
BLEDevice::init("BMP390_BLE");
BLEServer *pServer = BLEDevice::createServer();
BLEService *pService = pServer->createService(SERVICE_UUID);
tCharacteristic = pService->createCharacteristic(
Temp_CHARACTERISTIC_UUID,
BLECharacteristic::PROPERTY_READ |
BLECharacteristic::PROPERTY_NOTIFY
);
pCharacteristic = pService->createCharacteristic(
Press_CHARACTERISTIC_UUID,
BLECharacteristic::PROPERTY_READ |
BLECharacteristic::PROPERTY_NOTIFY
);
pService->start();
// BLEAdvertising *pAdvertising = pServer->getAdvertising(); // this still is working for backward compatibility
BLEAdvertising *pAdvertising = BLEDevice::getAdvertising();
pAdvertising->addServiceUUID(SERVICE_UUID);
pAdvertising->setScanResponse(true);
pAdvertising->setMinPreferred(0x06); // functions that help with iPhone connections issue
pAdvertising->setMinPreferred(0x12);
BLEDevice::startAdvertising();
Serial.begin(115200);
while (!Serial);
//Serial.println("Waiting a client connection to notify...");
Serial.println("Adafruit BMP390 test");
if (!bmp.begin_I2C()) { // hardware I2C mode, can pass in address & alt Wire
Serial.println("Could not find a valid BMP3 sensor, check wiring!");
while (1);
}
// Set up oversampling and filter initialization
bmp.setTemperatureOversampling(BMP3_OVERSAMPLING_8X);
bmp.setPressureOversampling(BMP3_OVERSAMPLING_4X);
bmp.setIIRFilterCoeff(BMP3_IIR_FILTER_COEFF_3);
bmp.setOutputDataRate(BMP3_ODR_50_HZ);
}
void loop() {
if (! bmp.performReading()) {
Serial.println("Failed to perform reading :(");
bmp.begin_I2C();
}
Serial.print("Temperature = ");
float temp = bmp.temperature;
Serial.print(temp);
Serial.println(" *C");
Serial.print("Pressure = ");
float press = bmp.pressure / 100.0;
Serial.print(press);
Serial.println(" hPa");
Serial.println();
tCharacteristic->setValue(temp);
tCharacteristic->notify();
pCharacteristic->setValue(press);
pCharacteristic->notify();
delay(2000);
}
~~~
RSL10エクスプローラ(セントラル)でつなぎにいきます。実数で送られてきます。
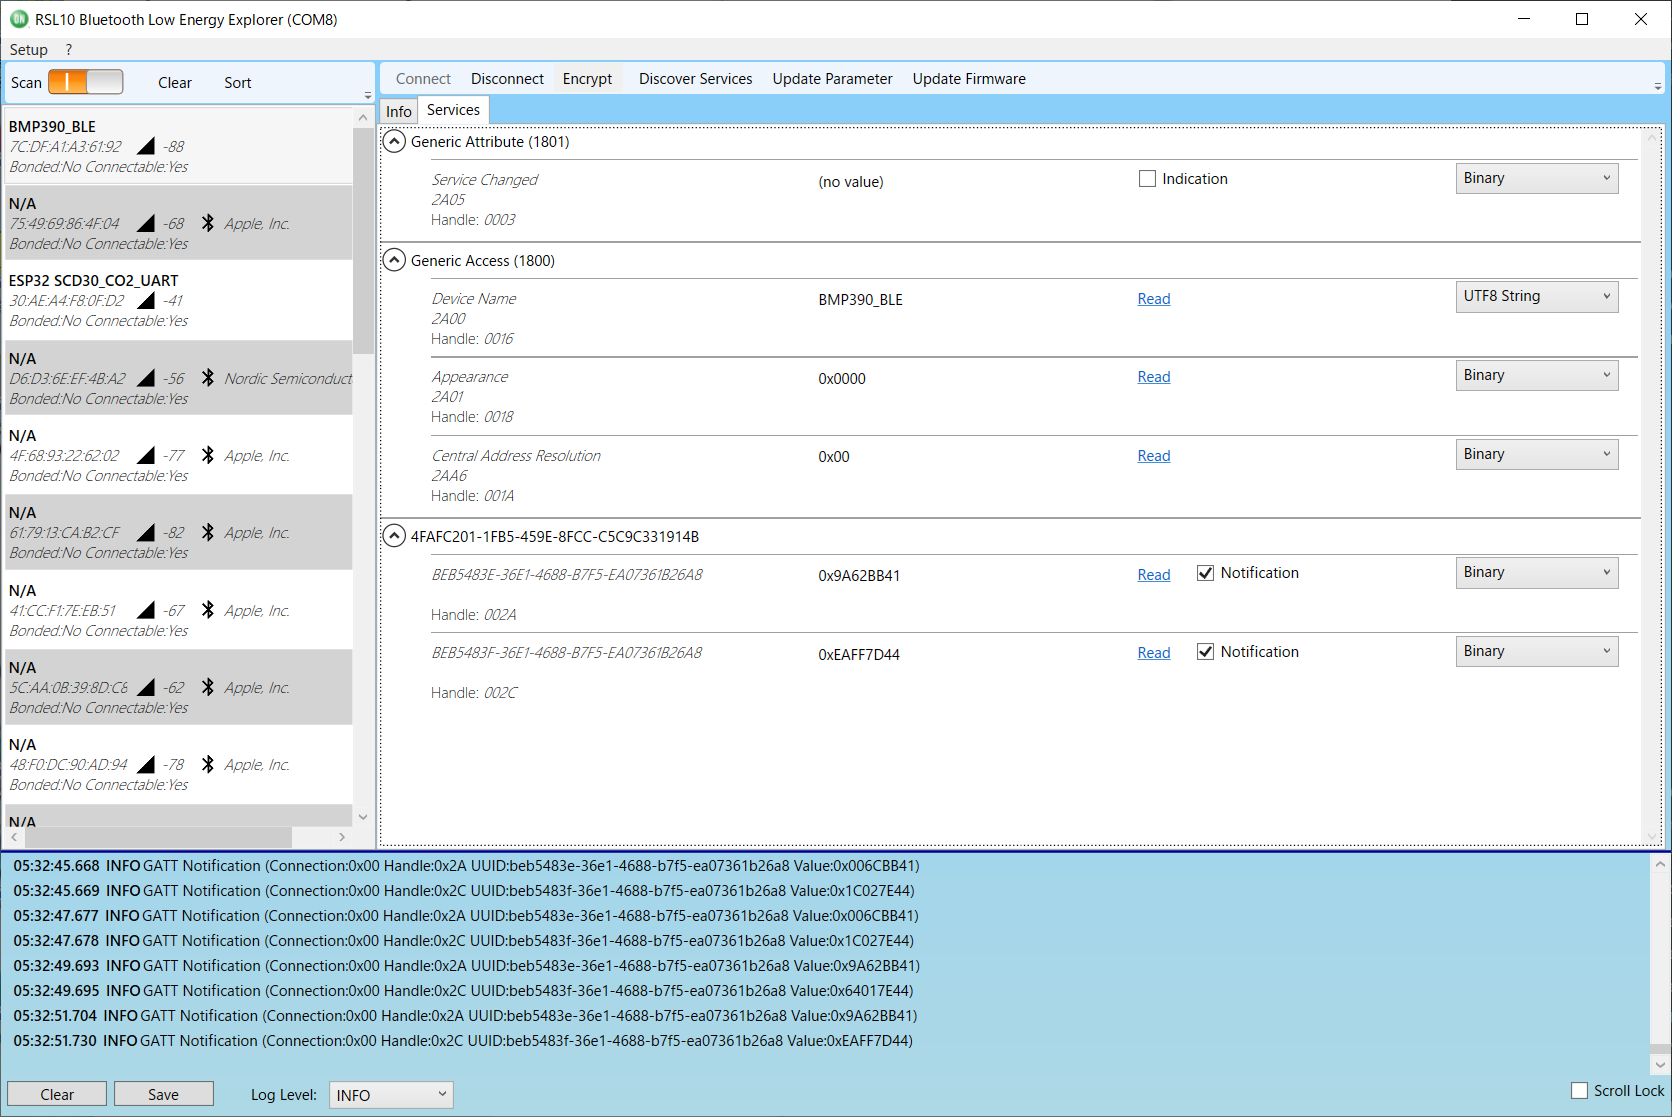
まだ、不安定です。