ebayなどで入手しやすいHT16K33コントローラを使った14セグメントLED(QUAD ALPHANUMERIC)を点灯します。HT16K33コントローラは、マトリクスなどの表示にも使われています。
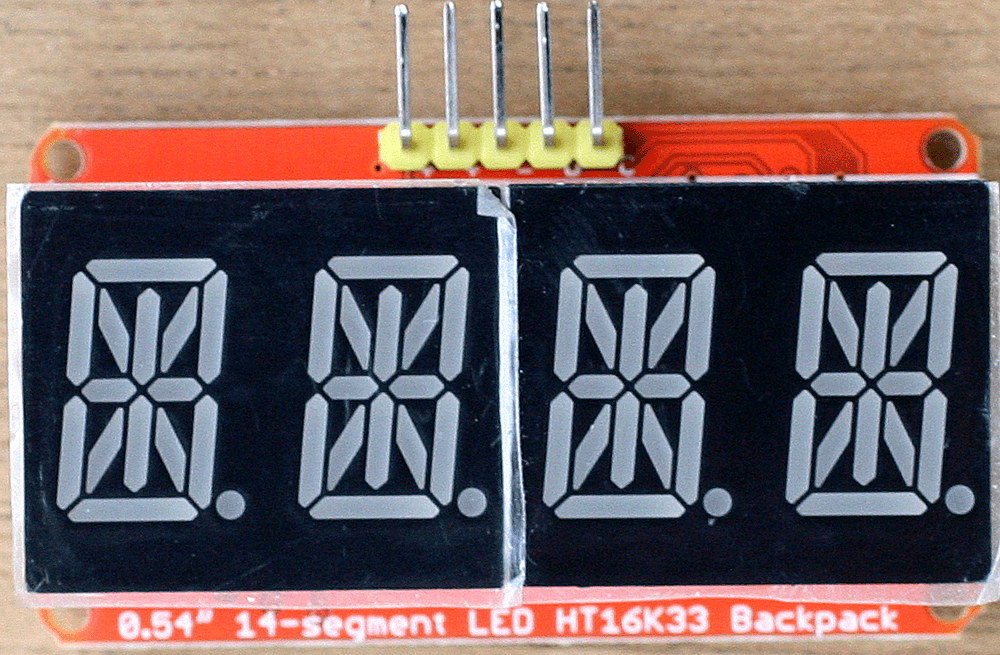
14セグメントLEDの接続
インターフェースはI2Cです。ピン穴の横に書かれているシルク印刷で、CはSCL、DはSDA、+はVcc、ーはGNDへ接続します。
| 14segLED端子 | Pico物理的ピン番号 | Pico GPIOピン番号 |
|---|---|---|
| + Vcc(Vi2c) | 36 | 3.3V |
| + Vcc | 36 | 3.3V |
| ー GND | 33 | GND |
| D SDA | 31 | GP26 |
| C SCL | 32 | GP27 |
Adafruitのブレークアウト・ボード
I2C専用の4ピン・コネクタを搭載したボードです。
TMP117 Precision Temperature Sensor
 SDA/SCL信号には10kΩのプルアップ抵抗が入っています。I2Cのスレーブ・アドレスがデフォルトが0x48で、裏面のADDRの部分をショートすると0x49になるようです。
GP27/26のI2Cバスにつなぎます。
SDA/SCL信号には10kΩのプルアップ抵抗が入っています。I2Cのスレーブ・アドレスがデフォルトが0x48で、裏面のADDRの部分をショートすると0x49になるようです。
GP27/26のI2Cバスにつなぎます。
必要なファイル
ダウンロードして解凍したファイルのうちlibとexamplesは、ラズパイの/home/piにコピーしています(第2回を参照)。
ダウンロード・フォルダにあったadafruit-circuitpython-raspberry_pi_pico-en_US-6.2.0-beta.1.uf2をデスクトップにドロップしておきます。
BOOTSELボタンを押したまま、ラズパイとPicoをUSBケーブルをつなげます。つながったら、BOOTSELから手を放します。RPI-RP2ドライブがマウントされます。そのRPI-RP2ドライブへ、adafruit-circuitpython-raspberry_pi_pico-en_US-6.2.0-beta.1.uf2をドラッグします。コピーが数秒で終わると、デスクトップには、CIRCUITPYドライブがマウントされています。
CIRCUITPYドライブを開きます。この中にあるlibフォルダに、/home/pi/libにあるadafruit_ht16k33フォルダをコピーします。温度センサTMP117を使うので、adafruit_tmp117.mpyもlibフォルダへコピーします。
温度計のプログラム
エディタはMuを使います。CIRCUITPYドライブが存在している状態で起動すると、Circuitpythonモードで立ち上がります。
# SPDX-FileCopyrightText: 2021 ladyada for Adafruit Industries
# SPDX-License-Identifier: MIT
# Author: Tony DiCola

import time
import board
import busio
from adafruit_ht16k33 import segments
import adafruit_tmp117

# Create the I2C interface.
i2c = busio.I2C(board.GP27, board.GP26)

# Create the LED segment class.
display = segments.Seg14x4(i2c)

tmp117 = adafruit_tmp117.TMP117(i2c)

# Clear the display.
display.fill(0)

while 1:
    print("Temperature: %.2f degrees C" % tmp117.temperature)
    display.print('{:.1f}c'.format(tmp117.temperature))
    display.show()
    time.sleep(1)
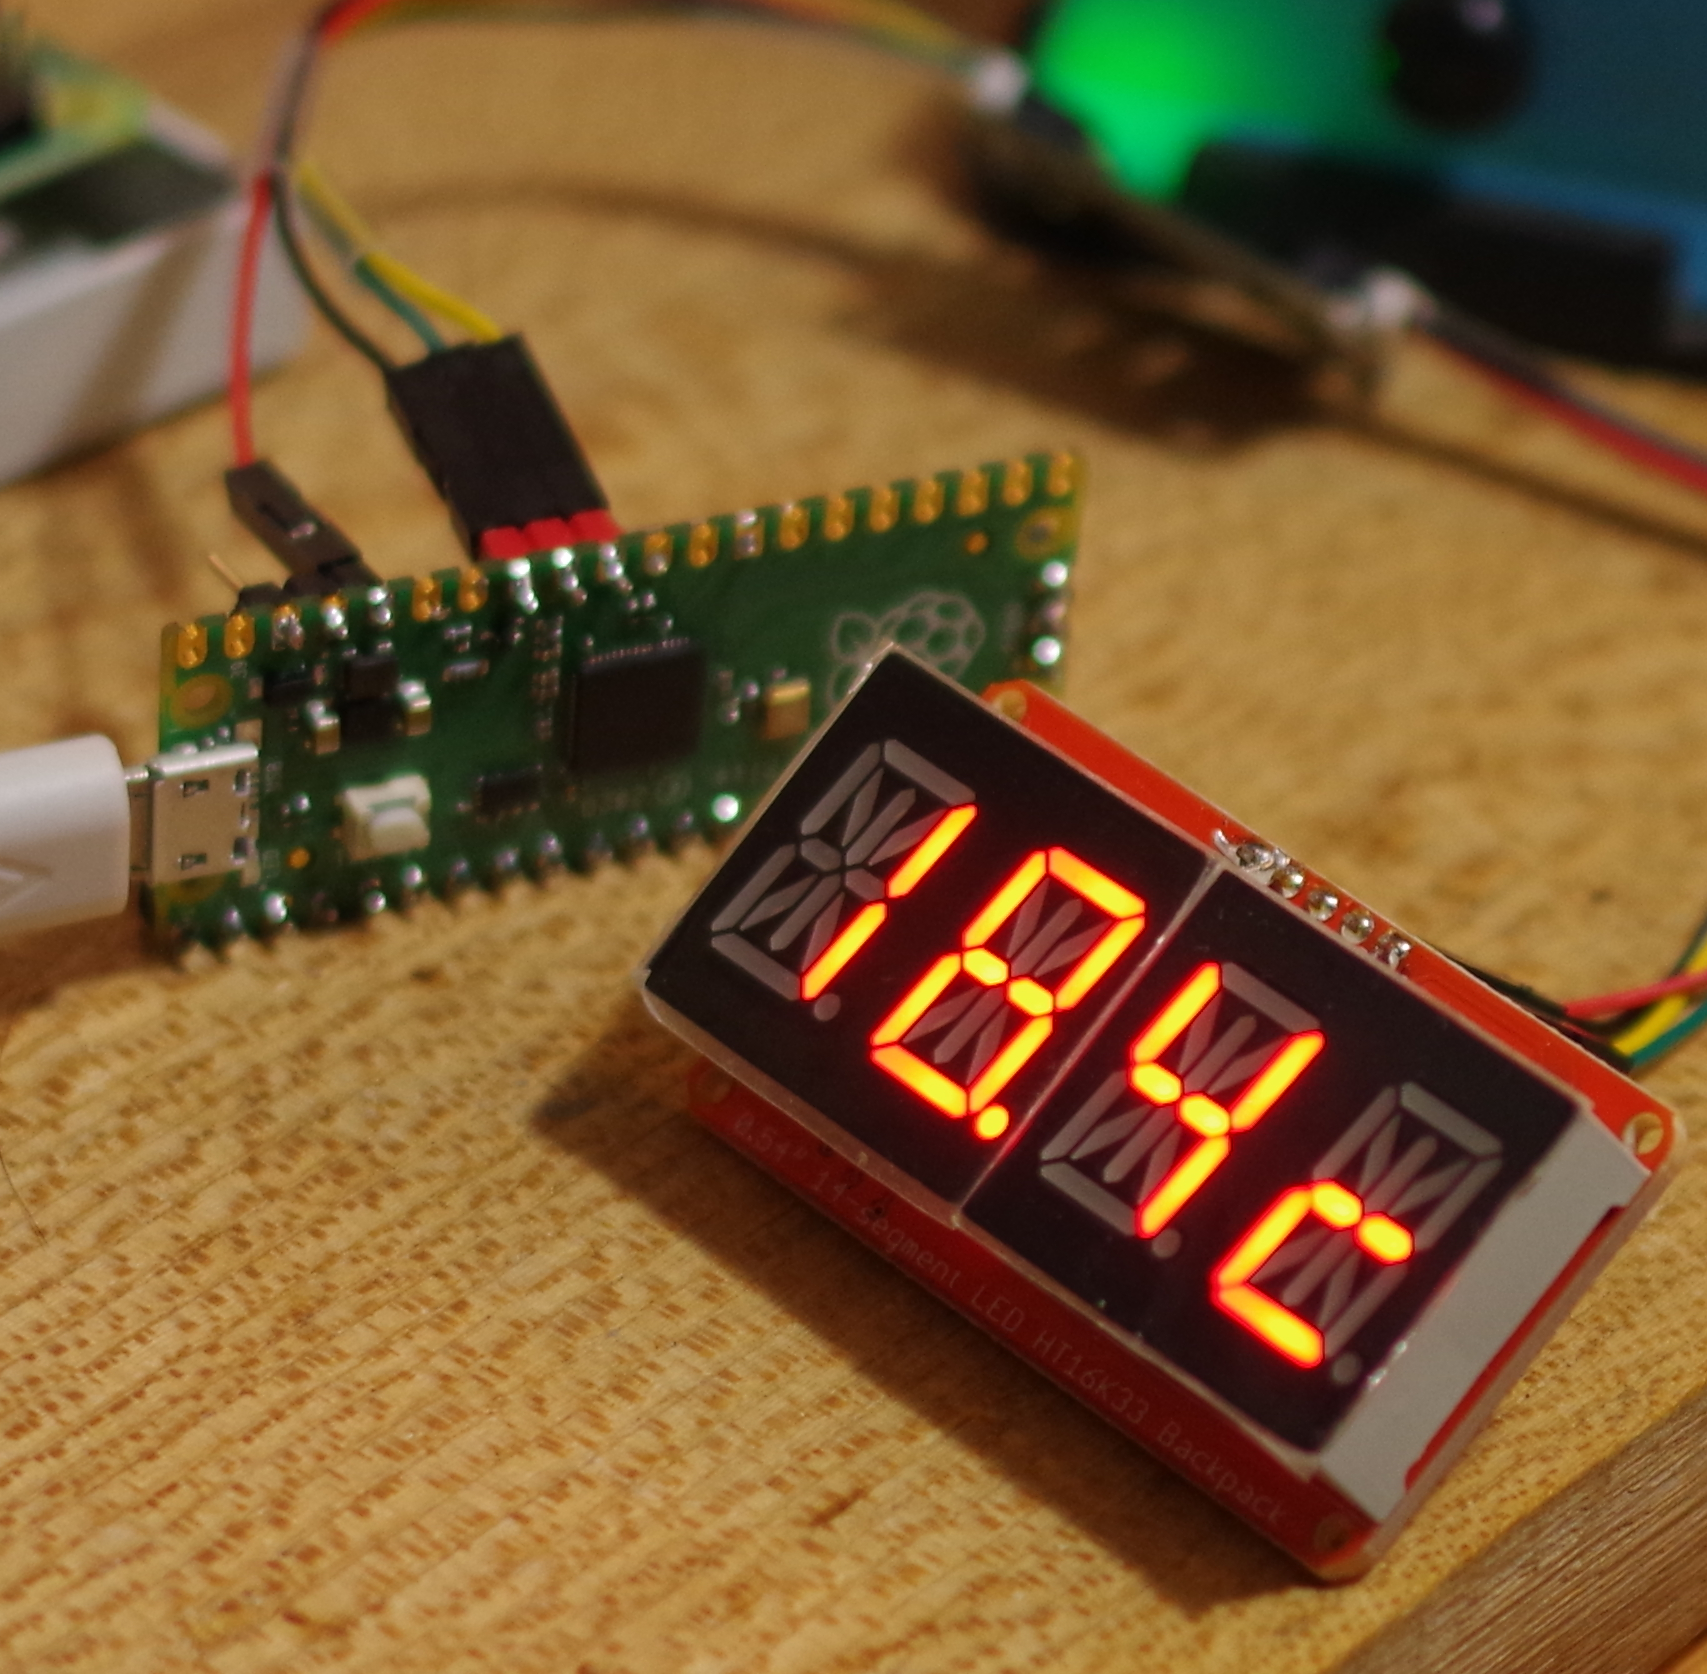
実行中の様子です。
温度表示部分を次のように差し替えると、横スクロールします。
display.marquee("tmp117 " + '{:.1f}c '.format(tmp117.temperature), 0.5)