第3回では、気圧センサBMP280をI2Cバスで接続してセンサ・データを読み出しました。MEMSセンサは、製造工程で、個々のパラメータが一定ではありません。そのため、補正(補償)をしなくては正しい値が求まりません。BMP280はたくさんの補正(補償)値が記録されているので、それを読み出して、補正(補償)式で計算しました。この前の世代では、固定小数点形式だったので、INT_16tやUINT_16t、INT_32tのデータ形式で計算ができるようになったのでがぜん使いやすくなりました。
STマイクロのLPS25HBは、それをさらに改良して、センサ側で全部計算をして計算結果だけを読み出せばよいようにしました。具体的には、24ビットのデータを読み出して4096で割ると、hPaの値が得られます。
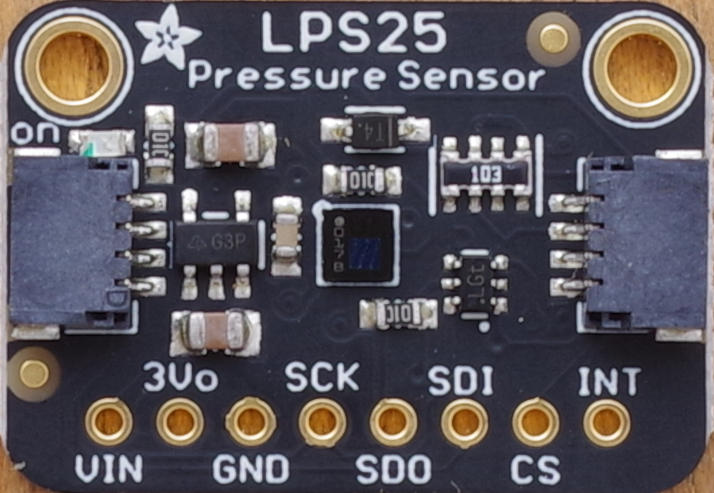
LPS25HBボードのおもなスペック
- 動作電圧 3.3V(デバイスは1.7~3.6 V)
- 測定範囲 260~1260hPa
- 確度 ±0.1hPa(25℃)、±1hPa(0~80℃)
- インターフェース SPI、I2C。I2C用プルアップ抵抗は実装
- スレーブ・アドレス 0x5d
接続
接続は前回の第4回を参照してください。STEMMA QTの規格に沿っているので、4ピン・ケーブルでつないでいます。

標準出力を用意
第3回を参照してprintfの出力を表示できるようにします。
WHO_AM_I
読み書きが正しくできるかどうかを、WHO_AM_I(0x0f)を読み出し、0xbdが返ってくることで確認します。
スリープ
このセンサは、電源が入ったら、スリープ・モードに遷移します。なので、測定したいときは、wakeupします。
具体的には、CTRL_REG1レジスタに0x90を書き込みます。
気圧の読み出しと表示
気圧のデータは、3バイト24ビットです。PRESS_OUT_H (0x2A)、 PRESS_OUT_L (0x29)、PRESS_OUT_XL (0x28)を読み出し、4096で割るとhPaの値になります。
気圧データの低いアドレス0x28から3バイトを読み出しますが、0x28 | 0x80の形で読まないと、正しいデータが読めません。
プログラム
/home/pi/pico/pico-examples/i2cのCMakeLists.txtに、
add_subdirectory(lps25_i2c)
を追加しました。
/home/pi/pico/pico-examples/i2c/lps25_i2c内にソースのlps25.cを保存します。同じディレクトリに、下記のCMakeLists.txtを入れます。
add_executable(lps25
        lps25.c
        )

# Pull in our (to be renamed) simple get you started dependencies
target_link_libraries(lps25 pico_stdlib hardware_i2c)

# create map/bin/hex file etc.
pico_add_extra_outputs(lps25)

# add url via pico_set_program_url
example_auto_set_url(lps25)
/home/pi/pico/pico-examples/build /i2cディレクトリで、
cmake ..
makeファイルができます。
/home/pi/pico/pico-examples/build/i2c/lps25_i2cディレクトリで、
make -j4
を実行します。実行ファイルができます。
BOOTSELボタンを押したままUSBケーブルをつなげます(抜き差し)。
pico\pico-examples\build\i2c\lps25_i2cに入っているlps25.uf2を、デスクトップに表示されているRPI-RP2ドライブにドラッグします。
/**
* Copyright (c) 2020 Raspberry Pi (Trading) Ltd.
*
* SPDX-License-Identifier: BSD-3-Clause
*/
# include <stdio.h>
# include <string.h>
# include "pico/stdlib.h"
# include "hardware/i2c.h"
/* Example code to talk to a lps25 temperature/pressure sensor.
NOTE: Ensure the device is capable of being driven at 3.3v NOT 5v. The Pico
GPIO (and therefor SPI) cannot be used at 5v.
GPIO 8 (pin 11)-> SDA on lps25 board
GPIO 9 (pin 12)-> SCL on lps25 board
3.3v (pin 3;6) -> VCC on lps25 board
GND (pin 38) -> GND on lps25 board
*/
static int addr = 0x5d;
# define I2C_PORT i2c0
# define WHO_AM_I 0x0f
# define CTRL_REG1 0x20
static void write_register(uint8_t reg, uint8_t data) {
uint8_t buf[2];
buf[0] = reg;
buf[1] = data;
i2c_write_blocking(I2C_PORT, addr, buf, 2, true);
}
static void read_registers(uint8_t reg, uint8_t *buf, uint16_t len) {
i2c_write_blocking(I2C_PORT, addr, ®, 1, true);
i2c_read_blocking(I2C_PORT, addr, buf, len, false);
}
static int32_t lps25_read_raw() {
uint8_t buffer[3];
uint8_t val = 0x28 | 0x80;
i2c_write_blocking(I2C_PORT, addr, &val, 1, true);
i2c_read_blocking(I2C_PORT, addr, buffer, 3, false);
int32_t pressure;
pressure = buffer[2] << 16 | buffer[1] << 8 | buffer[0];
return pressure;
}
int main() {
stdio_init_all();
printf("Hello, lps25! Reading raw data from registers via i2c...\n");
// This example will use I2C0 on GPIO8 (SDA) and GPIO9 (SCL) running at 100kHz.
i2c_init(I2C_PORT, 100 * 1000);
gpio_set_function(8, GPIO_FUNC_I2C);
gpio_set_function(9, GPIO_FUNC_I2C);
gpio_pull_up(8);
gpio_pull_up(9);
// interrogate the device for its I2C ID number, should be 0xbd
uint8_t id;
read_registers(WHO_AM_I, &id, 1);
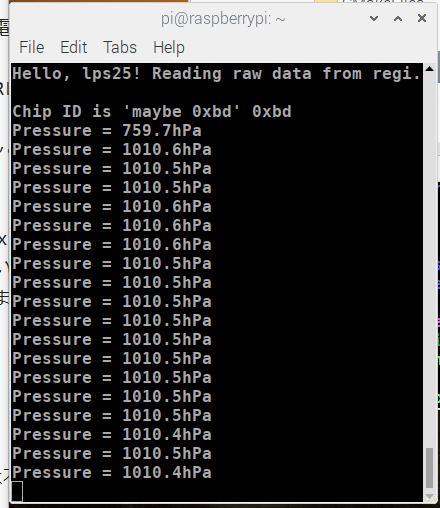
printf("\nChip ID is 'maybe 0xbd' 0x%x\n", id);
// wakeup
write_register(CTRL_REG1, 0x90);
int32_t press, pressure;
while (1) {
press = lps25_read_raw(pressure);
printf("Pressure = %.1fhPa\n", press / 4096.0);
sleep_ms(5000);
}
return 0;
}
実行中の様子です。
1回目の読み出しは不正確です。
(I2Cバス)pic-examplesのI2CはGP4/GP5を使っています。ここではGP8/GP9を使っています。ピン配置図(https://datasheets.raspberrypi.org/pico/pico-datasheet.pdf)では、どちらもI2C1です。しかし、プログラム内ではI2C0です。この矛盾の原因は不明です。
(C言語)筆者は普段Arduino IDEを使っています。したがって、PicoのようによりC言語の仕様に近い処理系で、記述が正しいかはまったく自信がありません。