はじめに
AdminLTEとは
AdminLTEは、最も広く使われているオープンソースの管理画面テンプレートの1つです。Bootstrapベースで構築され、モダンなデザイン、レスポンシブ対応、豊富なコンポーネントを提供し、管理画面の開発を効率化します。
Laravel-AdminLTEパッケージとは
jeroennoten/Laravel-AdminLTEは、AdminLTEをLaravelで簡単に利用するためのパッケージです。このパッケージを使用することで、AdminLTEの統合、認証画面の生成、メニュー管理などを容易に実装できます。
主な特徴
- AdminLTE 3の完全な統合
- カスタマイズ可能なサイドバーメニュー
- ビューコンポーネントとブレードディレクティブ
- 認証ビューの生成機能
- 多言語対応
1. プロジェクトの作成とパッケージのインストール
まず、新しいLaravelプロジェクトを作成し、必要なパッケージをインストールします。
新規プロジェクトの作成
composer create-project laravel/laravel laravel-adminlte-project
cd laravel-adminlte-project
AdminLTEパッケージのインストール
composer require jeroennoten/laravel-adminlte
AdminLTEのアセットをインストール
php artisan adminlte:install
上記コマンドにより、以下の3つの主要なリソースがインストールされます:
-
AdminLTEの配布ファイル (
public/vendorフォルダ)- AdminLTE本体のファイル
- Bootstrap
- jQuery
- その他の依存ファイル
-
パッケージの設定ファイル (
config/adminlte.php)- AdminLTEの基本設定
-
パッケージの翻訳ファイル (
lang/vendor/adminlte/)- 多言語対応のための翻訳リソース
2. 共通レイアウトの作成
AdminLTEを継承した共通レイアウトを作成します。以下のファイルを作成してください。(公式のwikiを参考)
@extends('adminlte::page')

{{-- Extend and customize the browser title --}}

@section('title')
    {{ config('adminlte.title') }}
    @hasSection('subtitle') | @yield('subtitle') @endif
@stop

{{-- Extend and customize the page content header --}}

@section('content_header')
    @hasSection('content_header_title')
        <h1 class="text-muted">
            @yield('content_header_title')

            @hasSection('content_header_subtitle')
                <small class="text-dark">
                    <i class="fas fa-xs fa-angle-right text-muted"></i>
                    @yield('content_header_subtitle')
                </small>
            @endif
        </h1>
    @endif
@stop

{{-- Rename section content to content_body --}}

@section('content')
    @yield('content_body')
@stop

{{-- Create a common footer --}}

@section('footer')
    <div class="float-right">
        Version: {{ config('app.version', '1.0.0') }}
    </div>

    <strong>
        <a href="{{ config('app.company_url', '#') }}">
            {{ config('app.company_name', 'My company') }}
        </a>
    </strong>
@stop

{{-- Add common Javascript/Jquery code --}}

@push('js')
<script>

    $(document).ready(function() {
        // Add your common script logic here...
    });

</script>
@endpush

{{-- Add common CSS customizations --}}

@push('css')
<style type="text/css">

    {{-- You can add AdminLTE customizations here --}}
    /*
    .card-header {
        border-bottom: none;
    }
    .card-title {
        font-weight: 600;
    }
    */

</style>
@endpush
3. 管理画面の作成
共通レイアウトを使用して、実際の管理画面ページを作成します。(公式のwikiを参考)
@extends('layouts.admin')

{{-- Customize layout sections --}}

@section('subtitle', 'Welcome')
@section('content_header_title', 'Home')
@section('content_header_subtitle', 'Welcome')

{{-- Content body: main page content --}}

@section('content_body')
    <p>Welcome to this beautiful admin panel.</p>
@stop

{{-- Push extra CSS --}}

@push('css')
    {{-- Add here extra stylesheets --}}
    {{-- <link rel="stylesheet" href="/css/admin_custom.css"> --}}
@endpush

{{-- Push extra scripts --}}

@push('js')
    <script> console.log("Hi, I'm using the Laravel-AdminLTE package!"); </script>
@endpush
4. ルーティングの設定
ルートを設定します。
Route::get('/dashboard', function () {
    return view('dashboard');
});
5. メニューの設定
AdminLTEのメニューを設定します。
return [
    'menu' => [
        //追加
        [
            'text' => 'ダッシュボード',
            'url'  => 'welcome',
            'icon' => 'fas fa-fw fa-tachometer-alt',
        ],
         // 他のメニュー項目
    ],
];
6. 画面確認
開発サーバーを起動
php artisan serve
ブラウザで以下のURLにアクセスします。
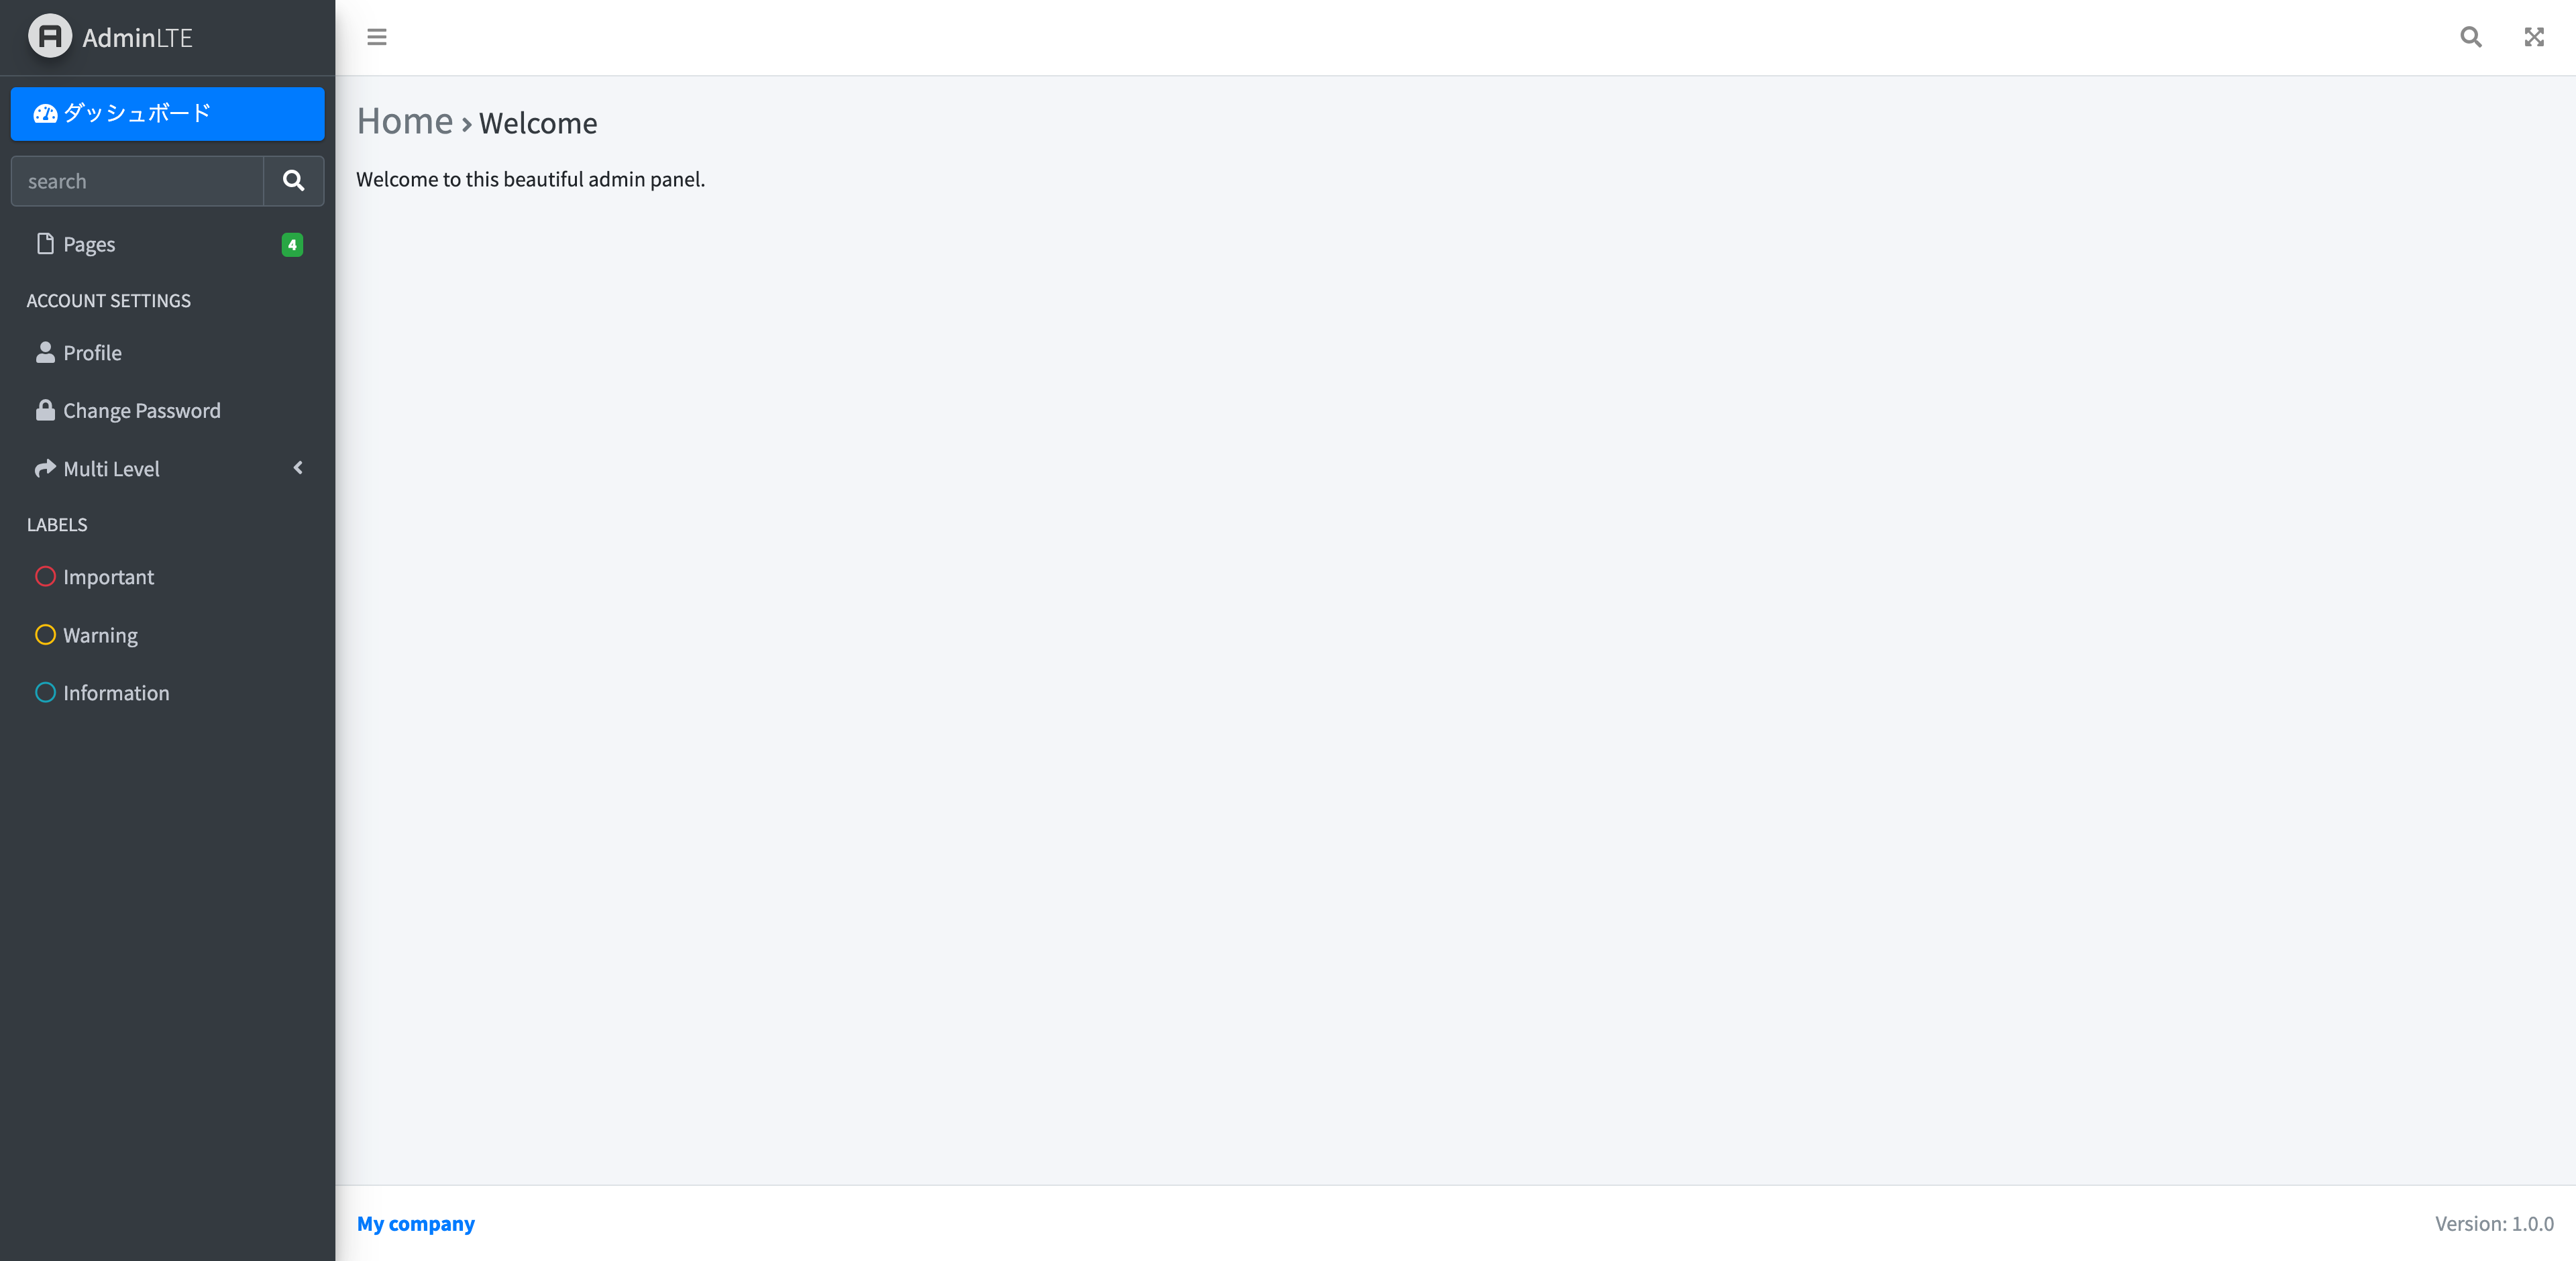
http://127.0.0.1:8000/dashboard
実際の画面
7. ログイン画面を作成する
認証機能はLaravel Breezeを利用します。
composer require laravel/breeze --dev
php artisan breeze:install

#選択肢は以下を選びました(任意)

 ┌ Which Breeze stack would you like to install? ───────────────┐
 │ Blade with Alpine                                            │
 └──────────────────────────────────────────────────────────────┘

 ┌ Would you like dark mode support? ───────────────────────────┐
 │ No                                                           │
 └──────────────────────────────────────────────────────────────┘

 ┌ Which testing framework do you prefer? ──────────────────────┐
 │ PHPUnit                                                      │
 └──────────────────────────────────────────────────────────────┘
生成されたログイン画面を以下のように編集する。
@extends('adminlte::auth.login')
.envを編集して表示を日本語化します。
APP_LOCALE=ja
APP_FALLBACK_LOCALE=en
APP_FAKER_LOCALE=ja_JP
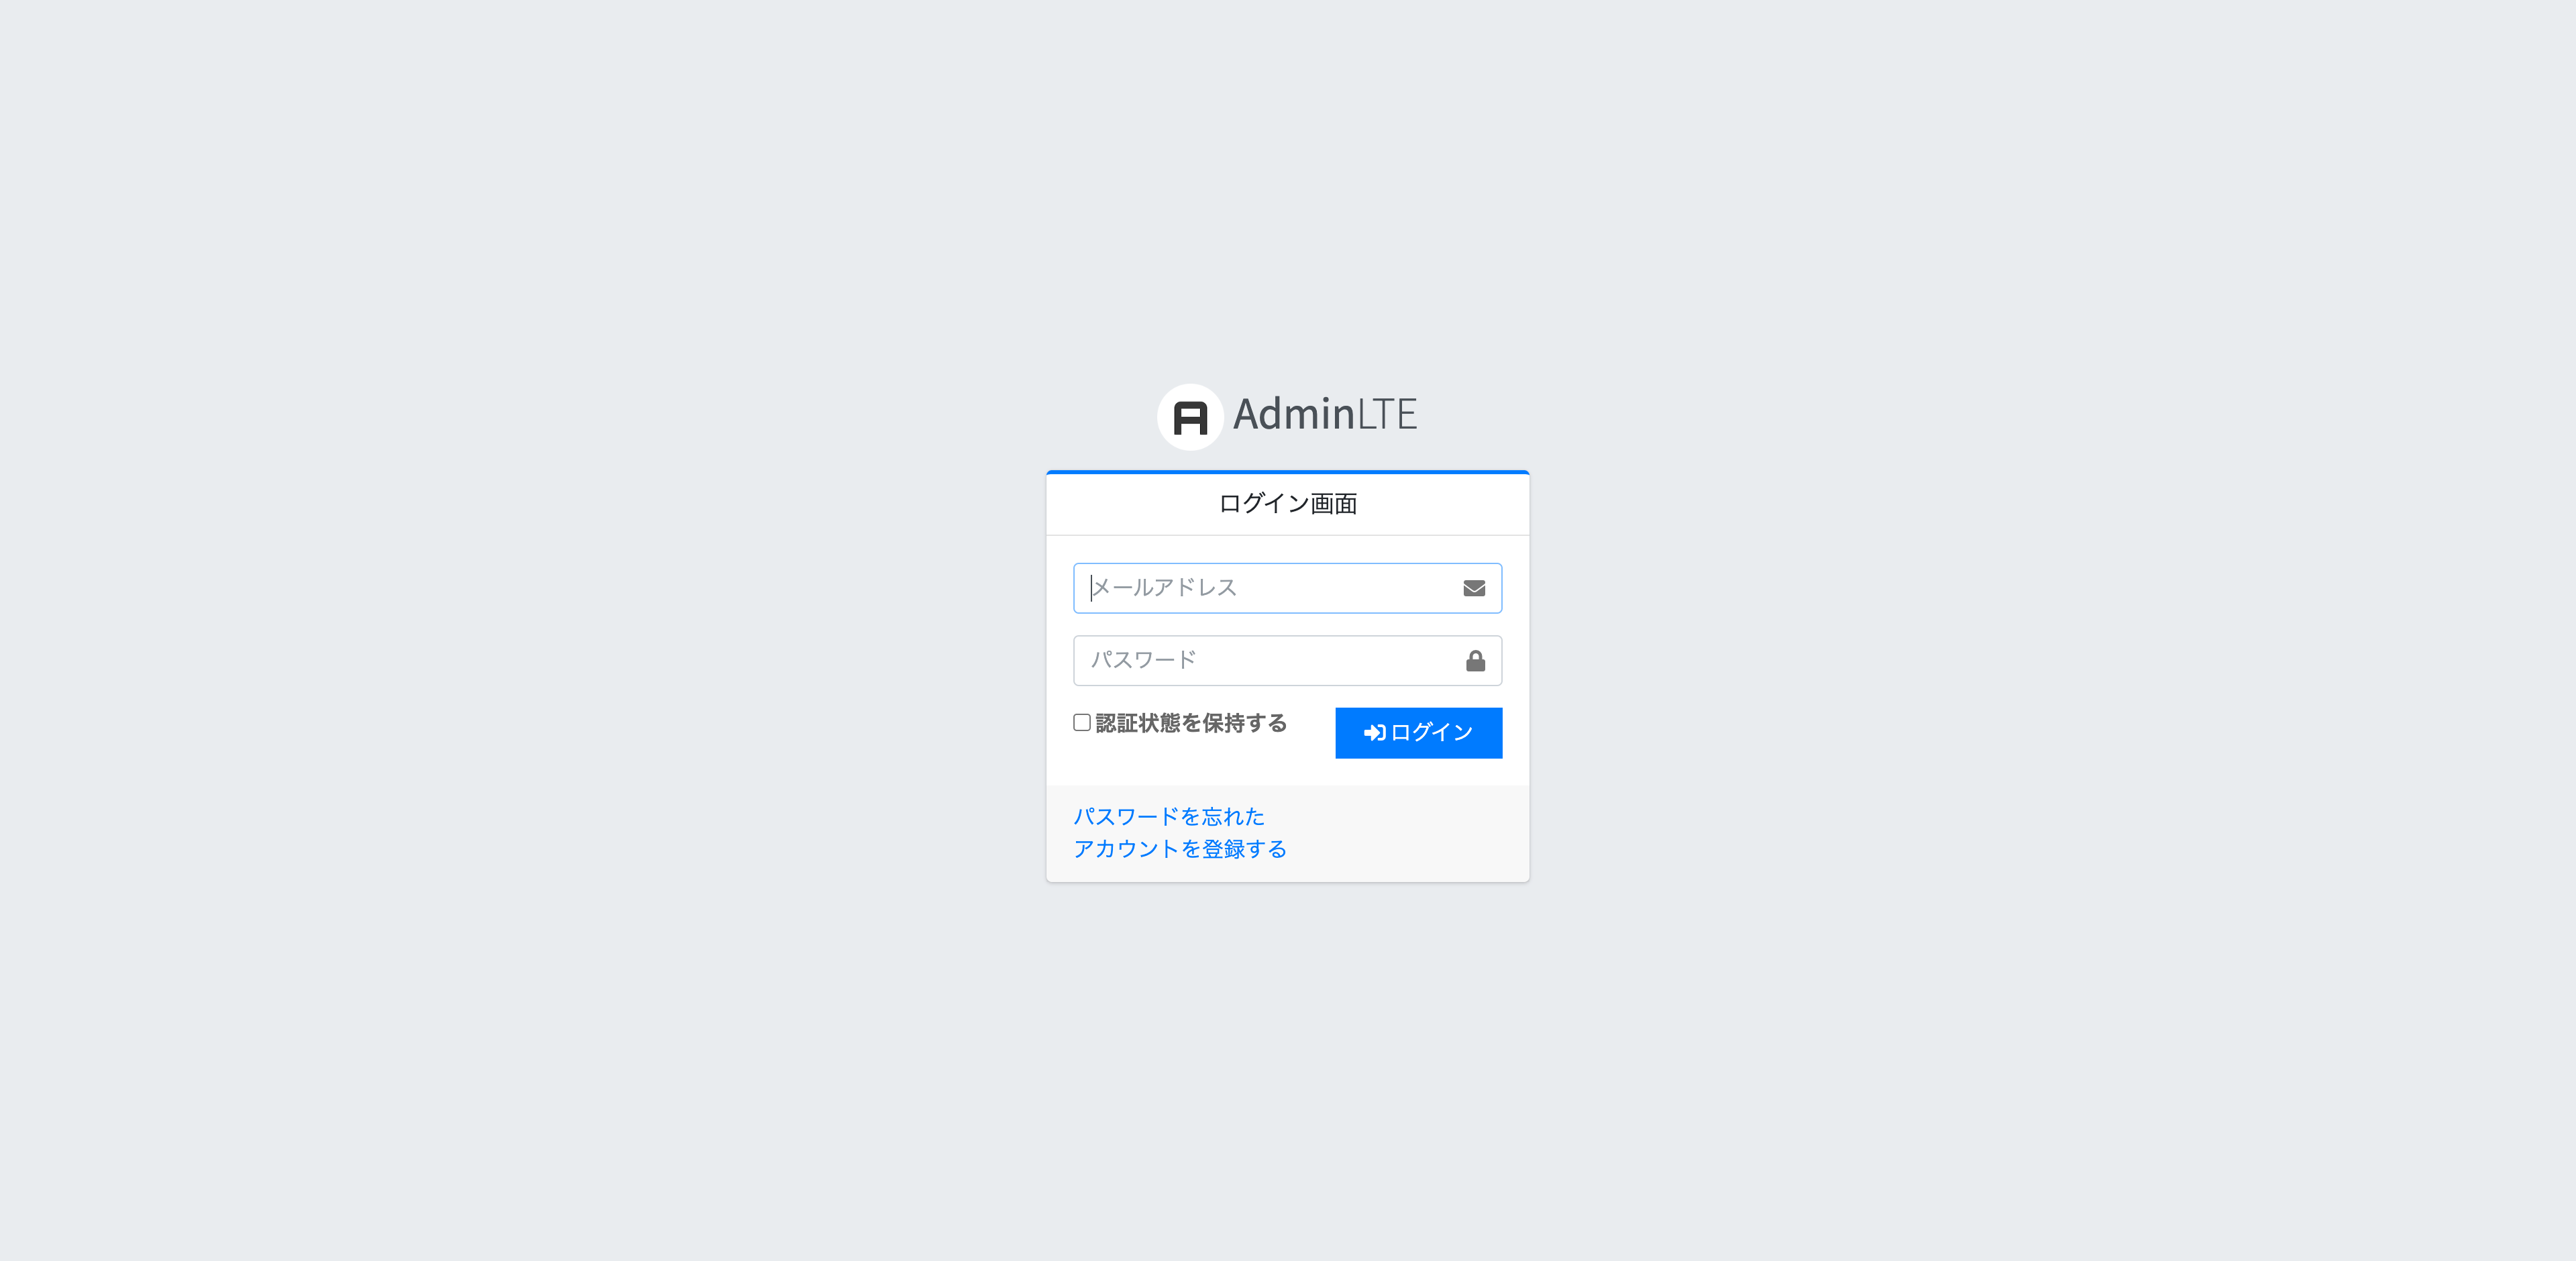
実際の画面
ブラウザで以下のURLにアクセスします。
http://127.0.0.1:8000/login
8. アカウント登録画面を作成
以下のファイルを編集
@extends('adminlte::auth.register')
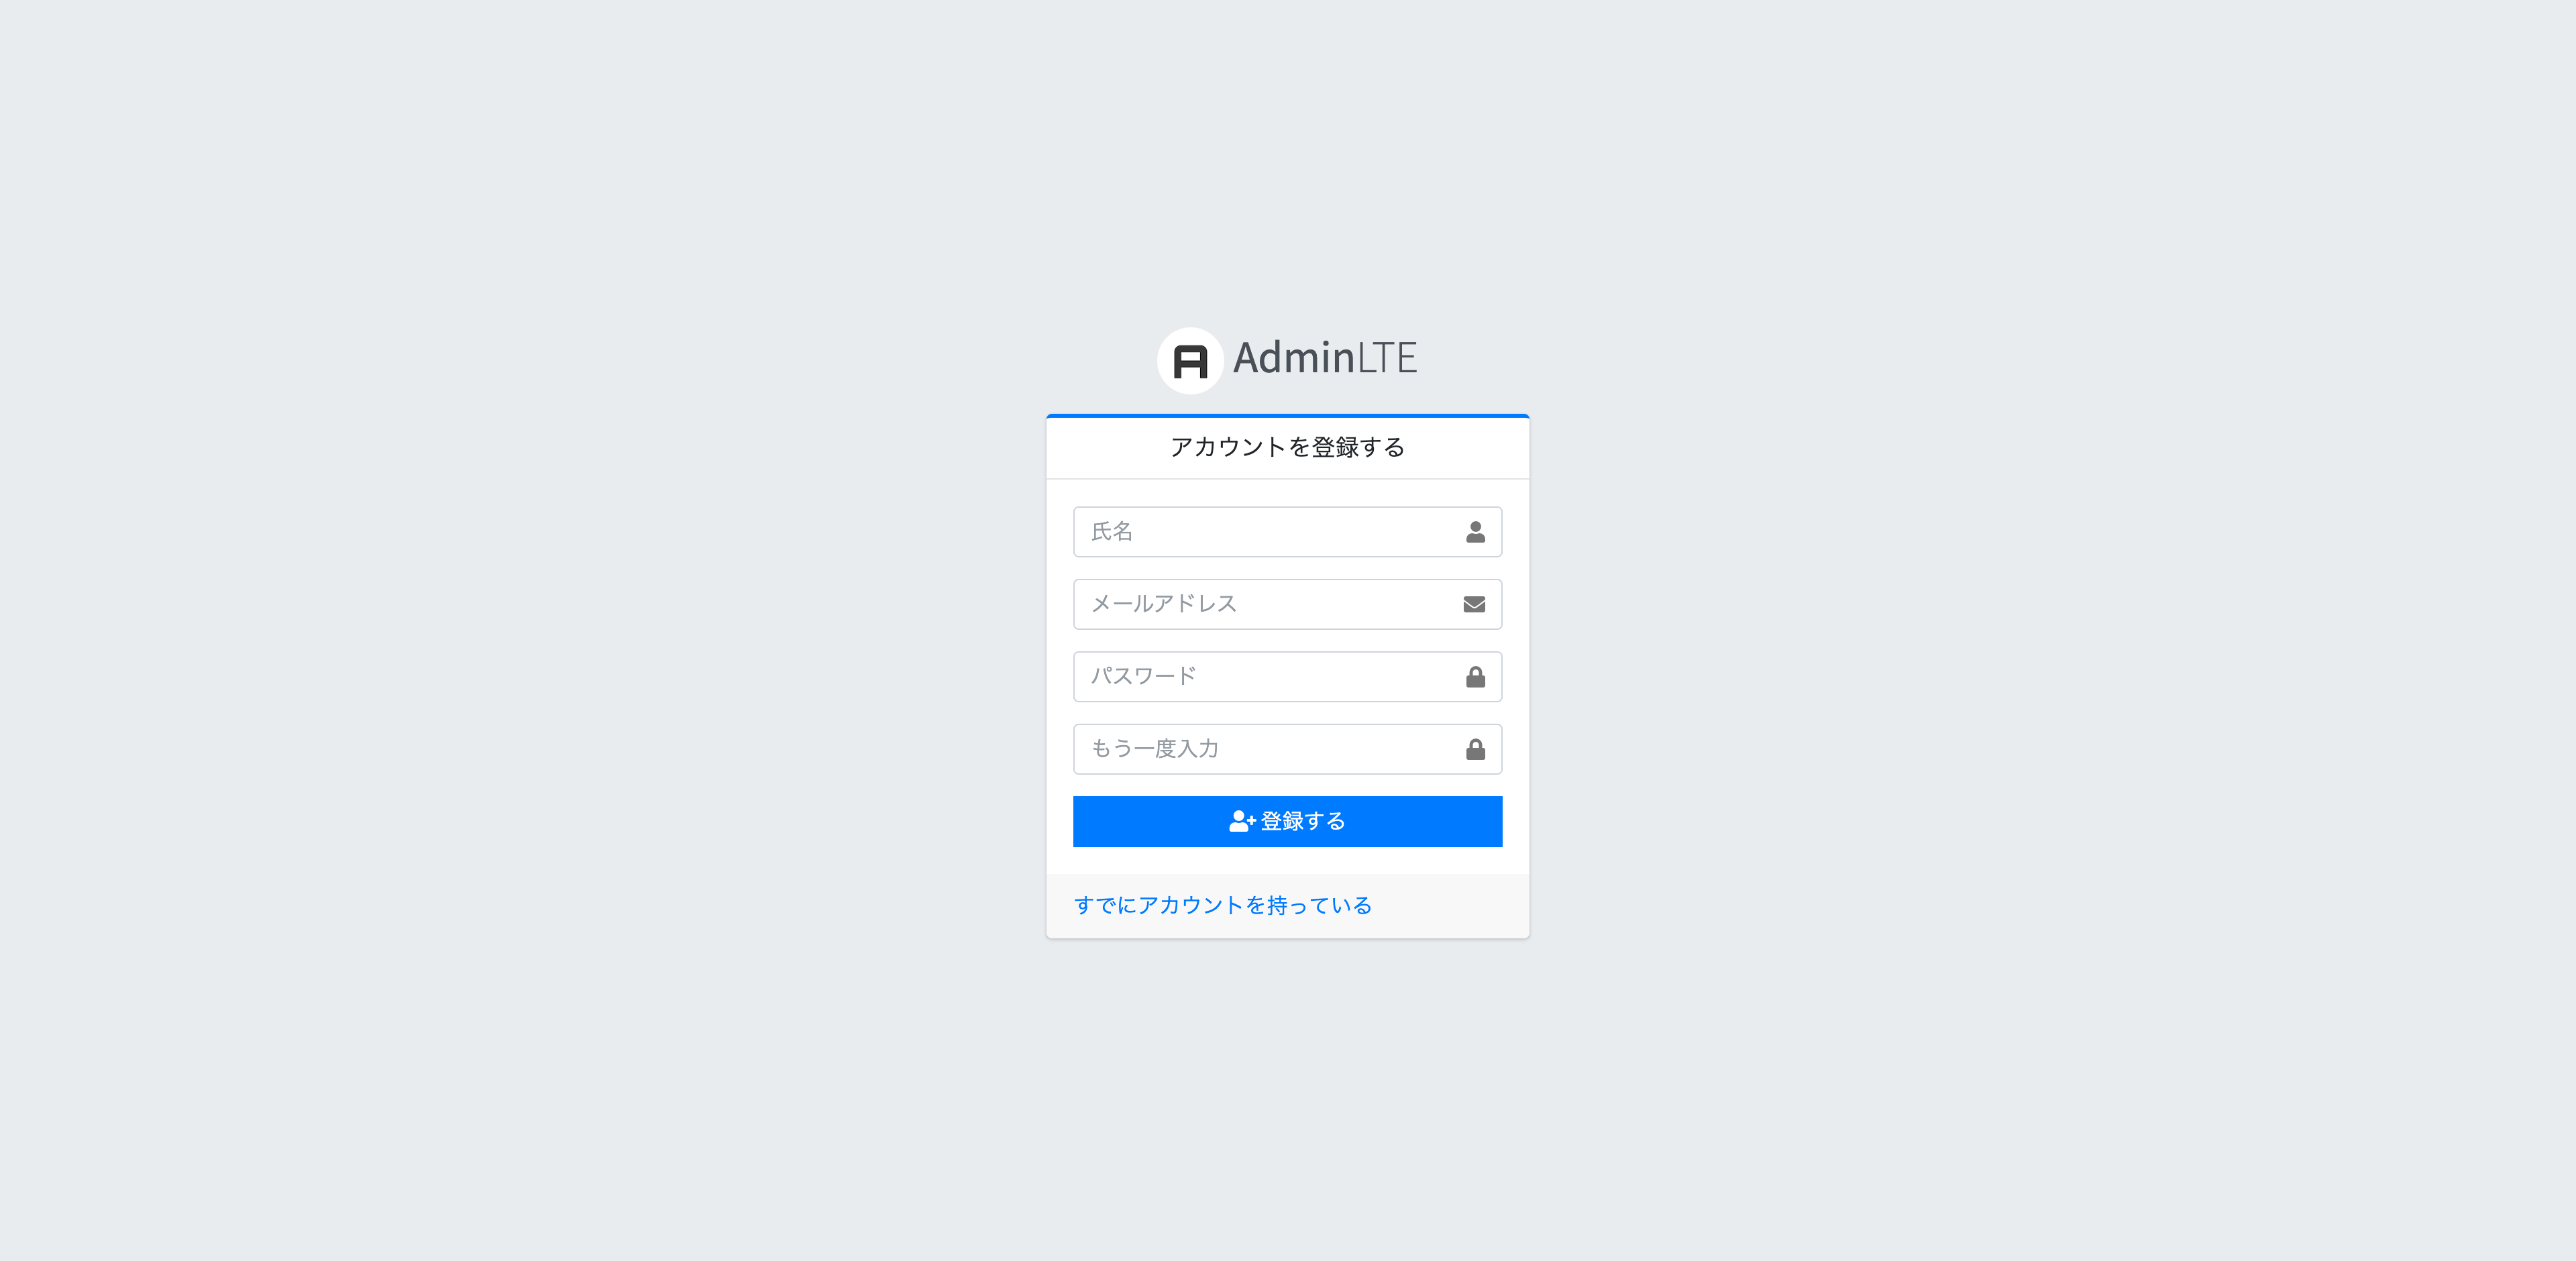
実際の画面
ブラウザで以下のURLにアクセスします。
http://127.0.0.1:8000/register


