AWS Amplify良いですよね。皆さんは使っていますか?
Amplifyを使うことでSPAなWebアプリケーションにAWSの多様な機能を組み込むことができますが、 ここではDynamoDB + GraphQL をデータソースとした簡単なチャットを作ってみます。
amplifyのコマンドを実行することで、AWSのマネジメントコンソール等を直接操作することなくある程度のアプリケーションを作ることができることを体感していただけるといいなーと思います。
ちなみにこれはAWS Amplify Advent Calendar 2019の14日の記事です!
開発環境について
$ vue -V
3.11.0

$ amplify -v
1.7.3
1. Vueアプリケーションを作る
vue create vue-chat-app

Vue CLI v4.1.1
? Please pick a preset: (Use arrow keys)
❯ default (babel, eslint)
  Manually select features
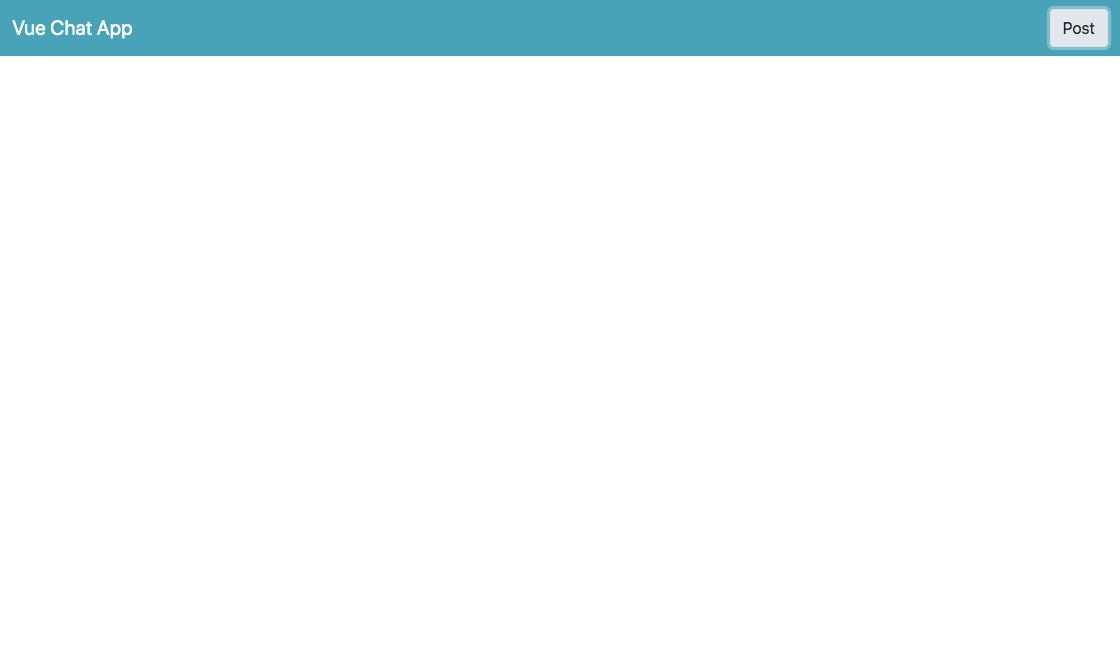
とりあえず起動してみます。
cd vue-chat-app
yarn serve
2. Vueアプリケーションを作る
まずはAmplifyを組み込まない状態で、簡単に挙動を確認できるところまでVueアプリケーションを作ります。
Bootstrapの組み込み
UI周りはbootstrap-vueを使いますね。
$ yarn add bootstrap-vue bootstrap core-js
アプリケーションの実装
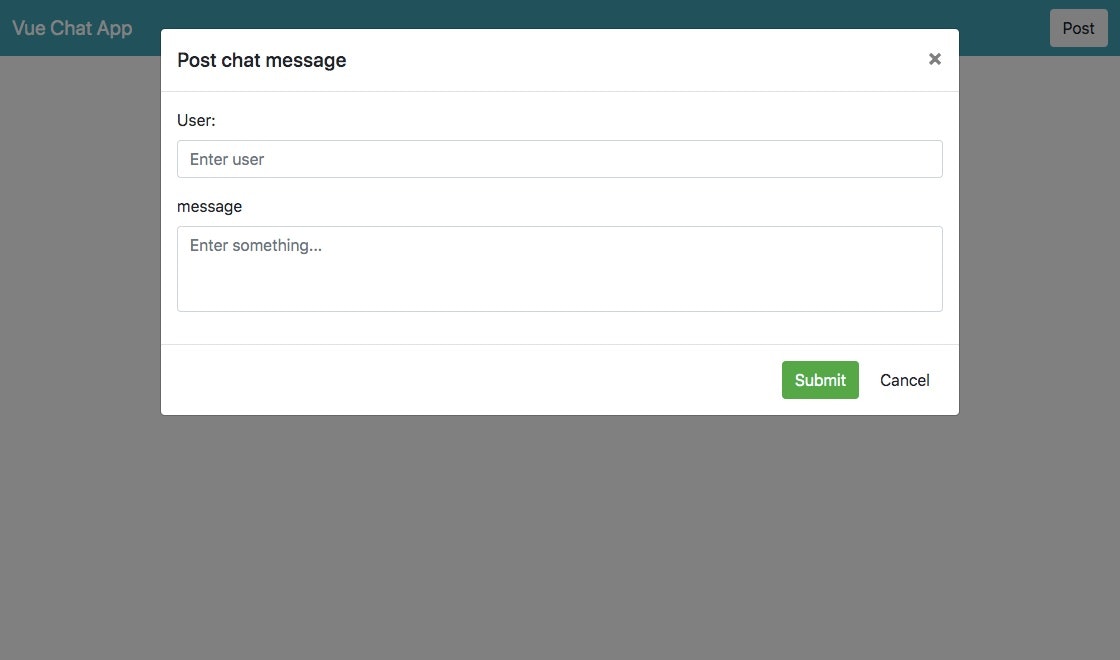
メッセージ送信ダイアログ展開
↓
フォームに入力
↓
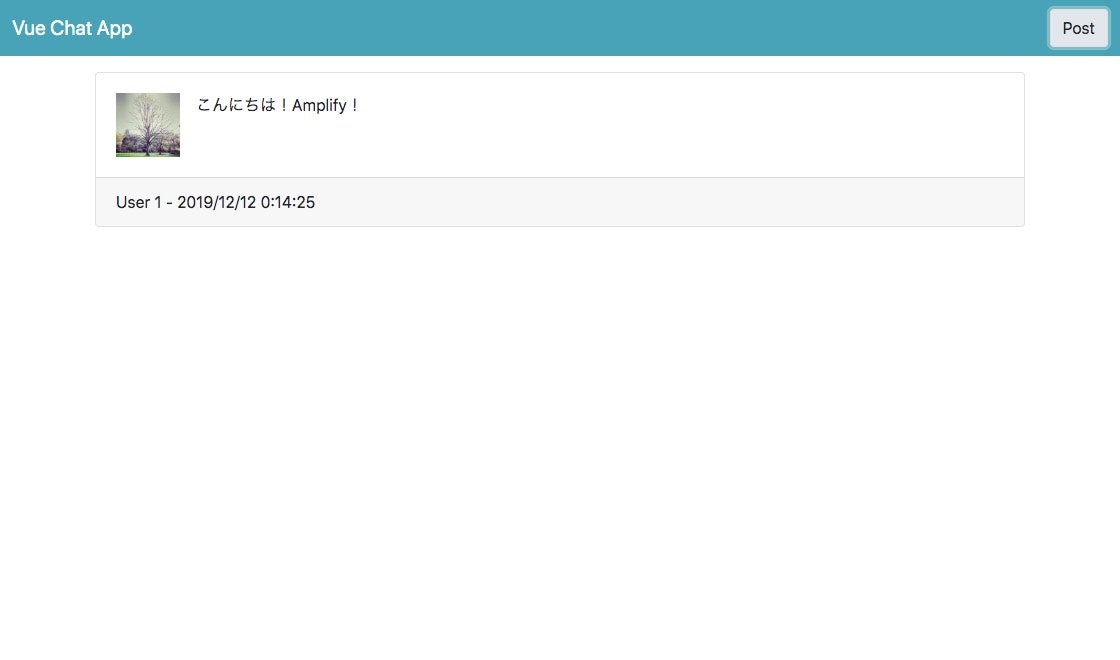
メッセージ表示
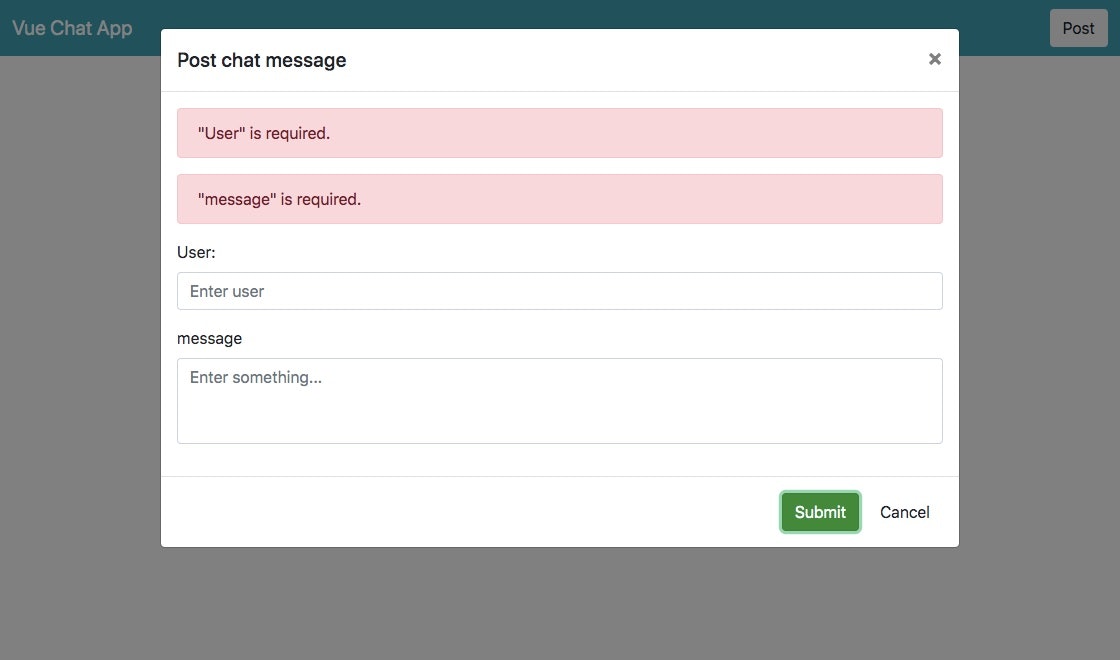
ができるところまでデータベースへの更新処理無しで実装してみます。
src/main.js
import Vue from 'vue'
import App from './App.vue'
import BootstrapVue from 'bootstrap-vue'
import 'bootstrap/dist/css/bootstrap.css'
import 'bootstrap-vue/dist/bootstrap-vue.css'

Vue.use(BootstrapVue)

Vue.config.productionTip = false

new Vue({
  render: h => h(App),
}).$mount('#app')
src/App.vue
<template>
  <div id="app">
    <header>
      <b-navbar variant="info" type="dark">
        <b-navbar-brand href="#">Vue Chat App</b-navbar-brand>

        <b-navbar-nav class="ml-auto">
          <b-nav-form>
            <b-button @click="modalShow = !modalShow" variant="light">Post</b-button>
          </b-nav-form>
        </b-navbar-nav>
      </b-navbar>
    </header>

    <b-container>
      <section class="form">
        <section>
          <b-modal v-model="modalShow" size="lg" title="Post chat message">
            <section v-if="errors.length > 0" class="alerts">
              <div
                v-for="(error, j) in errors"
                v-bind:key="j"
                class="alert alert-danger"
                role="alert"
              >{{ error }}</div>
            </section>

            <b-form>
              <b-form-group label="User:" label-for="user">
                <b-form-input id="user" v-model="form.user" required placeholder="Enter user"></b-form-input>
              </b-form-group>

              <b-form-group label="message" label-for="message">
                <b-form-textarea
                  id="message"
                  v-model="form.message"
                  placeholder="Enter something..."
                  rows="3"
                  max-rows="6"
                ></b-form-textarea>
              </b-form-group>
            </b-form>

            <template v-slot:modal-footer="{ submit, cancel, close }">
              <b-button variant="success" @click="onPostMessage">Submit</b-button>
              <b-button variant="default" @click="onCancel">Cancel</b-button>
            </template>
          </b-modal>
        </section>

        <section>
          <b-card
            v-for="(chat, i) in chats"
            v-bind:key="i"
            v-bind:footer="chat.user + ' - ' + chat.created_at"
            footer-tag="footer"
          >
            <b-media>
              <template v-slot:aside>
                <b-img width="64" src="https://picsum.photos/200"></b-img>
              </template>
              {{ chat.message }}
            </b-media>
          </b-card>
        </section>
      </section>
    </b-container>
  </div>
</template>

<script>
export default {
  user: "app",
  data() {
    return {
      form: {
        user: "",
        message: ""
      },
      chats: [],
      modalShow: false,
      errors: []
    };
  },
  computed: {
    formIsInValid() {
      return this.errors.length > 0;
    },
    chatParams() {
      return {
        ...this.form,
        created_at: new Date().toLocaleString()
      };
    }
  },
  methods: {
    onPostMessage() {
      this.checkMessageParams();
      if (this.formIsInValid) {
        return;
      }

      this.postMessage();

      this.modalShow = false;
      this.form.user = "";
      this.form.message = "";
    },
    postMessage() {
      this.chats.push(
        this.chatParams
      )
    },
    onCancel() {
      this.modalShow = false;
    },
    checkMessageParams() {
      this.errors = [];

      if (this.form.user === "") {
        this.errors.push('"User" is required.');
      }
      if (this.form.message === "") {
        this.errors.push('"message" is required.');
      }
    }
  }
};
</script>

<style>
.card {
  margin: 1em 0;
}
</style>
3. Amplifyを組み込む
3.1 初期化
おもむろに以下のコマンドを叩きます。
$ amplify init


Note: It is recommended to run this command from the root of your app directory

? Enter a name for the project
vue-chat-app

? Enter a name for the environment
develop

? Choose your default editor:
Visual Studio Code

? Choose the type of app that you're building
javascript

Please tell us about your project
? What javascript framework are you using
vue

? Source Directory Path:
src

? Distribution Directory Path:
dist

? Build Command:
yarn build

? Start Command:
yarn serve
3.2 S3へのホスティング
順番はどちらでもいいのですが、今回はDB周りの設定をする前に現在の状態のアプリケーションをS3へデプロイします。
$ amplify add hosting

? Select the environment setup: (S3 only with HTTP)
DEV

? hosting bucket name
vue-chat-app-20191214083130-hostingbucket

? index doc for the website
index.html

? error doc for the website
index.html

You can now publish your app using the following command:
Command: amplify publish
$ amplify publish

Current Environment: develop

| Category | Resource name   | Operation | Provider plugin   |
| -------- | --------------- | --------- | ----------------- |
| Hosting  | S3AndCloudFront | Create    | awscloudformation |

? Are you sure you want to continue?
Yes

~

✨  Done in 35.82s.
frontend build command exited with code 0
✔ Uploaded files successfully.
Your app is published successfully.
http://vue-chat-app-20191214083130-hostingbucket-develop.s3-website-ap-northeast-1.amazonaws.com
publishを実行するとamplify initでコマンドラインで回答したビルドコマンド(yarn build) が実行され、S3へデプロイされます。
デプロイが完了するとS3のエンドポイントのアドレスが表示されるのであくせすしてみます。
http://vue-chat-app-20191214083130-hostingbucket-develop.s3-website-ap-northeast-1.amazonaws.com
ローカルで確認した通りのアプリケーションが表示されればOKですね。
3.3 APIの追加
$ amplify add api

? Please select from one of the below mentioned services
GraphQL

? Provide API name:
vuechatapp

? Choose an authorization type for the API
API key

? Do you have an annotated GraphQL schema?
No

? Do you want a guided schema creation?
Yes

? What best describes your project: (e.g., “Todo” with ID, name, description)
Single object with fields

? Do you want to edit the schema now?
Yes

Please edit the file in your editor: /Users/Work/aws_amplify/vue-chat-app/amplify/backend/api/vuechatapp/schema.graphql

s? Press enter to continue
yesを選択するとエディタが起動し、以下のようなgraphqlスキーマファイルのテンプレートが表示されます。
schema.graphql
type Todo @model {
  id: ID!
  name: String!
  description: String
}
以下のように変更します。
type Chat @model {
  id: ID!
  user: String!
  message: String
  created_at: String
}
amplify statusで見てみます。
$ amplify status

Current Environment: develop

| Category | Resource name   | Operation | Provider plugin   |
| -------- | --------------- | --------- | ----------------- |
| Api      | vuechatapp      | Create    | awscloudformation |
| Hosting  | S3AndCloudFront | No Change | awscloudformation |

Hosting endpoint: http://vue-chat-app-20191214083130-hostingbucket-develop.s3-website-ap-northeast-1.amazonaws.com
で、再びデプロイします。
API側のリソース作成なので、今回はpushします。
pushはローカルで変更されたamplifyの変更をAWSへ適用する操作、
publishはamplifyの変更に加えてアプリケーションのビルド&デプロイをする操作ですね。
"amplify push" will build all your local backend resources and provision it in the cloud
"amplify publish" will build all your local backend and frontend resources (if you have hosting category added) and provision it in the cloud
amplify pushすると幾つか質問が表示されます。
以下は全てデフォルト値のままです。
GraphQL schema compiled successfully.
Edit your schema at /Users/yuto-ogi/Work/aws_amplify/vue-chat-app/amplify/backend/api/vuechatapp/schema.graphql or place .graphql files in a directory at /Users/yuto-ogi/Work/aws_amplify/vue-chat-app/amplify/backend/api/vuechatapp/schema

? Do you want to generate code for your newly created GraphQL API
Yes

? Choose the code generation language target
javascript

? Enter the file name pattern of graphql queries, mutations and subscriptions
src/graphql/**/*.js

? Do you want to generate/update all possible GraphQL operations - queries, mutations and subscriptions
Yes

? Enter maximum statement depth [increase from default if your schema is deeply nested]
2

⠏ Updating resources in the cloud. This may take a few minutes...
AWSでのGrapyQLリソース作成が完了すると以下のようなファイルがソースディレクトリに作成されます。
  modified:   .graphqlconfig.yml
  modified:   src/graphql/mutations.js
  modified:   src/graphql/queries.js
  modified:   src/graphql/schema.json
  modified:   src/graphql/subscriptions.js
さらに、src/配下にaws-exports.jsが作成されます(認証情報が含まれるのでgitignore対象のファイルです)
これをVueアプリケーションで読み込みます。
const awsmobile = {
    "aws_project_region": "ap-northeast-1",
    "aws_content_delivery_bucket": "*********************************",
    "aws_content_delivery_bucket_region": "ap-northeast-1",
    "aws_content_delivery_url": "*********************************",
    "aws_appsync_graphqlEndpoint": "*********************************",
    "aws_appsync_region": "ap-northeast-1",
    "aws_appsync_authenticationType": "API_KEY",
    "aws_appsync_apiKey": "*********************************"
};


export default awsmobile;
3.4 VueアプリケーションへのAppSyncの組み込み
$ yarn add aws-amplify aws-amplify-vue
以下を追記します。
main.js
import Amplify, * as AmplifyModules from 'aws-amplify'
import { AmplifyPlugin } from 'aws-amplify-vue'
import awsconfig from './aws-exports'
Amplify.configure(awsconfig)
Vue.use(AmplifyPlugin, AmplifyModules)

Vue.config.productionTip = false
App.vue
amplify push後に作成されたGraphQL関連のファイルをimportし、アプリケーションに組み込みます。
import { API, graphqlOperation } from "aws-amplify";
import { createChat } from "@/graphql/mutations";
import { listChats } from "@/graphql/queries";
import { onCreateChat } from "@/graphql/subscriptions";
createdアクション内では既存のレコードを読み込み、またデータベースへの変更を購読する、という2つの処理を行っています。
async created() {
  // query
  const queryResponse = await API.graphql(graphqlOperation(listChats));
  this.chats = queryResponse.data.listChats.items;

  // subscribe
  API.graphql(
    graphqlOperation(onCreateChat)
  ).subscribe({
    next: chat => {
      this.chats.push(chat.value.data.onCreateChat);
    }
  });
},
postMessageではGrapyQLのmutationにてDynamoDBのレコードを作成しています。
async postMessage() {
  await API.graphql(
    graphqlOperation(createChat, {
      input: this.chatParams
    })
  ).catch(error => {
    console.error(error);
  });
},
4. 公開
ローカルで一通りの動作確認ができたらS3へデプロイします。
$ amplify publish
以下のような感じになりました。
ユーザーアイコンの表示には(Lorem Picsum](https://picsum.photos/)を使用していますが、とりあえずリンクを指定しているだけなのでリロードする度に画像変わるし全てのユーザーで同じ画像が表示されます^^;
最後に
このアプリケーションはHamamatsu.js #8のハンズオンにて使用したものです。
残念ながら当日はAmplifyの組み込みまで至らなかったので、このアドベントカレンダーが供養になればいいなーと思います。
最終的なソースコードはここにありますので良かったら見ていってください。


