初めましてjackです。
8月からPythonをメインにエンジニア業務に従事することになりまして。
そこでどうせならDjangoも学べば鬼に金棒。具志堅用高にメリケンサックですよね。
今回は表題の通り、表示させたいテキストをMTVを使って表示させる事が目標です。
以下、参照したサイト、書籍です。
環境構築もこちらを参照すればできると思います。丸投げでごめんなさい。てへぺろこつんこつん
- クイックインストールガイド | Django ドキュメント | Django
- はじめての Django アプリ作成、その 1 | Django ドキュメント | Django
- 「Python3 + Django2.0入門 - Pythonで作るWebアプリケーション開発入門 - その1」
ちなみに私の開発環境は以下となっています。
- Python 3.6.7
- Django 2.2.3
- macOS
では、早速。
django-admin startproject djangoApp
をターミナルにて実行してアプリを作成!
cd djangoApp
ls
で中身を確認すると
- djangoApp
- manage.py
が作成されている。おおおおおお!!!
次にdjangoApp直下にviews.pyを作成
djangoApp
├── _init_.py
├── setting.py
├── urls.py
├── views.py ←ここ
└── wsgi.py
んでもって、djangoApp/views.pyに下記を入力させて定番の文言をば。
from django.http import HttpResponse

def index(requsest):
    return HttpResponse('Hello World')
これでリクエストに対してテキストでレスポンスできるはず、、、
次にdjangoApp/urls.pyを変更
from django.contrib import admin
from django.urls import path
from . import views

urlpatterns = [
   path('admin/', admin.site.urls),
   path('index/', views.index),
]
上記の変更を保存した後にターミナルにてローカルサーバーを起動
python3 manage.py runserver
localhost:8000/indexにアクセスしてみたら、、、

ちゃんとでましたね!
次はアプリを追加してそっちでも表記できるか試してみましょう!
python3 manage.py startapp hoge
そうするとディレクトリはこうなってるはず
├── djangoApp
│   ├── __pycache__
│   ├── _init_.py
│   ├── setting.py
│   ├── urls.py
│   ├── views.py
│   └── wsgi.py
├── hoge
│   ├── __pycache__
│   ├── migrations
│   ├── _init_.py
│   ├── admin.py
│   ├── apps.py
│   ├── models.py
│   ├── tests.py
│   └── views.py
└── manage.py
作成したfoge/views.pyを下記に編集
from django.http import HttpResponse

def index(requsest):
    return HttpResponse("Hello World")

def ue(requsest):
    return HttpResponse("ue")

def shita(requsest):
    return HttpResponse("shita")
次はfogeディレクトリ直下にurls.pyを作成
├── djangoApp
│   ├── __pycache__
│   ├── _init_.py
│   ├── setting.py
│   ├── urls.py
│   ├── views.py
│   └── wsgi.py
├── hoge
│   ├── __pycache__
│   ├── migrations
│   ├── _init_.py
│   ├── admin.py
│   ├── apps.py
│   ├── models.py
│   ├── tests.py
│   ├── urls.py ←ここ
│   └── views.py
└── manage.py
そしてこのurls.pyを編集します。
from django.urls import path
from . import views

urlpatterns = [
path("", views.index),
path("ue/", views.ue),
path("shita", views.shita),
]
次に追加したhogeアプリへの繋がりを作成。
from django.contrib import admin
from django.urls import path, include
from . import views

path('admin/', admin.site.urls),
path('index/', views.index),
path('hoge/', include('hoge.urls')),
ではここまで作成したものを保存してローカルサーバーをもう一度立ちあげてみる。
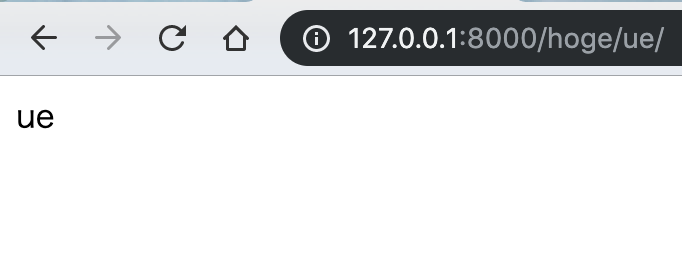

うまく追加アプリと接続ができました!!
では次にこの表示にhtmlとcssを適応させましょう!
その為にdjango/setting.pyの一番下に
STATIC_URL = '/static/'
を追記しまして
BASE_DIR = os.path.dirname(os.path.dirname(os.path.abspath(__file__)))
STATICFILES_DIRS = [os.path.join(BASE_DIR, "static")]
BASE_DIRの下に上記を追記します。
それからstaticディレクトリを下記場所に作成
├── djangoApp
│   ├── __pycache__
│   ├── _init_.py
│   ├── setting.py
│   ├── urls.py
│   ├── views.py
│   └── wsgi.py
├── hoge
│   ├── __pycache__
│   ├── migrations
│   ├── _init_.py
│   ├── admin.py
│   ├── apps.py
│   ├── models.py
│   ├── tests.py
│   ├── urls.py
│   └── views.py
├── static ←ここ
└── manage.py
そんでもってstatic直下にstyle.cssのファイルを作成して下記編集を行います。
h1 {
   color: blue
}
次にテンプレートディレクトリを作成します
├── djangoApp
│   ├── __pycache__
│   ├── _init_.py
│   ├── setting.py
│   ├── urls.py
│   ├── views.py
│   └── wsgi.py
├── hoge
│   ├── __pycache__
│   ├── migrations
│   ├── _init_.py
│   ├── admin.py
│   ├── apps.py
│   ├── models.py
│   ├── tests.py
│   ├── urls.py
│   └── views.py
├── static
├── templates ←ここ
└── manage.py
そんでもってtemplates直下にindex.htmlを作成して下記編集を行います。
<!DOCTYPE html>
<html lang="ja">
  <head>
    <meta charset="utf-8">
    <link rel="stylesheet" href="/static/style.css">
  </head>
  <body>
    <h1>{{title}}</h1>

  </body>
</html>
そんでもってこの作成したテンプレートの存在をお知らせします。
TEMPLATES = [
    {
        'BACKEND': 'django.template.backends.django.DjangoTemplates',
        'DIRS': [os.path.join(BASE_DIR, "templates")], ←ここ
        'APP_DIRS': True,
        'OPTIONS': {
            'context_processors': [
この作成したcssとhtmlをviewに反映させる為に編集します。
from django.http import HttpResponse
from django.shortcuts import render

def index(requsest):
    return render(requsest, 'index.html',
    {"title":'Hello World!!!'})
そして編集した後にローカルサーバーのindexを見てみると

しっかりhtmlとcssを反映させることが出来ていますね!
これでもういつでも好きな文言をDjangoを使って表記できますね!(自分自身に言ってます泣)
それではさよならさよならさよならー