この記事はかつての私と同じように「Reduxを使った非同期処理がいまいち分かんねー」という方に向けて書いた。とりあえずはReactの公式サイト、Reduxの公式サイト、Dan氏のReduxビデオ解説を観たが、なんかスッキリしない。特にReduxの非同期処理が分からない、という方向けの超シンプル解説。
Reactは公式サイトのチュートリアルなんかも充実していて丁寧だし分かりやすかった。しかしReduxは違う。特に公式サイトの非同期処理の例が変にややこしい。
こういうことをブログで書くと「アタシは公式サイトの説明を読んでも分からないバカです」と言ってるみたいだから、恥ずかしいしあまり書かれない。ウザいぐらいに「Reduxは素晴らしい。シンプル。カンタン」という発言がネット上にあふれている。
しかし私の頭ではパっと分からなかった。私以外でも「これ難しいなー」と思ってる人が居るんじゃないだろうか。仮に今は分かっていてもそこに達するまでにまーまー苦労したとか。オープンイノベーションの世界では「オレは習得するのに苦労したから、後続の人も同じ苦労をしろ」を根絶するべき。
したがって恥を忍んででも「ReactのRedux非同期処理がサルでも分かる超解説」を書くことにした。
この解説方法を一言で言うとこうなる。
まず先にReduxを使わないで非同期処理のコードをReactで書いて、その後でReduxを加える
これをやることでやっと理解できた。
これは単にサーバーに保存されているコメント群をとってきて表示するだけ。
(mockapi.ioが動いてない場合はerror表示を出します。)
クローンしてそのまま npm install してnpm startとすれば動きます。まだまだ学習中の身でもあるので「こうした方がいい」とかあったらぜひコメントください。
Reactだけの例
まずはReact だけを使った例
これはReactの基礎知識があれば把握できるレベルの単純なコード。
import React, { Component } from 'react'
import ReactDOM from 'react-dom'

class CommentList extends Component {
  constructor() {
    super();
    this.state = {
      comments: [
        {
          id: 1,
          comment: 'comment 1'
        },
        {
          id: 2,
          comment: 'comment 2'
        },
        {
          id: 3,
          comment: 'comment 3'
        },
        {
          id: 4,
          comment: 'comment 4'
        }
      ],
      hasError: false,
      isLoading: false
    }
  }
  render() {
    if (this.state.hasError) {
      return <p>error</p>;
    }
    if (this.state.isLoading) {
      return <p>loading . . . </p>;
    }
    return (
      <ul>
        {this.state.comments.map((item) => (
          <li key={item.id}>
            {item.comment}
          </li>
        ))}
      </ul>
    )
  }
}

ReactDOM.render(
  <CommentList />,
  document.getElementById('app')
)
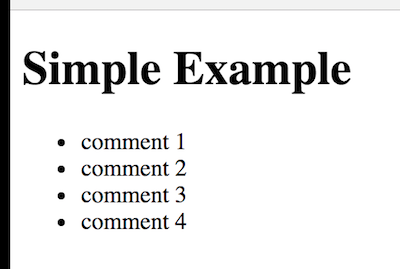
実行した結果
ソースコードをクローンした場合はコミットログのaacf3a3 "non-redux example"にして、npm startすれば以下の画面が出る。

constructorを見れば分かるようにstateには配列でcommentとboolean形式で2種類のステータスを入れている。
constructor() {
    super();
    this.state = {
      comments: [
        {
          id: 1,
          comment: 'comment 1'
        },
        {
          id: 2,
     // :  省略

      ],
      hasError: false,
      isLoading: false
    }
isLoading かもしくは hasErrorをtrueにすると、それぞれの表示に切り替わる。
APIからデータを取ってくる
ソースコードにcommentsを書き入れるのでは内容が変化しないので、そこをAPIからJSON形式で取ってくるように変更する。
import React, { Component } from 'react'
import ReactDOM from 'react-dom'

class CommentList extends Component {
  constructor() {
    super();
    this.state = {
      comments: []
    }
  }
  fetchData(url) {
    this.setState({ isLoading: true });
    fetch(url)
      .then((response) => {
        if (!response.ok) {
          throw Error(response.statusText);
        }
        this.setState({ isLoading: false });
        return response;
      })
      .then((response) => response.json())
      .then((comments) => this.setState({ comments }))
      .catch(() => this.setState({ hasErrored: true }));
  }
  componentDidMount() {
    this.fetchData('https://594ecc215fbb1a00117871a4.mockapi.io/comments');
  }
  render() {
    if (this.state.hasError) {
      return <p>error</p>;
    }
    if (this.state.isLoading) {
      return <p>loading . . . </p>;
    }
    return (
      <ul>
        {this.state.comments.map((item) => (
          <li key={item.id}>
            {item.comment}
          </li>
        ))}
      </ul>
    )
  }
}

ReactDOM.render(
  <CommentList />,
  document.getElementById('app')
)
つまり以下のコードがmount時に実行されてコメントをAPIから取ってくる。
  componentDidMount() {
    this.fetchData('https://594ecc215fbb1a00117871a4.mockapi.io/comments');
  }
https://594ecc215fbb1a00117871a4.mockapi.io/commentsというのは無料で登録したモックで、アクセスすると5つのコメントをJSON形式で返してくる。本来ならここはRailsとかのサーバーにしてお好きなJSONを返すようにする。
動かした結果の画面はほぼ同じだが、コメントの中身はAPIから取ってきてますよ、と。
Reduxを入れる
では上記のコードにReduxを入れていく。まずはredux react-redux redux-thunkが必要になるのでそれらをインストールする。
npm install redux react-redux redux-thunk --save
念のためReduxの3原則
- Single source of truth(状態管理は1箇所だけ)
- State is read-only(状態は読み取り専用)
- Changes are made with pure functions(変更は純粋な関数で行う)
Reduxを入れてコードが完成した後のファイル構成
├── package.json
└── src
    ├── actions
    │   └── comments.js
    ├── components
    │   └── CommentList.js
    ├── index.html
    ├── index.js
    ├── reducers
    │   ├── comments.js
    │   └── index.js
    └── store
        └── configureStore.js
Stateの内容
Redux無しのコードで明らかになったようにStateには3つのプロパティが必要。comments、hasError、isLoadingでありそれぞれにReduxアクションが必要になる。
export const getCommentsError = status => ({
  type: 'GET_COMMENTS_ERROR',
  hasError: status
})

export const loadComments = status => ({
  type: 'LOAD_COMMENTS',
  isLoading: status
})

export const fetchCommentsSuccess = comments => ({
  type: 'FETCH_COMMENTS_SUCCESS',
  comments
})
getCommentsErrorとloadCommentsはstatusを引数としてtype とステータスを返す。
fetchCommentsSuccessはデータの取り出しに成功したらコメントを配列に入れてcommentsとしてtype と共に返す。
アクションクリエータはアクションを返す。返すと書いているのにReturnが無い!となった方はこれは以下のように書いてるのと同じ。以下のコードをアロー関数で書いてreturnを省略しただけ。
export function getCommentsError(status){
  return {
    type: 'GET_COMMENTS_ERROR',
    hasError: status
  };
}
アクションとしては元のRedux無しにあったfetchDataに相当するアクションがもうひとつ必要になる。ここではそれをfetchCommentsとして作成する。
export const fetchComments = url => {
  return (dispatch) => {
    dispatch(loadComments(true));

    fetch(url)
      .then((response) => {
        if(!response.ok) {
          throw Error(response.statusText);
        }
        dispatch(loadComments(false));

        return response;
      })
      .then((response) => response.json())
      .then((comments) => dispatch(fetchCommentsSuccess(comments)))
      .catch(() => dispatch(getCommentsError(true)));
  }
}
reducers
reducersはstateとactionという2つの引数を持つ。reducersの中ではswitchを使ってaction.typeごとに処理を分けて、それぞれのactionを返す。
export const getCommentsError = (state = false, action) => {
  switch (action.type) {
    case 'GET_COMMENTS_ERROR':
      return action.hasError;
    default:
      return state;
  }
}

export const loadComments = (state = false, action) => {
  switch (action.type) {
    case 'LOAD_COMMENTS':
      return action.isLoading;
    default:
      return state;
  }
}

export const comments = (state = [], action) => {
  switch (action.type) {
    case 'FETCH_COMMENTS_SUCCESS':
      return action.comments;
    default:
      return state;
  }
}
それぞれのreducerをrootReducerでくっつける。
importでそれぞれのreducerをインポートする。後はcombineReducersで囲う。
reducer名をもっとシンプルにgetErrorとかloadとかでも良かったんじゃないの?と思うかもしれないが、ここはできるだけcommentsという主語を入れた名前の方がいい。
今回の例では全てのreducerはcommentsに関することだが、これ以降にusers、likes、とか色んなreducerを扱うようになった時に混乱しないため。
import { combineReducers } from 'redux';
import { getCommentsError, loadComments, comments } from './comments';

export default combineReducers({
  getCommentsError,
  loadComments,
  comments,
});
Store
ここはほぼ全てのReduxの解説にある内容と同じ。こうしてStore作りますよ、と。
import { createStore, applyMiddleware } from 'redux';
import thunk from 'redux-thunk';
import rootReducer from '../reducers';

const configureStore = initialState => {
  return createStore(
    rootReducer,
    initialState,
    applyMiddleware(thunk)
  );
}

export default configureStore
import React from 'react';
import { render } from 'react-dom';
import { Provider } from 'react-redux';
import configureStore from './store/configureStore';
import CommentList from './components/CommentList';

const store = configureStore();

render(
  <Provider store={store}>
    <CommentList />
  </Provider>,
  document.getElementById('app')
);
Components
import React, { Component, PropTypes } from 'react';
import { connect } from 'react-redux';
import { fetchComments } from '../actions/comments';

class CommentList extends Component {
  componentDidMount() {
    this.props.fetchData('https://594ecc215fbb1a00117871a4.mockapi.io/comments');
  }

  render() {
    if (this.props.hasError) {
      return <p> error </p>;
    }
    if (this.props.isLoading) {
      return <p> Loading...</p>;
    }

    return (
      <ul>
        {this.props.comments.map((item) => (
          <li key={item.id}>
            {item.comment}
          </li>
        ))}
      </ul>
    );
  }
}

CommentList.propTypes = {
  fetchData: PropTypes.func.isRequired,
  comments: PropTypes.array.isRequired,
  hasError: PropTypes.bool.isRequired,
  isLoading: PropTypes.bool.isRequired
};

const mapStateToProps = state => ({
  comments: state.comments,
  hasError: state.getCommentsError,
  isLoading: state.loadComments
});

const mapDispatchToProps= dispatch => ({
  fetchData: (url) => dispatch(fetchComments(url))
});

export default connect(mapStateToProps, mapDispatchToProps)(CommentList);
まず importしているconnectがcomponentをstore につなげる役割をする。
actionsからはfetchCommentsのみをimport する。ここで必要なのはこのアクションだけで他のはdispachして呼び出す。
後はもう細かい説明よりコード見た方がいい。
ウェブ系エンジニアの皆様へ
「ほとんどのエンジニアには解けるが、下位10%のダメなエンジニアにだけ解けないパズル?」なるものをシリーズ化してパズル1から8まで作成した。もしご興味あれば解いてみてください。
http://tango-ruby.hatenablog.com/entry/2015/11/30/122814