今回はSwiftでの画面遷移についてまとめてみました!
1. Segueを使った画面遷移(コードを使わない方法)
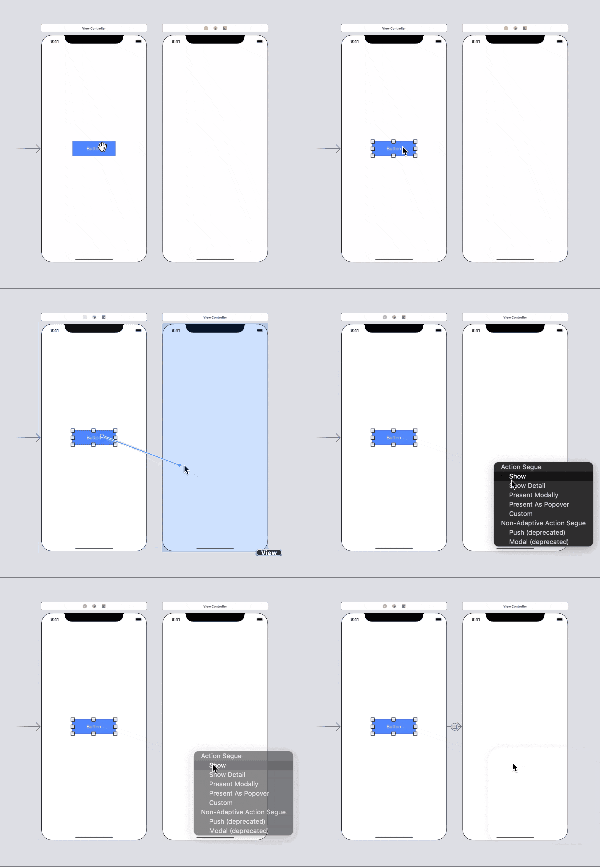
Xcodeでボタンを押した時に画面遷移をさせたい場合は以下のようにStoryboardでSegueを用いてボタンと画面を繋ぐのが一般的です。こうすることでボタンをタップした時に画面遷移することができるようになります。
2. Segueを使った画面遷移(コードを使用)
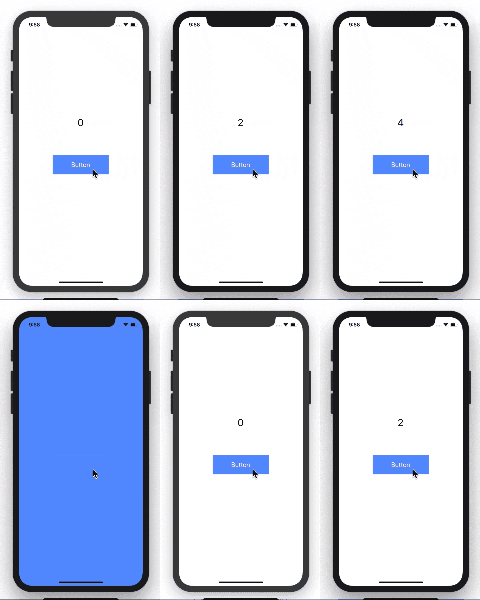
1の方法だと、例えばラベルに表示した数字が5になったら遷移させるといったことができません。このように、もし何らかの処理後に画面遷移させたい場合はSegueに加えてコードによる記述が必要です。以下の例ではラベルに表示した文字が5になったら次の画面に遷移しています(遷移先画面にはわかりやすいように背景色をつけてあります)。
1. ViewController同士をSegueで繋ぐ
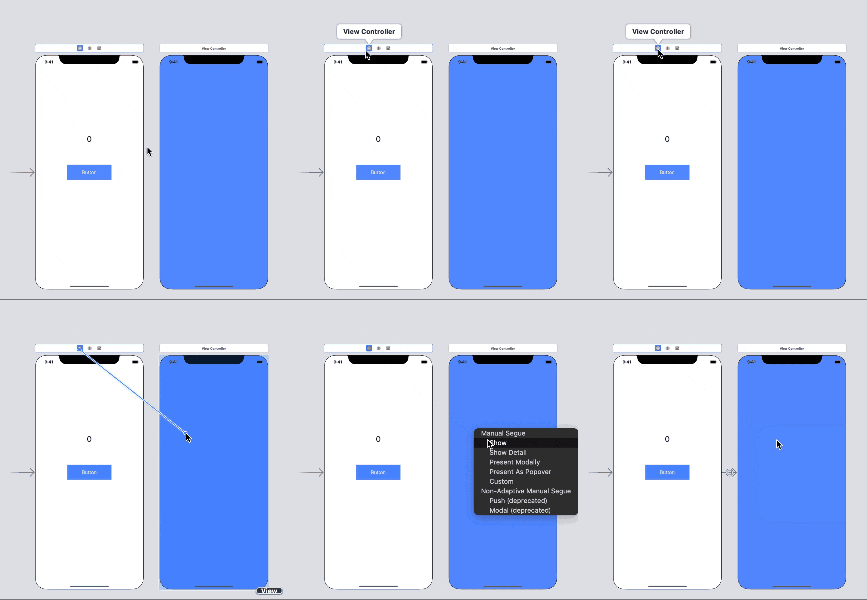
遷移元のViewControllerから遷移先へとSegueを繋ぎます。この時、ボタンからではなくViewControllerからSegueを伸ばしている点に注意してください。
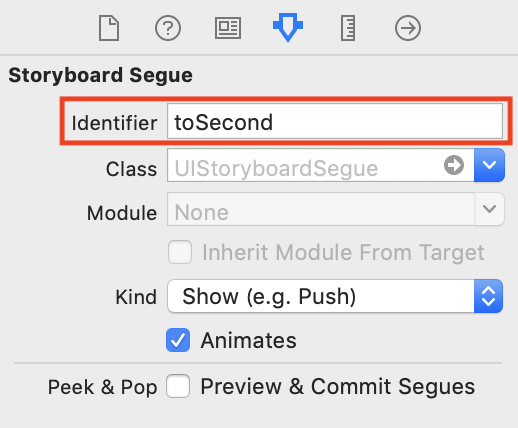
2. Segueにidentifierをつける
identifierはSegueの名前のようなものです。コードを使って遷移をする場合はどのSegueを使って遷移を行うのか明示しなければならないため、忘れずにつける必要があります。
3. コードを記述する
以下のコードが画面遷移部分です。withIdentifierの部分には2でつけたidentifierを入れます。
self.performSegue(withIdentifier: "toSecond", sender: nil)
以下コード全文
import UIKit

class ViewController: UIViewController {

    @IBOutlet var numberLabel: UILabel!
    @IBOutlet var addNumberButton: UIButton!

    var number: Int = 0

    override func viewDidLoad() {
        super.viewDidLoad()

    }

    @IBAction func didTapButton() {
        number += 1
        numberLabel.text = String(number)
        if number == 5 {
            self.performSegue(withIdentifier: "toSecond", sender: self)
        }
    }
}
3. Segueを使わない画面遷移
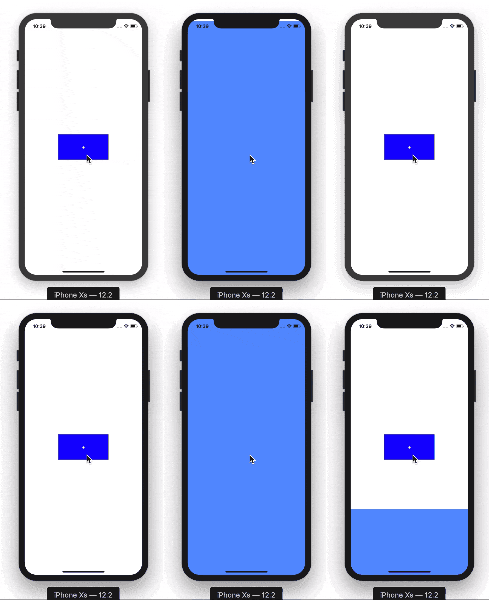
1,2の方法はSegueを用いるので、パーツをコードで作成している場合はこの3番目の方法で画面遷移を行う必要があります。
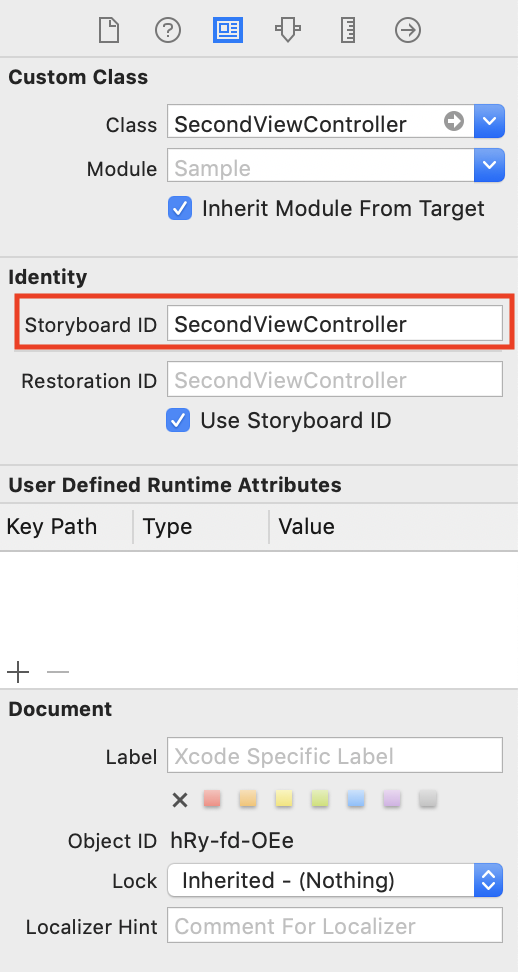
1. StorybordIDをつける
Segueを使わない代わりにStoryboardの画面をインスタンス化するので、StoryboardIDをつけておく必要があります。UseStoryboard IDにチェックをつけるのを忘れないように注意してください。
2. コードを記述する
以下の部分が画面遷移のコードです。withIdentifierの部分には1でつけたStoryboardIDを入れてください。
let secondViewController = self.storyboard?.instantiateViewController(withIdentifier: "SecondViewController") as! SecondViewController
self.present(secondViewController, animated: true, completion: nil)
以下コード全文
import UIKit

class ViewController: UIViewController {

    override func viewDidLoad() {
        super.viewDidLoad()

        let addNumberButton = UIButton()
        addNumberButton.backgroundColor = UIColor.blue
        addNumberButton.setTitle("+", for: UIControl.State.normal)
        let viewWidth = self.view.frame.width
        let viewHeight = self.view.frame.height
        addNumberButton.frame = CGRect(x: viewWidth/2, y: viewHeight/2, width: 160, height: 80)
        addNumberButton.center = self.view.center
        addNumberButton.addTarget(self, action: #selector(didTapButton), for: .touchUpInside)
        self.view.addSubview(addNumberButton)

    }

    @objc func didTapButton() {
        let secondViewController = self.storyboard?.instantiateViewController(withIdentifier: "SecondViewController") as! SecondViewController
        self.present(secondViewController, animated: true, completion: nil)

    }

}
おまけ
3のようなコードを使わない画面遷移の場合はExtensionを用意しておくと便利です。参考までに。
import UIKit

protocol StoryBoardInstantiatable {}
extension UIViewController: StoryBoardInstantiatable {}

extension StoryBoardInstantiatable where Self: UIViewController {

    static func instantiate() -> Self {
        let storyboard = UIStoryboard(name: self.className, bundle: nil)
        return storyboard.instantiateInitialViewController() as! Self
    }

    static func instantiate(withStoryboard storyboard: String) -> Self {
        let storyboard = UIStoryboard(name: storyboard, bundle: nil)
        return storyboard.instantiateViewController(withIdentifier: self.className) as! Self
    }
}

protocol ClassNameProtocol {
    static var className: String { get }
    var className: String { get }
}

extension ClassNameProtocol {

    static var className: String {
        return String(describing: self)
    }

    var className: String {
        return type(of: self).className
    }
}

extension NSObject: ClassNameProtocol {}
こうしておくことで以下のように遷移先画面をインスタンス化できます。
let controller = ViewController.instantiate()
