はじめに
導入されてから久しいConstraintLayoutですが,みなさん使っているでしょうか.発表されてから3年ほど経ったのもあり,日本語の記事も結構増えてきました.
しかし,ボトムアップでわかりやすく使い方を説明してくれる記事は多いのですが,どうも事例ベースのまとめは少ないように感じます.記事を読んで試みるもなるほど,結局このレイアウトはどうやって作るんや…? ちょっと急いでるし,まあLinearLayoutでええか… みたいな.
ということで,本記事はレイアウトを先に紹介してからその実装方法を示す,逆引き式で使い方をまとめていきたいと思います.これであっちこっちのサイトを行ったり来たりしなくていいようになるといいな.つまり,
ConstraintLayoutの仕組みは大体分かってるけど,実際に作りたいものが作れん
みたいな人向けだと思います.
ですから,ConstraintLayoutの詳しい仕組みとかは他の記事にお任せします.
これとかめっちゃわかりやすい.
本記事の実装はGitHubに置いています.
(AndroidStudioにCloneしてPreviewするのをオススメします)
目次
レイアウトをカテゴライズするのって難しいですね.ので,今回はパーツの個数で区切ろうと思います.基本的に3つのパーツまでのレイアウトを理解すれば,それより多くなっても大体作れます.ということで目次は
といった流れにしました.では見ていきましょう.
注意
実装例のXMLにマテリアルデザインを使っているので,この例をコピペで動かす時はgradleとres/values/styles.xmlを以下のように編集してください.自分のレイアウトに適用する際は必要ありません.
dependencies {
    api 'com.android.support:design:28.0.0-rc01'
    ...
}
<resources>

    <!-- Base application theme. -->
    <style name="AppTheme" parent="Theme.MaterialComponents.Light.NoActionBar">
        <!-- Customize your theme here. -->
        <item name="colorPrimary">@color/colorPrimary</item>
        <item name="colorPrimaryDark">@color/colorPrimaryDark</item>
        <item name="colorAccent">@color/colorAccent</item>
    </style>

</resources>
1つの場合
1つだけしか使わないってケースは少ないかもしれないけれど,基本になるので少し丁寧に.
左下とか右上は書いてませんが,他のケースから察してください.おなしゃす.
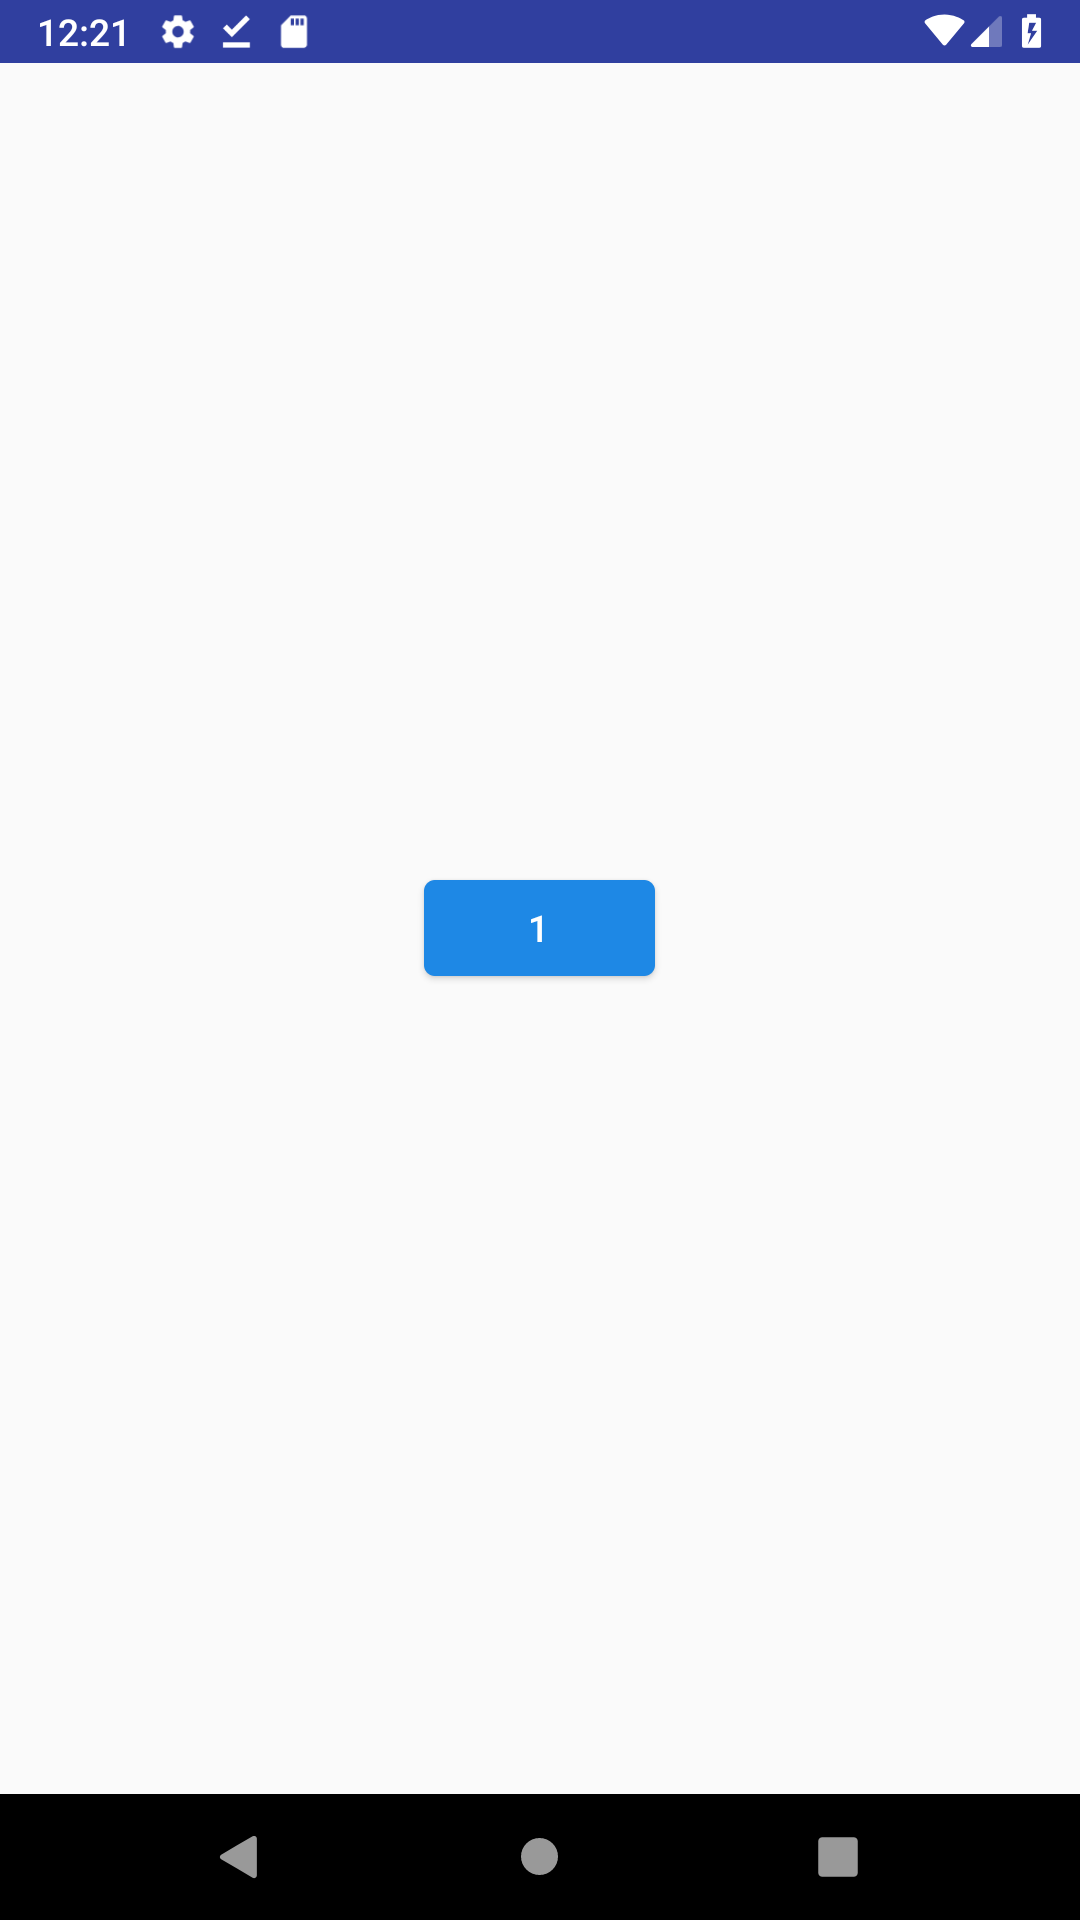
中央
ど真ん中に表示.上下左右全てに制約をつけましょう.
<?xml version="1.0" encoding="utf-8"?>
<android.support.constraint.ConstraintLayout xmlns:android="http://schemas.android.com/apk/res/android"
    android:layout_width="match_parent"
    android:layout_height="match_parent"
    xmlns:app="http://schemas.android.com/apk/res-auto">

    <android.support.design.button.MaterialButton
        android:layout_width="wrap_content"
        android:layout_height="wrap_content"
        android:text="1"
        app:layout_constraintStart_toStartOf="parent"
        app:layout_constraintEnd_toEndOf="parent"
        app:layout_constraintTop_toTopOf="parent"
        app:layout_constraintBottom_toBottomOf="parent" />

</android.support.constraint.ConstraintLayout>
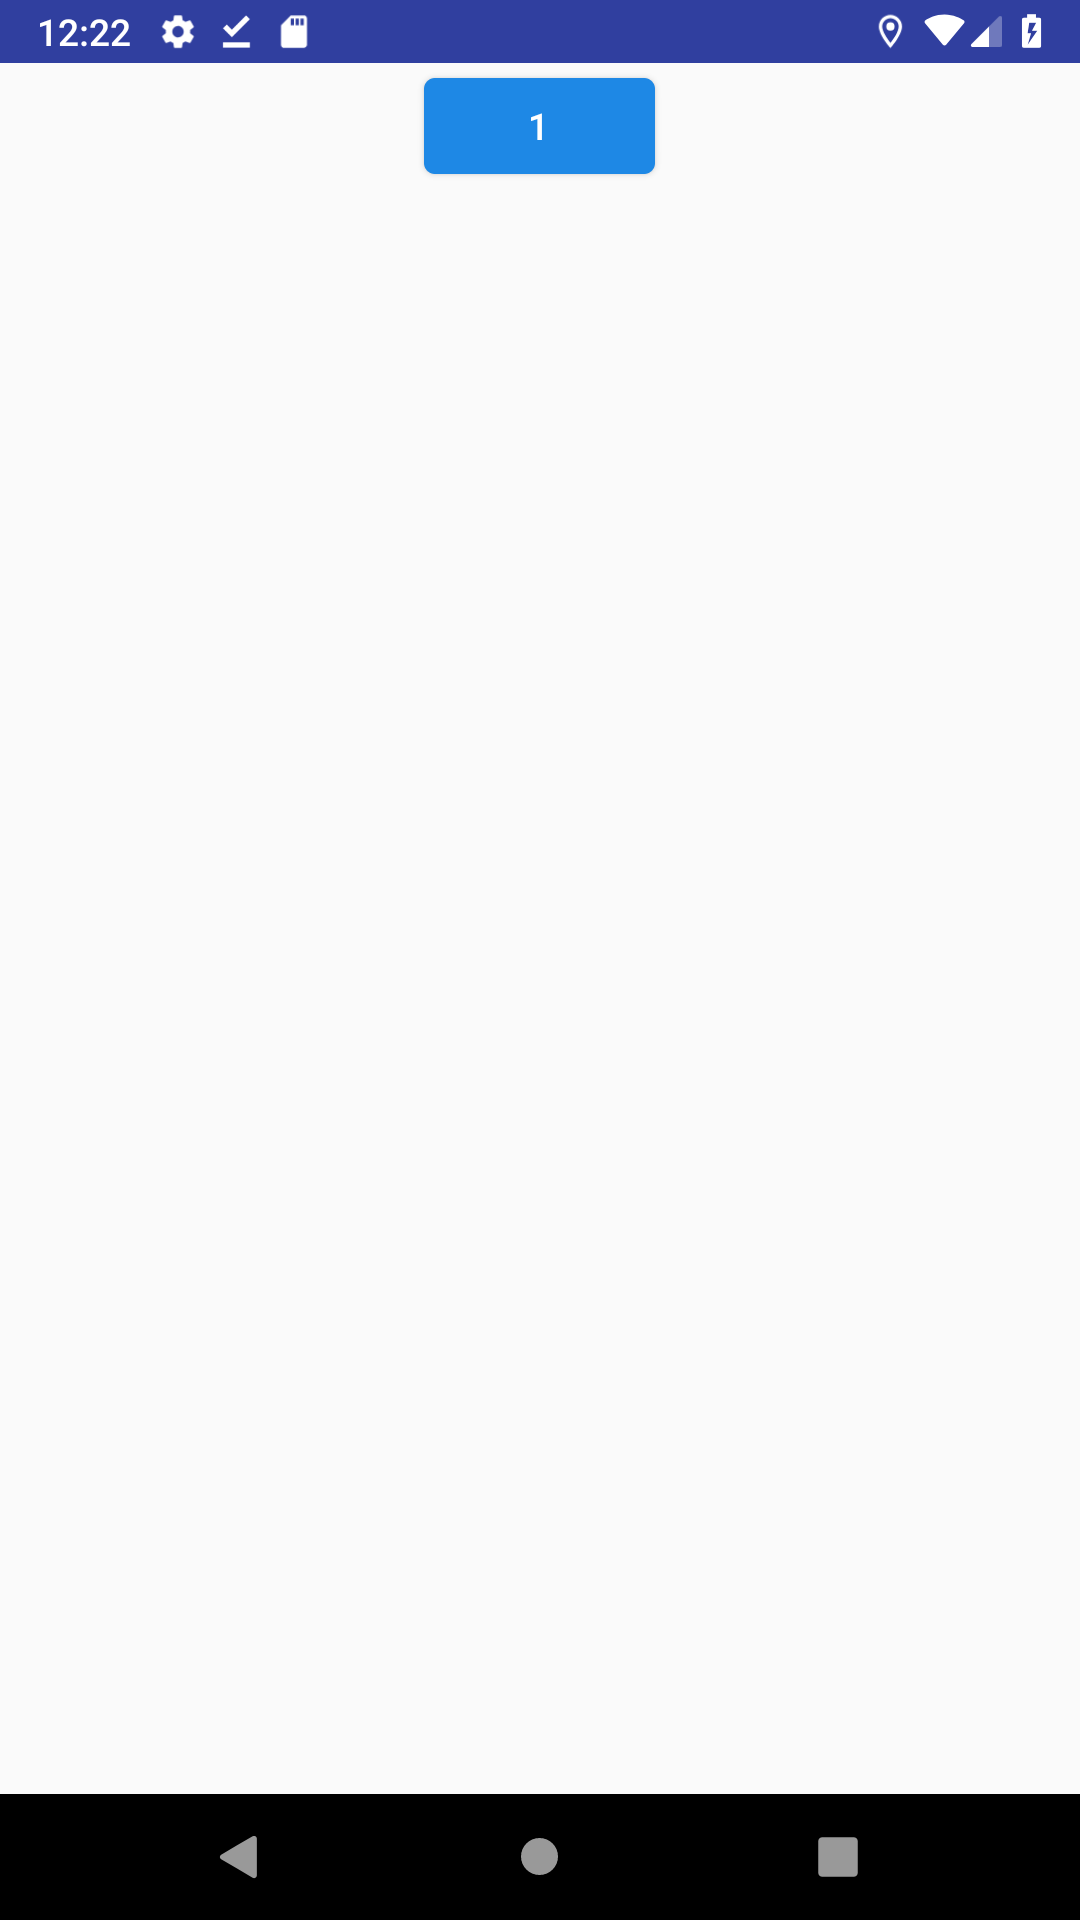
上
LinearLayoutだと簡単なやつ.ConstraintLayoutではBottomの制約をつけないことで実現します.
「制約をつけない」っていうのも手法の一つです.
<?xml version="1.0" encoding="utf-8"?>
<android.support.constraint.ConstraintLayout xmlns:android="http://schemas.android.com/apk/res/android"
    android:layout_width="match_parent"
    android:layout_height="match_parent"
    xmlns:app="http://schemas.android.com/apk/res-auto">

    <android.support.design.button.MaterialButton
        android:layout_width="wrap_content"
        android:layout_height="wrap_content"
        android:text="1"
        app:layout_constraintStart_toStartOf="parent"
        app:layout_constraintEnd_toEndOf="parent"
        app:layout_constraintTop_toTopOf="parent" />

</android.support.constraint.ConstraintLayout>
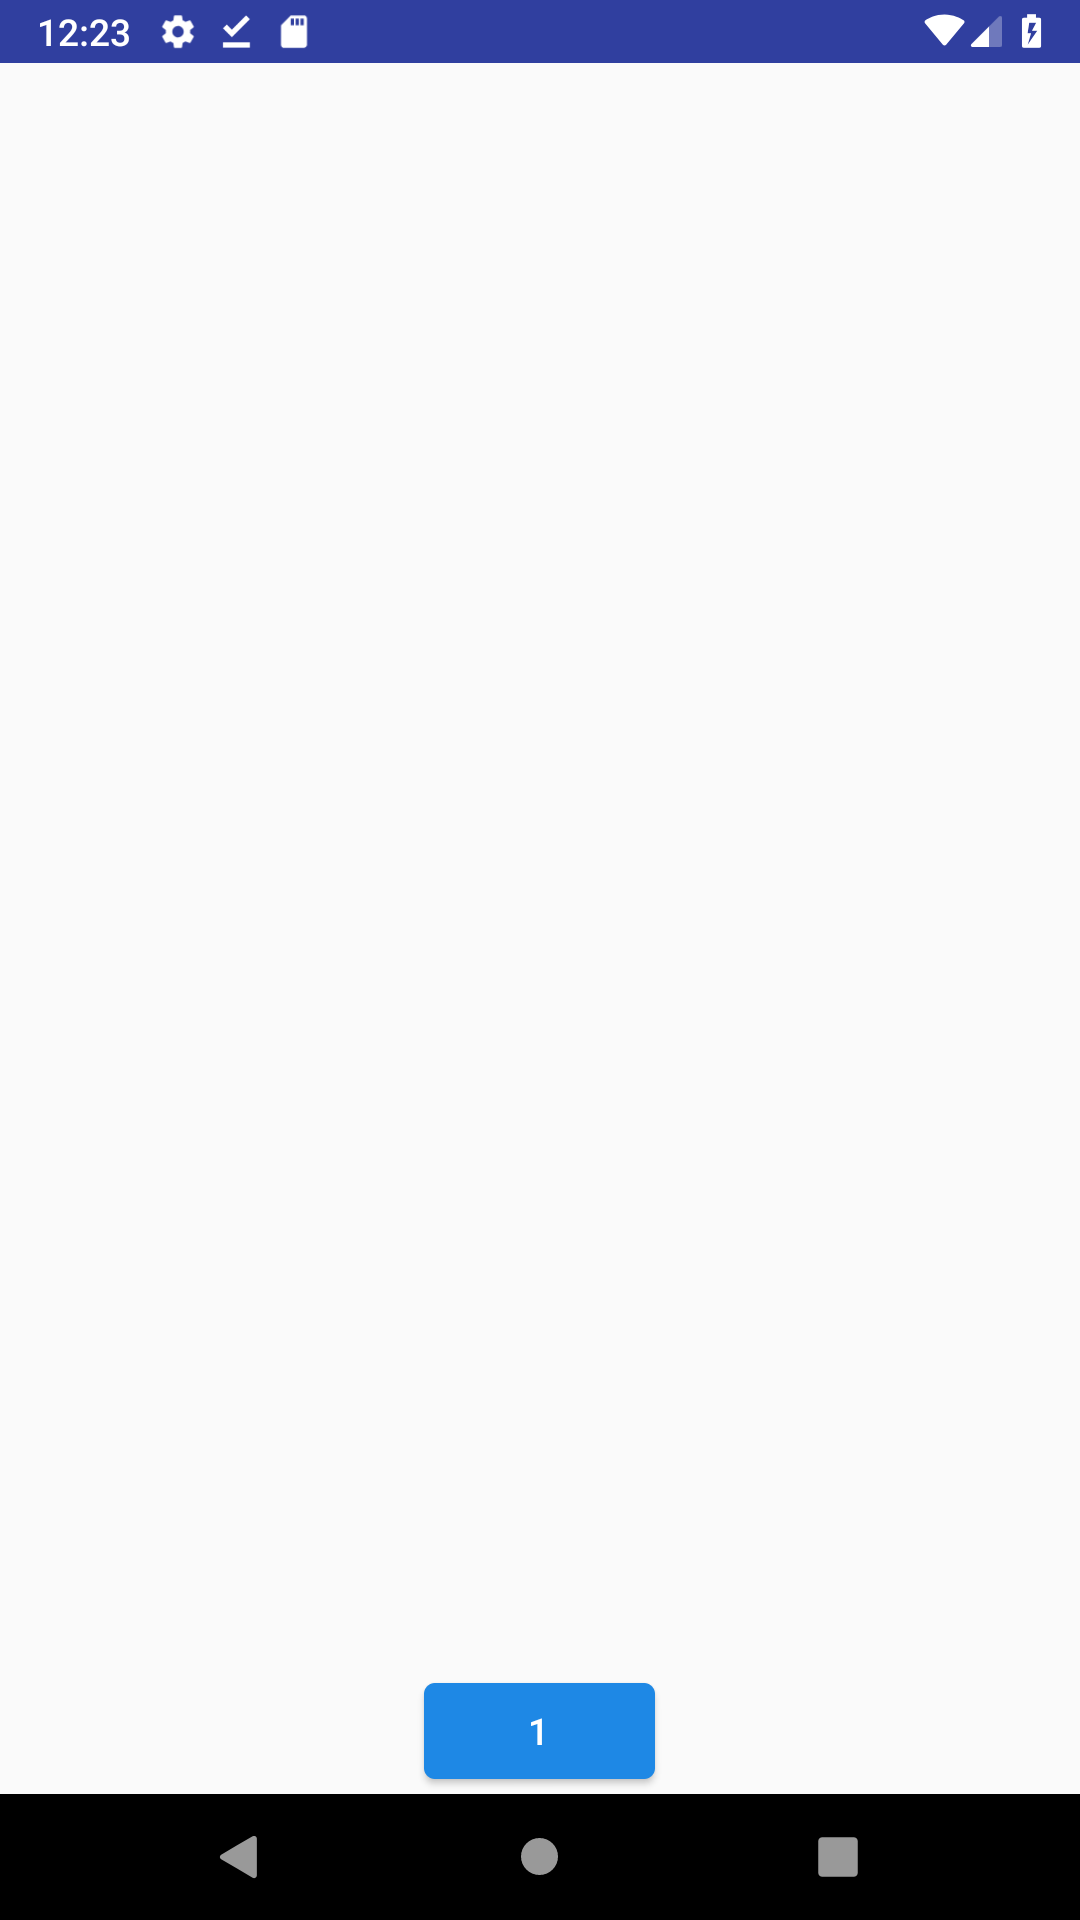
下
上の反対.Topの制約をつけません.
<?xml version="1.0" encoding="utf-8"?>
<android.support.constraint.ConstraintLayout xmlns:android="http://schemas.android.com/apk/res/android"
    android:layout_width="match_parent"
    android:layout_height="match_parent"
    xmlns:app="http://schemas.android.com/apk/res-auto">

    <android.support.design.button.MaterialButton
        android:layout_width="wrap_content"
        android:layout_height="wrap_content"
        android:text="1"
        app:layout_constraintStart_toStartOf="parent"
        app:layout_constraintEnd_toEndOf="parent"
        app:layout_constraintBottom_toBottomOf="parent" />

</android.support.constraint.ConstraintLayout>
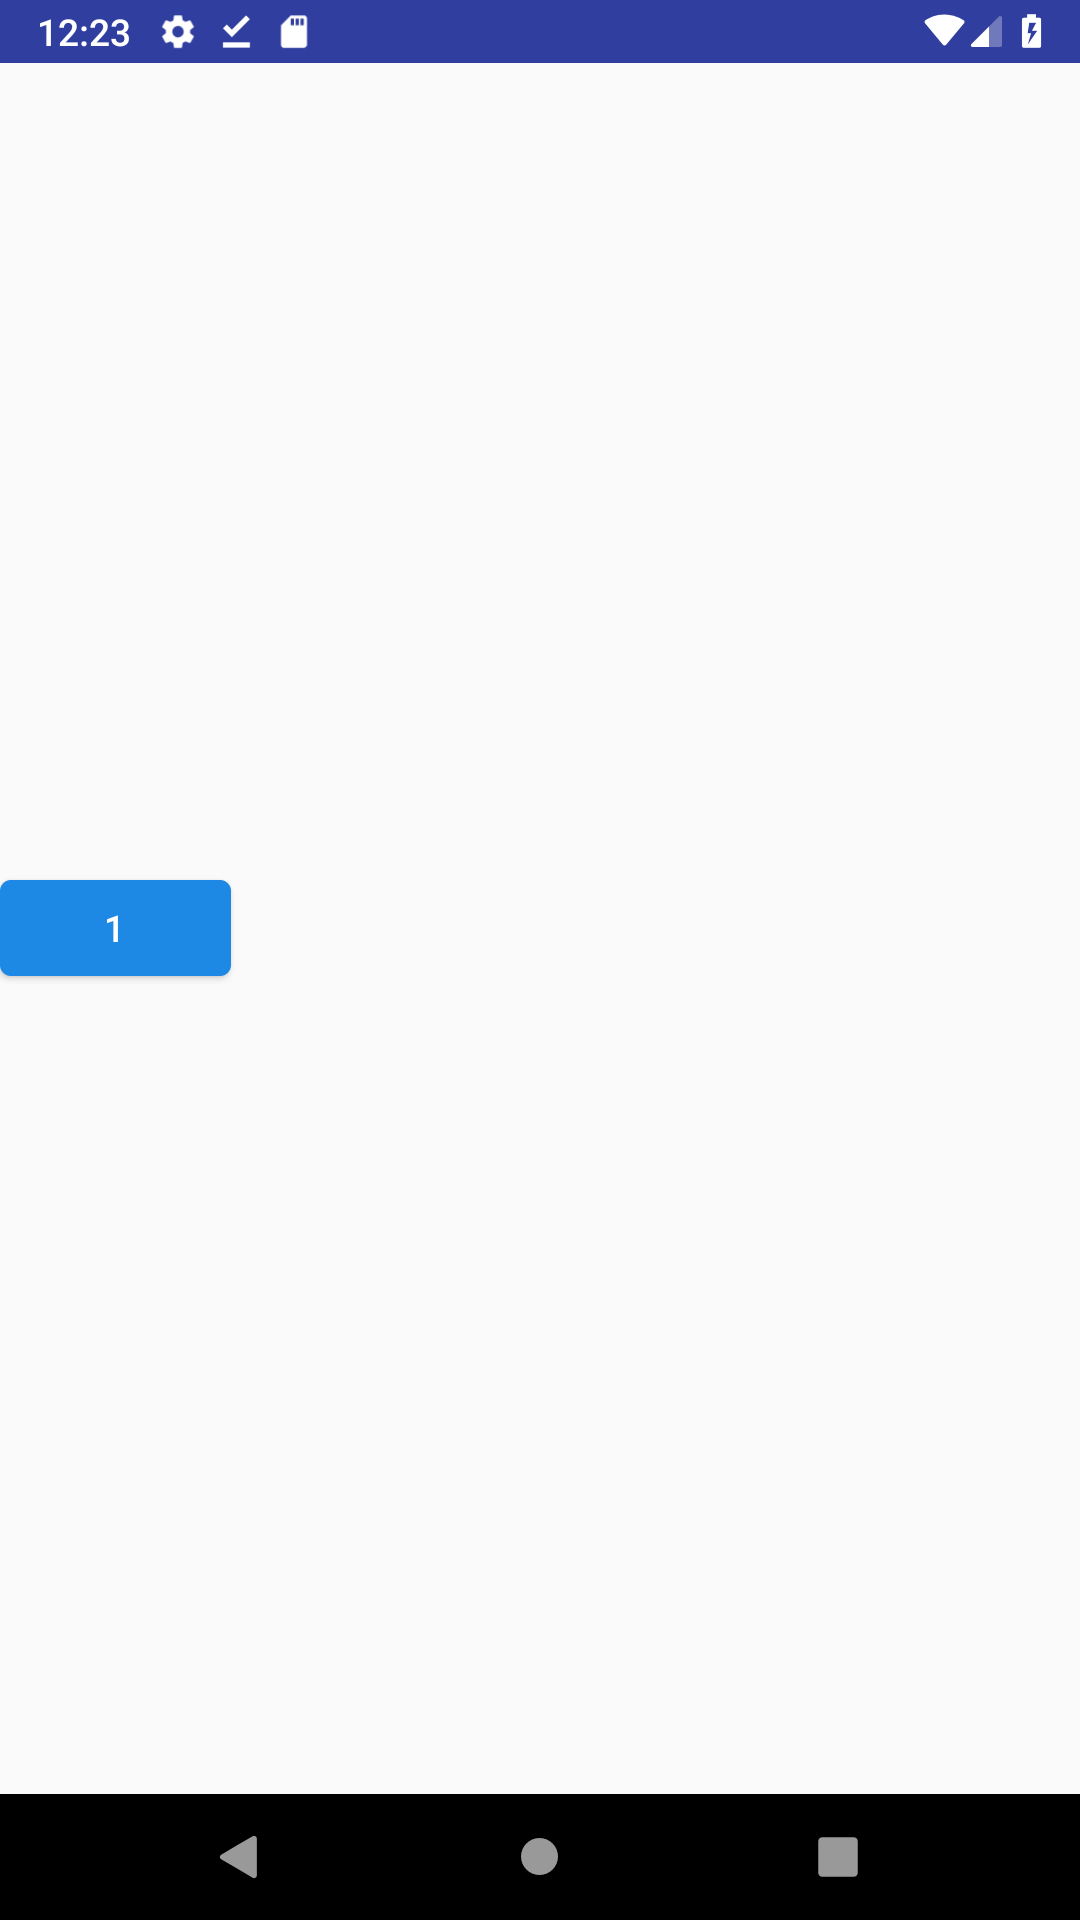
左
もうなんとなく言いたいことがわかると思います.
Endの制約をつけません.
<?xml version="1.0" encoding="utf-8"?>
<android.support.constraint.ConstraintLayout xmlns:android="http://schemas.android.com/apk/res/android"
    android:layout_width="match_parent"
    android:layout_height="match_parent"
    xmlns:app="http://schemas.android.com/apk/res-auto">

    <android.support.design.button.MaterialButton
        android:layout_width="wrap_content"
        android:layout_height="wrap_content"
        android:text="1"
        app:layout_constraintStart_toStartOf="parent"
        app:layout_constraintTop_toTopOf="parent"
        app:layout_constraintBottom_toBottomOf="parent" />

</android.support.constraint.ConstraintLayout>
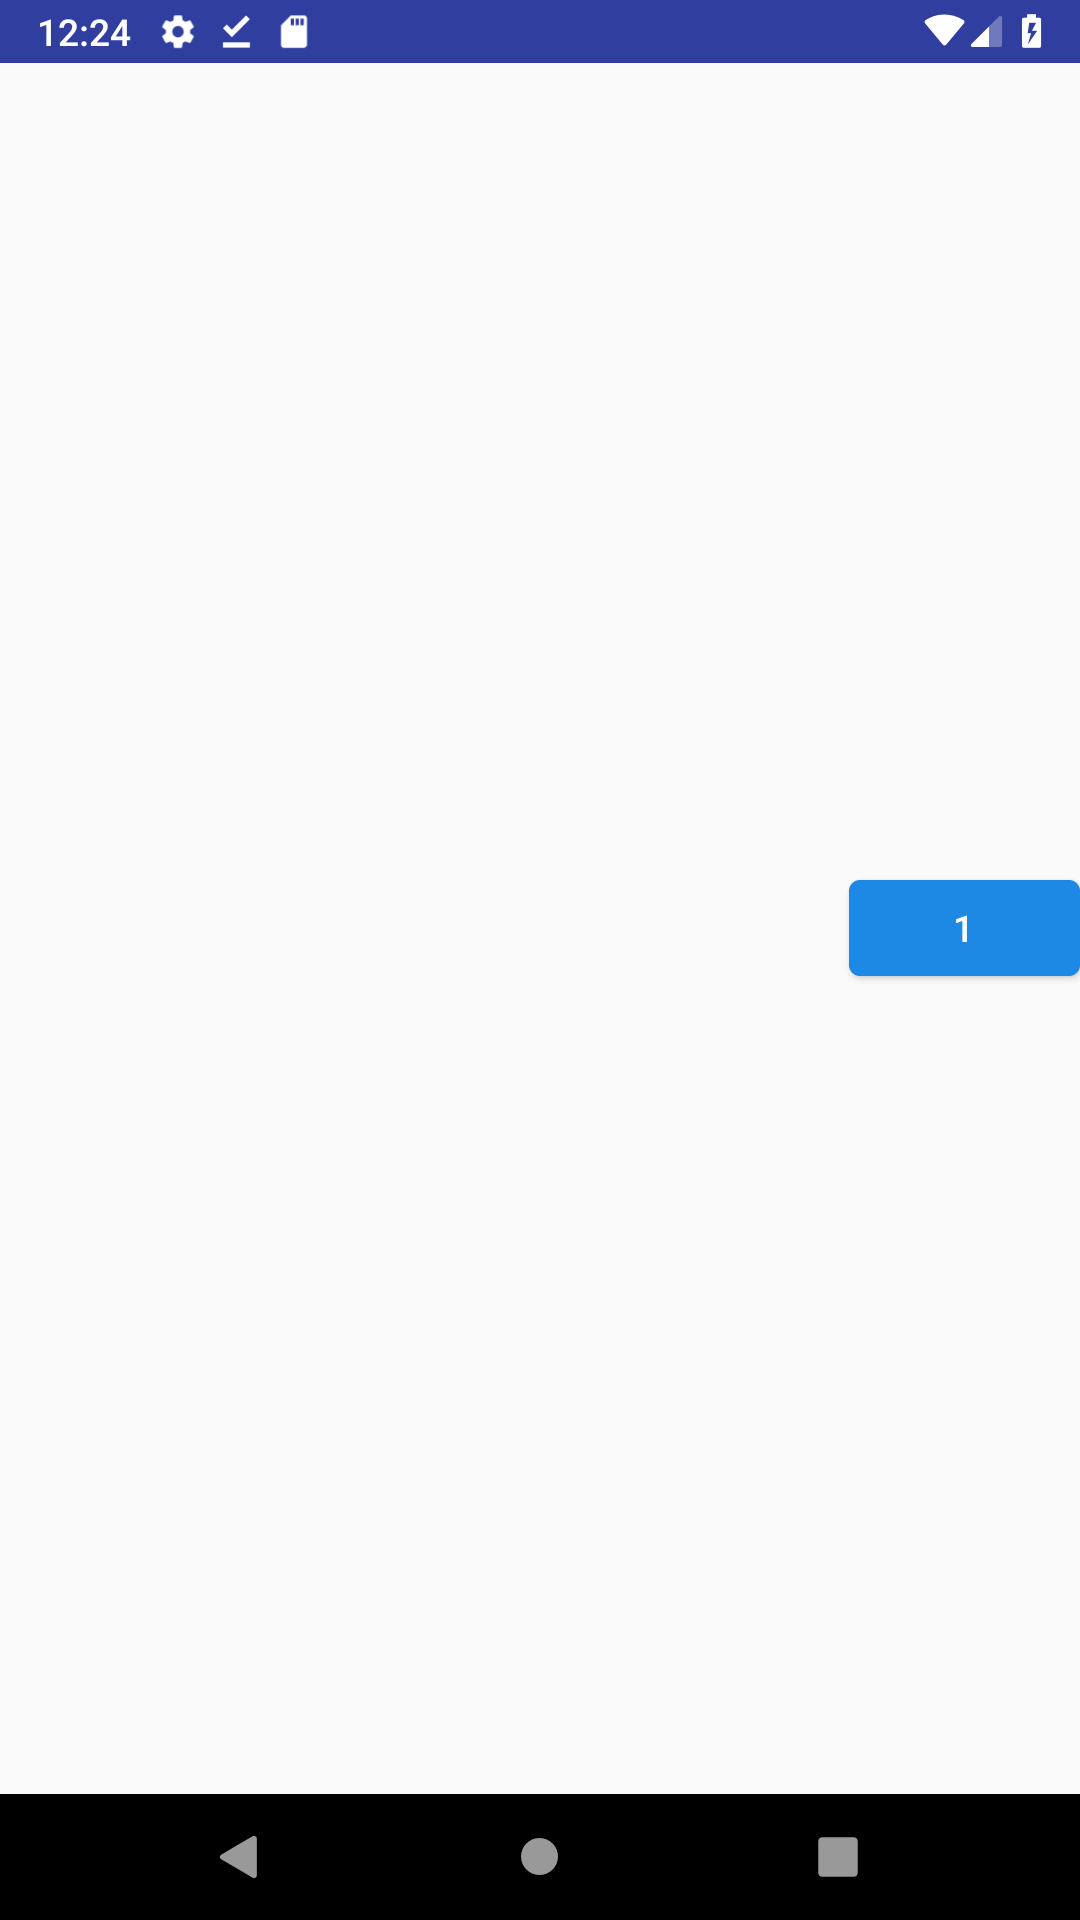
右
Startの制約をつけません.
<?xml version="1.0" encoding="utf-8"?>
<android.support.constraint.ConstraintLayout xmlns:android="http://schemas.android.com/apk/res/android"
    android:layout_width="match_parent"
    android:layout_height="match_parent"
    xmlns:app="http://schemas.android.com/apk/res-auto">

    <android.support.design.button.MaterialButton
        android:layout_width="wrap_content"
        android:layout_height="wrap_content"
        android:text="1"
        app:layout_constraintEnd_toEndOf="parent"
        app:layout_constraintTop_toTopOf="parent"
        app:layout_constraintBottom_toBottomOf="parent" />

</android.support.constraint.ConstraintLayout>
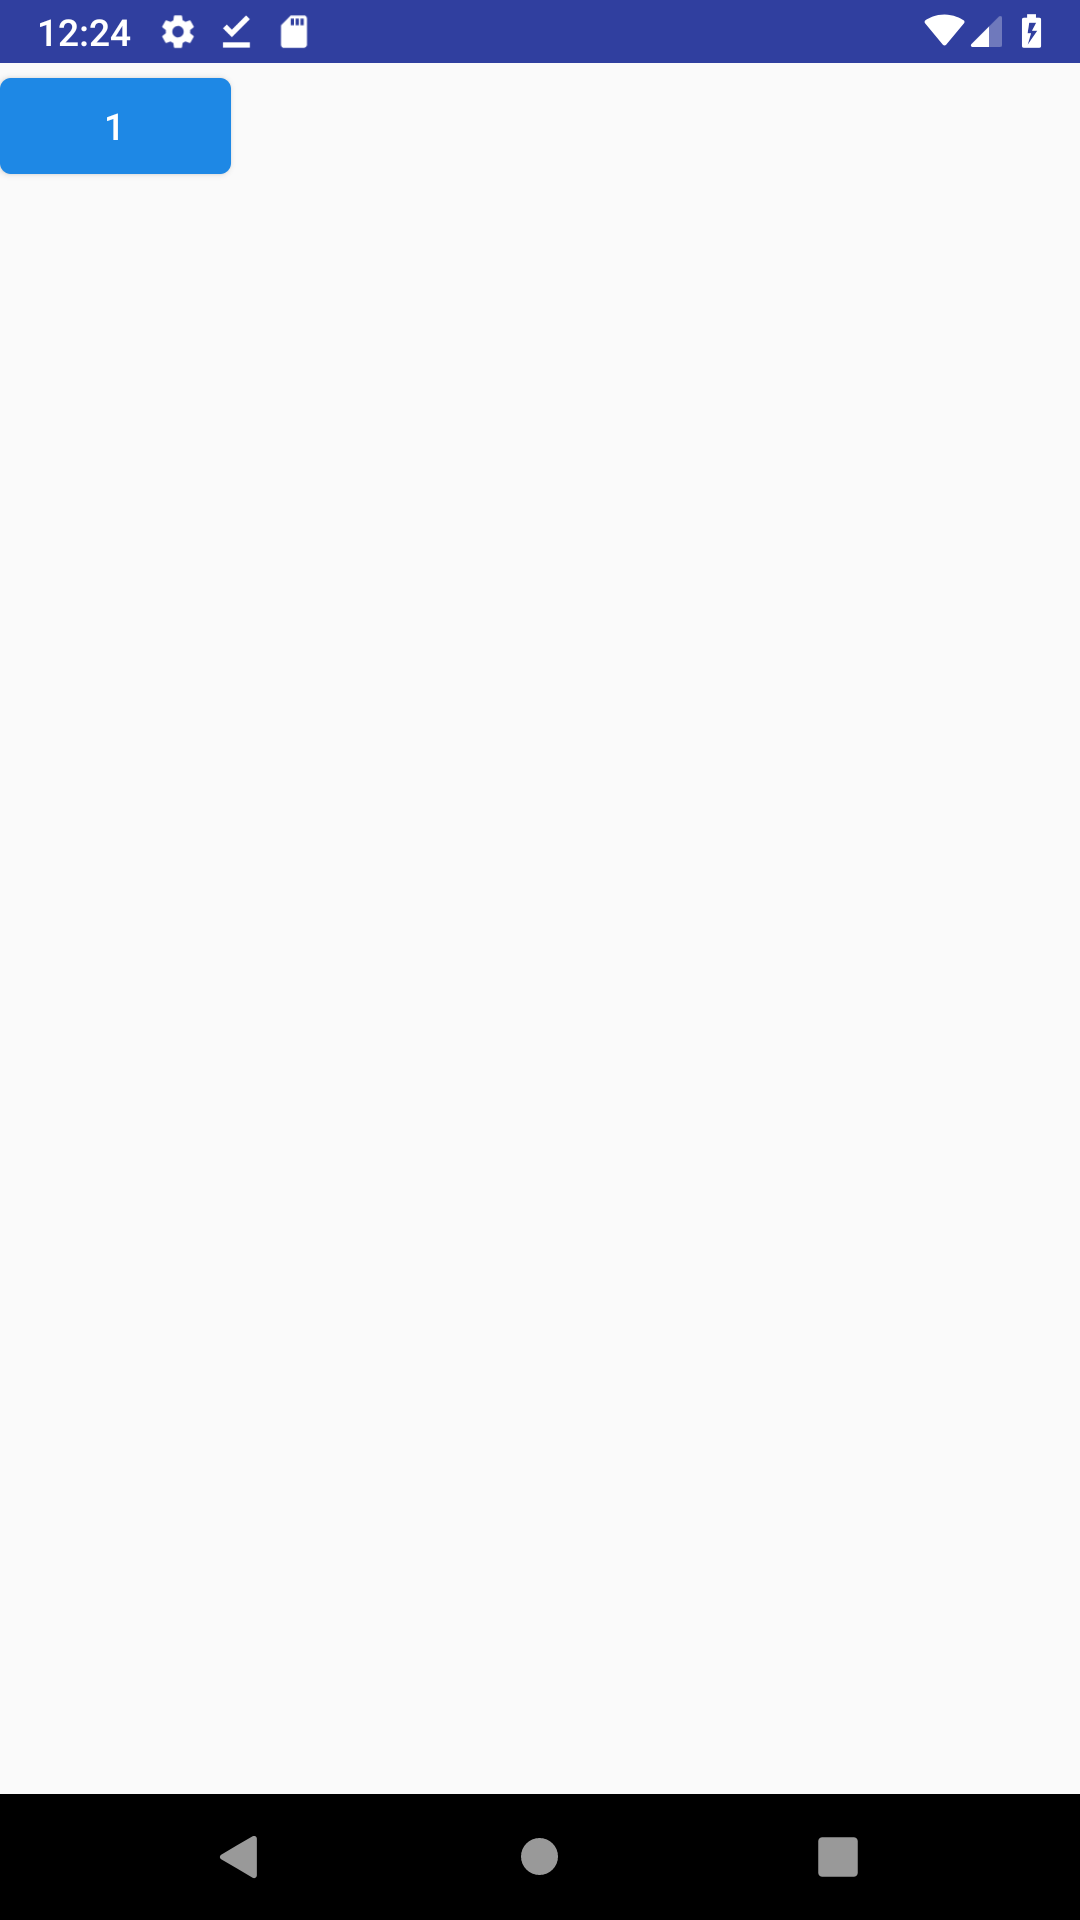
左上
どんどん制約を減らします.EndとBottomの制約をつけません.
<?xml version="1.0" encoding="utf-8"?>
<android.support.constraint.ConstraintLayout xmlns:android="http://schemas.android.com/apk/res/android"
    android:layout_width="match_parent"
    android:layout_height="match_parent"
    xmlns:app="http://schemas.android.com/apk/res-auto">

    <android.support.design.button.MaterialButton
        android:layout_width="wrap_content"
        android:layout_height="wrap_content"
        android:text="1"
        app:layout_constraintStart_toStartOf="parent"
        app:layout_constraintTop_toTopOf="parent" />

</android.support.constraint.ConstraintLayout>
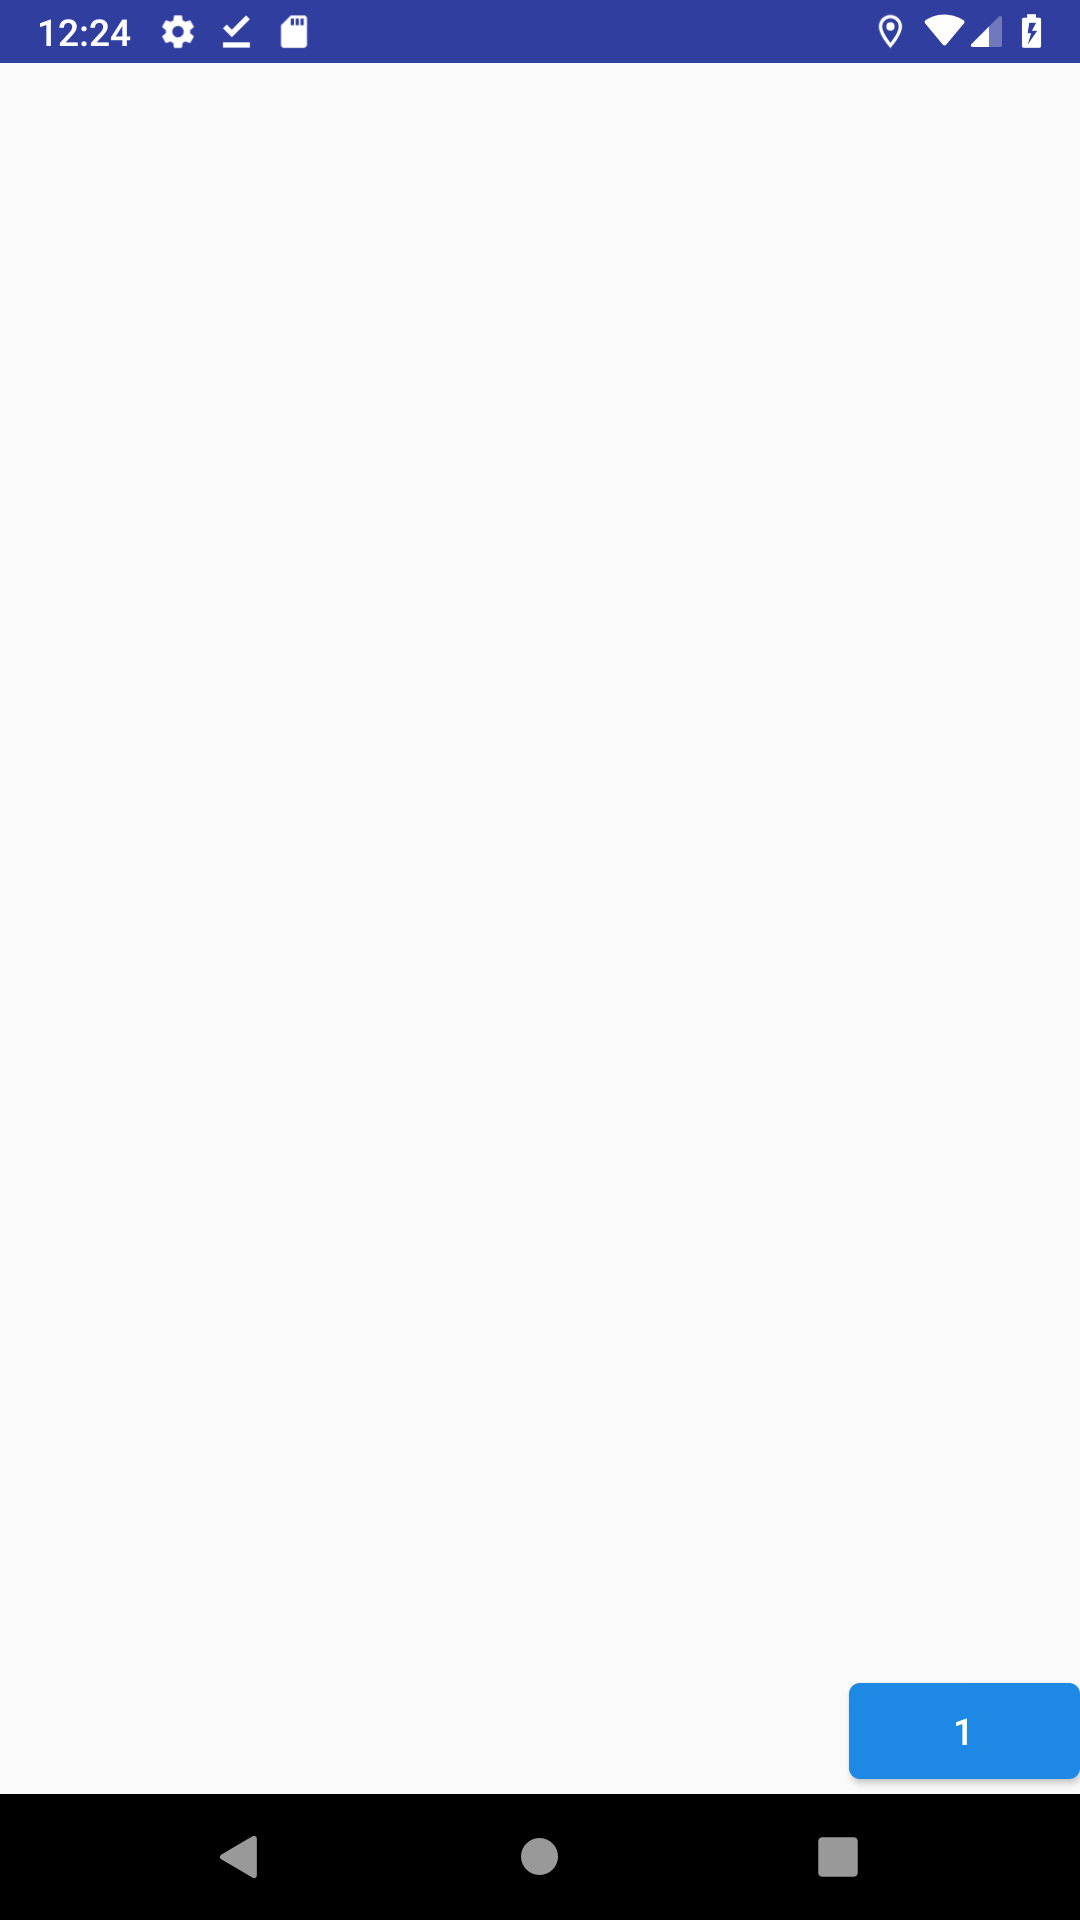
右下
StartとTopの制約をつけません.
<?xml version="1.0" encoding="utf-8"?>
<android.support.constraint.ConstraintLayout xmlns:android="http://schemas.android.com/apk/res/android"
    android:layout_width="match_parent"
    android:layout_height="match_parent"
    xmlns:app="http://schemas.android.com/apk/res-auto">

    <android.support.design.button.MaterialButton
        android:layout_width="wrap_content"
        android:layout_height="wrap_content"
        android:text="1"
        app:layout_constraintEnd_toEndOf="parent"
        app:layout_constraintBottom_toBottomOf="parent" />

</android.support.constraint.ConstraintLayout>
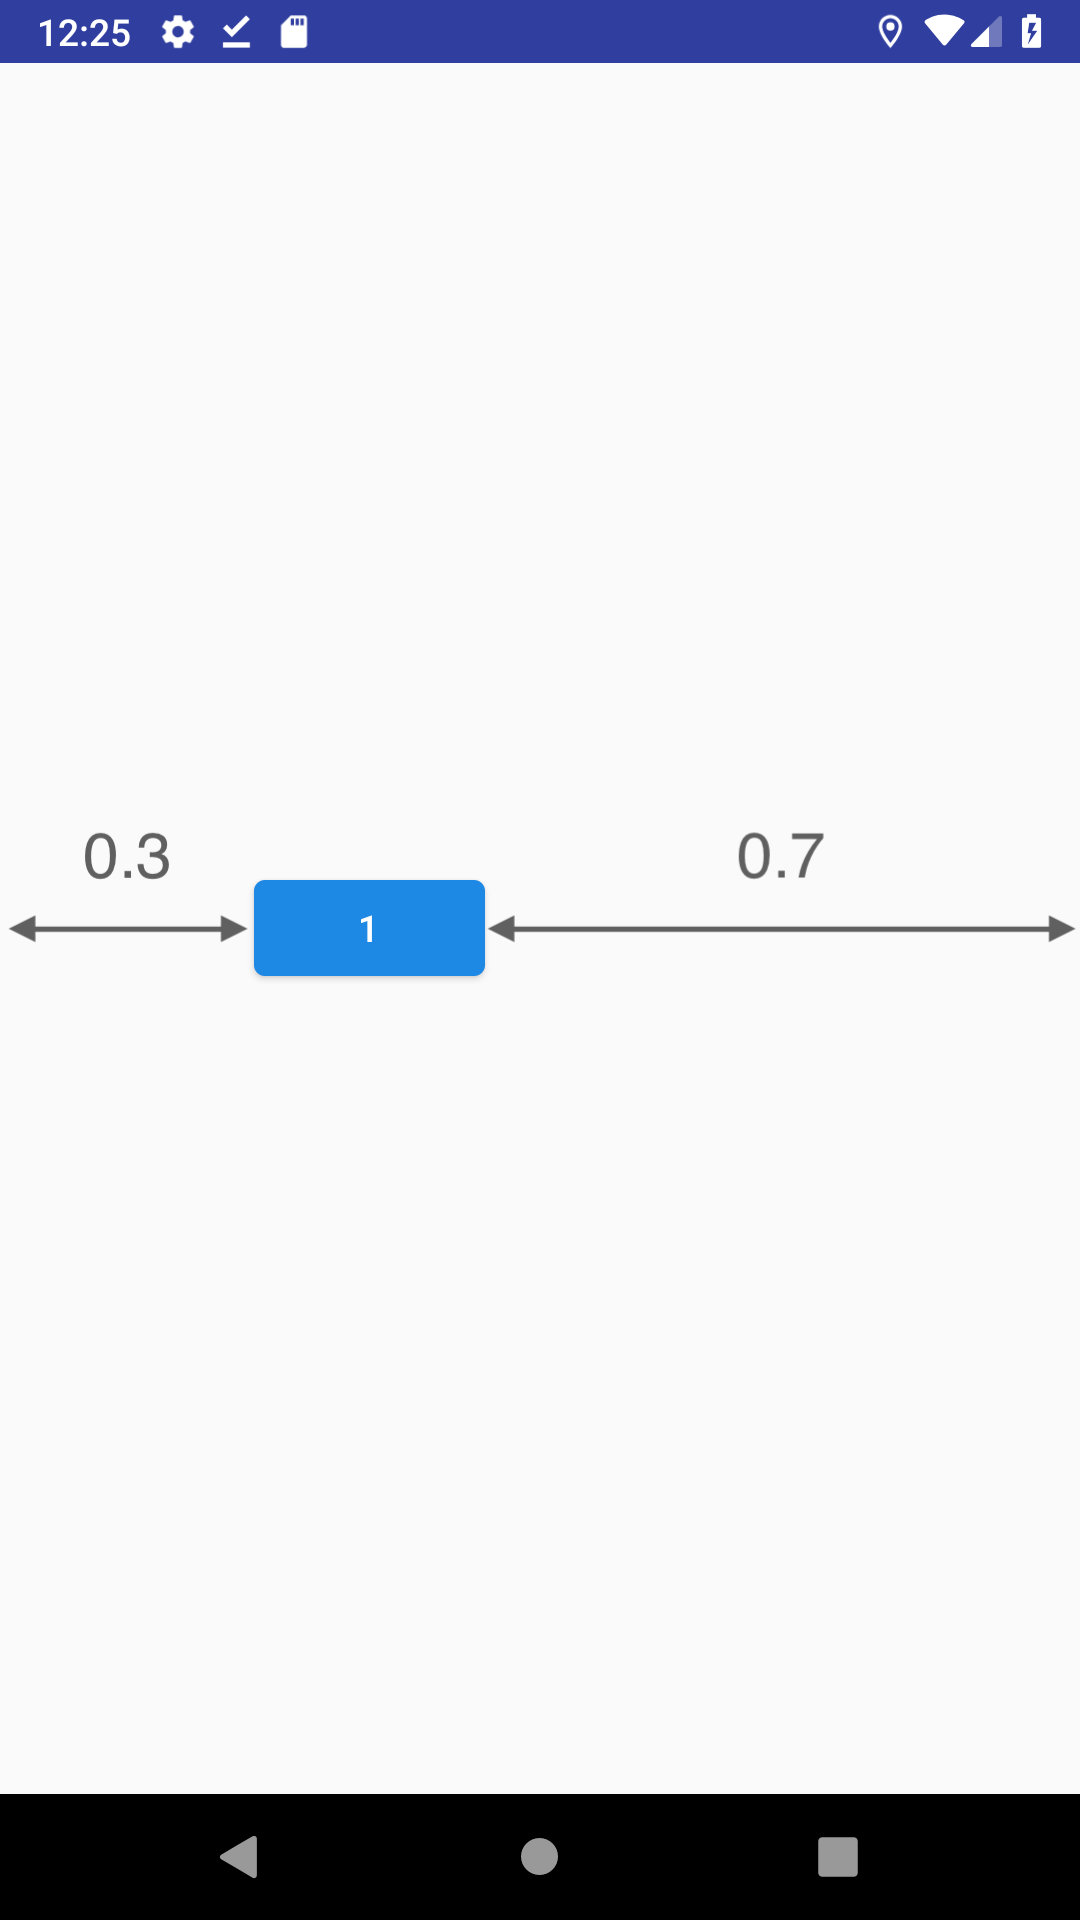
水平方向に好きな位置
図のように,マージンに比率を持たせることで実現します.
app:layout_constraintHorizontal_biasを指定しましょう.
<?xml version="1.0" encoding="utf-8"?>
<android.support.constraint.ConstraintLayout xmlns:android="http://schemas.android.com/apk/res/android"
    android:layout_width="match_parent"
    android:layout_height="match_parent"
    xmlns:app="http://schemas.android.com/apk/res-auto">

    <android.support.design.button.MaterialButton
        android:layout_width="wrap_content"
        android:layout_height="wrap_content"
        android:text="1"
        app:layout_constraintStart_toStartOf="parent"
        app:layout_constraintEnd_toEndOf="parent"
        app:layout_constraintTop_toTopOf="parent"
        app:layout_constraintBottom_toBottomOf="parent"
        app:layout_constraintHorizontal_bias="0.3" />

</android.support.constraint.ConstraintLayout>
垂直方向に好きな位置
app:layout_constraintVertical_biasを指定します.
<?xml version="1.0" encoding="utf-8"?>
<android.support.constraint.ConstraintLayout xmlns:android="http://schemas.android.com/apk/res/android"
    android:layout_width="match_parent"
    android:layout_height="match_parent"
    xmlns:app="http://schemas.android.com/apk/res-auto">

    <android.support.design.button.MaterialButton
        android:layout_width="wrap_content"
        android:layout_height="wrap_content"
        android:text="1"
        app:layout_constraintStart_toStartOf="parent"
        app:layout_constraintEnd_toEndOf="parent"
        app:layout_constraintTop_toTopOf="parent"
        app:layout_constraintBottom_toBottomOf="parent"
        app:layout_constraintVertical_bias="0.7" />

</android.support.constraint.ConstraintLayout>
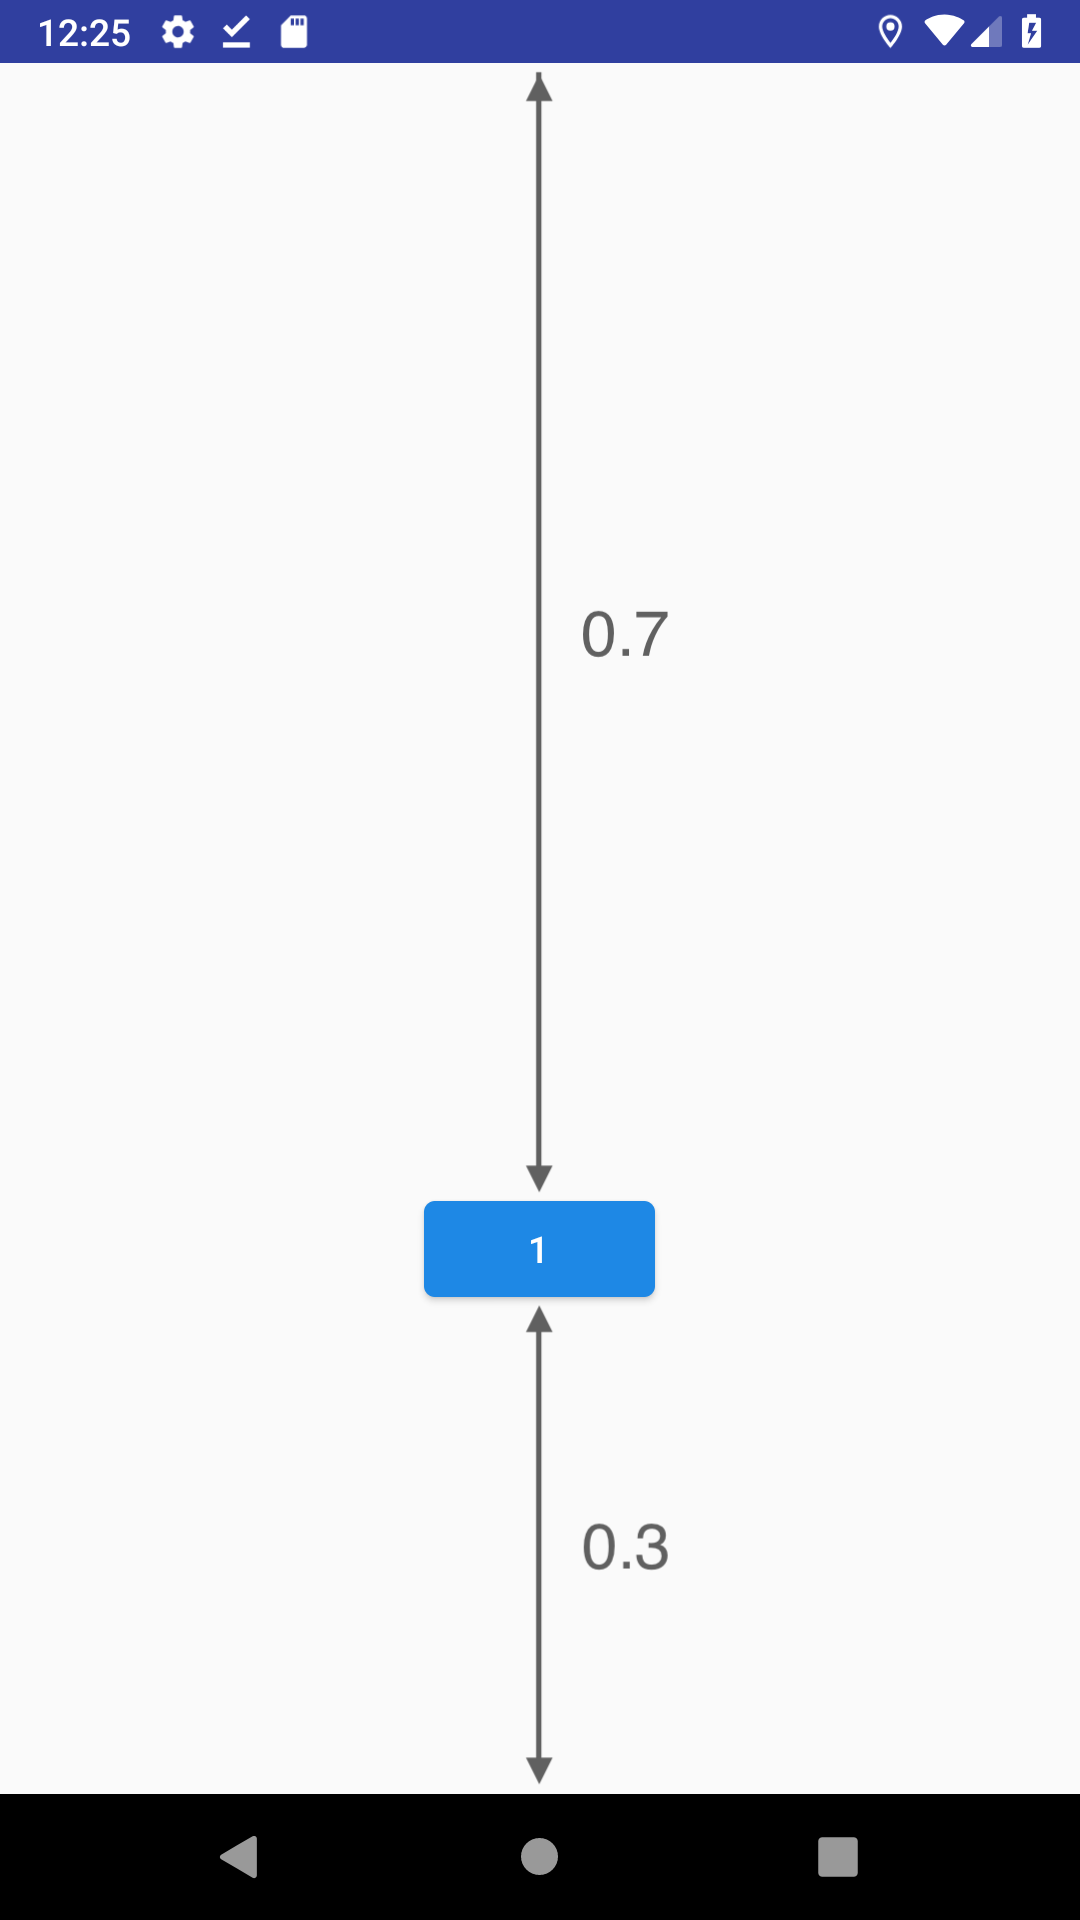
好きな位置
先ほどの2つを組み合わせます.
app:layout_constraintHorizontal_bias
app:layout_constraintVertical_bias
を指定しましょう.
<?xml version="1.0" encoding="utf-8"?>
<android.support.constraint.ConstraintLayout xmlns:android="http://schemas.android.com/apk/res/android"
    android:layout_width="match_parent"
    android:layout_height="match_parent"
    xmlns:app="http://schemas.android.com/apk/res-auto">

    <android.support.design.button.MaterialButton
        android:layout_width="wrap_content"
        android:layout_height="wrap_content"
        android:text="1"
        app:layout_constraintStart_toStartOf="parent"
        app:layout_constraintEnd_toEndOf="parent"
        app:layout_constraintTop_toTopOf="parent"
        app:layout_constraintBottom_toBottomOf="parent"
        app:layout_constraintHorizontal_bias="0.8"
        app:layout_constraintVertical_bias="0.4" />

</android.support.constraint.ConstraintLayout>
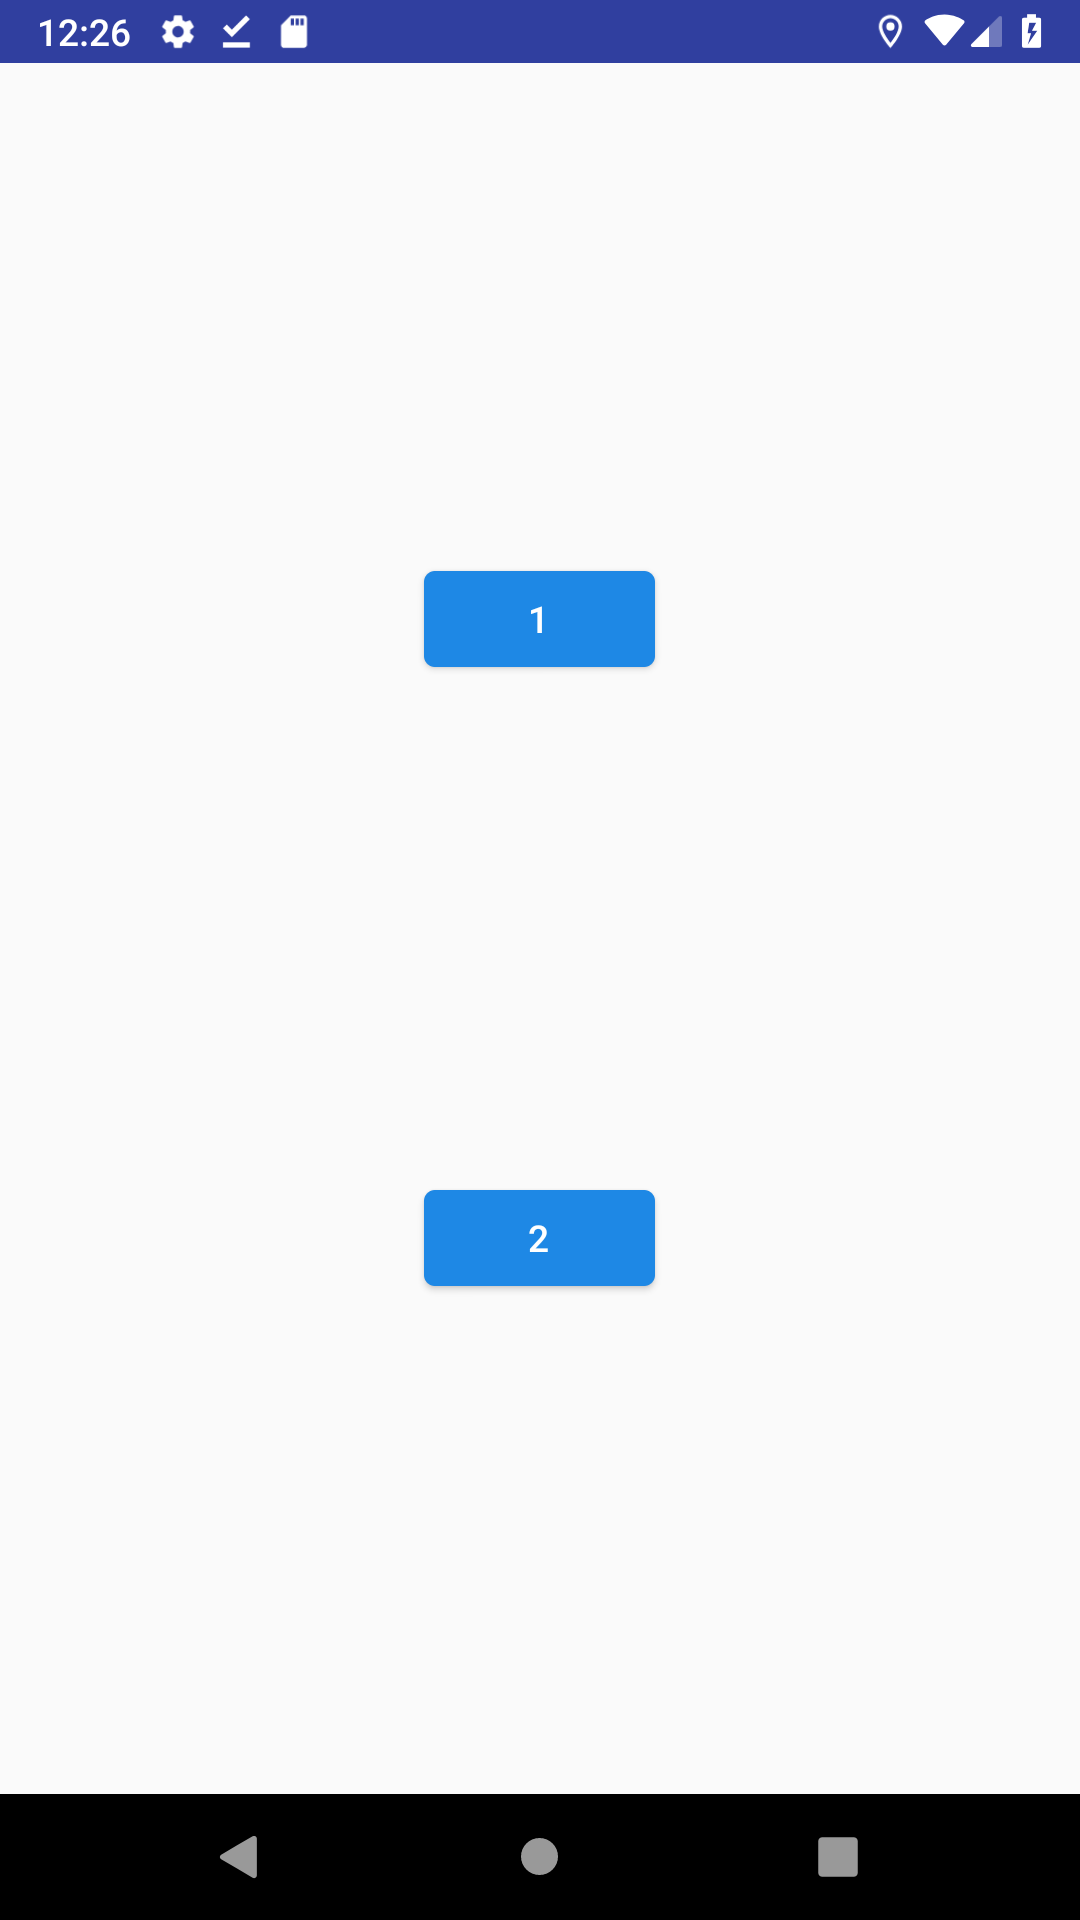
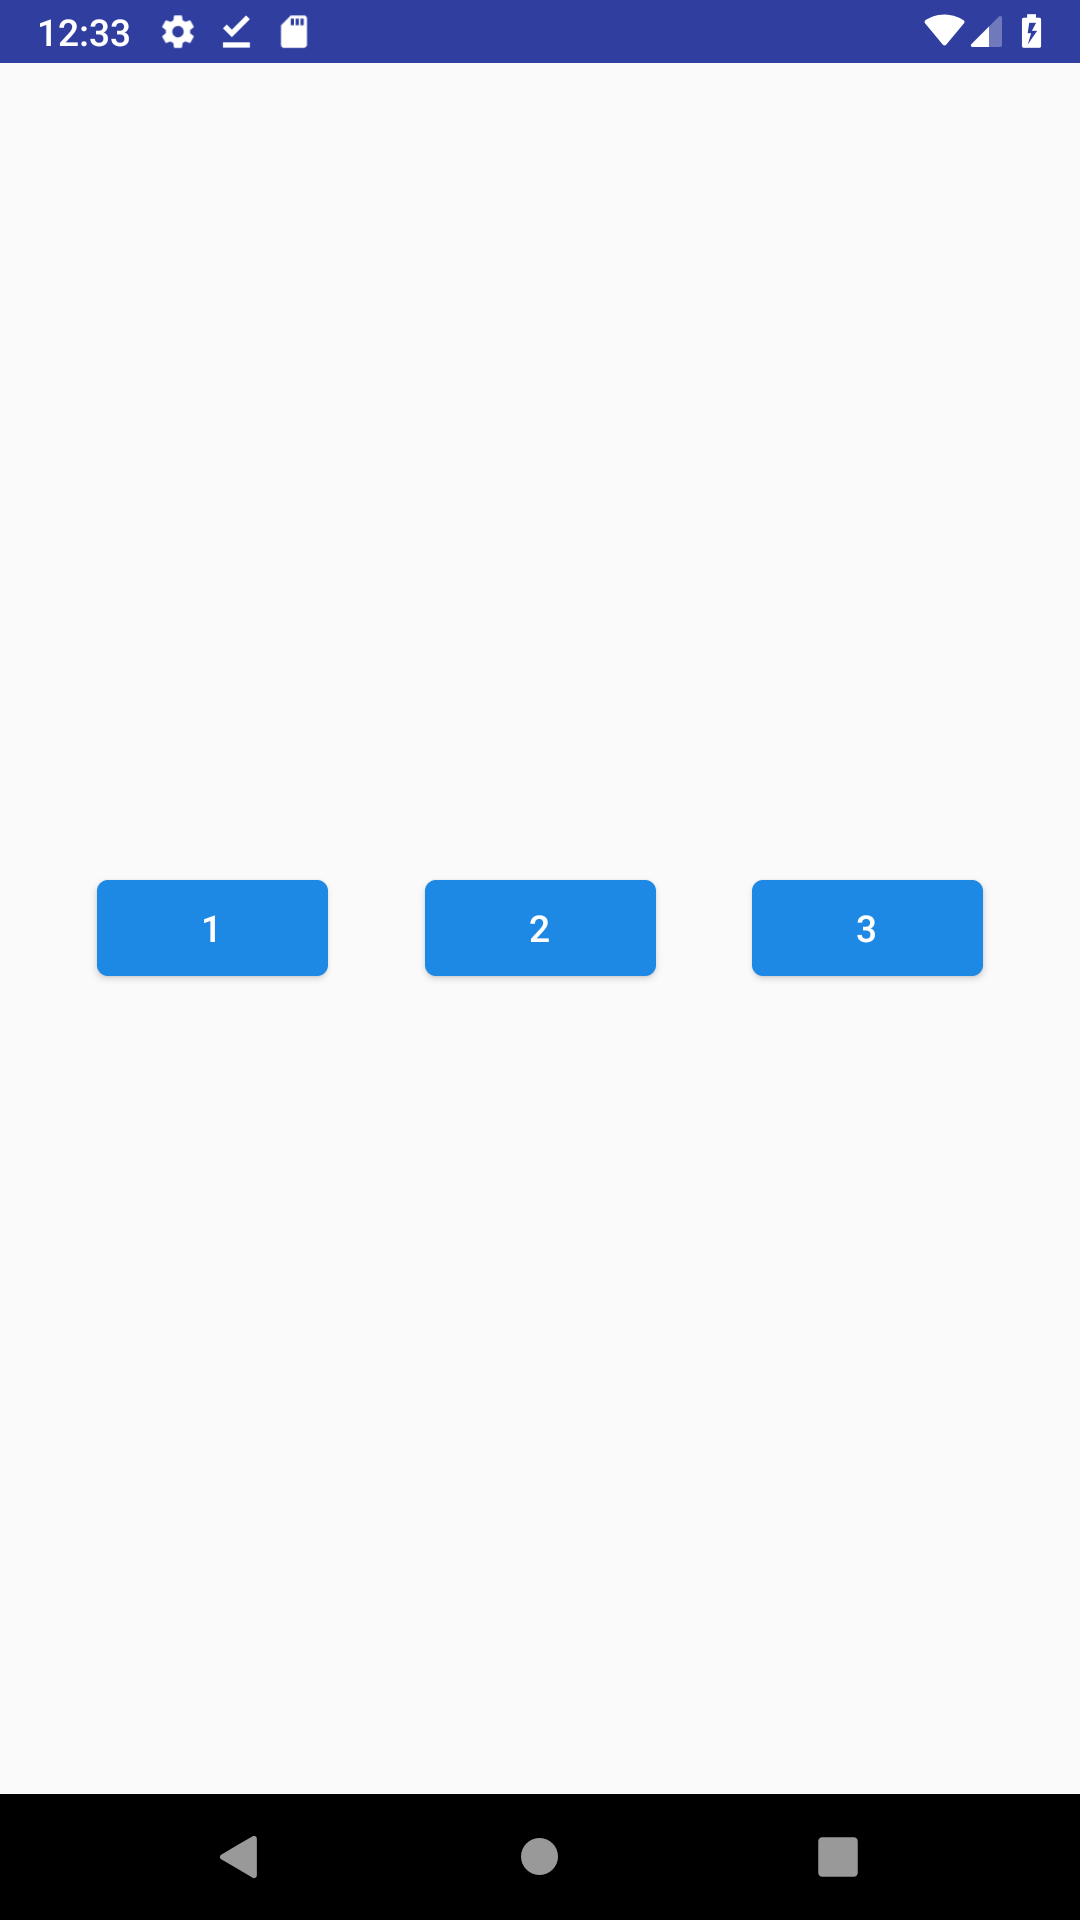
2つの場合
互いに制約を加えるConstraintLayoutにおいて,2つのパーツを使いこなせることは結構重要です.複数の取り扱いがわかってしまえば,数が増えても大体は対応できると思うのです.
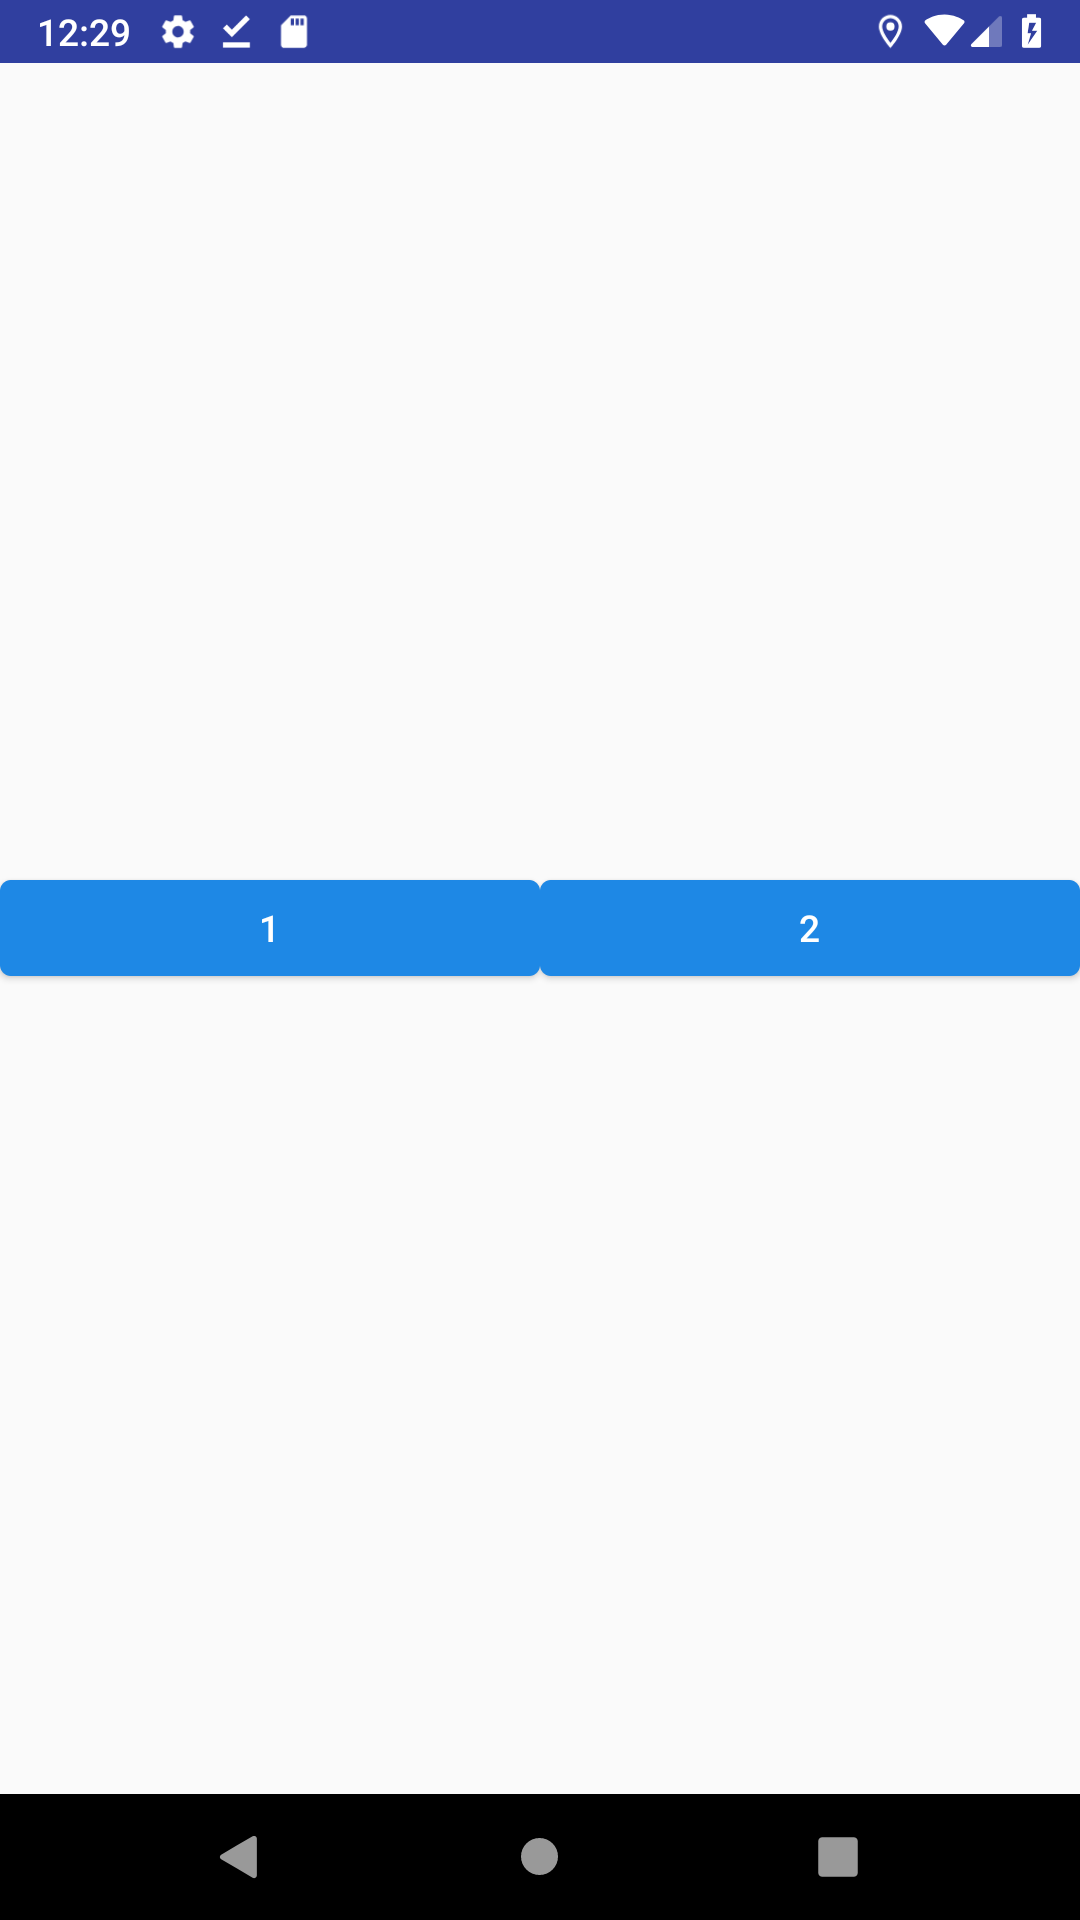
垂直方向に均等
マージンを均等化する場合です.特に難しいことは考えず,中央表示と同じ感覚で制約をつけます.
<?xml version="1.0" encoding="utf-8"?>
<android.support.constraint.ConstraintLayout xmlns:android="http://schemas.android.com/apk/res/android"
    android:layout_width="match_parent"
    android:layout_height="match_parent"
    xmlns:app="http://schemas.android.com/apk/res-auto">

    <android.support.design.button.MaterialButton
        android:id="@+id/button1"
        android:layout_width="wrap_content"
        android:layout_height="wrap_content"
        android:text="1"
        app:layout_constraintStart_toStartOf="parent"
        app:layout_constraintEnd_toEndOf="parent"
        app:layout_constraintTop_toTopOf="parent"
        app:layout_constraintBottom_toTopOf="@id/button2" />

    <android.support.design.button.MaterialButton
        android:id="@+id/button2"
        android:layout_width="wrap_content"
        android:layout_height="wrap_content"
        android:text="2"
        app:layout_constraintStart_toStartOf="parent"
        app:layout_constraintEnd_toEndOf="parent"
        app:layout_constraintTop_toBottomOf="@id/button1"
        app:layout_constraintBottom_toBottomOf="parent" />

</android.support.constraint.ConstraintLayout>
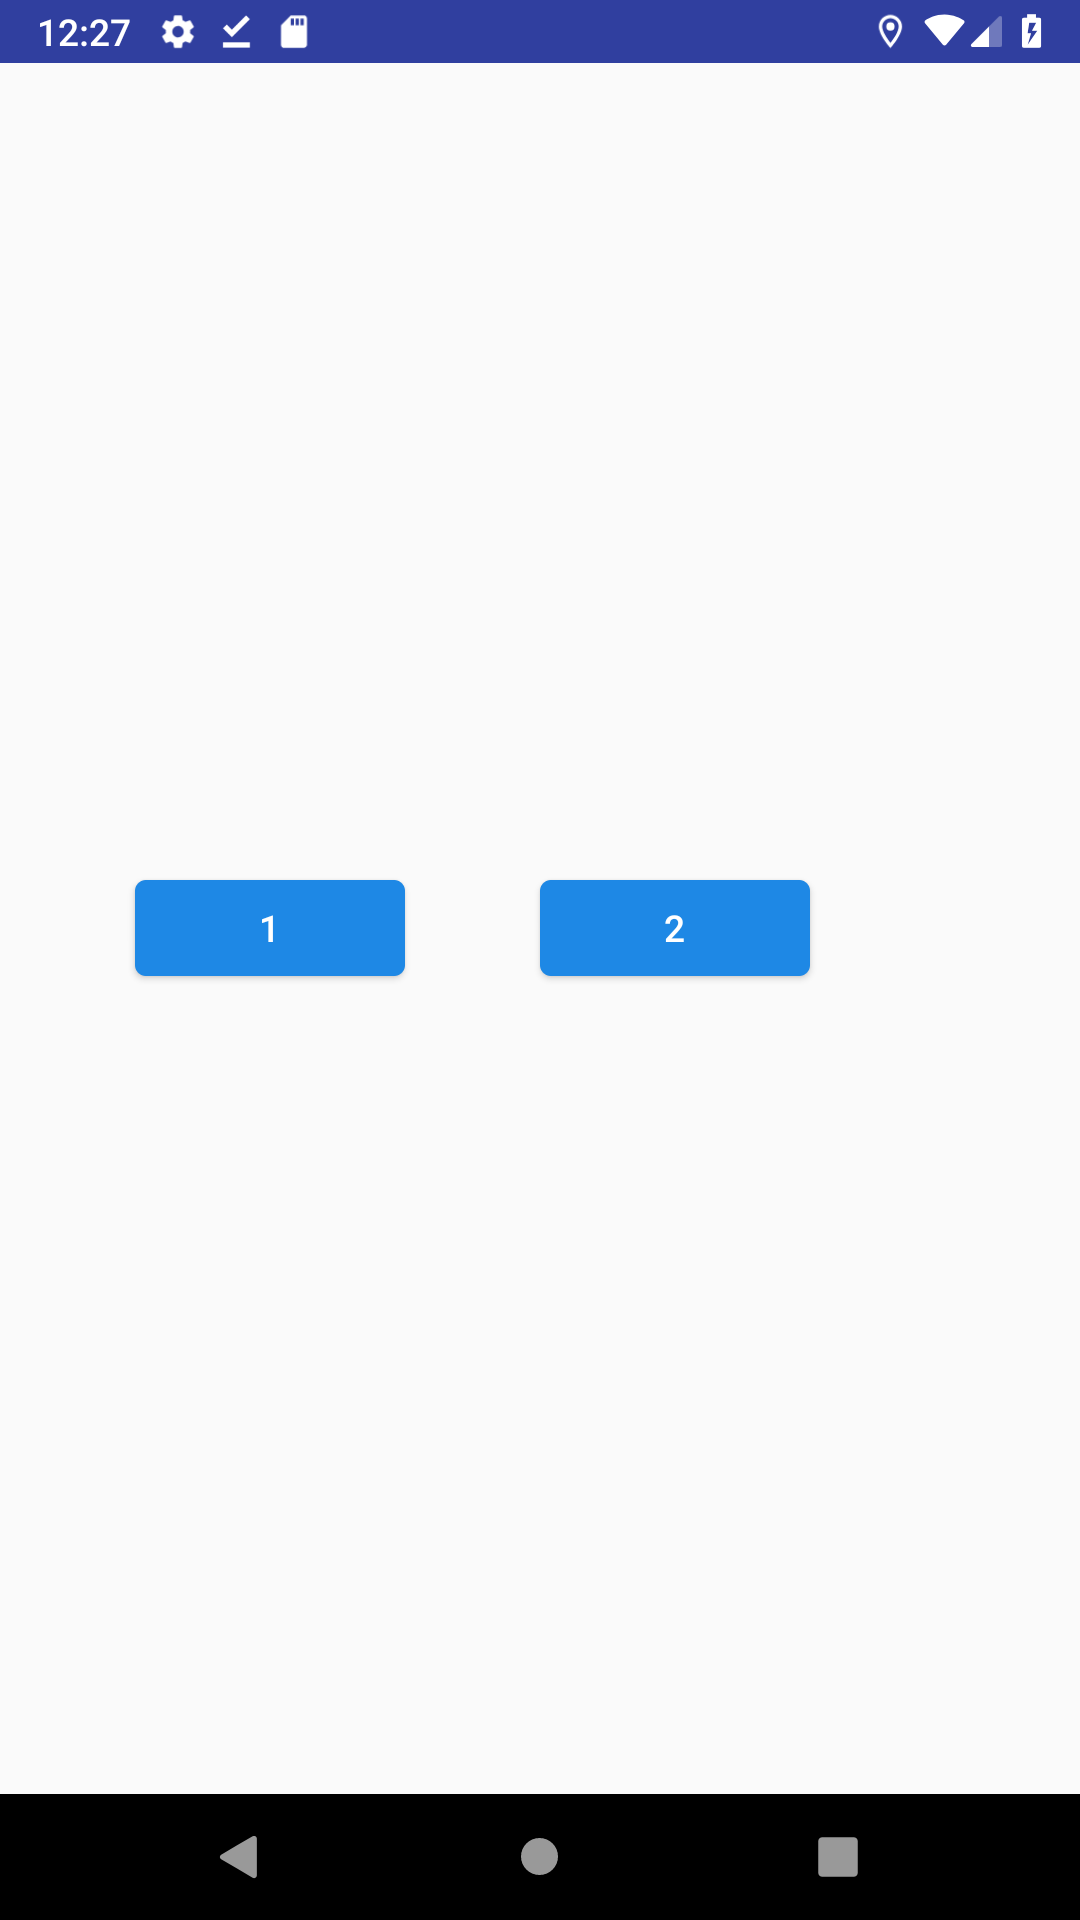
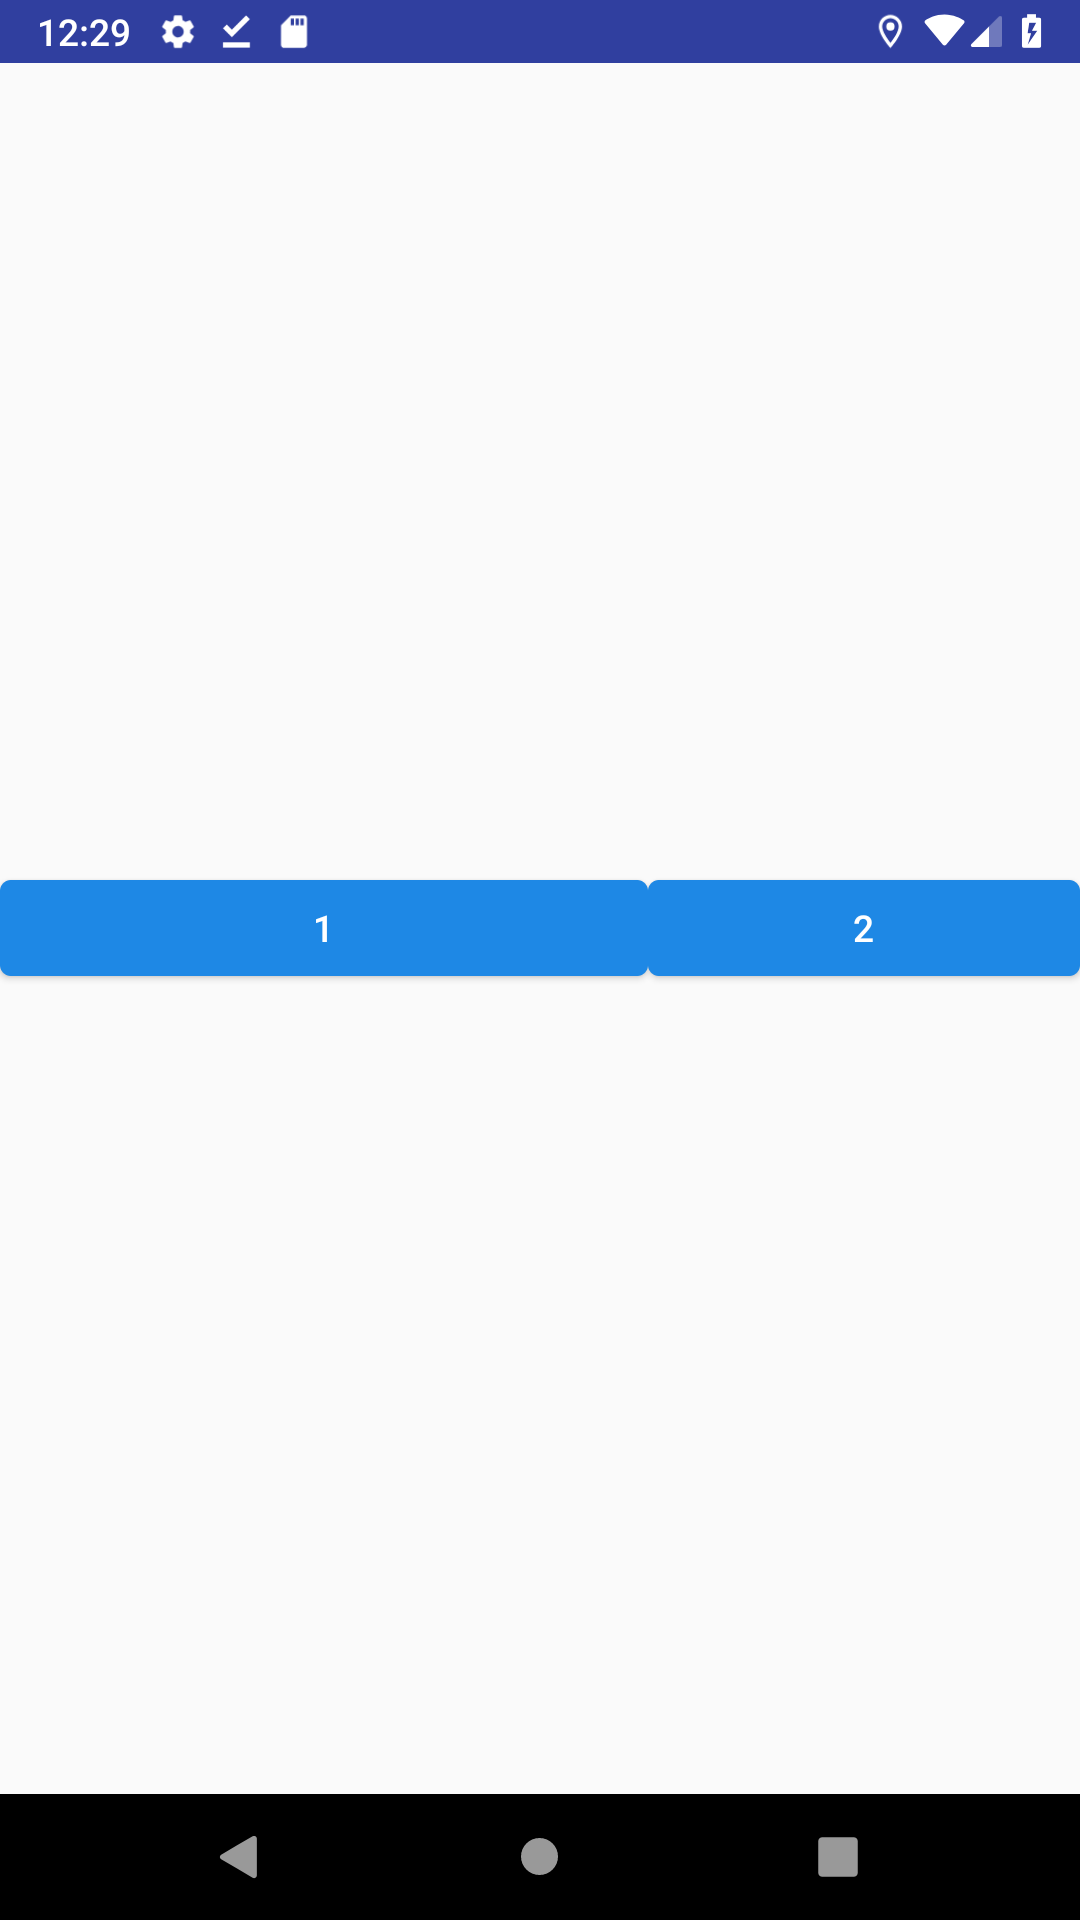
水平方向に均等
水平方向も制約部位を変えるだけです.新しいパラメータはありません.
ここからは数が多くなってしまうので水平方向なレイアウト(Horizontal)のみ例を示します.
縦方向(Vertical)なレイアウトを作りたい場合は,基本的に制約部位を変えるのと,Horizontal系のパラメータをVertical系に変えるだけです.

<?xml version="1.0" encoding="utf-8"?>
<android.support.constraint.ConstraintLayout xmlns:android="http://schemas.android.com/apk/res/android"
    android:layout_width="match_parent"
    android:layout_height="match_parent"
    xmlns:app="http://schemas.android.com/apk/res-auto">

    <android.support.design.button.MaterialButton
        android:id="@+id/button1"
        android:layout_width="wrap_content"
        android:layout_height="wrap_content"
        android:text="1"
        app:layout_constraintStart_toStartOf="parent"
        app:layout_constraintEnd_toStartOf="@id/button2"
        app:layout_constraintTop_toTopOf="parent"
        app:layout_constraintBottom_toBottomOf="parent" />

    <android.support.design.button.MaterialButton
        android:id="@+id/button2"
        android:layout_width="wrap_content"
        android:layout_height="wrap_content"
        android:text="2"
        app:layout_constraintStart_toEndOf="@id/button1"
        app:layout_constraintEnd_toEndOf="parent"
        app:layout_constraintTop_toTopOf="parent"
        app:layout_constraintBottom_toBottomOf="parent" />

</android.support.constraint.ConstraintLayout>
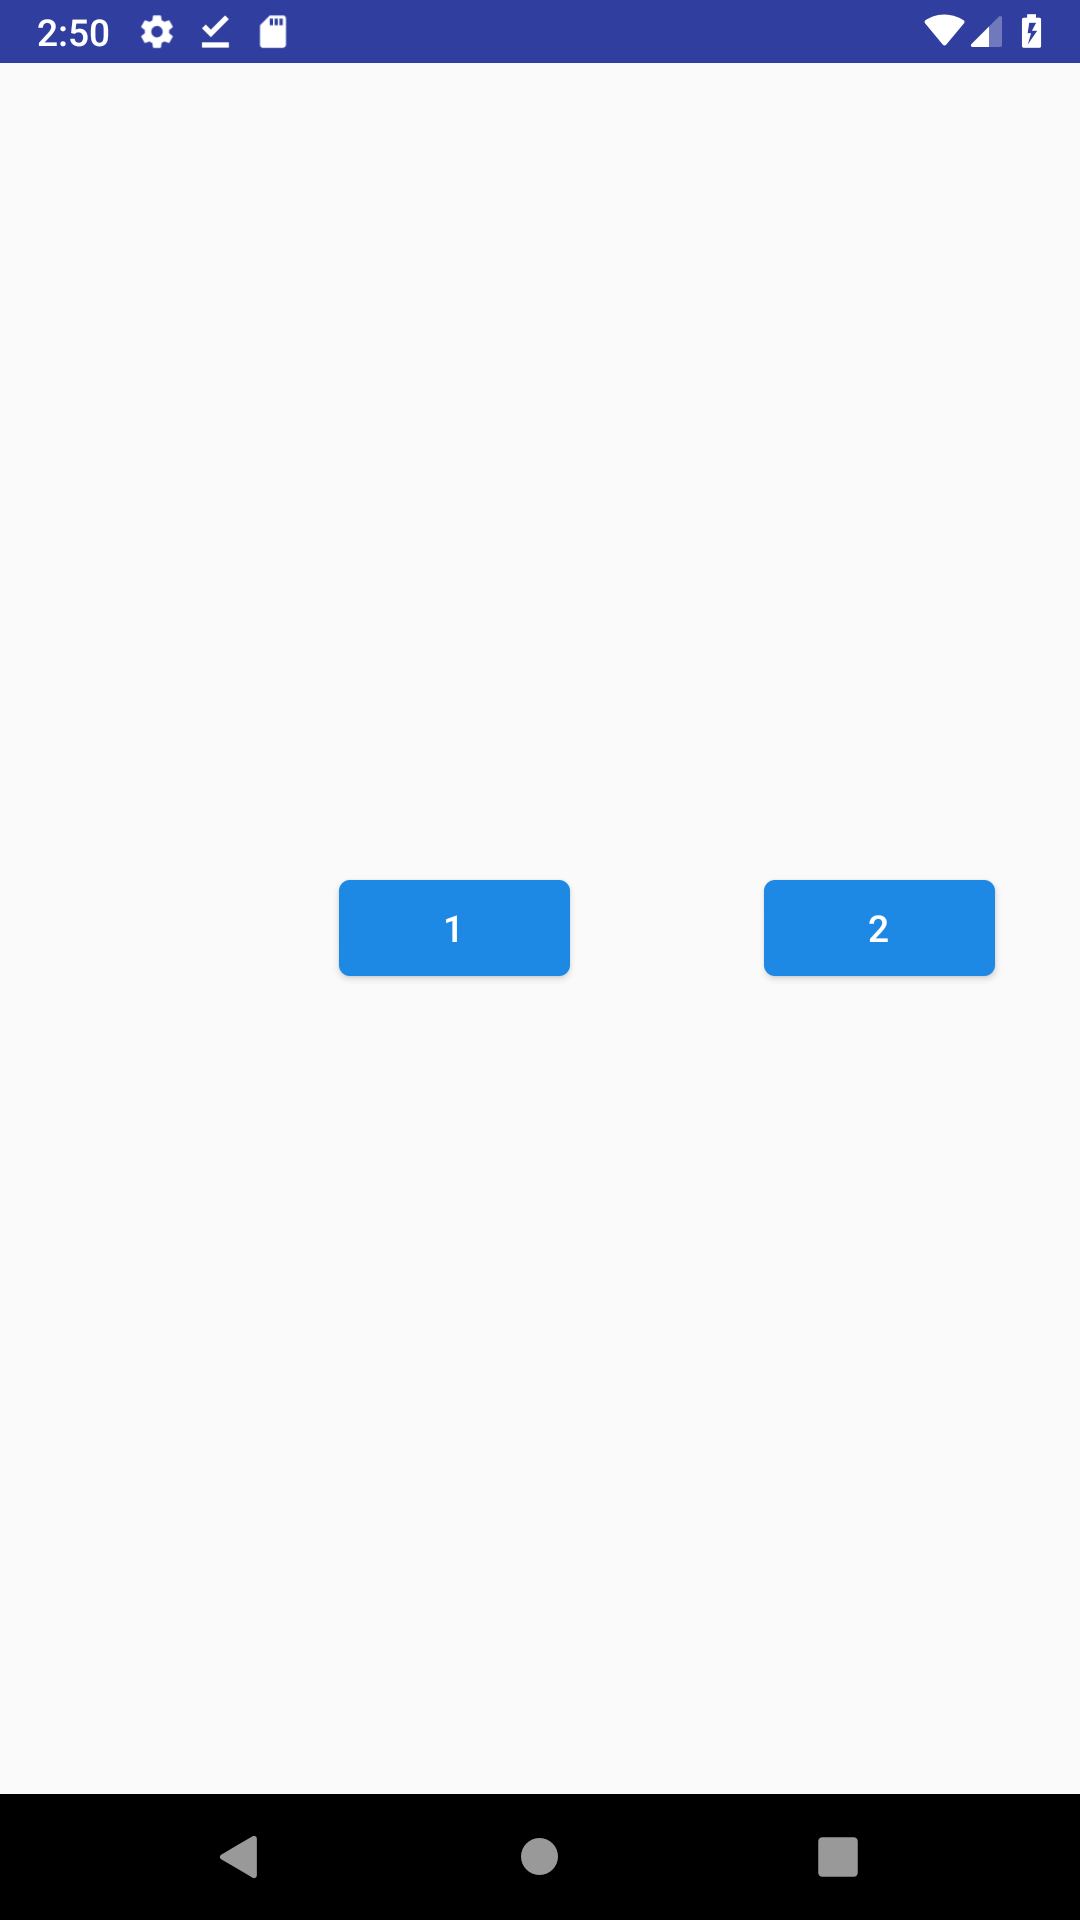
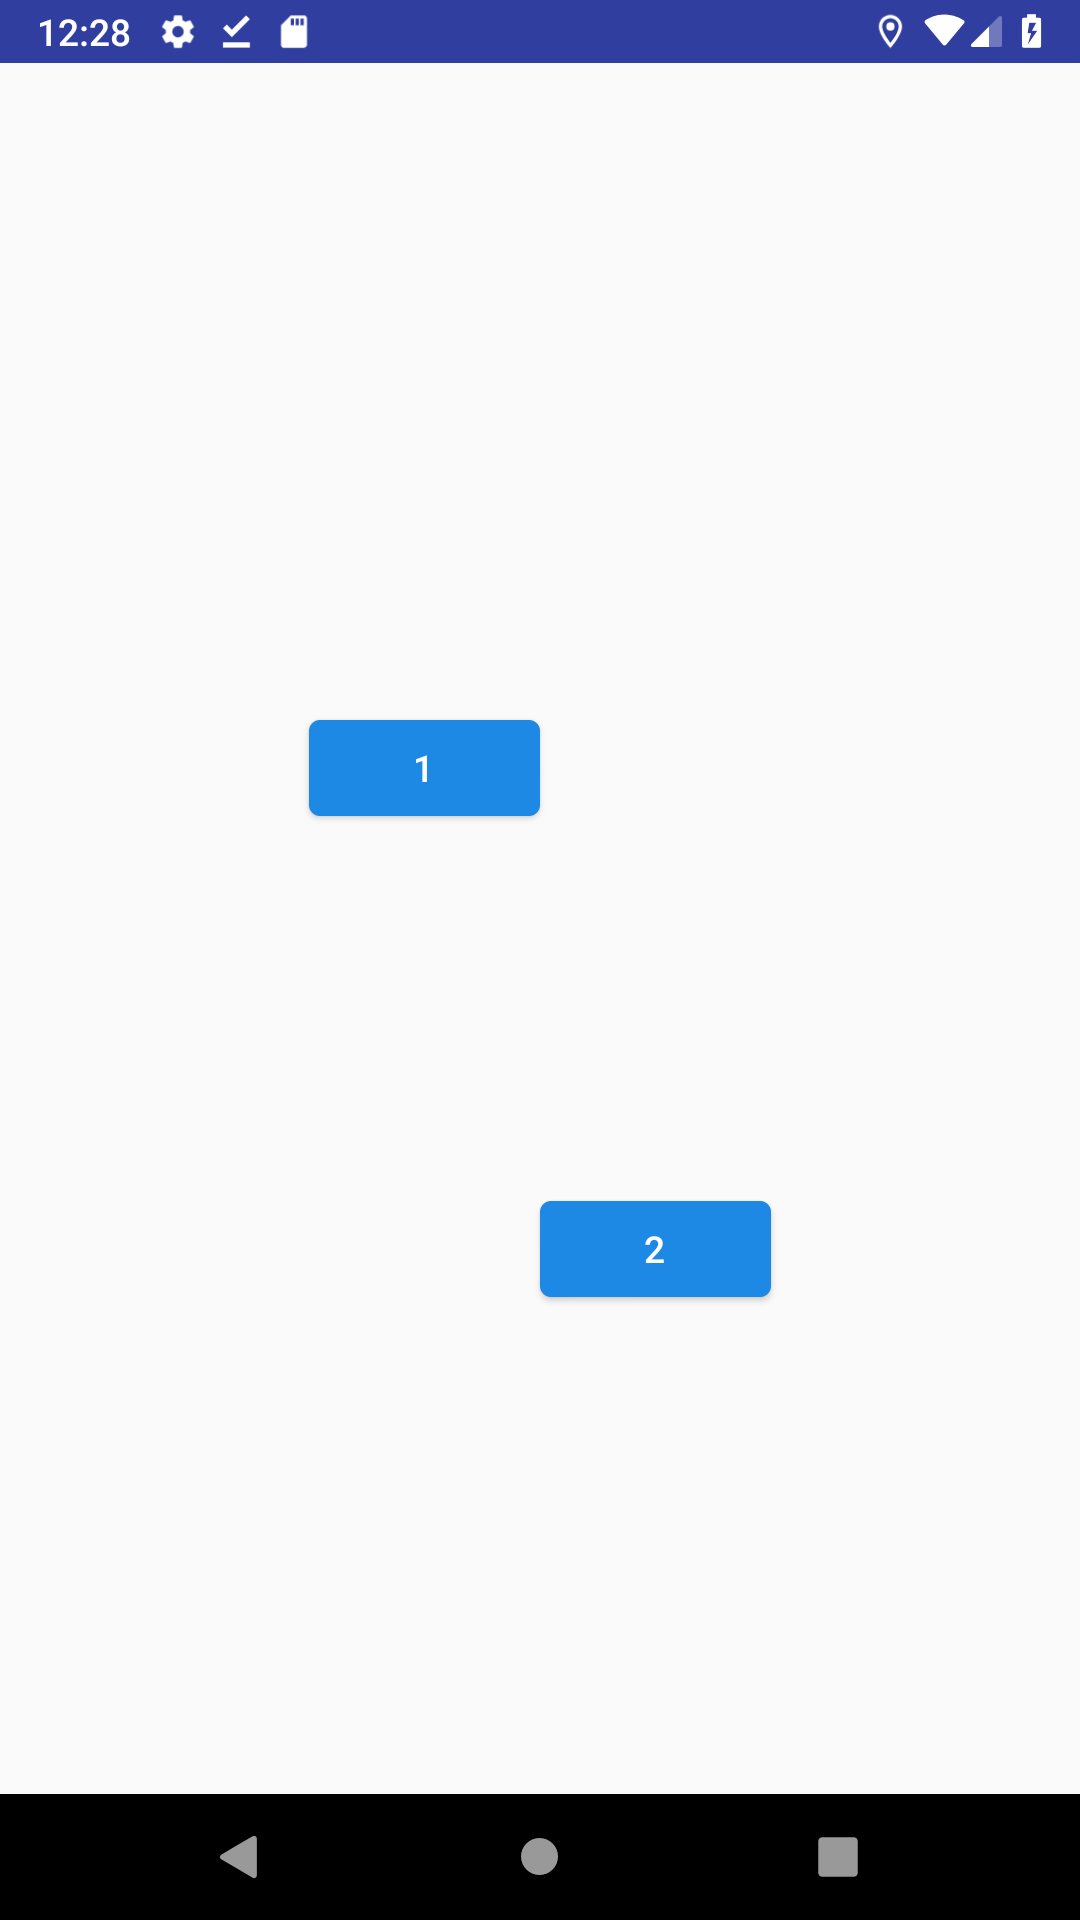
ちょっとずらしたい①(Space)
さて,ちょっとさっきのレイアウトを左右にずらしたいんだよなぁ,ってあると思います.
しかしこれが結構曲者で,見た目は似ているもののマージンを比率でコントロールする術はありません.
ここはSpaceを入れることで擬似的に実現しましょう.
これまでのレイアウト同様,Weightを用いて比率を決定できます.
widthを0dpにするのを忘れないようにしましょう.
<?xml version="1.0" encoding="utf-8"?>
<android.support.constraint.ConstraintLayout xmlns:android="http://schemas.android.com/apk/res/android"
    android:layout_width="match_parent"
    android:layout_height="match_parent"
    xmlns:app="http://schemas.android.com/apk/res-auto">

    <Space
        android:id="@+id/space1"
        android:layout_width="0dp"
        android:layout_height="wrap_content"
        app:layout_constraintStart_toStartOf="parent"
        app:layout_constraintEnd_toStartOf="@id/button1"
        app:layout_constraintTop_toTopOf="parent"
        app:layout_constraintBottom_toBottomOf="parent"
        app:layout_constraintHorizontal_weight="1" />

    <android.support.design.button.MaterialButton
        android:id="@+id/button1"
        android:layout_width="0dp"
        android:layout_height="wrap_content"
        android:text="1"
        app:layout_constraintStart_toEndOf="@id/space1"
        app:layout_constraintEnd_toStartOf="@id/space2"
        app:layout_constraintTop_toTopOf="parent"
        app:layout_constraintBottom_toBottomOf="parent"
        app:layout_constraintHorizontal_chainStyle="spread"
        app:layout_constraintHorizontal_weight="2"/>

    <Space
        android:id="@+id/space2"
        android:layout_width="0dp"
        android:layout_height="wrap_content"
        app:layout_constraintStart_toEndOf="@id/button1"
        app:layout_constraintEnd_toStartOf="@id/button2"
        app:layout_constraintTop_toTopOf="parent"
        app:layout_constraintBottom_toBottomOf="parent"
        app:layout_constraintHorizontal_weight="1" />

    <android.support.design.button.MaterialButton
        android:id="@+id/button2"
        android:layout_width="0dp"
        android:layout_height="wrap_content"
        android:text="2"
        app:layout_constraintStart_toEndOf="@id/space2"
        app:layout_constraintEnd_toStartOf="@id/space3"
        app:layout_constraintTop_toTopOf="parent"
        app:layout_constraintBottom_toBottomOf="parent"
        app:layout_constraintHorizontal_weight="2" />

    <Space
        android:id="@+id/space3"
        android:layout_width="0dp"
        android:layout_height="wrap_content"
        app:layout_constraintStart_toEndOf="@id/button2"
        app:layout_constraintEnd_toEndOf="parent"
        app:layout_constraintTop_toTopOf="parent"
        app:layout_constraintBottom_toBottomOf="parent"
        app:layout_constraintHorizontal_weight="2" />

</android.support.constraint.ConstraintLayout>
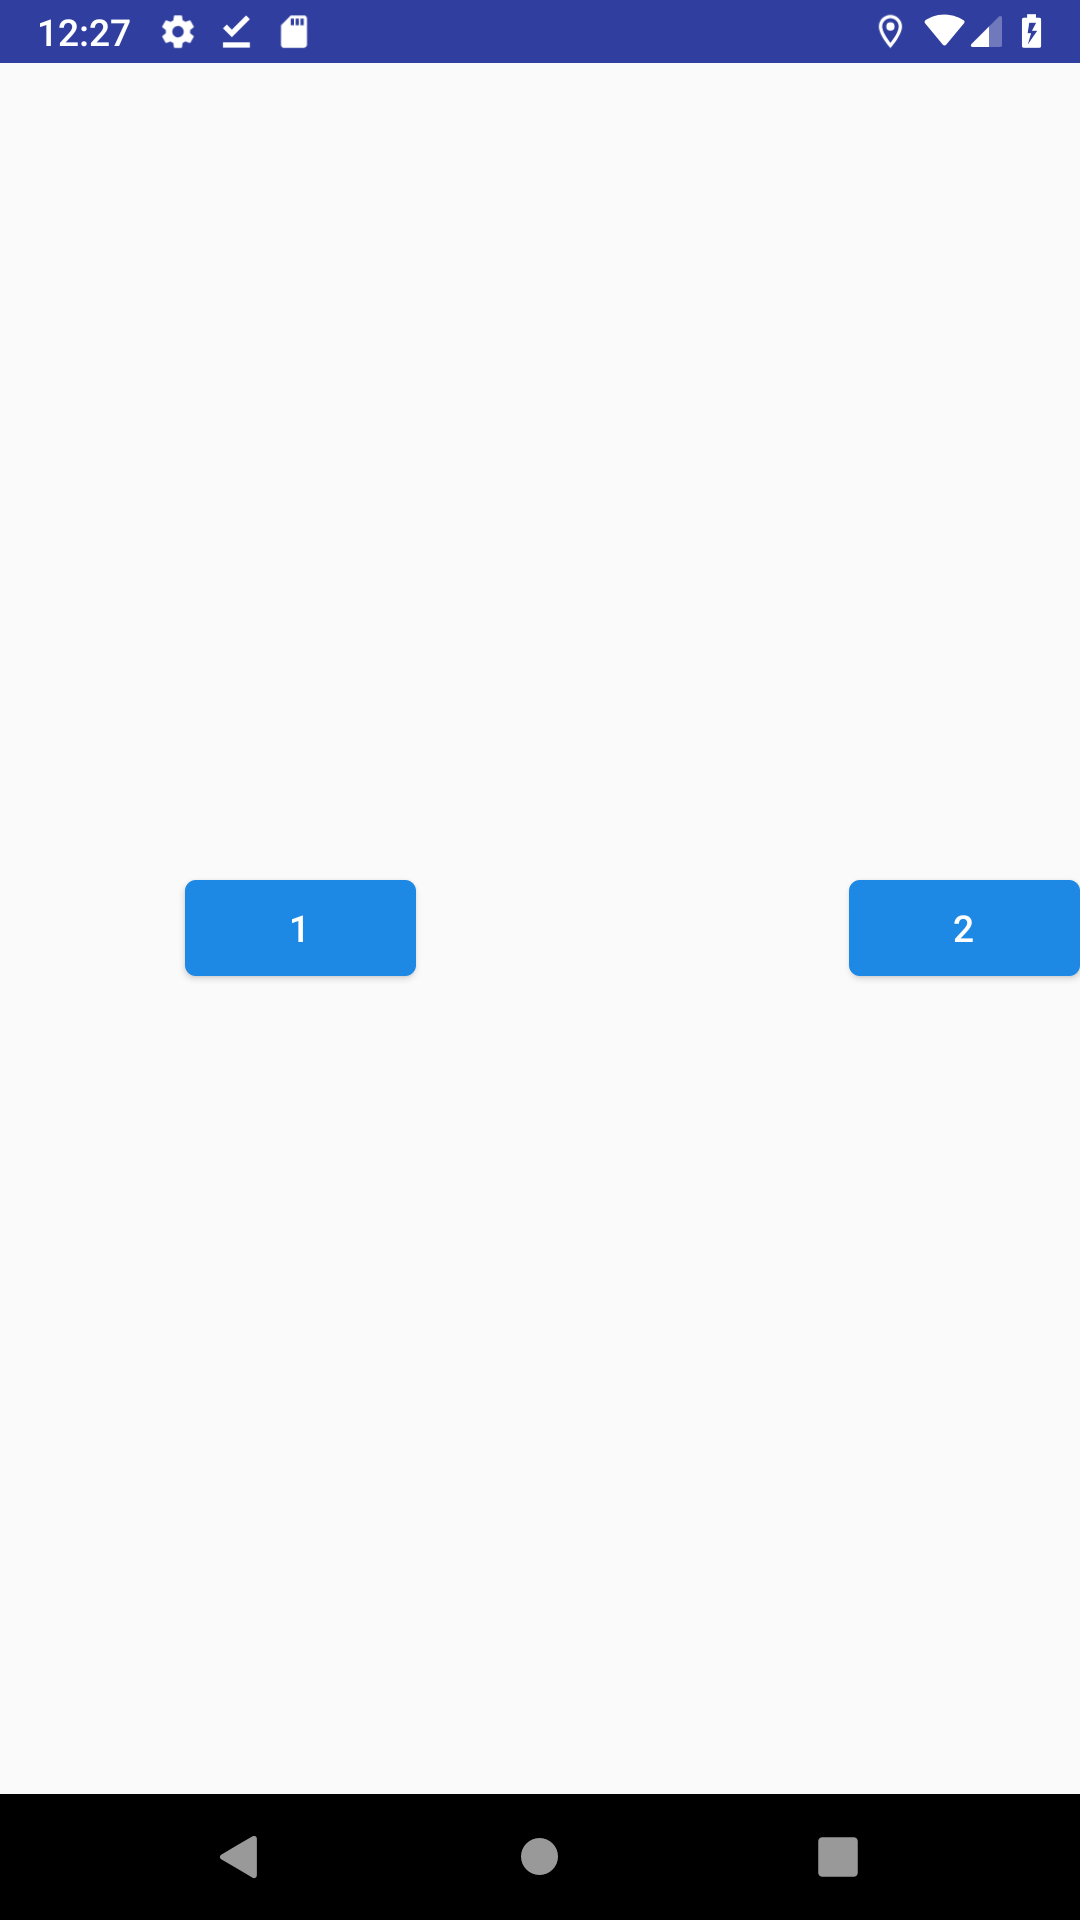
ちょっとずらしたい②(biasの組み合わせ)
先ほどはSpaceとweightパラメータを使って比率を決定し,要素をずらす事を実現しました.
ただ,単純に「水平方向に好きな位置」で述べたbiasの組み合わせでも書けます.
この場合要素の大きさはwrap_contentかdpを指定して固定したい場合に向いていますね.
<?xml version="1.0" encoding="utf-8"?>
<android.support.constraint.ConstraintLayout xmlns:android="http://schemas.android.com/apk/res/android"
    android:layout_width="match_parent"
    android:layout_height="match_parent"
    xmlns:app="http://schemas.android.com/apk/res-auto">

    <android.support.design.button.MaterialButton
        android:id="@+id/button1"
        android:layout_width="wrap_content"
        android:layout_height="wrap_content"
        android:text="1"
        app:layout_constraintStart_toStartOf="parent"
        app:layout_constraintEnd_toEndOf="parent"
        app:layout_constraintTop_toTopOf="parent"
        app:layout_constraintBottom_toBottomOf="parent"
        app:layout_constraintHorizontal_bias="0.4" />

    <android.support.design.button.MaterialButton
        android:id="@+id/button2"
        android:layout_width="wrap_content"
        android:layout_height="wrap_content"
        android:text="2"
        app:layout_constraintStart_toStartOf="parent"
        app:layout_constraintEnd_toEndOf="parent"
        app:layout_constraintTop_toTopOf="parent"
        app:layout_constraintBottom_toBottomOf="parent"
        app:layout_constraintHorizontal_bias="0.9" />

</android.support.constraint.ConstraintLayout>
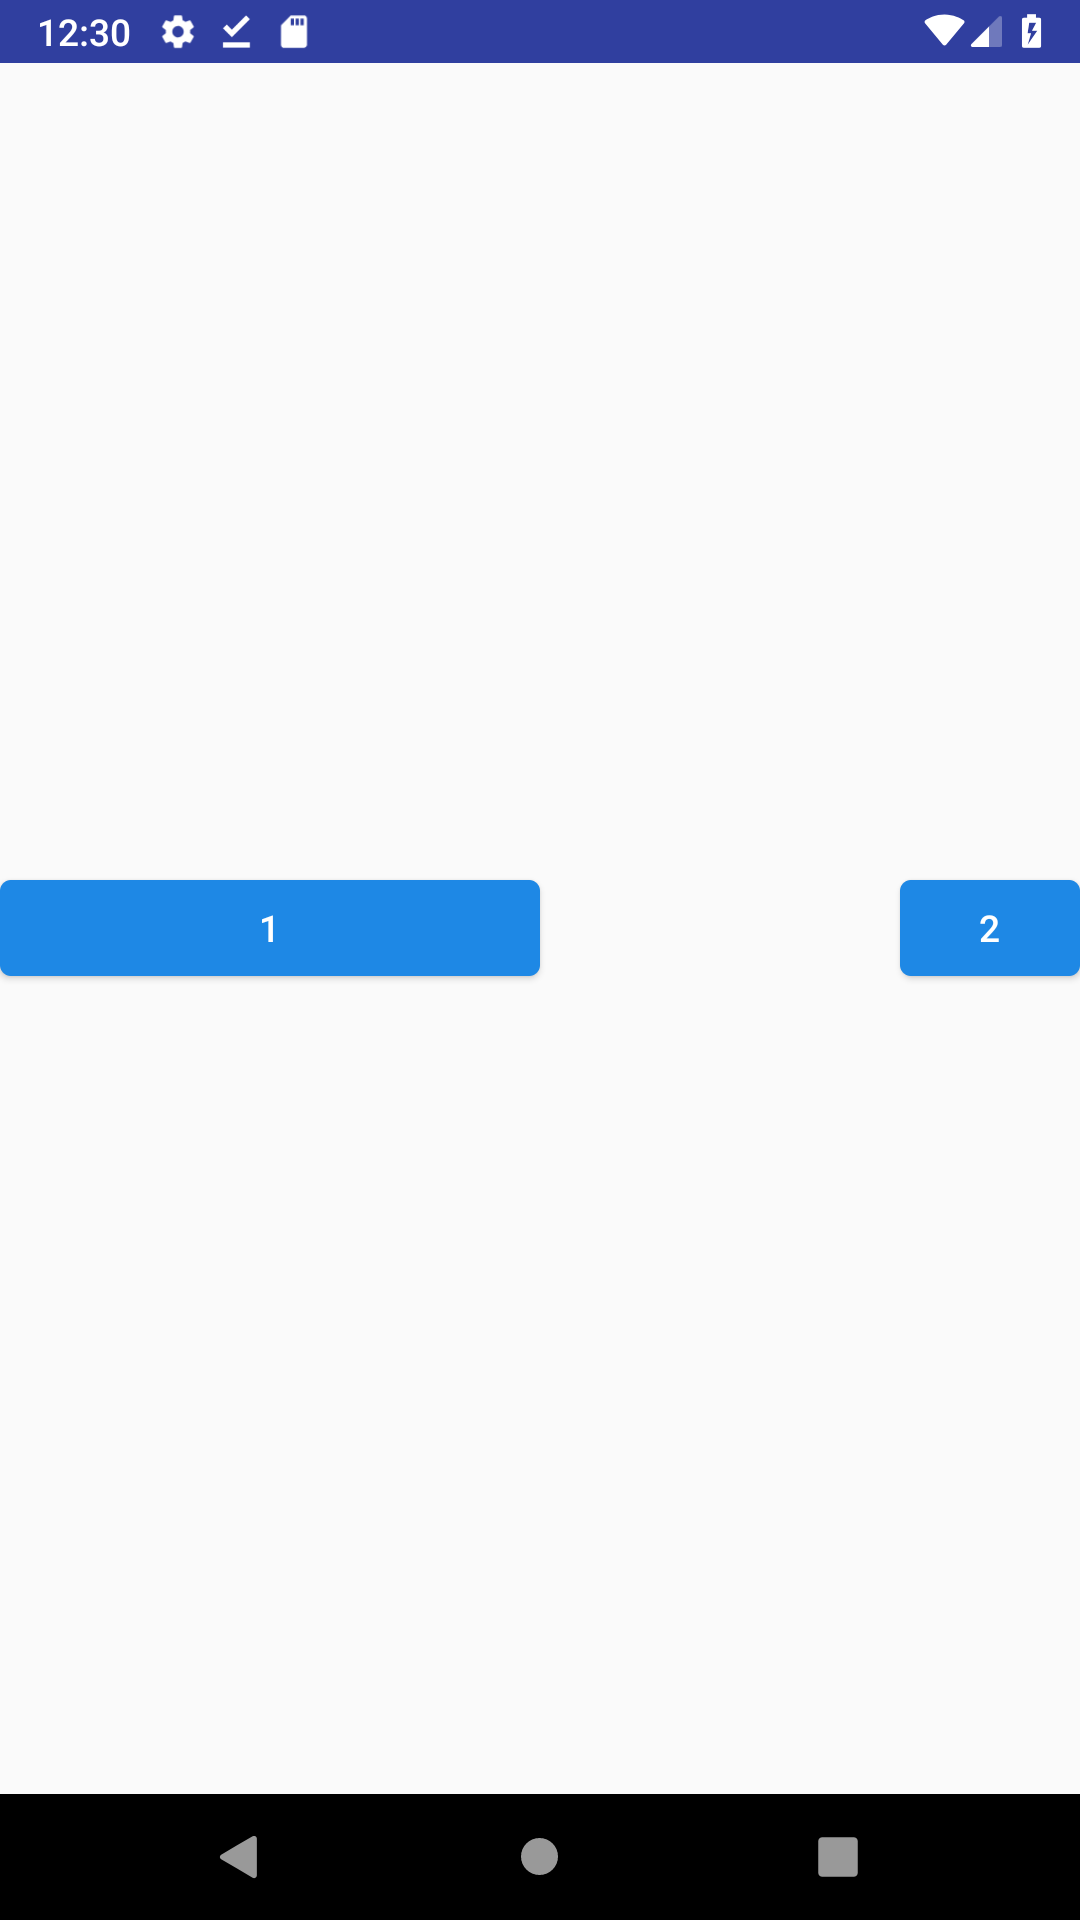
片方が端にある場合
しかし,片方が画面の端っこに固定(fix)されている場合は,biasを使うことができるようです.
<?xml version="1.0" encoding="utf-8"?>
<android.support.constraint.ConstraintLayout xmlns:android="http://schemas.android.com/apk/res/android"
    android:layout_width="match_parent"
    android:layout_height="match_parent"
    xmlns:app="http://schemas.android.com/apk/res-auto">

    <android.support.design.button.MaterialButton
        android:id="@+id/button1"
        android:layout_width="wrap_content"
        android:layout_height="wrap_content"
        android:text="1"
        app:layout_constraintStart_toStartOf="parent"
        app:layout_constraintEnd_toStartOf="@id/button2"
        app:layout_constraintTop_toTopOf="parent"
        app:layout_constraintBottom_toBottomOf="parent"
        app:layout_constraintHorizontal_chainStyle="spread"
        app:layout_constraintHorizontal_bias="0.3" />

    <android.support.design.button.MaterialButton
        android:id="@+id/button2"
        android:layout_width="wrap_content"
        android:layout_height="wrap_content"
        android:text="2"
        app:layout_constraintEnd_toEndOf="parent"
        app:layout_constraintTop_toTopOf="parent"
        app:layout_constraintBottom_toBottomOf="parent" />

</android.support.constraint.ConstraintLayout>
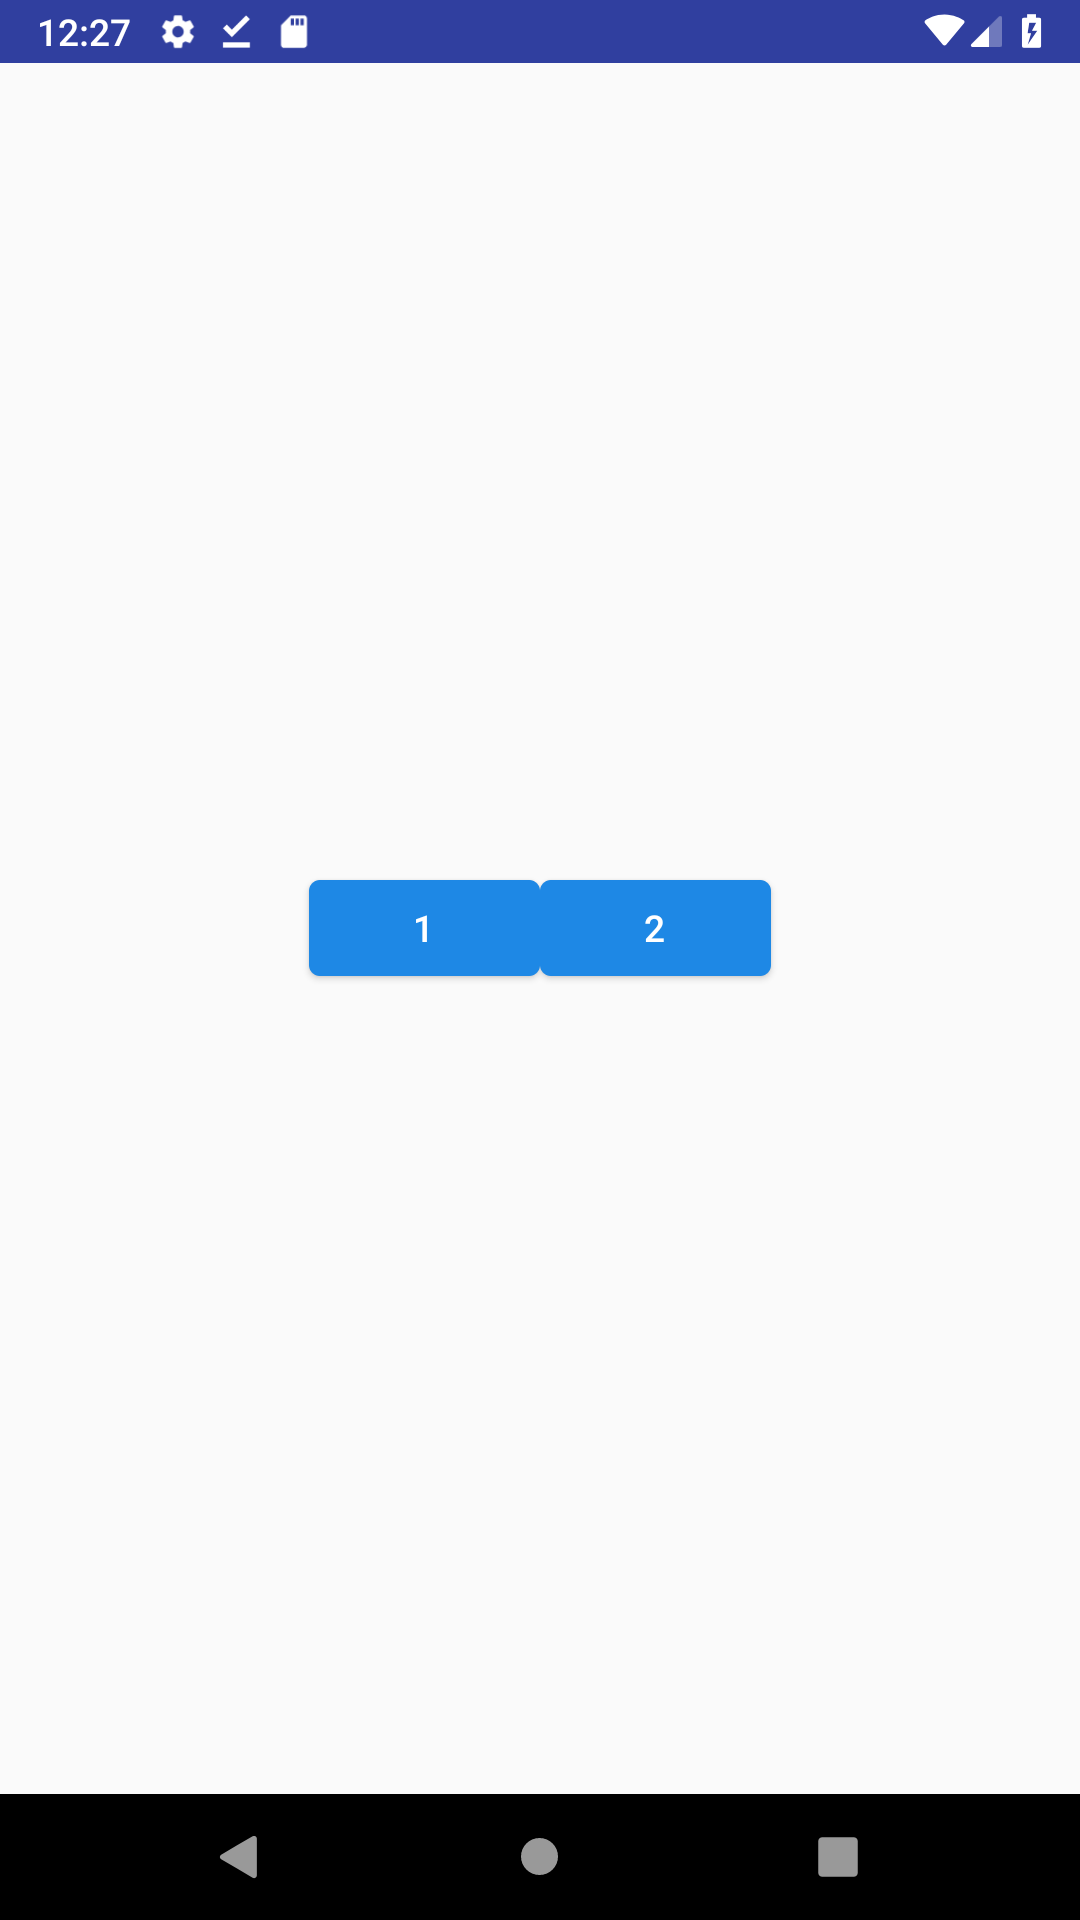
くっつける
要素を中央に詰めて表示したい場合です.
app:layout_constraintHorizontal_chainStyle="packed"
を指定しましょう.
<?xml version="1.0" encoding="utf-8"?>
<android.support.constraint.ConstraintLayout xmlns:android="http://schemas.android.com/apk/res/android"
    android:layout_width="match_parent"
    android:layout_height="match_parent"
    xmlns:app="http://schemas.android.com/apk/res-auto">

    <android.support.design.button.MaterialButton
        android:id="@+id/button1"
        android:layout_width="wrap_content"
        android:layout_height="wrap_content"
        android:text="1"
        app:layout_constraintStart_toStartOf="parent"
        app:layout_constraintEnd_toStartOf="@id/button2"
        app:layout_constraintTop_toTopOf="parent"
        app:layout_constraintBottom_toBottomOf="parent"
        app:layout_constraintHorizontal_chainStyle="packed" />

    <android.support.design.button.MaterialButton
        android:id="@+id/button2"
        android:layout_width="wrap_content"
        android:layout_height="wrap_content"
        android:text="2"
        app:layout_constraintStart_toEndOf="@id/button1"
        app:layout_constraintEnd_toEndOf="parent"
        app:layout_constraintTop_toTopOf="parent"
        app:layout_constraintBottom_toBottomOf="parent" />

</android.support.constraint.ConstraintLayout>
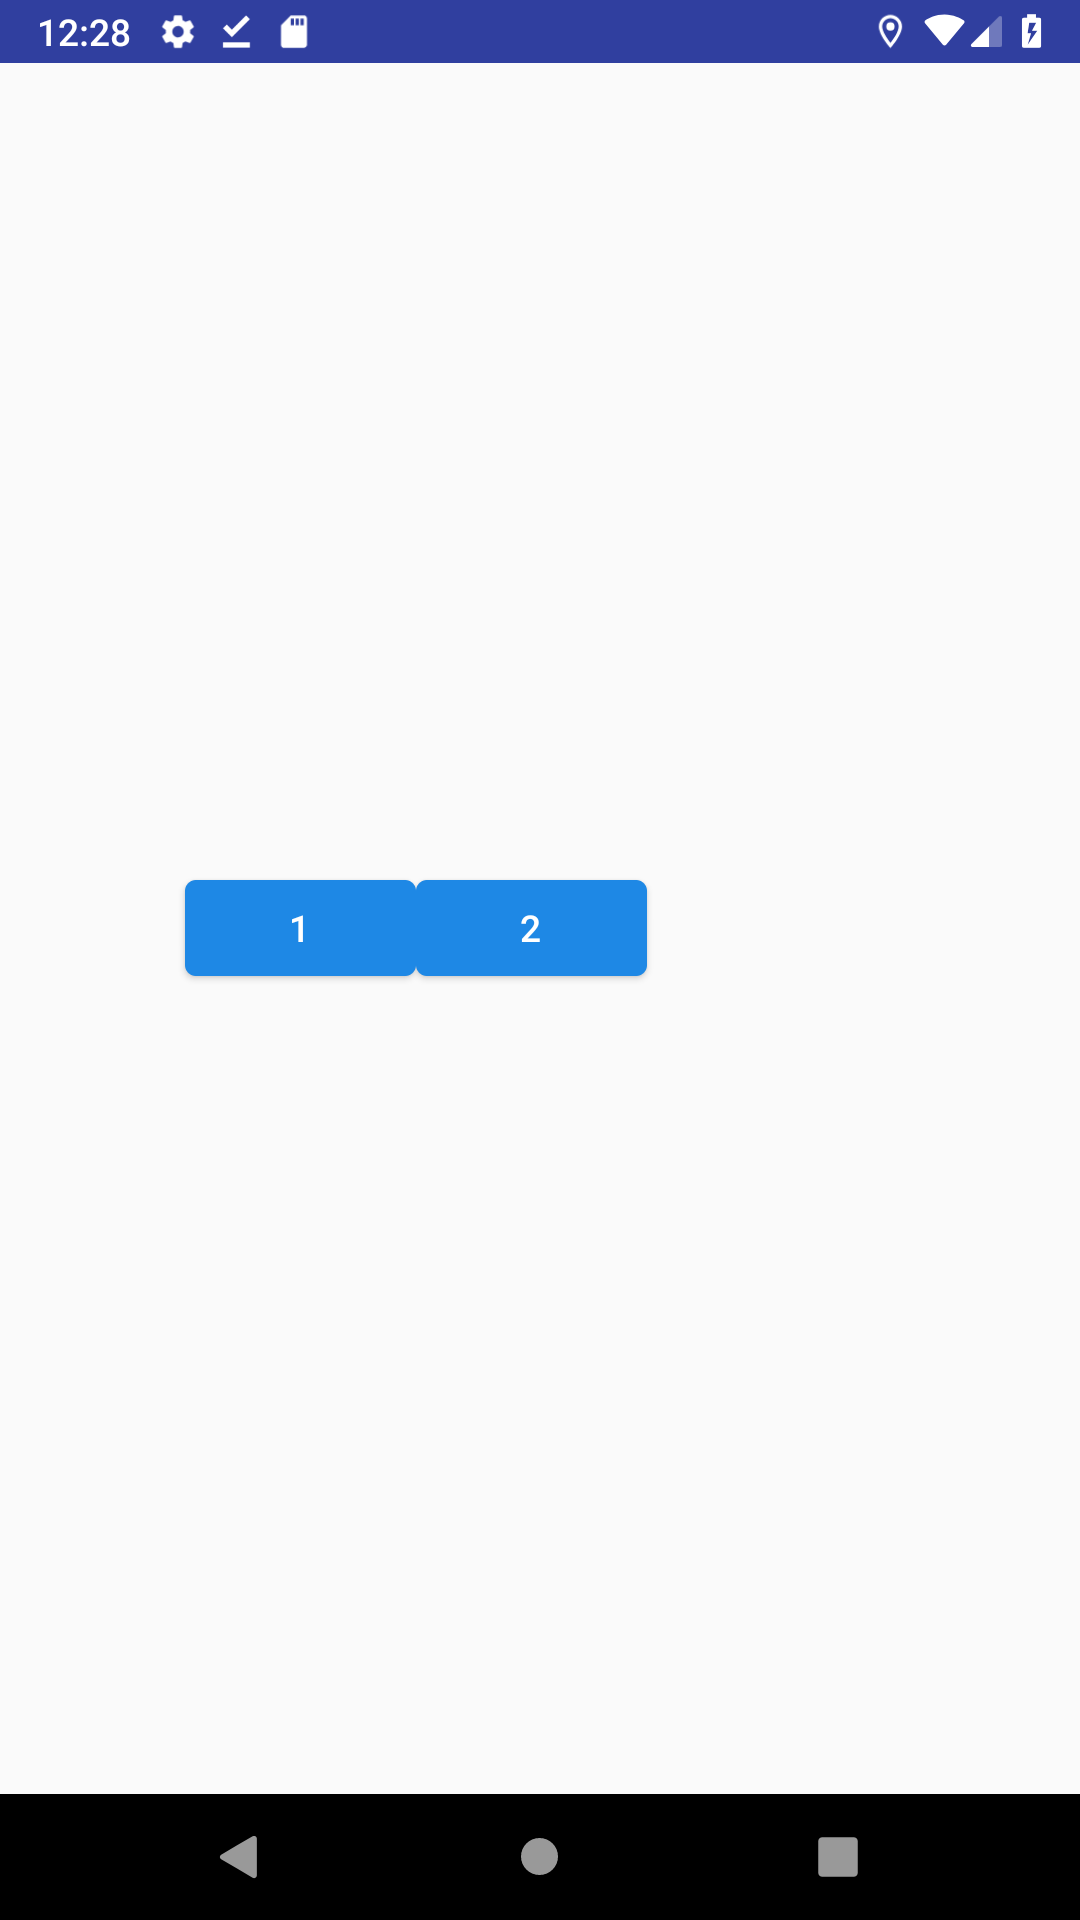
ちょっとずらしたい
それをちょっと左右にずらしたいなぁ,というとき.
今回はbiasが使えます.
<?xml version="1.0" encoding="utf-8"?>
<android.support.constraint.ConstraintLayout xmlns:android="http://schemas.android.com/apk/res/android"
    android:layout_width="match_parent"
    android:layout_height="match_parent"
    xmlns:app="http://schemas.android.com/apk/res-auto">

    <android.support.design.button.MaterialButton
        android:id="@+id/button1"
        android:layout_width="wrap_content"
        android:layout_height="wrap_content"
        android:text="1"
        app:layout_constraintStart_toStartOf="parent"
        app:layout_constraintEnd_toStartOf="@id/button2"
        app:layout_constraintTop_toTopOf="parent"
        app:layout_constraintBottom_toBottomOf="parent"
        app:layout_constraintHorizontal_chainStyle="packed"
        app:layout_constraintHorizontal_bias="0.3" />

    <android.support.design.button.MaterialButton
        android:id="@+id/button2"
        android:layout_width="wrap_content"
        android:layout_height="wrap_content"
        android:text="2"
        app:layout_constraintStart_toEndOf="@id/button1"
        app:layout_constraintEnd_toEndOf="parent"
        app:layout_constraintTop_toTopOf="parent"
        app:layout_constraintBottom_toBottomOf="parent" />

</android.support.constraint.ConstraintLayout>
垂直方向にずらす
app:layout_constraintHorizontal_chainStyle="packed"はあくまで水平方向に要素を詰めることしか指定していませんので,app:layout_constraintVertical_biasを弄ればそのまま要素を動かせます.
<?xml version="1.0" encoding="utf-8"?>
<android.support.constraint.ConstraintLayout xmlns:android="http://schemas.android.com/apk/res/android"
    android:layout_width="match_parent"
    android:layout_height="match_parent"
    xmlns:app="http://schemas.android.com/apk/res-auto">

    <android.support.design.button.MaterialButton
        android:id="@+id/button1"
        android:layout_width="wrap_content"
        android:layout_height="wrap_content"
        android:text="1"
        app:layout_constraintStart_toStartOf="parent"
        app:layout_constraintEnd_toStartOf="@id/button2"
        app:layout_constraintTop_toTopOf="parent"
        app:layout_constraintBottom_toBottomOf="parent"
        app:layout_constraintHorizontal_chainStyle="packed"
        app:layout_constraintVertical_bias="0.4"/>

    <android.support.design.button.MaterialButton
        android:id="@+id/button2"
        android:layout_width="wrap_content"
        android:layout_height="wrap_content"
        android:text="2"
        app:layout_constraintStart_toEndOf="@id/button1"
        app:layout_constraintEnd_toEndOf="parent"
        app:layout_constraintTop_toTopOf="parent"
        app:layout_constraintBottom_toBottomOf="parent"
        app:layout_constraintVertical_bias="0.7"/>

</android.support.constraint.ConstraintLayout>
そんなにくっつなかなくていい
いや,確かに詰めて表示したいんだけどそんな密着しなくてええんや,って時.
素直にandroid:layout_marginを指定しましょう.

<?xml version="1.0" encoding="utf-8"?>
<android.support.constraint.ConstraintLayout xmlns:android="http://schemas.android.com/apk/res/android"
    android:layout_width="match_parent"
    android:layout_height="match_parent"
    xmlns:app="http://schemas.android.com/apk/res-auto">

    <android.support.design.button.MaterialButton
        android:id="@+id/button1"
        android:layout_width="wrap_content"
        android:layout_height="wrap_content"
        android:text="1"
        app:layout_constraintStart_toStartOf="parent"
        app:layout_constraintEnd_toStartOf="@id/button2"
        app:layout_constraintTop_toTopOf="parent"
        app:layout_constraintBottom_toBottomOf="parent"
        app:layout_constraintHorizontal_chainStyle="packed"
        app:layout_constraintHorizontal_bias="0.3" />

    <android.support.design.button.MaterialButton
        android:id="@+id/button2"
        android:layout_width="wrap_content"
        android:layout_height="wrap_content"
        android:text="2"
        app:layout_constraintStart_toEndOf="@id/button1"
        app:layout_constraintEnd_toEndOf="parent"
        app:layout_constraintTop_toTopOf="parent"
        app:layout_constraintBottom_toBottomOf="parent"
        android:layout_marginStart="15dp"/>

</android.support.constraint.ConstraintLayout>
画面全体に均等
要素で画面を全て使って表示したい時ですね.
android:layout_width="0dp"
app:layout_constraintHorizontal_chainStyle="spread"
を同時に指定することで実現します.
<?xml version="1.0" encoding="utf-8"?>
<android.support.constraint.ConstraintLayout xmlns:android="http://schemas.android.com/apk/res/android"
    android:layout_width="match_parent"
    android:layout_height="match_parent"
    xmlns:app="http://schemas.android.com/apk/res-auto">

    <android.support.design.button.MaterialButton
        android:id="@+id/button1"
        android:layout_width="0dp"
        android:layout_height="wrap_content"
        android:text="1"
        app:layout_constraintStart_toStartOf="parent"
        app:layout_constraintEnd_toStartOf="@id/button2"
        app:layout_constraintTop_toTopOf="parent"
        app:layout_constraintBottom_toBottomOf="parent"
        app:layout_constraintHorizontal_chainStyle="spread" />

    <android.support.design.button.MaterialButton
        android:id="@+id/button2"
        android:layout_width="0dp"
        android:layout_height="wrap_content"
        android:text="2"
        app:layout_constraintStart_toEndOf="@id/button1"
        app:layout_constraintEnd_toEndOf="parent"
        app:layout_constraintTop_toTopOf="parent"
        app:layout_constraintBottom_toBottomOf="parent" />

</android.support.constraint.ConstraintLayout>
比率を変えたい
app:layout_constraintHorizontal_weightで比率が指定可能です.
<?xml version="1.0" encoding="utf-8"?>
<android.support.constraint.ConstraintLayout xmlns:android="http://schemas.android.com/apk/res/android"
    android:layout_width="match_parent"
    android:layout_height="match_parent"
    xmlns:app="http://schemas.android.com/apk/res-auto">

    <android.support.design.button.MaterialButton
        android:id="@+id/button1"
        android:layout_width="0dp"
        android:layout_height="wrap_content"
        android:text="1"
        app:layout_constraintStart_toStartOf="parent"
        app:layout_constraintEnd_toStartOf="@id/button2"
        app:layout_constraintTop_toTopOf="parent"
        app:layout_constraintBottom_toBottomOf="parent"
        app:layout_constraintHorizontal_chainStyle="spread"
        app:layout_constraintHorizontal_weight="3" />

    <android.support.design.button.MaterialButton
        android:id="@+id/button2"
        android:layout_width="0dp"
        android:layout_height="wrap_content"
        android:text="2"
        app:layout_constraintStart_toEndOf="@id/button1"
        app:layout_constraintEnd_toEndOf="parent"
        app:layout_constraintTop_toTopOf="parent"
        app:layout_constraintBottom_toBottomOf="parent"
        app:layout_constraintHorizontal_weight="2" />

</android.support.constraint.ConstraintLayout>
画面両端
要素を画面の両端に寄せたい時.
app:layout_constraintHorizontal_chainStyle="spread_inside"を指定しましょう.

<?xml version="1.0" encoding="utf-8"?>
<android.support.constraint.ConstraintLayout xmlns:android="http://schemas.android.com/apk/res/android"
    android:layout_width="match_parent"
    android:layout_height="match_parent"
    xmlns:app="http://schemas.android.com/apk/res-auto">

    <android.support.design.button.MaterialButton
        android:id="@+id/button1"
        android:layout_width="wrap_content"
        android:layout_height="wrap_content"
        android:text="1"
        app:layout_constraintStart_toStartOf="parent"
        app:layout_constraintEnd_toStartOf="@id/button2"
        app:layout_constraintTop_toTopOf="parent"
        app:layout_constraintBottom_toBottomOf="parent"
        app:layout_constraintHorizontal_chainStyle="spread_inside" />

    <android.support.design.button.MaterialButton
        android:id="@+id/button2"
        android:layout_width="wrap_content"
        android:layout_height="wrap_content"
        android:text="2"
        app:layout_constraintStart_toEndOf="@id/button1"
        app:layout_constraintEnd_toEndOf="parent"
        app:layout_constraintTop_toTopOf="parent"
        app:layout_constraintBottom_toBottomOf="parent" />

</android.support.constraint.ConstraintLayout>
比率を変えたい
これはSpaceの出番です.widthを0dpにしてweightを指定しましょう.
<?xml version="1.0" encoding="utf-8"?>
<android.support.constraint.ConstraintLayout xmlns:android="http://schemas.android.com/apk/res/android"
    android:layout_width="match_parent"
    android:layout_height="match_parent"
    xmlns:app="http://schemas.android.com/apk/res-auto">

    <android.support.design.button.MaterialButton
        android:id="@+id/button1"
        android:layout_width="0dp"
        android:layout_height="wrap_content"
        android:text="1"
        app:layout_constraintStart_toStartOf="parent"
        app:layout_constraintEnd_toStartOf="@id/space1"
        app:layout_constraintTop_toTopOf="parent"
        app:layout_constraintBottom_toBottomOf="parent"
        app:layout_constraintHorizontal_chainStyle="spread"
        app:layout_constraintHorizontal_weight="3"/>

    <Space
        android:id="@+id/space1"
        android:layout_width="0dp"
        android:layout_height="wrap_content"
        app:layout_constraintStart_toEndOf="@id/button1"
        app:layout_constraintEnd_toStartOf="@id/button2"
        app:layout_constraintTop_toTopOf="parent"
        app:layout_constraintBottom_toBottomOf="parent"
        app:layout_constraintHorizontal_weight="2" />

    <android.support.design.button.MaterialButton
        android:id="@+id/button2"
        android:layout_width="0dp"
        android:layout_height="wrap_content"
        android:text="2"
        app:layout_constraintStart_toEndOf="@id/space1"
        app:layout_constraintEnd_toEndOf="parent"
        app:layout_constraintTop_toTopOf="parent"
        app:layout_constraintBottom_toBottomOf="parent"
        app:layout_constraintHorizontal_weight="1" />

</android.support.constraint.ConstraintLayout>
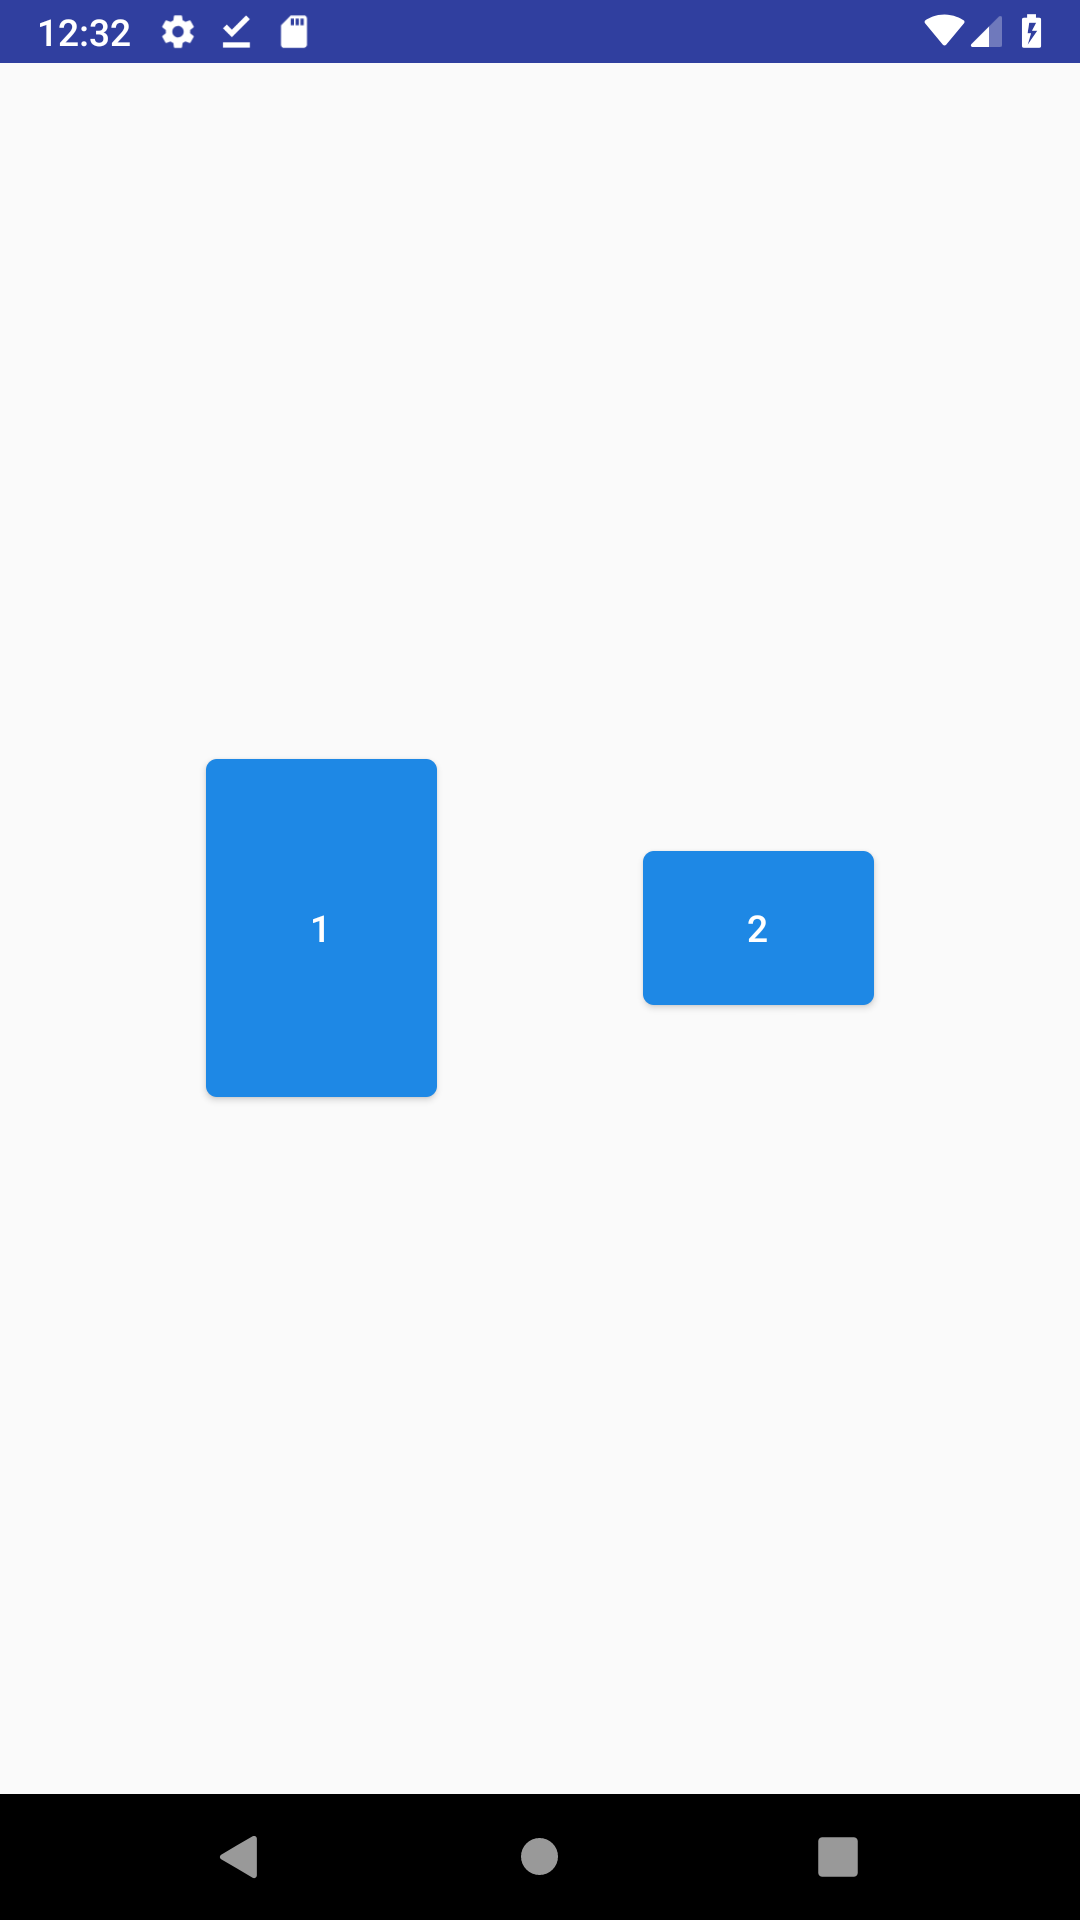
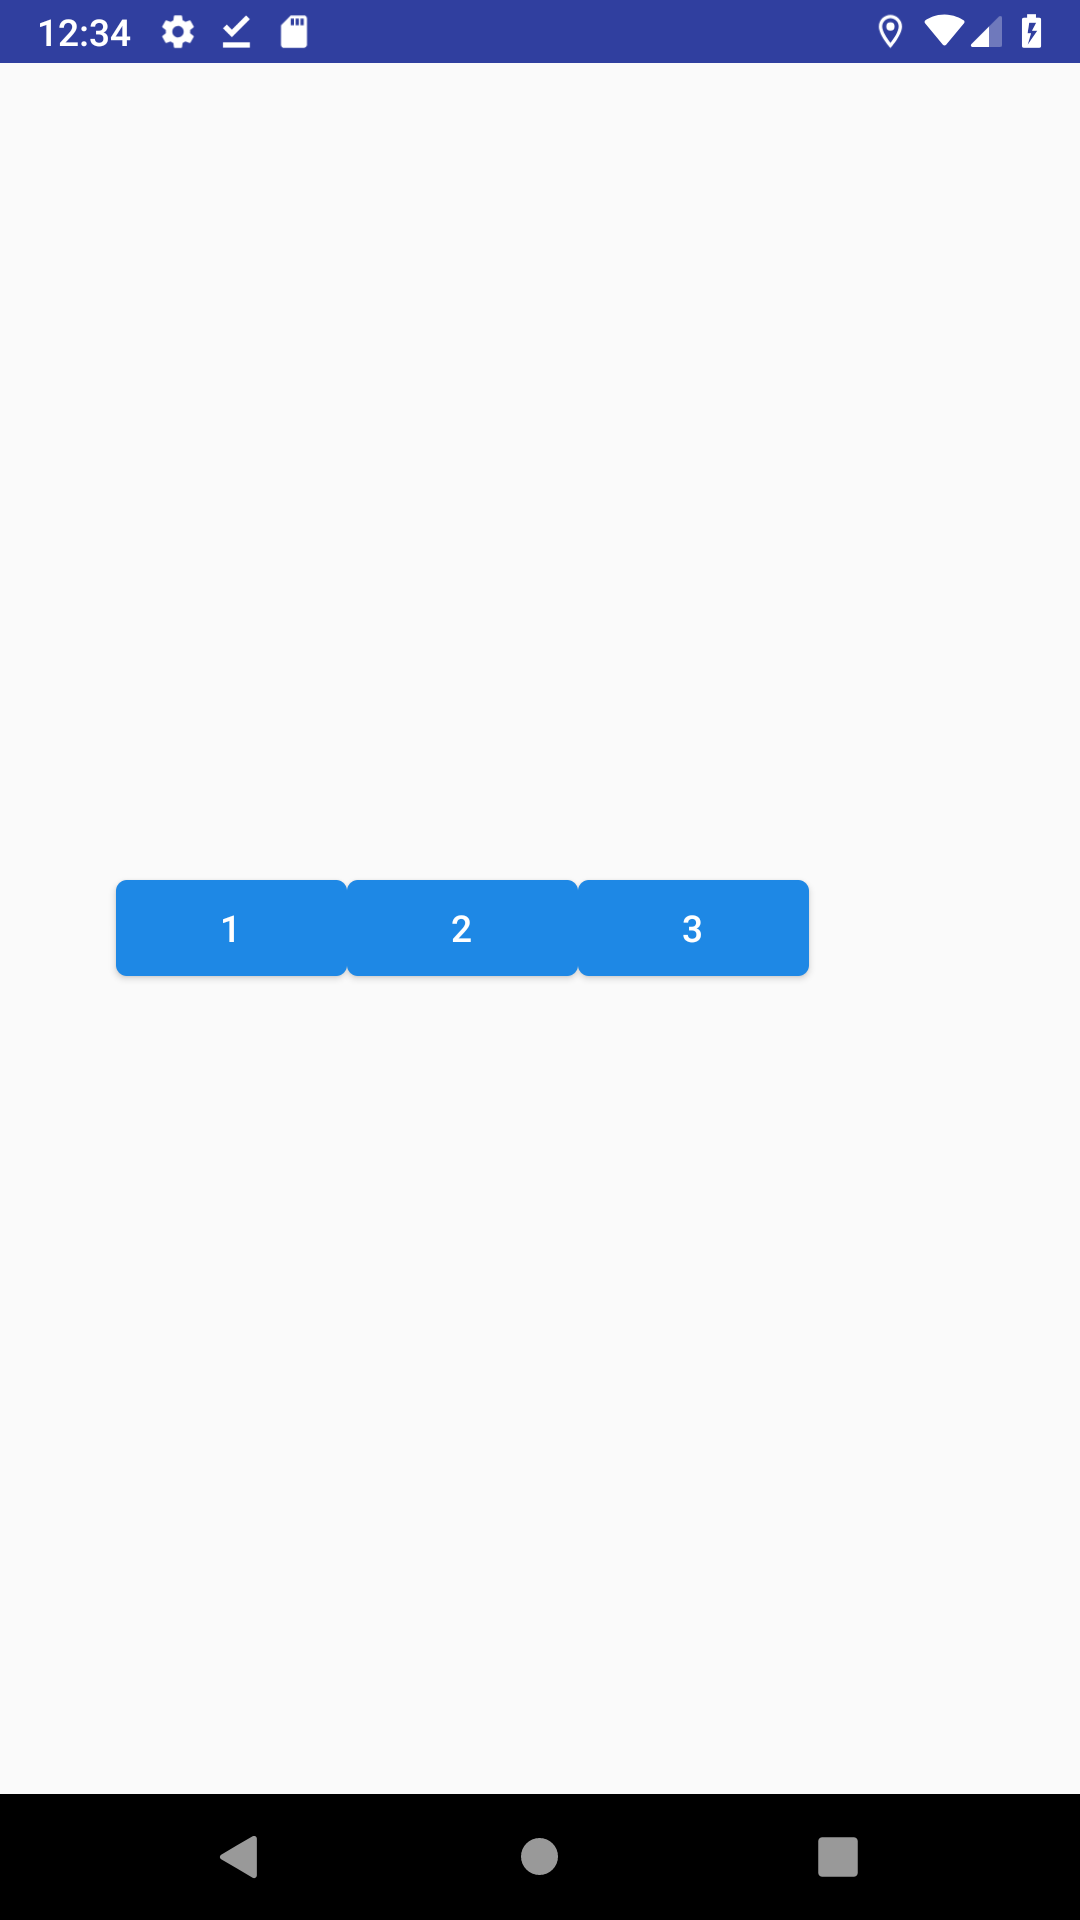
パーツの端を揃える
左のようにサイズの異なる要素を端を揃えたい時.
ボタン2のTopの制約をつけないことで実現します.
仕組み的にはパーツが1つの時に画面最下部に表示したのと全く同じです.
 →
→ 
<?xml version="1.0" encoding="utf-8"?>
<android.support.constraint.ConstraintLayout xmlns:android="http://schemas.android.com/apk/res/android"
    android:layout_width="match_parent"
    android:layout_height="match_parent"
    xmlns:app="http://schemas.android.com/apk/res-auto">

    <android.support.design.button.MaterialButton
        android:id="@+id/button1"
        android:layout_width="wrap_content"
        android:layout_height="140dp"
        android:text="1"
        app:layout_constraintStart_toStartOf="parent"
        app:layout_constraintEnd_toStartOf="@id/button2"
        app:layout_constraintTop_toTopOf="parent"
        app:layout_constraintBottom_toBottomOf="parent" />

    <android.support.design.button.MaterialButton
        android:id="@+id/button2"
        android:layout_width="wrap_content"
        android:layout_height="70dp"
        android:text="2"
        app:layout_constraintStart_toEndOf="@id/button1"
        app:layout_constraintEnd_toEndOf="parent"
        app:layout_constraintBottom_toBottomOf="@id/button1" />

</android.support.constraint.ConstraintLayout>
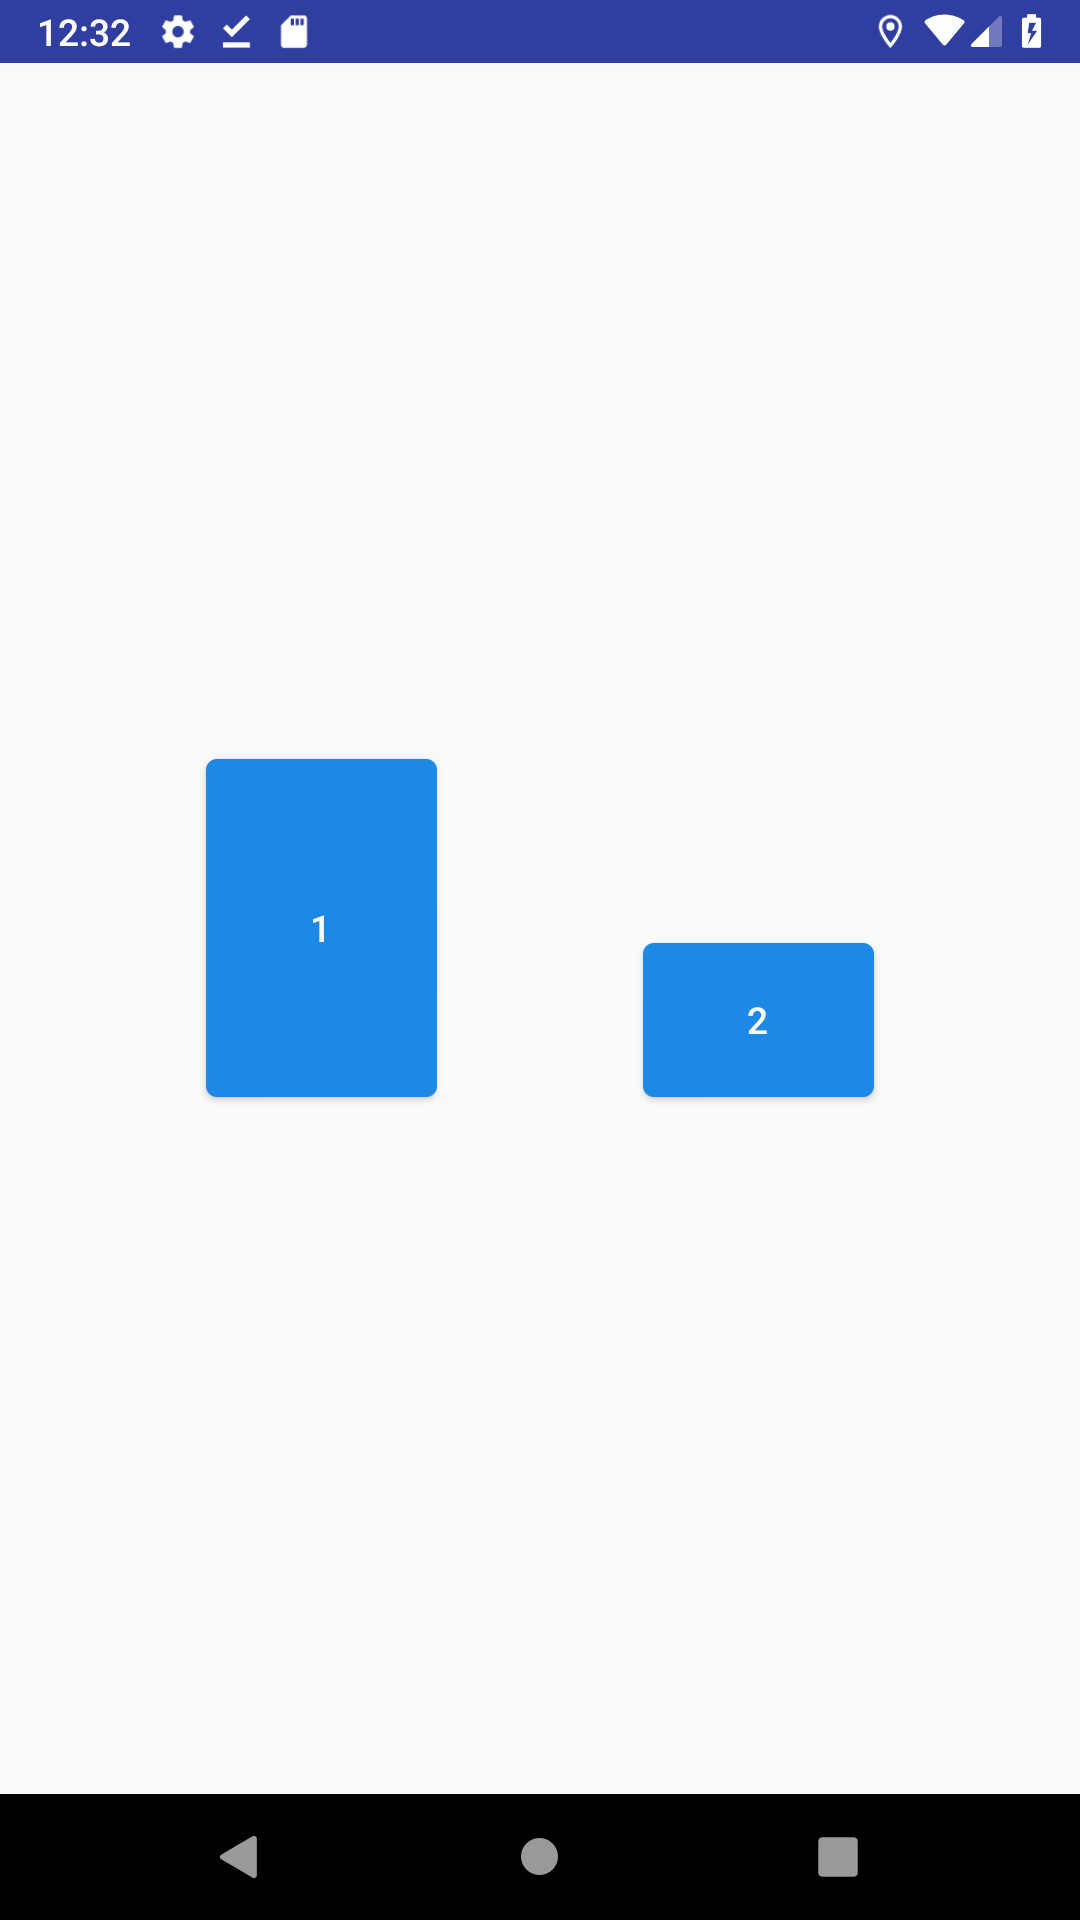
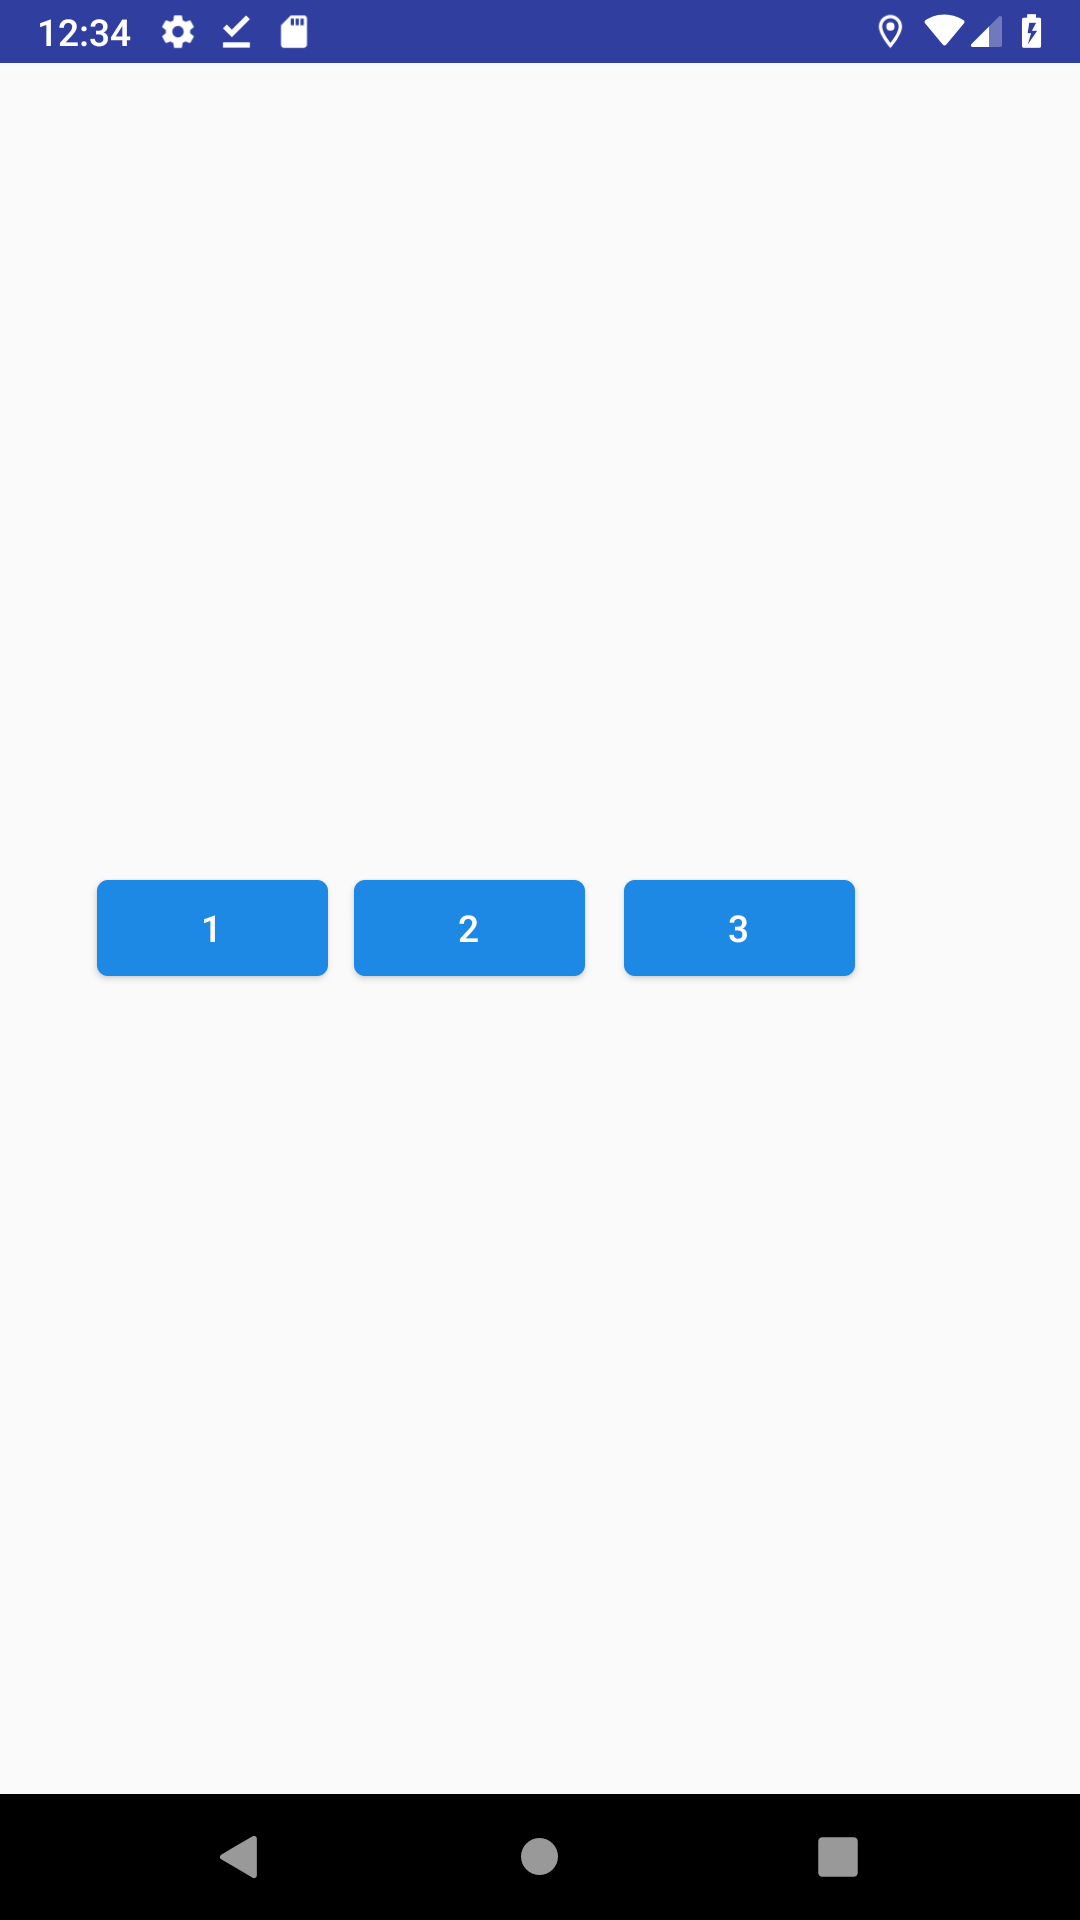
中心を他パーツの端に揃える
これは知らないと難しそう.ボタン2のTopとBottomを両方ともボタン1のBottomに対して制約をつけることで実現します.
<?xml version="1.0" encoding="utf-8"?>
<android.support.constraint.ConstraintLayout xmlns:android="http://schemas.android.com/apk/res/android"
    android:layout_width="match_parent"
    android:layout_height="match_parent"
    xmlns:app="http://schemas.android.com/apk/res-auto">

    <android.support.design.button.MaterialButton
        android:id="@+id/button1"
        android:layout_width="wrap_content"
        android:layout_height="140dp"
        android:text="1"
        app:layout_constraintStart_toStartOf="parent"
        app:layout_constraintEnd_toStartOf="@id/button2"
        app:layout_constraintTop_toTopOf="parent"
        app:layout_constraintBottom_toBottomOf="parent" />

    <android.support.design.button.MaterialButton
        android:id="@+id/button2"
        android:layout_width="wrap_content"
        android:layout_height="70dp"
        android:text="2"
        app:layout_constraintStart_toEndOf="@id/button1"
        app:layout_constraintEnd_toEndOf="parent"
        app:layout_constraintTop_toBottomOf="@id/button1"
        app:layout_constraintBottom_toBottomOf="@id/button1" />

</android.support.constraint.ConstraintLayout>
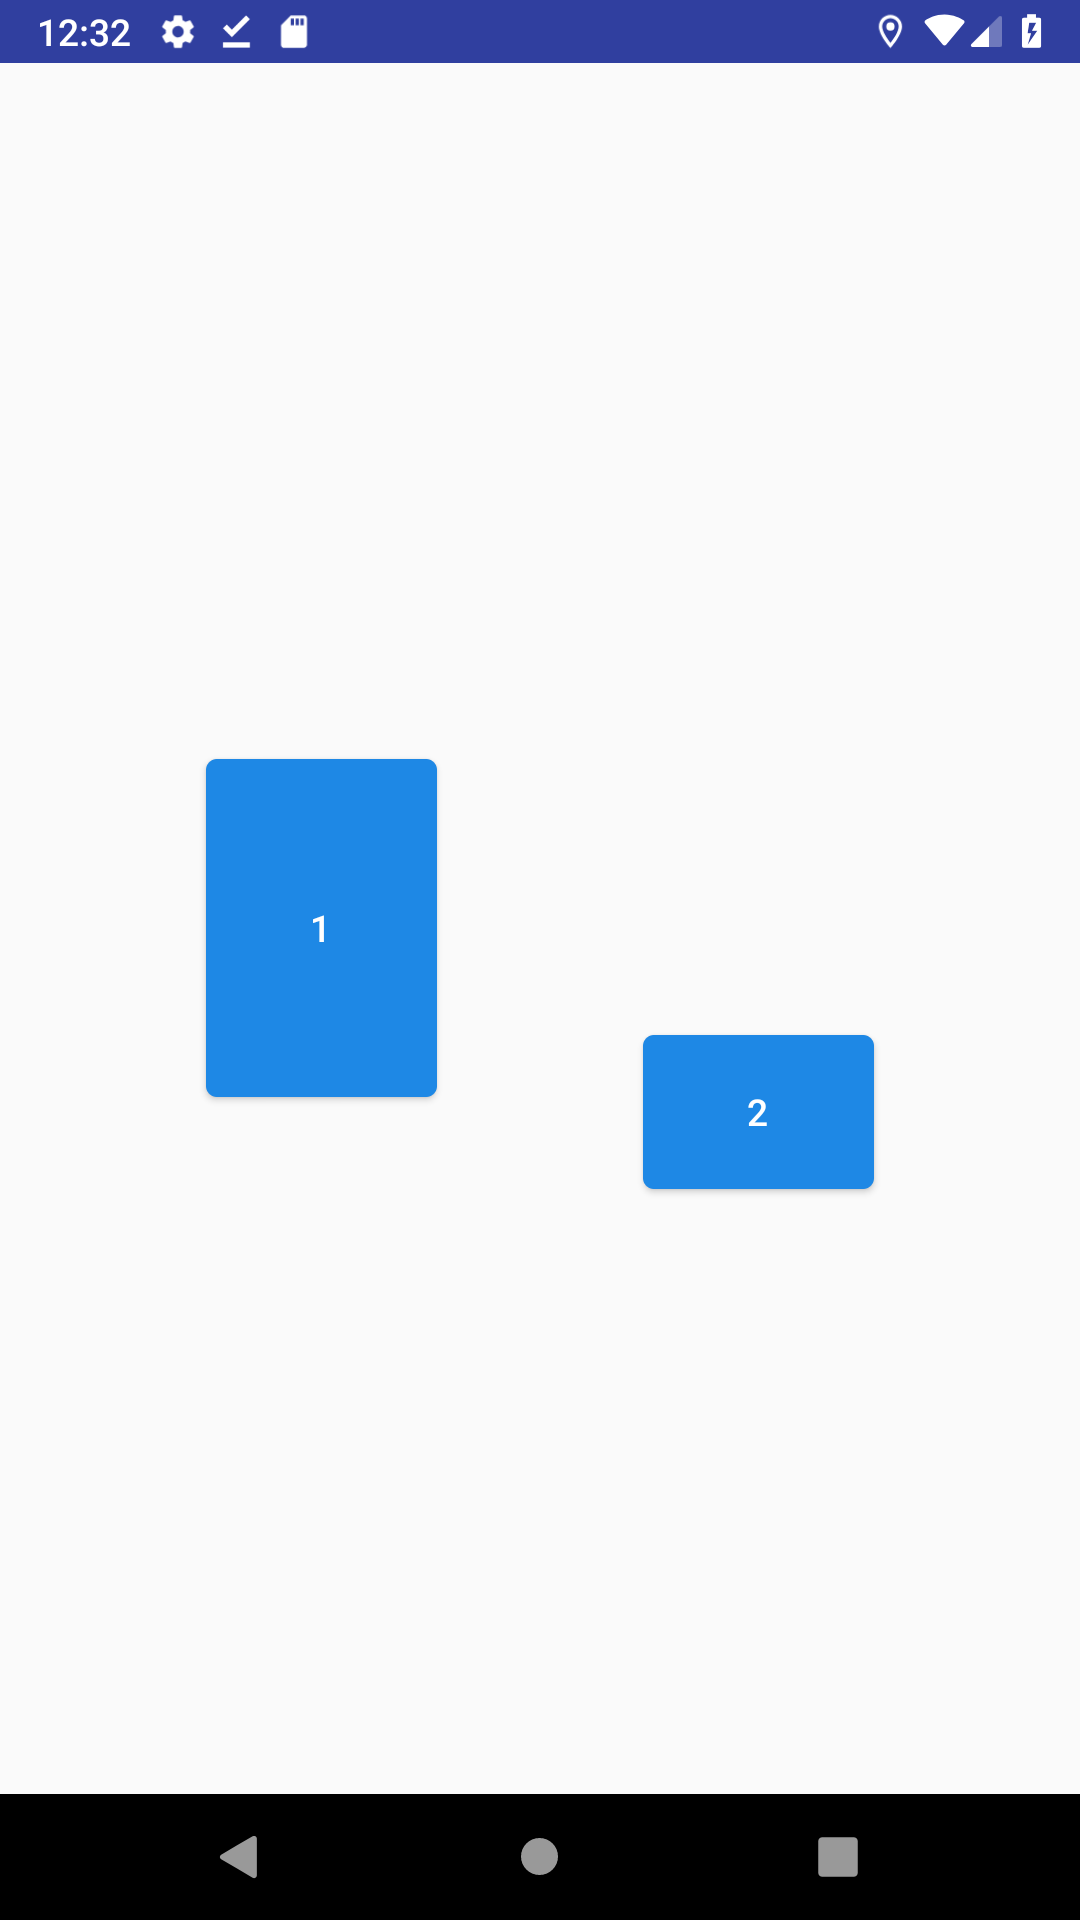
文字を揃える
うおぉ,文字がずれとるやんけ…,って時.
app:layout_constraintBaseline_toBaselineOfを指定しましょう.
TextViewなんかでは多用しそうですね.
 →
→ 
<?xml version="1.0" encoding="utf-8"?>
<android.support.constraint.ConstraintLayout xmlns:android="http://schemas.android.com/apk/res/android"
    android:layout_width="match_parent"
    android:layout_height="match_parent"
    xmlns:app="http://schemas.android.com/apk/res-auto">

    <android.support.design.button.MaterialButton
        android:id="@+id/button1"
        android:layout_width="wrap_content"
        android:layout_height="140dp"
        android:text="1"
        android:gravity="bottom|center"
        app:layout_constraintStart_toStartOf="parent"
        app:layout_constraintEnd_toStartOf="@id/button2"
        app:layout_constraintTop_toTopOf="parent"
        app:layout_constraintBottom_toBottomOf="parent" />

    <android.support.design.button.MaterialButton
        android:id="@+id/button2"
        android:layout_width="wrap_content"
        android:layout_height="70dp"
        android:text="2"
        app:layout_constraintStart_toEndOf="@id/button1"
        app:layout_constraintEnd_toEndOf="parent"
        app:layout_constraintBaseline_toBaselineOf="@id/button1"/>

</android.support.constraint.ConstraintLayout>
3つの場合
さて,基本的にここからはこれまでの組み合わせです.
といって書かないのも無責任なので少し書きます.組み合わせ方を学びましょう.
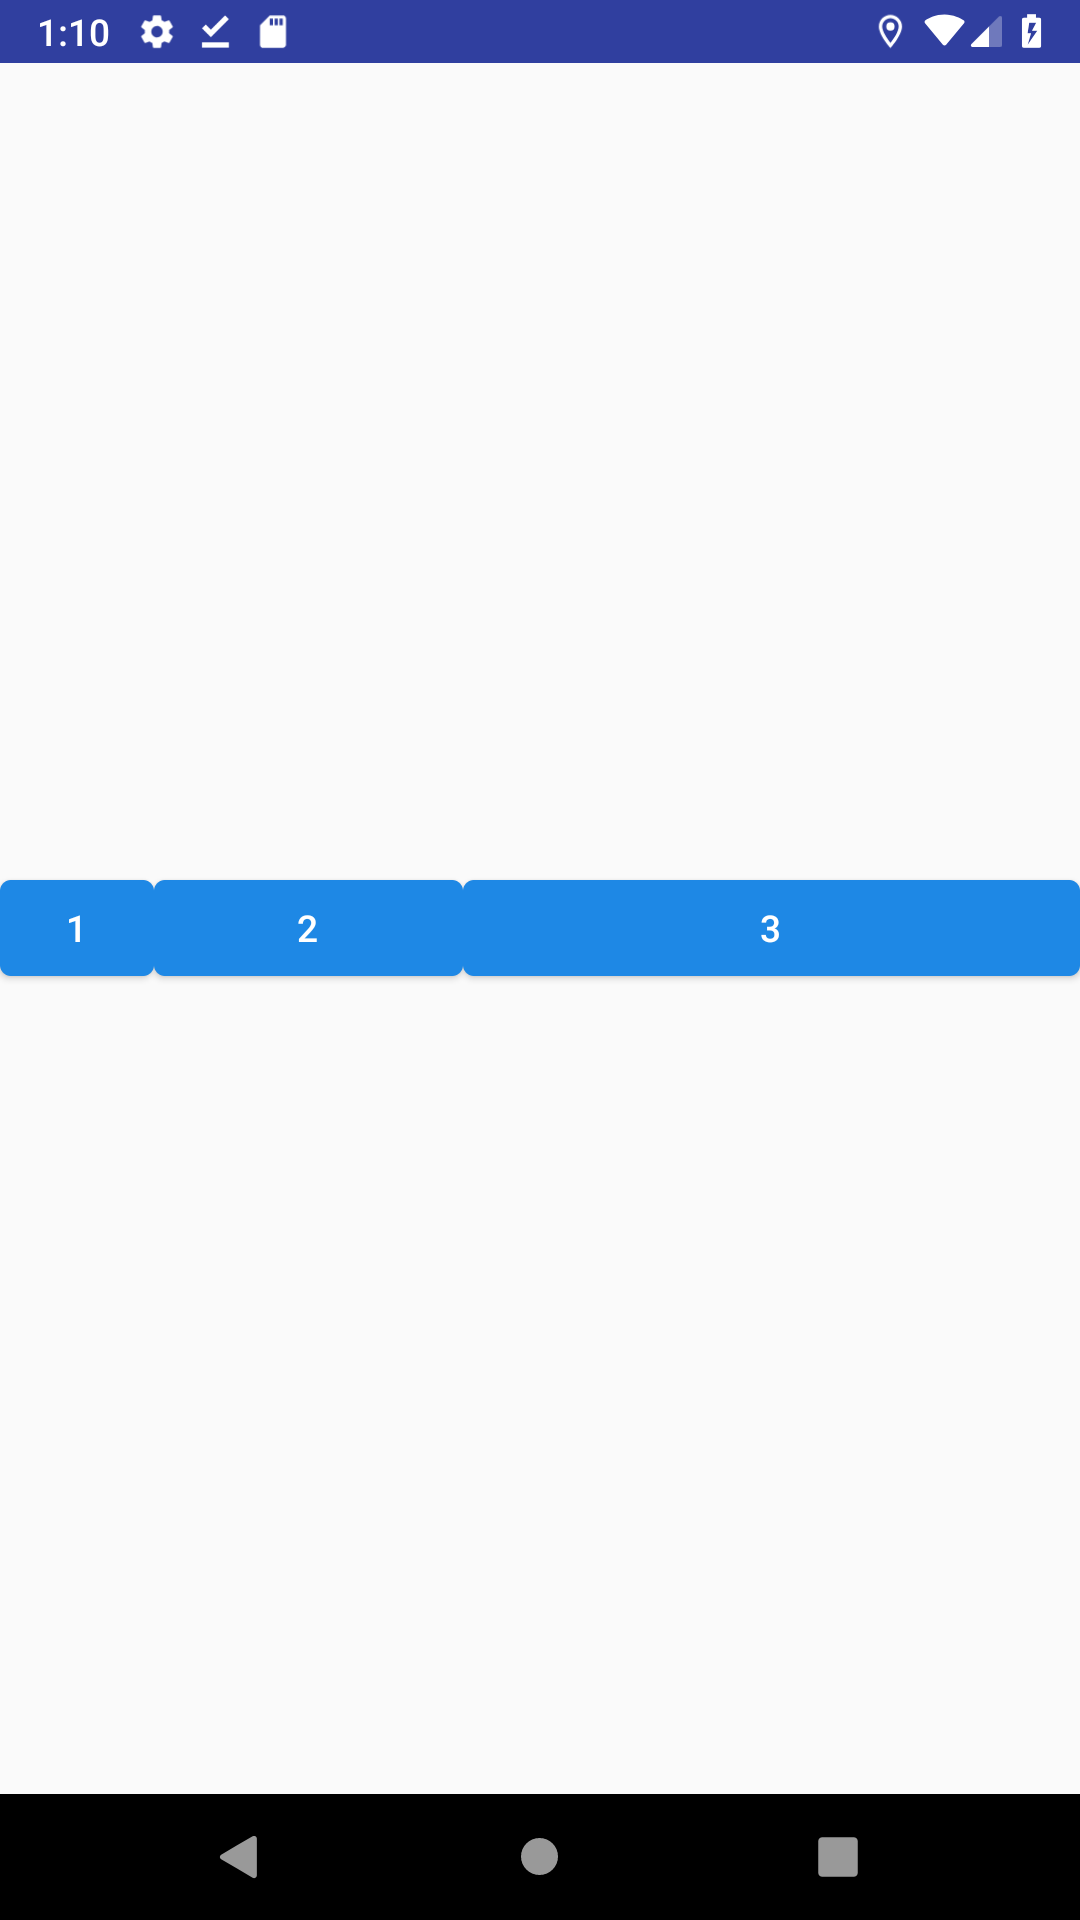
水平方向に均等
2つの時と同じ.
<?xml version="1.0" encoding="utf-8"?>
<android.support.constraint.ConstraintLayout xmlns:android="http://schemas.android.com/apk/res/android"
    android:layout_width="match_parent"
    android:layout_height="match_parent"
    xmlns:app="http://schemas.android.com/apk/res-auto">

    <android.support.design.button.MaterialButton
        android:id="@+id/button1"
        android:layout_width="wrap_content"
        android:layout_height="wrap_content"
        android:text="1"
        app:layout_constraintStart_toStartOf="parent"
        app:layout_constraintEnd_toStartOf="@id/button2"
        app:layout_constraintTop_toTopOf="parent"
        app:layout_constraintBottom_toBottomOf="parent" />

    <android.support.design.button.MaterialButton
        android:id="@+id/button2"
        android:layout_width="wrap_content"
        android:layout_height="wrap_content"
        android:text="2"
        app:layout_constraintStart_toEndOf="@id/button1"
        app:layout_constraintEnd_toStartOf="@id/button3"
        app:layout_constraintTop_toTopOf="parent"
        app:layout_constraintBottom_toBottomOf="parent" />

    <android.support.design.button.MaterialButton
        android:id="@+id/button3"
        android:layout_width="wrap_content"
        android:layout_height="wrap_content"
        android:text="3"
        app:layout_constraintStart_toEndOf="@id/button2"
        app:layout_constraintEnd_toEndOf="parent"
        app:layout_constraintTop_toTopOf="parent"
        app:layout_constraintBottom_toBottomOf="parent" />

</android.support.constraint.ConstraintLayout>
ちょっとずらしたい
これも2つの時と全く同じ.Spaceを使うか,biasを組み合わせます.
xml省略.
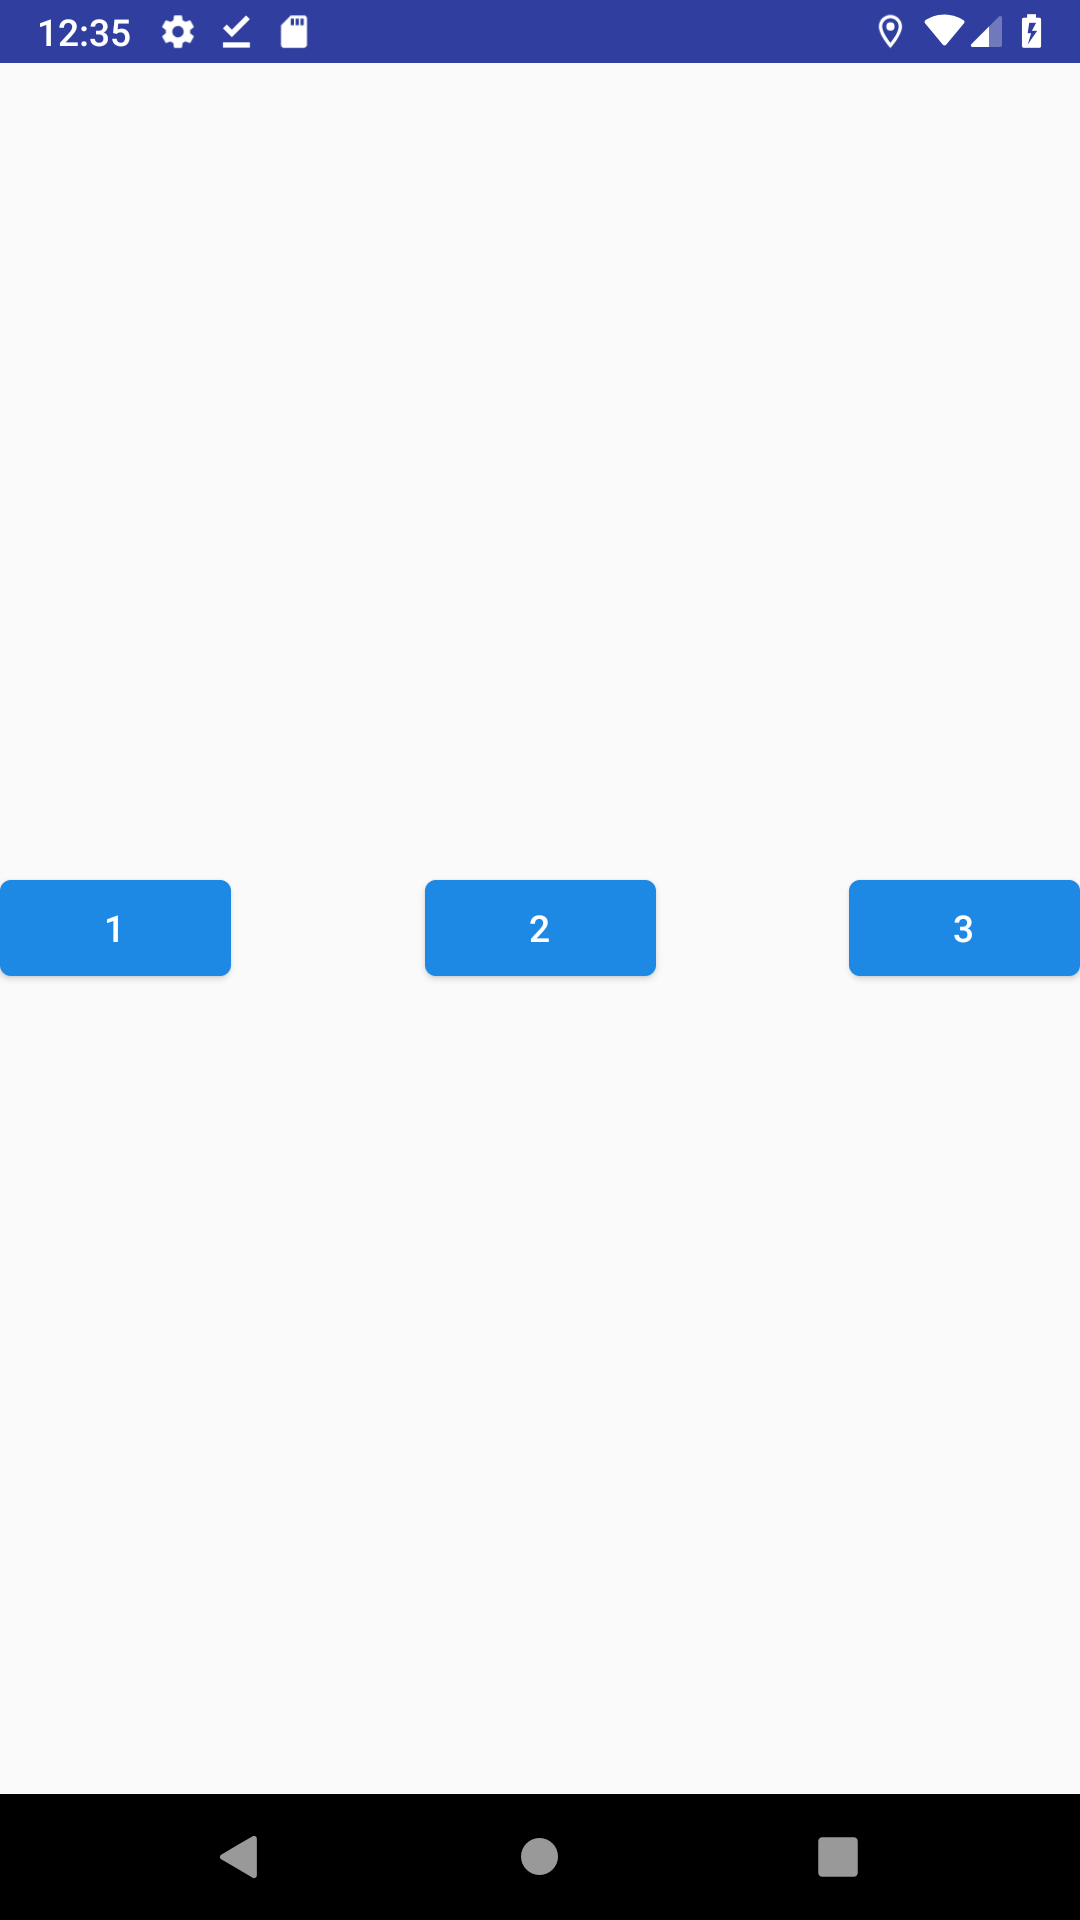
くっつける
app:layout_constraintHorizontal_chainStyle="packed"でしたよね.

<?xml version="1.0" encoding="utf-8"?>
<android.support.constraint.ConstraintLayout xmlns:android="http://schemas.android.com/apk/res/android"
    android:layout_width="match_parent"
    android:layout_height="match_parent"
    xmlns:app="http://schemas.android.com/apk/res-auto">

    <android.support.design.button.MaterialButton
        android:id="@+id/button1"
        android:layout_width="wrap_content"
        android:layout_height="wrap_content"
        android:text="1"
        app:layout_constraintStart_toStartOf="parent"
        app:layout_constraintEnd_toStartOf="@id/button2"
        app:layout_constraintTop_toTopOf="parent"
        app:layout_constraintBottom_toBottomOf="parent"
        app:layout_constraintHorizontal_chainStyle="packed" />

    <android.support.design.button.MaterialButton
        android:id="@+id/button2"
        android:layout_width="wrap_content"
        android:layout_height="wrap_content"
        android:text="2"
        app:layout_constraintStart_toEndOf="@id/button1"
        app:layout_constraintEnd_toStartOf="@id/button3"
        app:layout_constraintTop_toTopOf="parent"
        app:layout_constraintBottom_toBottomOf="parent" />

    <android.support.design.button.MaterialButton
        android:id="@+id/button3"
        android:layout_width="wrap_content"
        android:layout_height="wrap_content"
        android:text="3"
        app:layout_constraintStart_toEndOf="@id/button2"
        app:layout_constraintEnd_toEndOf="parent"
        app:layout_constraintTop_toTopOf="parent"
        app:layout_constraintBottom_toBottomOf="parent" />

</android.support.constraint.ConstraintLayout>
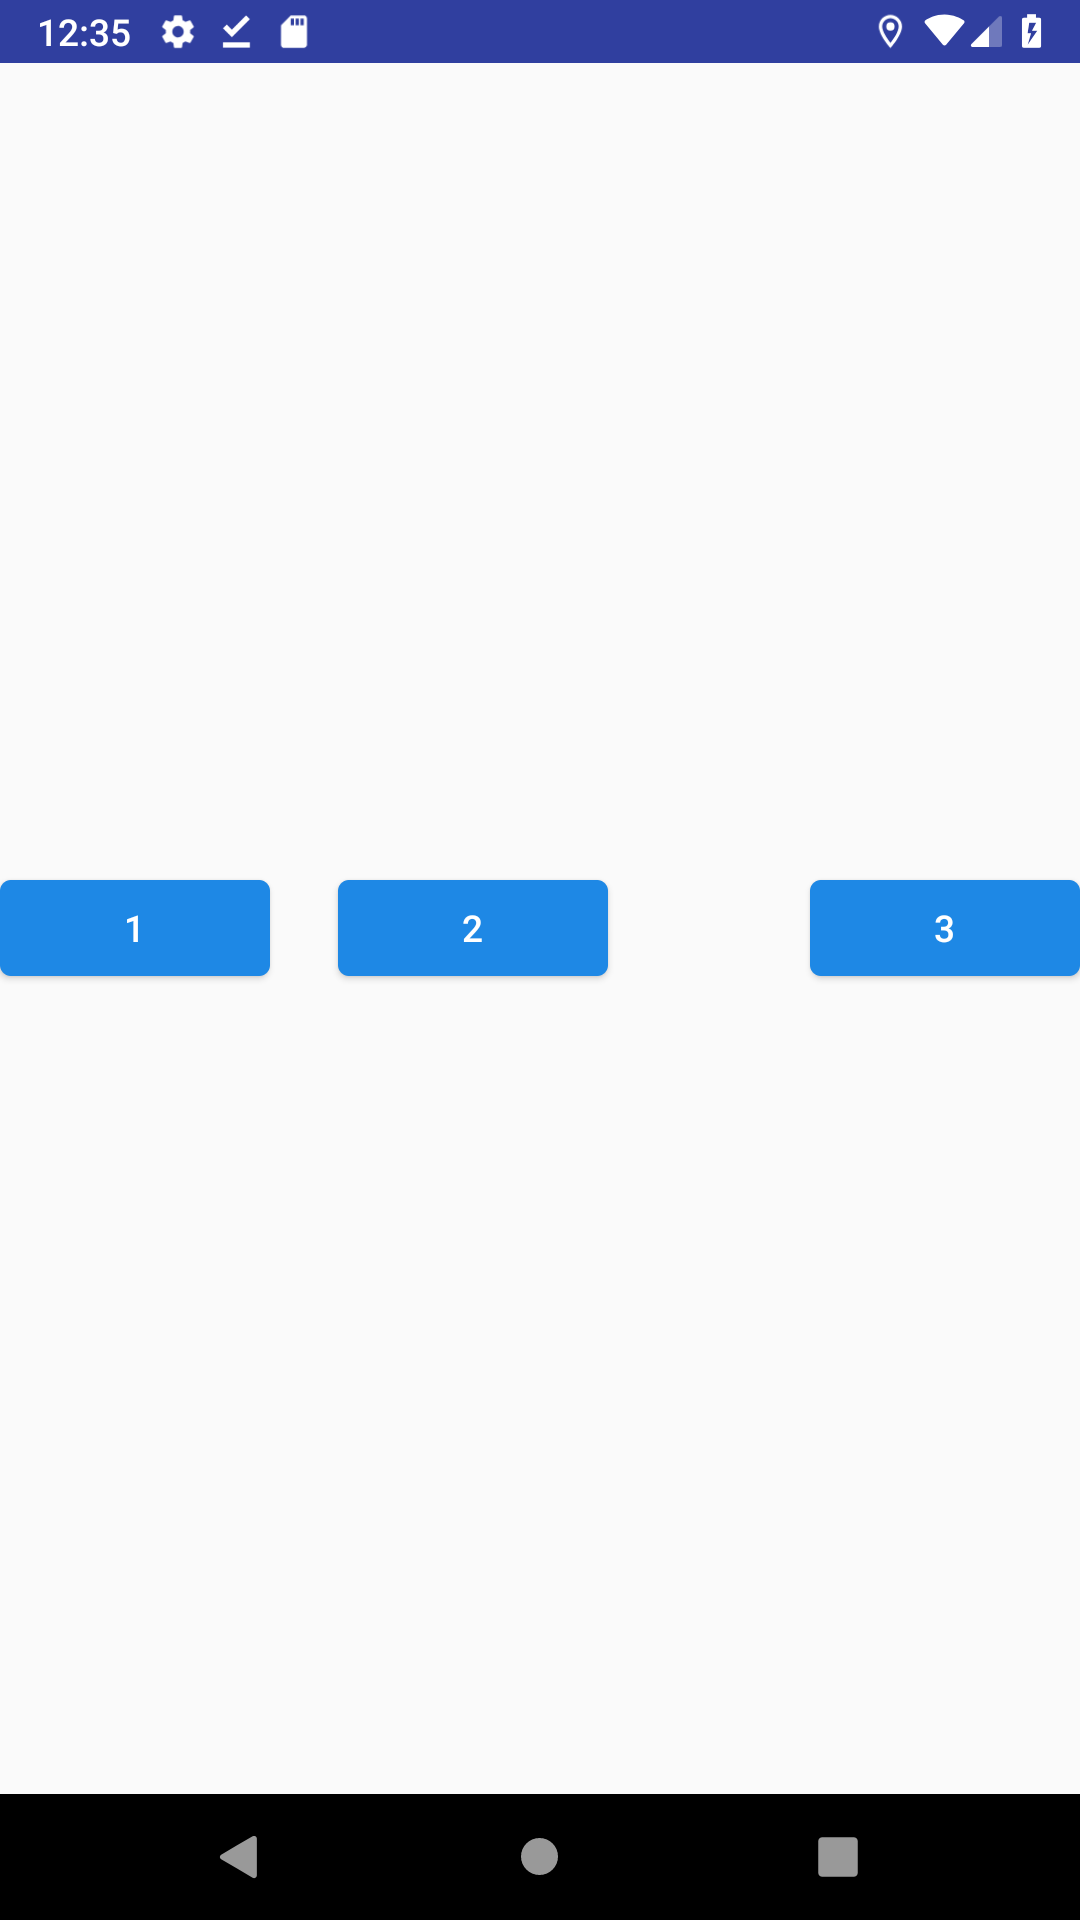
ちょっとずらしたい
app:layout_constraintHorizontal_biasです.
めっちゃ同じです.
<?xml version="1.0" encoding="utf-8"?>
<android.support.constraint.ConstraintLayout xmlns:android="http://schemas.android.com/apk/res/android"
    android:layout_width="match_parent"
    android:layout_height="match_parent"
    xmlns:app="http://schemas.android.com/apk/res-auto">

    <android.support.design.button.MaterialButton
        android:id="@+id/button1"
        android:layout_width="wrap_content"
        android:layout_height="wrap_content"
        android:text="1"
        app:layout_constraintStart_toStartOf="parent"
        app:layout_constraintEnd_toStartOf="@id/button2"
        app:layout_constraintTop_toTopOf="parent"
        app:layout_constraintBottom_toBottomOf="parent"
        app:layout_constraintHorizontal_chainStyle="packed"
        app:layout_constraintHorizontal_bias="0.3" />

    <android.support.design.button.MaterialButton
        android:id="@+id/button2"
        android:layout_width="wrap_content"
        android:layout_height="wrap_content"
        android:text="2"
        app:layout_constraintStart_toEndOf="@id/button1"
        app:layout_constraintEnd_toStartOf="@id/button3"
        app:layout_constraintTop_toTopOf="parent"
        app:layout_constraintBottom_toBottomOf="parent" />

    <android.support.design.button.MaterialButton
        android:id="@+id/button3"
        android:layout_width="wrap_content"
        android:layout_height="wrap_content"
        android:text="3"
        app:layout_constraintStart_toEndOf="@id/button2"
        app:layout_constraintEnd_toEndOf="parent"
        app:layout_constraintTop_toTopOf="parent"
        app:layout_constraintBottom_toBottomOf="parent" />

</android.support.constraint.ConstraintLayout>
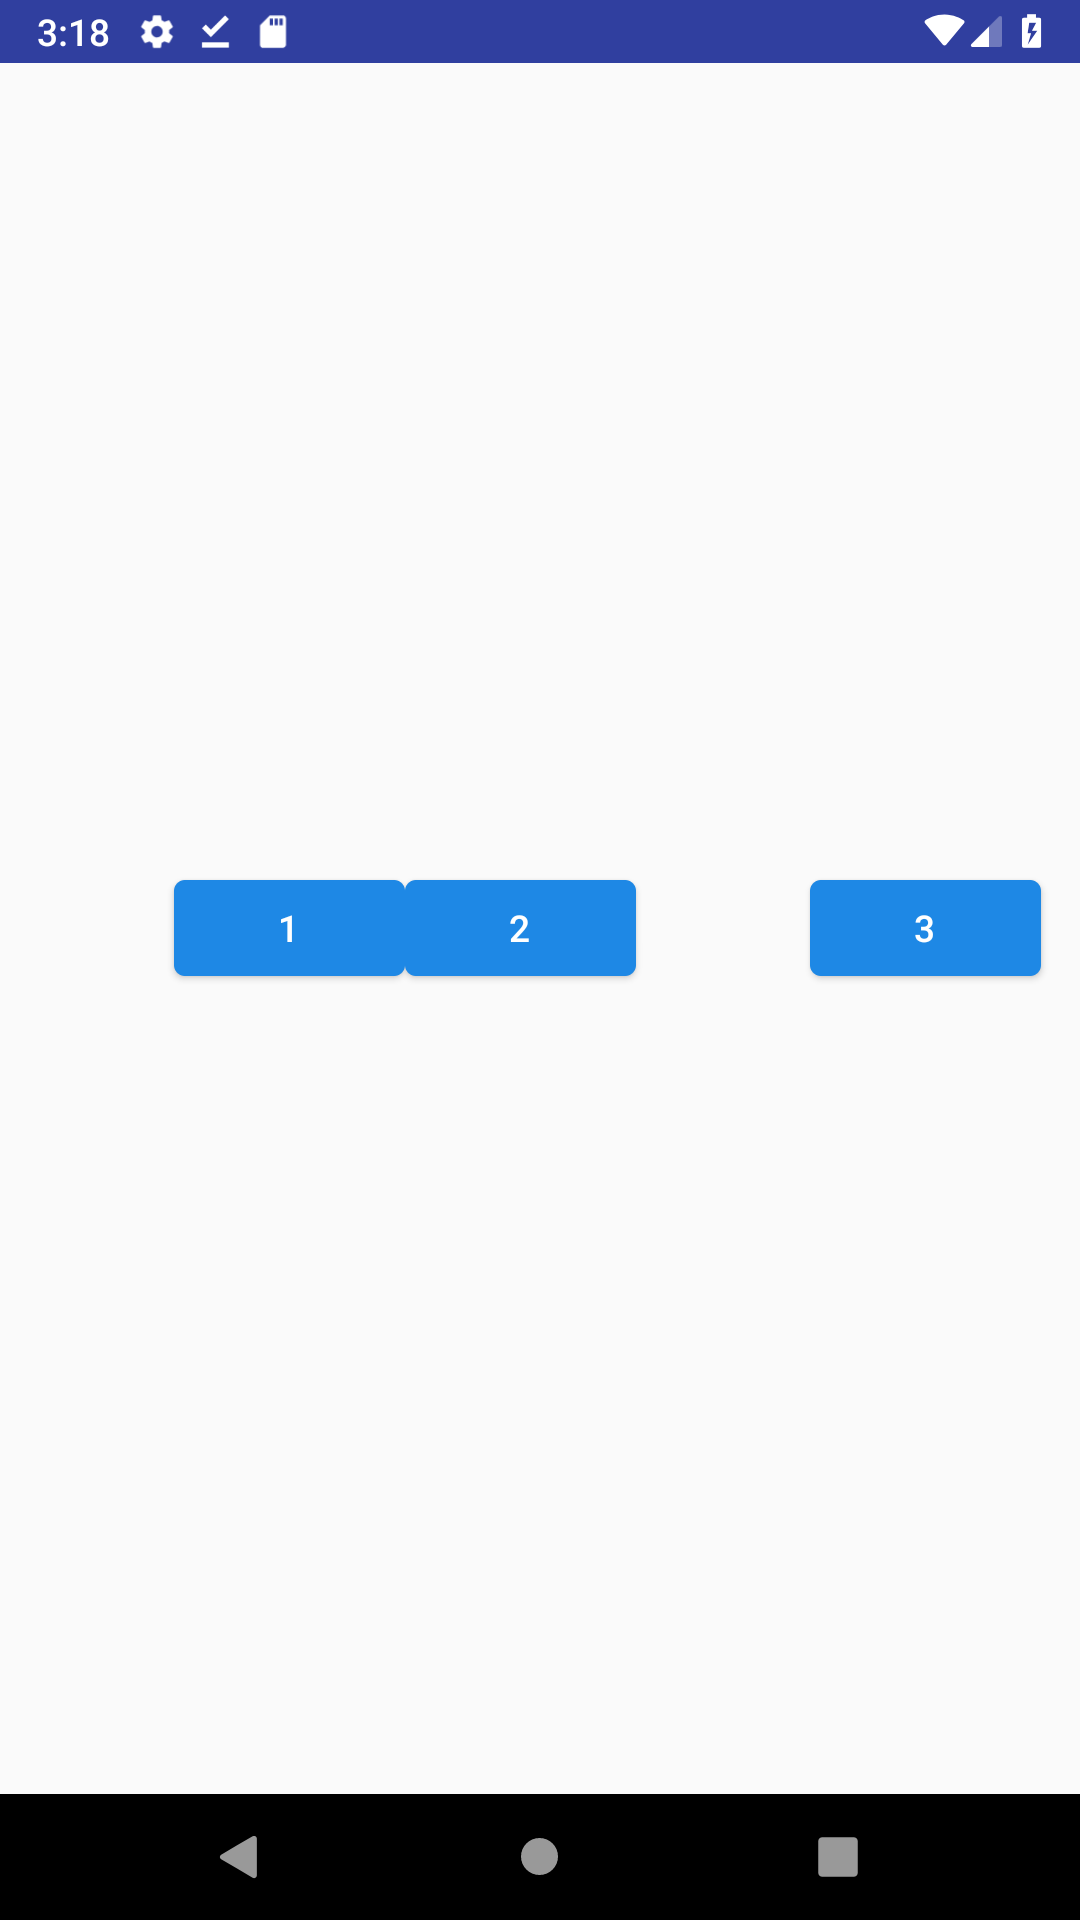
部分的に詰めて表示する
これは新しい.全部じゃなくて,一部の要素だけ詰めたいんだよなぁって時.
ボタン3のボタン2に対する制約を外すことで,chainから離脱します.
画面右端とのスペースは,marginなりguidelineで確保しましょう.
<?xml version="1.0" encoding="utf-8"?>
<android.support.constraint.ConstraintLayout xmlns:android="http://schemas.android.com/apk/res/android"
    android:layout_width="match_parent"
    android:layout_height="match_parent"
    xmlns:app="http://schemas.android.com/apk/res-auto">

    <android.support.design.button.MaterialButton
        android:id="@+id/button1"
        android:layout_width="wrap_content"
        android:layout_height="wrap_content"
        android:text="1"
        app:layout_constraintStart_toStartOf="parent"
        app:layout_constraintEnd_toStartOf="@id/button2"
        app:layout_constraintTop_toTopOf="parent"
        app:layout_constraintBottom_toBottomOf="parent"
        app:layout_constraintHorizontal_chainStyle="packed" />

    <android.support.design.button.MaterialButton
        android:id="@+id/button2"
        android:layout_width="wrap_content"
        android:layout_height="wrap_content"
        android:text="2"
        app:layout_constraintStart_toEndOf="@id/button1"
        app:layout_constraintEnd_toStartOf="@id/button3"
        app:layout_constraintTop_toTopOf="parent"
        app:layout_constraintBottom_toBottomOf="parent" />

    <android.support.design.button.MaterialButton
        android:id="@+id/button3"
        android:layout_width="wrap_content"
        android:layout_height="wrap_content"
        android:text="3"
        android:layout_marginEnd="15dp"
        app:layout_constraintEnd_toEndOf="parent"
        app:layout_constraintTop_toTopOf="parent"
        app:layout_constraintBottom_toBottomOf="parent" />

</android.support.constraint.ConstraintLayout>
そんなにくっつなかなくていい
やっぱりこれもandroid:layout_marginを適宜使いましょう.
<?xml version="1.0" encoding="utf-8"?>
<android.support.constraint.ConstraintLayout xmlns:android="http://schemas.android.com/apk/res/android"
    android:layout_width="match_parent"
    android:layout_height="match_parent"
    xmlns:app="http://schemas.android.com/apk/res-auto">

    <android.support.design.button.MaterialButton
        android:id="@+id/button1"
        android:layout_width="wrap_content"
        android:layout_height="wrap_content"
        android:text="1"
        app:layout_constraintStart_toStartOf="parent"
        app:layout_constraintEnd_toStartOf="@id/button2"
        app:layout_constraintTop_toTopOf="parent"
        app:layout_constraintBottom_toBottomOf="parent"
        app:layout_constraintHorizontal_chainStyle="packed"
        app:layout_constraintHorizontal_bias="0.3" />

    <android.support.design.button.MaterialButton
        android:id="@+id/button2"
        android:layout_width="wrap_content"
        android:layout_height="wrap_content"
        android:text="2"
        app:layout_constraintStart_toEndOf="@id/button1"
        app:layout_constraintEnd_toStartOf="@id/button3"
        app:layout_constraintTop_toTopOf="parent"
        app:layout_constraintBottom_toBottomOf="parent"
        android:layout_marginStart="10dp"/>

    <android.support.design.button.MaterialButton
        android:id="@+id/button3"
        android:layout_width="wrap_content"
        android:layout_height="wrap_content"
        android:text="3"
        app:layout_constraintStart_toEndOf="@id/button2"
        app:layout_constraintEnd_toEndOf="parent"
        app:layout_constraintTop_toTopOf="parent"
        app:layout_constraintBottom_toBottomOf="parent"
        android:layout_marginStart="15dp"/>

</android.support.constraint.ConstraintLayout>
画面全体に均等
app:layout_constraintHorizontal_chainStyle="spread"ですね.
説明することがない.

<?xml version="1.0" encoding="utf-8"?>
<android.support.constraint.ConstraintLayout xmlns:android="http://schemas.android.com/apk/res/android"
    android:layout_width="match_parent"
    android:layout_height="match_parent"
    xmlns:app="http://schemas.android.com/apk/res-auto">

    <android.support.design.button.MaterialButton
        android:id="@+id/button1"
        android:layout_width="0dp"
        android:layout_height="wrap_content"
        android:text="1"
        app:layout_constraintStart_toStartOf="parent"
        app:layout_constraintEnd_toStartOf="@id/button2"
        app:layout_constraintTop_toTopOf="parent"
        app:layout_constraintBottom_toBottomOf="parent"
        app:layout_constraintHorizontal_chainStyle="spread" />

    <android.support.design.button.MaterialButton
        android:id="@+id/button2"
        android:layout_width="0dp"
        android:layout_height="wrap_content"
        android:text="2"
        app:layout_constraintStart_toEndOf="@id/button1"
        app:layout_constraintEnd_toStartOf="@id/button3"
        app:layout_constraintTop_toTopOf="parent"
        app:layout_constraintBottom_toBottomOf="parent" />

    <android.support.design.button.MaterialButton
        android:id="@+id/button3"
        android:layout_width="0dp"
        android:layout_height="wrap_content"
        android:text="3"
        app:layout_constraintStart_toEndOf="@id/button2"
        app:layout_constraintEnd_toEndOf="parent"
        app:layout_constraintTop_toTopOf="parent"
        app:layout_constraintBottom_toBottomOf="parent" />

</android.support.constraint.ConstraintLayout>
比率を変えたい
...
<?xml version="1.0" encoding="utf-8"?>
<android.support.constraint.ConstraintLayout xmlns:android="http://schemas.android.com/apk/res/android"
    android:layout_width="match_parent"
    android:layout_height="match_parent"
    xmlns:app="http://schemas.android.com/apk/res-auto">

    <android.support.design.button.MaterialButton
        android:id="@+id/button1"
        android:layout_width="0dp"
        android:layout_height="wrap_content"
        android:text="1"
        app:layout_constraintStart_toStartOf="parent"
        app:layout_constraintEnd_toStartOf="@id/button2"
        app:layout_constraintTop_toTopOf="parent"
        app:layout_constraintBottom_toBottomOf="parent"
        app:layout_constraintHorizontal_chainStyle="spread"
        app:layout_constraintHorizontal_weight="1" />

    <android.support.design.button.MaterialButton
        android:id="@+id/button2"
        android:layout_width="0dp"
        android:layout_height="wrap_content"
        android:text="2"
        app:layout_constraintStart_toEndOf="@id/button1"
        app:layout_constraintEnd_toStartOf="@id/button3"
        app:layout_constraintTop_toTopOf="parent"
        app:layout_constraintBottom_toBottomOf="parent"
        app:layout_constraintHorizontal_weight="2" />

    <android.support.design.button.MaterialButton
        android:id="@+id/button3"
        android:layout_width="0dp"
        android:layout_height="wrap_content"
        android:text="3"
        app:layout_constraintStart_toEndOf="@id/button2"
        app:layout_constraintEnd_toEndOf="parent"
        app:layout_constraintTop_toTopOf="parent"
        app:layout_constraintBottom_toBottomOf="parent"
        app:layout_constraintHorizontal_weight="4" />

</android.support.constraint.ConstraintLayout>
画面両端にくっつける
app:layout_constraintHorizontal_chainStyle="spread_inside"を指定します.
<?xml version="1.0" encoding="utf-8"?>
<android.support.constraint.ConstraintLayout xmlns:android="http://schemas.android.com/apk/res/android"
    android:layout_width="match_parent"
    android:layout_height="match_parent"
    xmlns:app="http://schemas.android.com/apk/res-auto">

    <android.support.design.button.MaterialButton
        android:id="@+id/button1"
        android:layout_width="wrap_content"
        android:layout_height="wrap_content"
        android:text="1"
        app:layout_constraintStart_toStartOf="parent"
        app:layout_constraintEnd_toStartOf="@id/button2"
        app:layout_constraintTop_toTopOf="parent"
        app:layout_constraintBottom_toBottomOf="parent"
        app:layout_constraintHorizontal_chainStyle="spread_inside" />

    <android.support.design.button.MaterialButton
        android:id="@+id/button2"
        android:layout_width="wrap_content"
        android:layout_height="wrap_content"
        android:text="2"
        app:layout_constraintStart_toEndOf="@id/button1"
        app:layout_constraintEnd_toStartOf="@id/button3"
        app:layout_constraintTop_toTopOf="parent"
        app:layout_constraintBottom_toBottomOf="parent" />

    <android.support.design.button.MaterialButton
        android:id="@+id/button3"
        android:layout_width="wrap_content"
        android:layout_height="wrap_content"
        android:text="3"
        app:layout_constraintStart_toEndOf="@id/button2"
        app:layout_constraintEnd_toEndOf="parent"
        app:layout_constraintTop_toTopOf="parent"
        app:layout_constraintBottom_toBottomOf="parent" />

</android.support.constraint.ConstraintLayout>
比率を変えたい
おなじみSpaceを使いましょう.
<?xml version="1.0" encoding="utf-8"?>
<android.support.constraint.ConstraintLayout xmlns:android="http://schemas.android.com/apk/res/android"
    android:layout_width="match_parent"
    android:layout_height="match_parent"
    xmlns:app="http://schemas.android.com/apk/res-auto">

    <android.support.design.button.MaterialButton
        android:id="@+id/button1"
        android:layout_width="0dp"
        android:layout_height="wrap_content"
        android:text="1"
        app:layout_constraintStart_toStartOf="parent"
        app:layout_constraintEnd_toStartOf="@id/space1"
        app:layout_constraintTop_toTopOf="parent"
        app:layout_constraintBottom_toBottomOf="parent"
        app:layout_constraintHorizontal_chainStyle="spread"
        app:layout_constraintHorizontal_weight="4" />

    <Space
        android:id="@+id/space1"
        android:layout_width="0dp"
        android:layout_height="wrap_content"
        app:layout_constraintStart_toEndOf="@id/button1"
        app:layout_constraintEnd_toStartOf="@id/button2"
        app:layout_constraintTop_toTopOf="parent"
        app:layout_constraintBottom_toBottomOf="parent"
        app:layout_constraintHorizontal_weight="1" />

    <android.support.design.button.MaterialButton
        android:id="@+id/button2"
        android:layout_width="0dp"
        android:layout_height="wrap_content"
        android:text="2"
        app:layout_constraintStart_toEndOf="@id/space1"
        app:layout_constraintEnd_toStartOf="@id/space2"
        app:layout_constraintTop_toTopOf="parent"
        app:layout_constraintBottom_toBottomOf="parent"
        app:layout_constraintHorizontal_weight="4" />

    <Space
        android:id="@+id/space2"
        android:layout_width="0dp"
        android:layout_height="wrap_content"
        app:layout_constraintStart_toEndOf="@id/button2"
        app:layout_constraintEnd_toStartOf="@id/button3"
        app:layout_constraintTop_toTopOf="parent"
        app:layout_constraintBottom_toBottomOf="parent"
        app:layout_constraintHorizontal_weight="3" />

    <android.support.design.button.MaterialButton
        android:id="@+id/button3"
        android:layout_width="0dp"
        android:layout_height="wrap_content"
        android:text="3"
        app:layout_constraintStart_toEndOf="@id/space2"
        app:layout_constraintEnd_toEndOf="parent"
        app:layout_constraintTop_toTopOf="parent"
        app:layout_constraintBottom_toBottomOf="parent"
        app:layout_constraintHorizontal_weight="4" />

</android.support.constraint.ConstraintLayout>
応用例
さて,応用例と目次を作ってしまったからには書かなければならないのですが,そこそこ応用も書いてしまった気がします.とりあえず1つ書いておくので,これ欲しい!等々ありましたらリクエストをください.
一覧
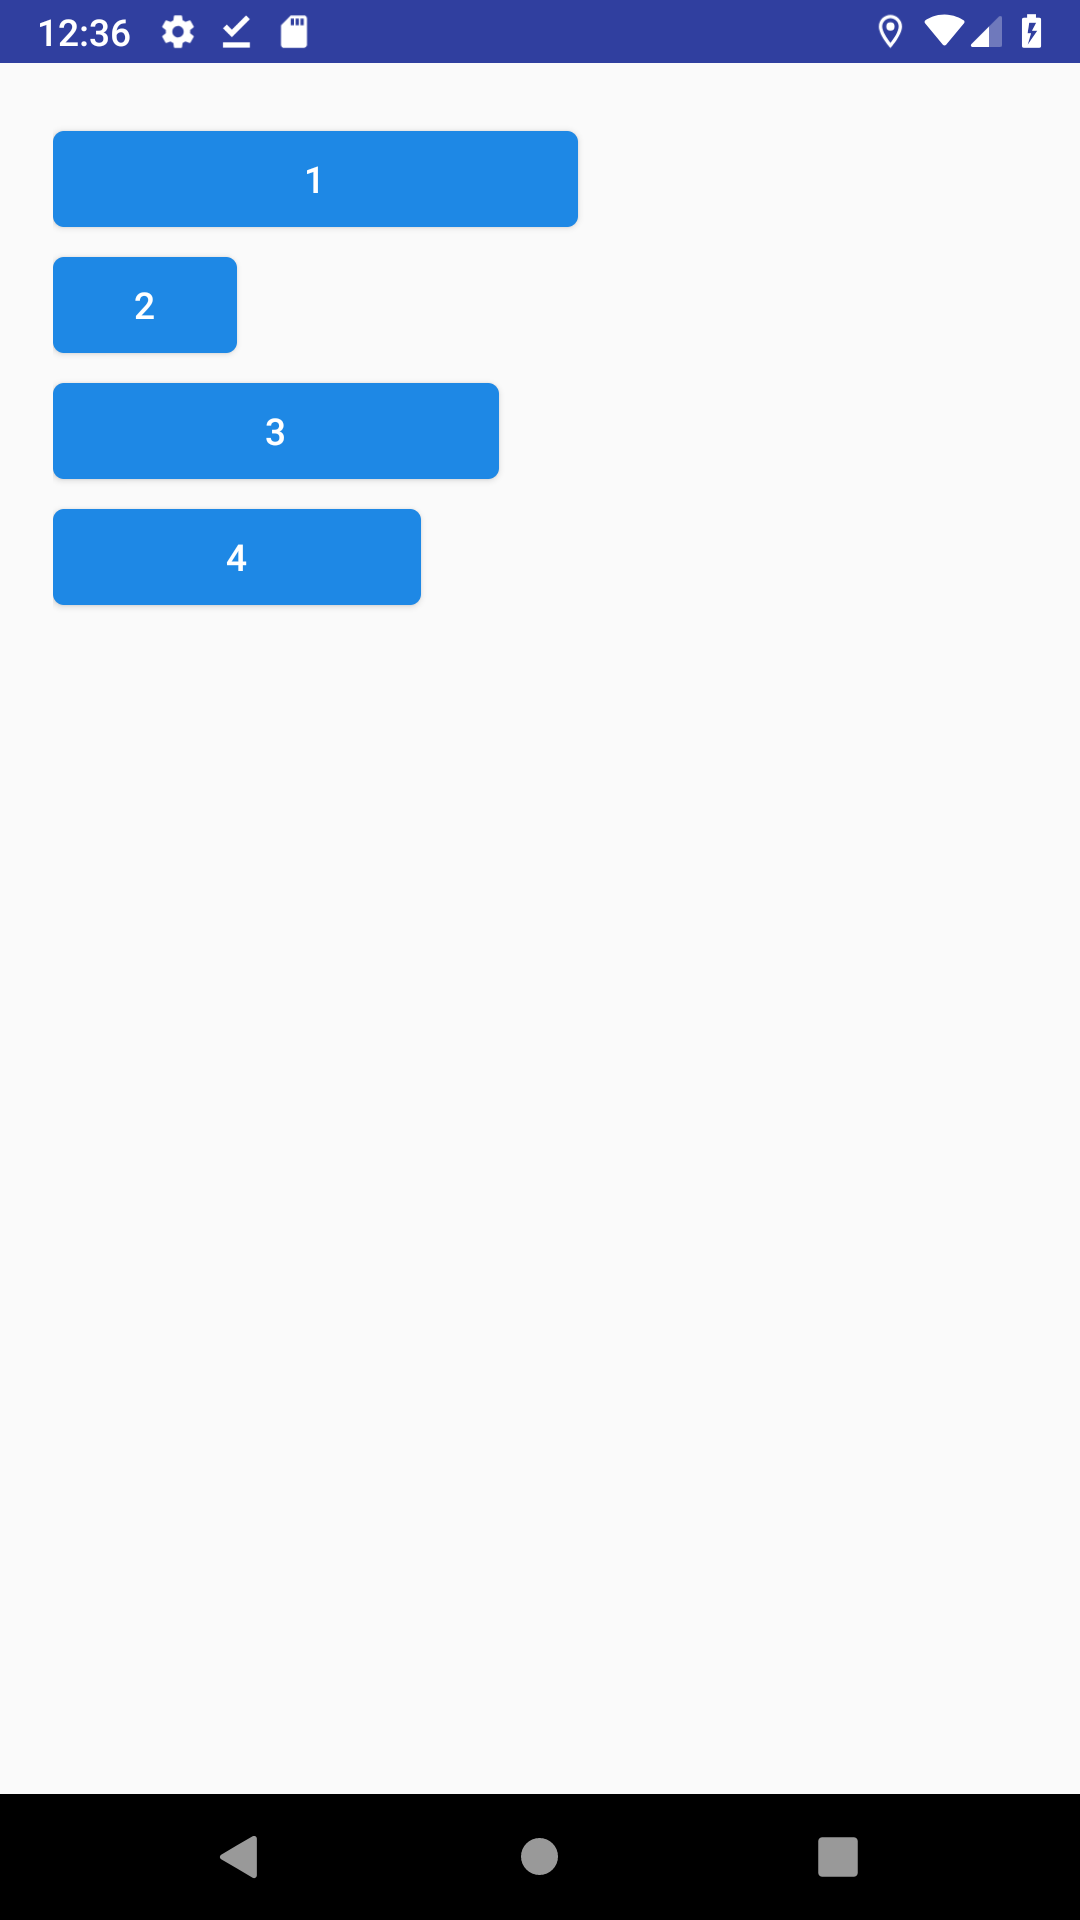
これ,実は全て1つの場合の組み合わせでできています.
ボタン1は左上に表示.ボタン2はボタン1を画面最上部と捉えて左上に表示.以下再帰的に・・・,といった感じですね. ConstraintLayoutで組んでいれば画面がひっくり返ろうが解像度が違おうが大丈夫です.
ちなみに左にスペースがあるのはandroid:padding="20dp"を親要素に適用しているからですね.
<?xml version="1.0" encoding="utf-8"?>
<android.support.constraint.ConstraintLayout xmlns:android="http://schemas.android.com/apk/res/android"
    android:layout_width="match_parent"
    android:layout_height="match_parent"
    android:padding="20dp"
    xmlns:app="http://schemas.android.com/apk/res-auto">

    <android.support.design.button.MaterialButton
        android:id="@+id/button1"
        android:layout_width="200dp"
        android:layout_height="wrap_content"
        android:text="1"
        app:layout_constraintStart_toStartOf="parent"
        app:layout_constraintTop_toTopOf="parent" />

    <android.support.design.button.MaterialButton
        android:id="@+id/button2"
        android:layout_width="70dp"
        android:layout_height="wrap_content"
        android:text="2"
        app:layout_constraintStart_toStartOf="parent"
        app:layout_constraintTop_toBottomOf="@id/button1" />

    <android.support.design.button.MaterialButton
        android:id="@+id/button3"
        android:layout_width="170dp"
        android:layout_height="wrap_content"
        android:text="3"
        app:layout_constraintStart_toStartOf="parent"
        app:layout_constraintTop_toBottomOf="@id/button2" />

    <android.support.design.button.MaterialButton
        android:id="@+id/button4"
        android:layout_width="140dp"
        android:layout_height="wrap_content"
        android:text="4"
        app:layout_constraintStart_toStartOf="parent"
        app:layout_constraintTop_toBottomOf="@id/button3" />

</android.support.constraint.ConstraintLayout>
まとめ
色んなことに言えますが,ボトムアップで勉強すると同時に,ケース別にトップダウンで学ぶのも大事なんじゃないかなと思います.しかしそのトップにあたる資料が散らばってたり英語だったり.そんな時に使ってもらえたらええかなと.(半分自分用のメモ)
めんどいと思って結局使ってなかった方は,コピペでもなんでも使ってみてください.
こんなレイアウト欲しい等あれば,コメントにてよろしくお願いします.