【AWS】手元の端末からRDSに接続する方法
目次
構築イメージ

動作環境・前提条件
【動作環境】
OS : macOS 10.14.6
RDS : MySQL 5.7
【前提条件】
1. VPC作成済
2. それぞれ別のAvailability Zoneでサブネットを2つ作成済
3. VPCにインターネットゲートウェイをアタッチ済
4. VPCにDNS解決とDNSホスト名を設定済
5. サブネットにルートテーブルを設定し、0.0.0.0/0宛をインターネットゲートウェイにする
STEP1. RDSの作成
マネジメントコンソールから通常通りRDSを作成します.

パブリックアクセスの許可
ここで接続タブのなかでパブリックアクセス許可します

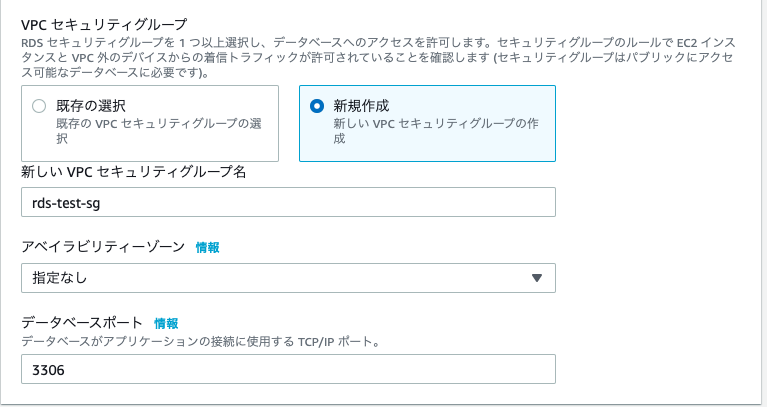
セキュリティグループ
新規にセキュリティグループを作成します.
パスワード
パスワードとIDは覚えておくようにします.
ここまで終えたらデータベースの作成をクリックします.
STEP2. セキュリティグループの確認
RDS作成後に、アタッチされているセキュリティグループを確認し、
自分のインターネット環境のグローバルアドレスがインバウンドルールに入っていることを確認します.
もしなければインバウンドルールに以下のサイトで確認したIPアドレスをソースのところに設定します.
myipサイト(https://www.expressvpn.com/jp/what-is-my-ip)

STEP3. Mysqlクライアントのインストール
自身のMacにMysqlクライアントをインストールします.
ターミナル
$ brew update
$ brew install mysql
STEP4. RDSに接続
RDSのエンドポイントを確認します.

そして, Macのターミナルでコマンドを実行します.
mymasteruserとmysql–ins~.comのところは自身のものに変更します.
macターミナル
$ mysql -h mysql–instance1.123456789012.us-east-1.rds.amazonaws.com -P 3306 -u mymasteruser -p
結果
Welcome to the MySQL monitor.  Commands end with ; or \g.
Your MySQL connection id is 12
Server version: 5.7.22-log Source distribution

Copyright (c) 2000, 2020, Oracle and/or its affiliates. All rights reserved.

Oracle is a registered trademark of Oracle Corporation and/or its
affiliates. Other names may be trademarks of their respective
owners.

Type 'help;' or '\h' for help. Type '\c' to clear the current input statement.

mysql>
STEP5. 参考サイト